DIY Projects

Seasonal Decor

Recipes

Search by Category:

here you can search the blog posts by category. If you are looking for something specific, you can use the search bar.

Easy DIY Topiary

DIY Projects

read more

Check out this easy and budget friendly topiary DIY project!
Don’t forget to subscribe to our YouTube channel so you won’t miss any of our videos!
-Grey Birch Designs-

Magnolia Table Cookbook – Chicken & Wild Rice Soup recipe and review

Recipes

read more

Subscribe to our YouTube channel so you won’t miss any of our videos!
-Grey Birch Designs-

Hearth & Hand Favorites

Seasonal Decor

read more

I don’t know about you but when Chip and Jo came out with a line of products at Target I was so excited!!! Since then I have purchase quite a few items from this line and compared prices and quality of the items to some of my other go to places for decor. I decided to put together a round up of my favorite items from the Hearth & Hand collection at Target to share with you all. These are the items I currently have in my home or things I just love and need to have!! Overall I have been really impressed with the items, the price point for the quality is great, the design is amazing (but would you expect anything less from Joanna Gaines, seriously) and the ease of getting it at Target or Target.com makes it even better! With that said here are my favorites!!

Click on the photo to view the items below


DIY Floating Shelves

DIY Projects

read more

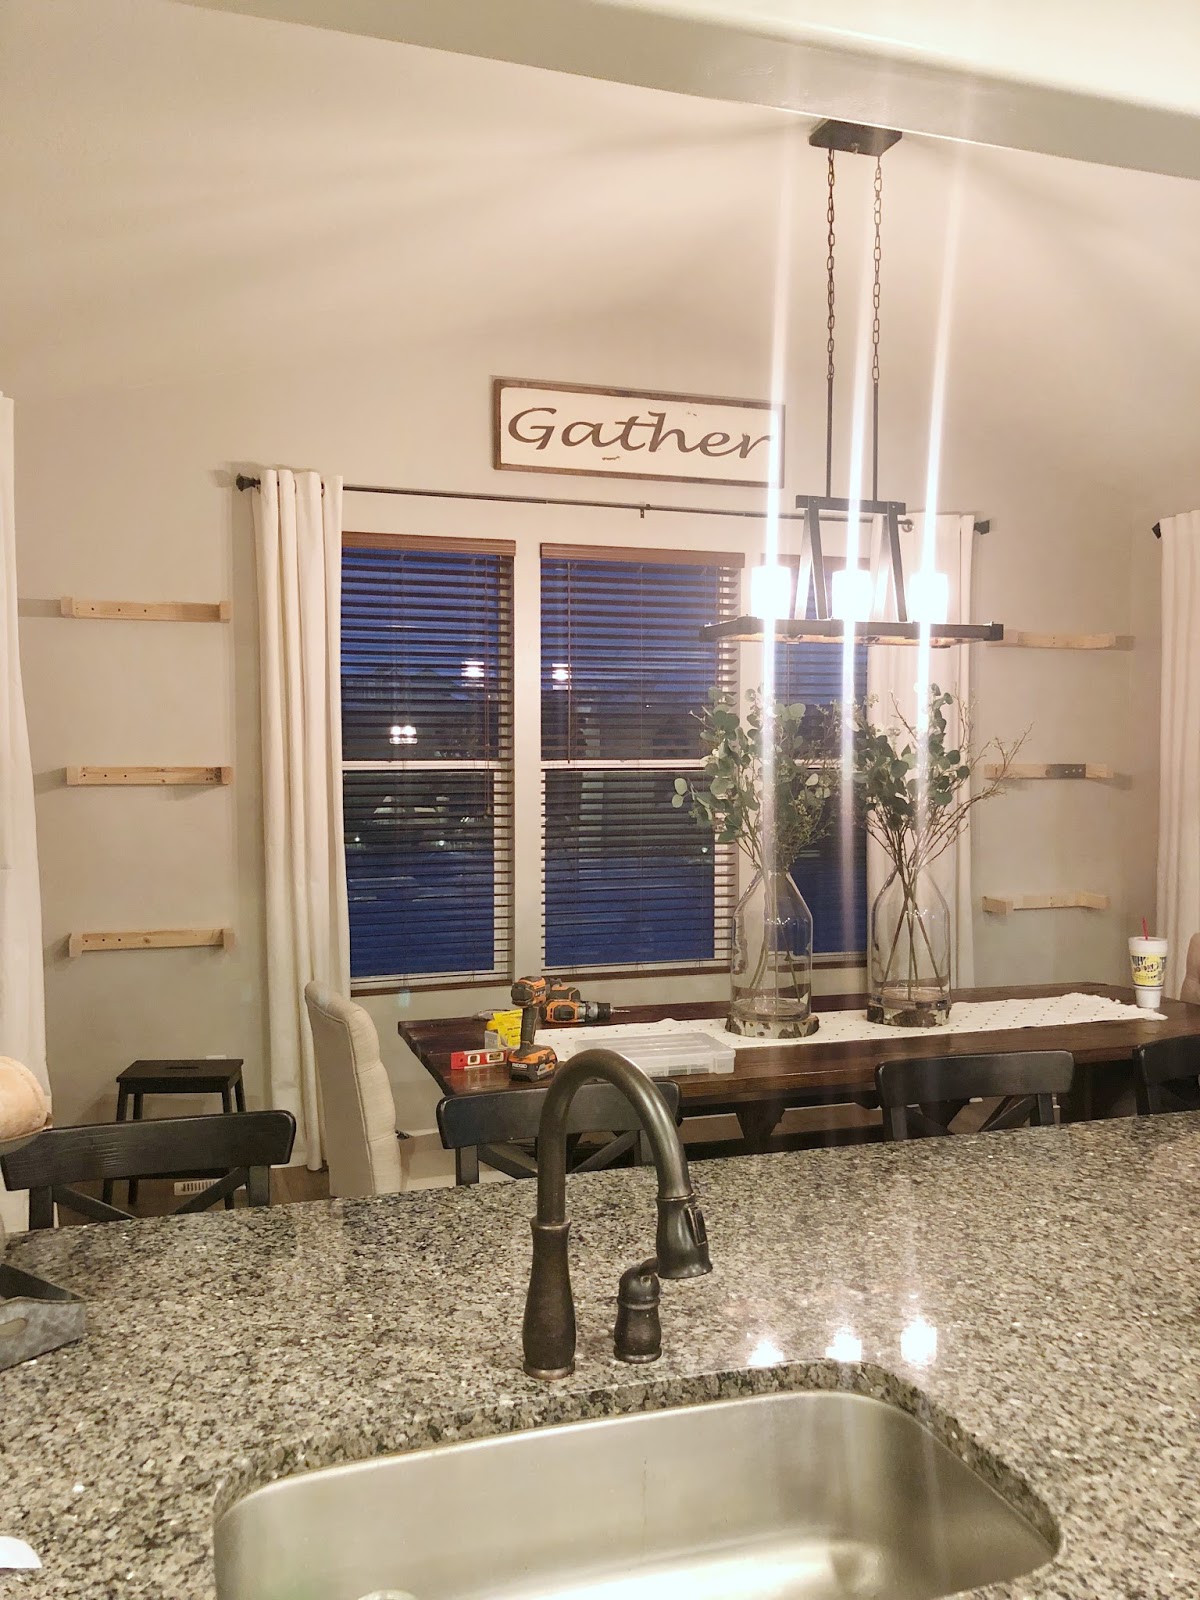
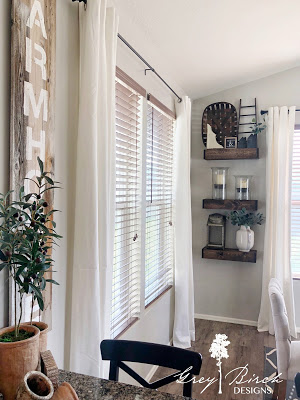
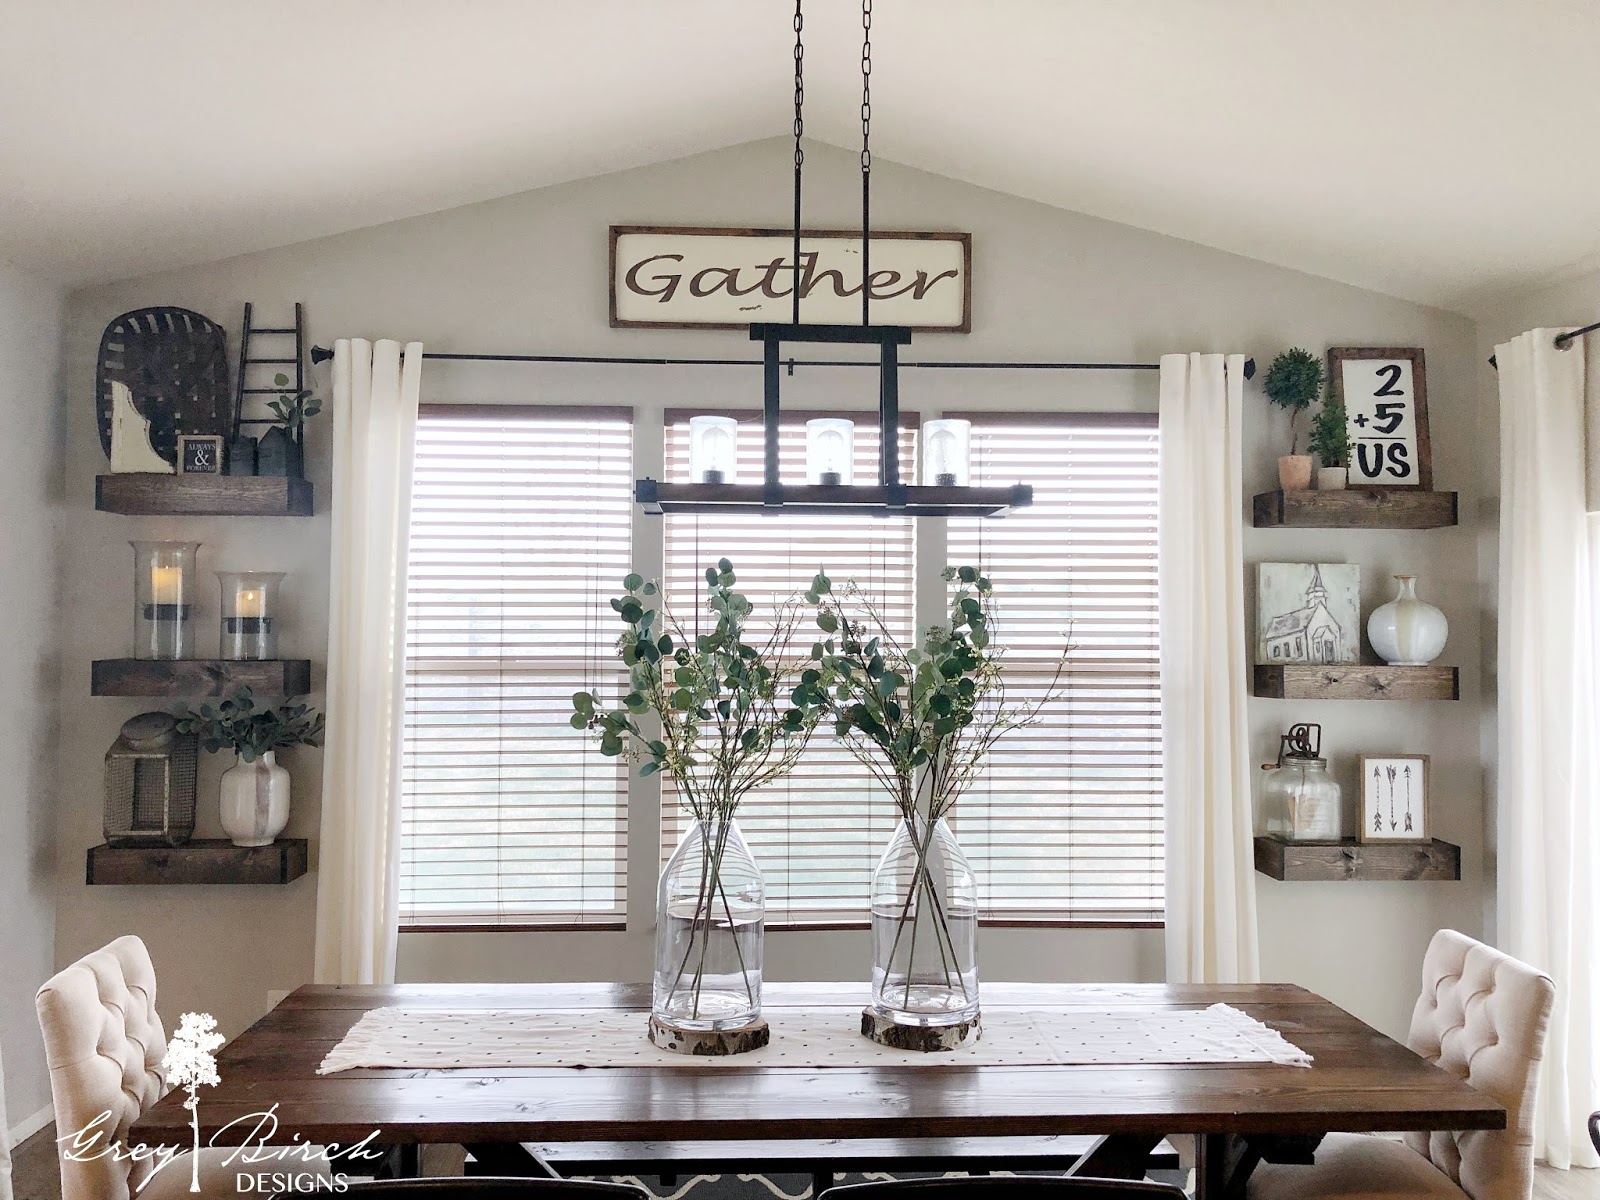
I love this project! It was so easy and they make a beautiful statement that is easy on the budget too! I looked into buying floating shelves before but ran into a few problems: First, I needed a unique size. Second, the ones I found were pricey and I needed 6!! That’s when I decided that we needed to build them ourselves. I’m so happy with how they turned out and we were able to build all 6 for less than the price of buying 1!!! These are my favorite kind of projects. Here is our quick, easy tutorial so you can make some too!
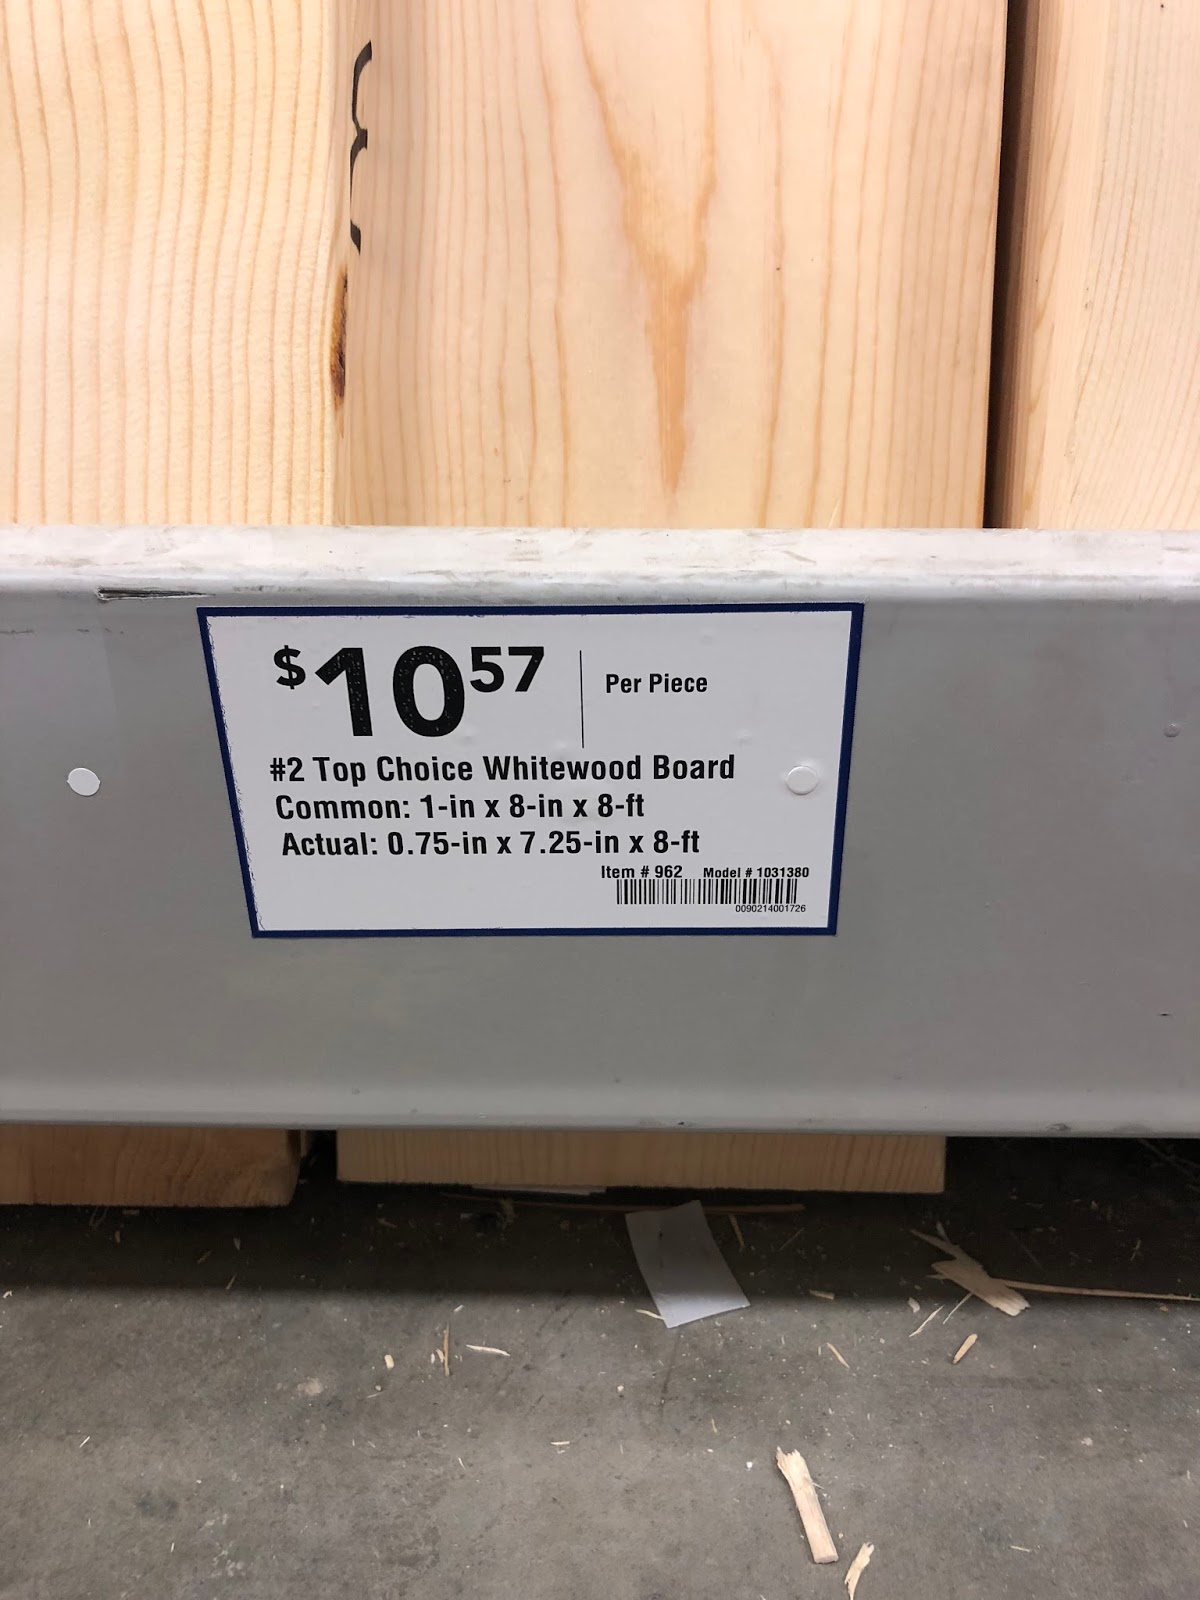
Supply List


1″ x 4″ pine boards (shelf sides)
1″ x 8″ pine boards (shelf top + bottom)
2″ x 3″ wood studs (cleat frame)
Brad nail gun or hammer and finish nails
Drill/driver and wood screws
Miter saw
Sander/sand paper
Glue
Level
Stud finder
Wood Stain (we used Minwax Expresso)

Board lengths will vary depending on how many shelves you are going to build


Step:1

The first thing you need to do is determine where you want the shelves and use a stud finder to mark the studs on your wall. The shelves are not heavy but I do not recommend securing them to just drywall. Once you have done this you can start building the cleats. They will be hidden and attach to the wall and what your shelf will slide on to. Make each cleat out of two short and one long piece of 2″ x 3″ stud. The total width of your cleat should be about 1.5 inches less than the desired width of your finished shelf. You can glue/nail or screw them together. Remember these will be hidden so they don’t need to look perfect.
Step:2

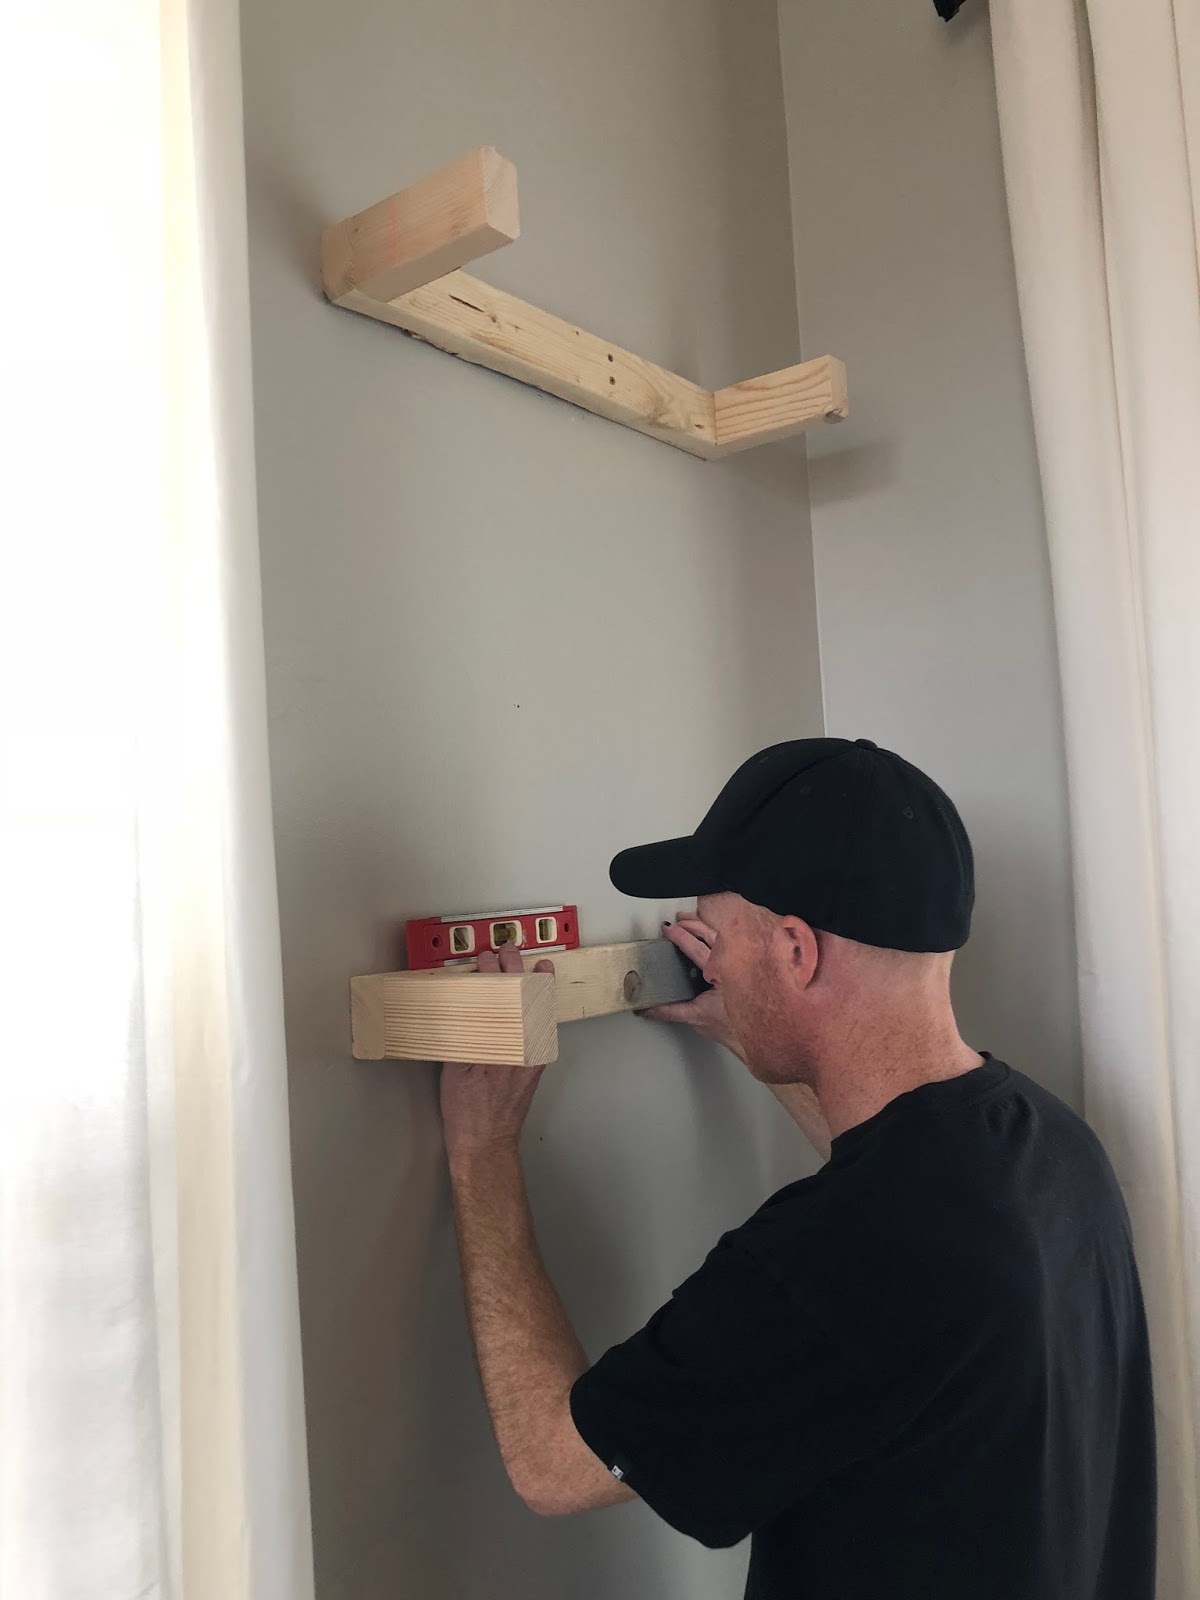
Mark the desired location of each cleat on the wall so they are equally spaced and level. Secure the cleats to the wall using screws long enough to reach into the studs – I recommend 3″ screws. Remember to pre drill your holes to avoid splitting the wood.


Step:3

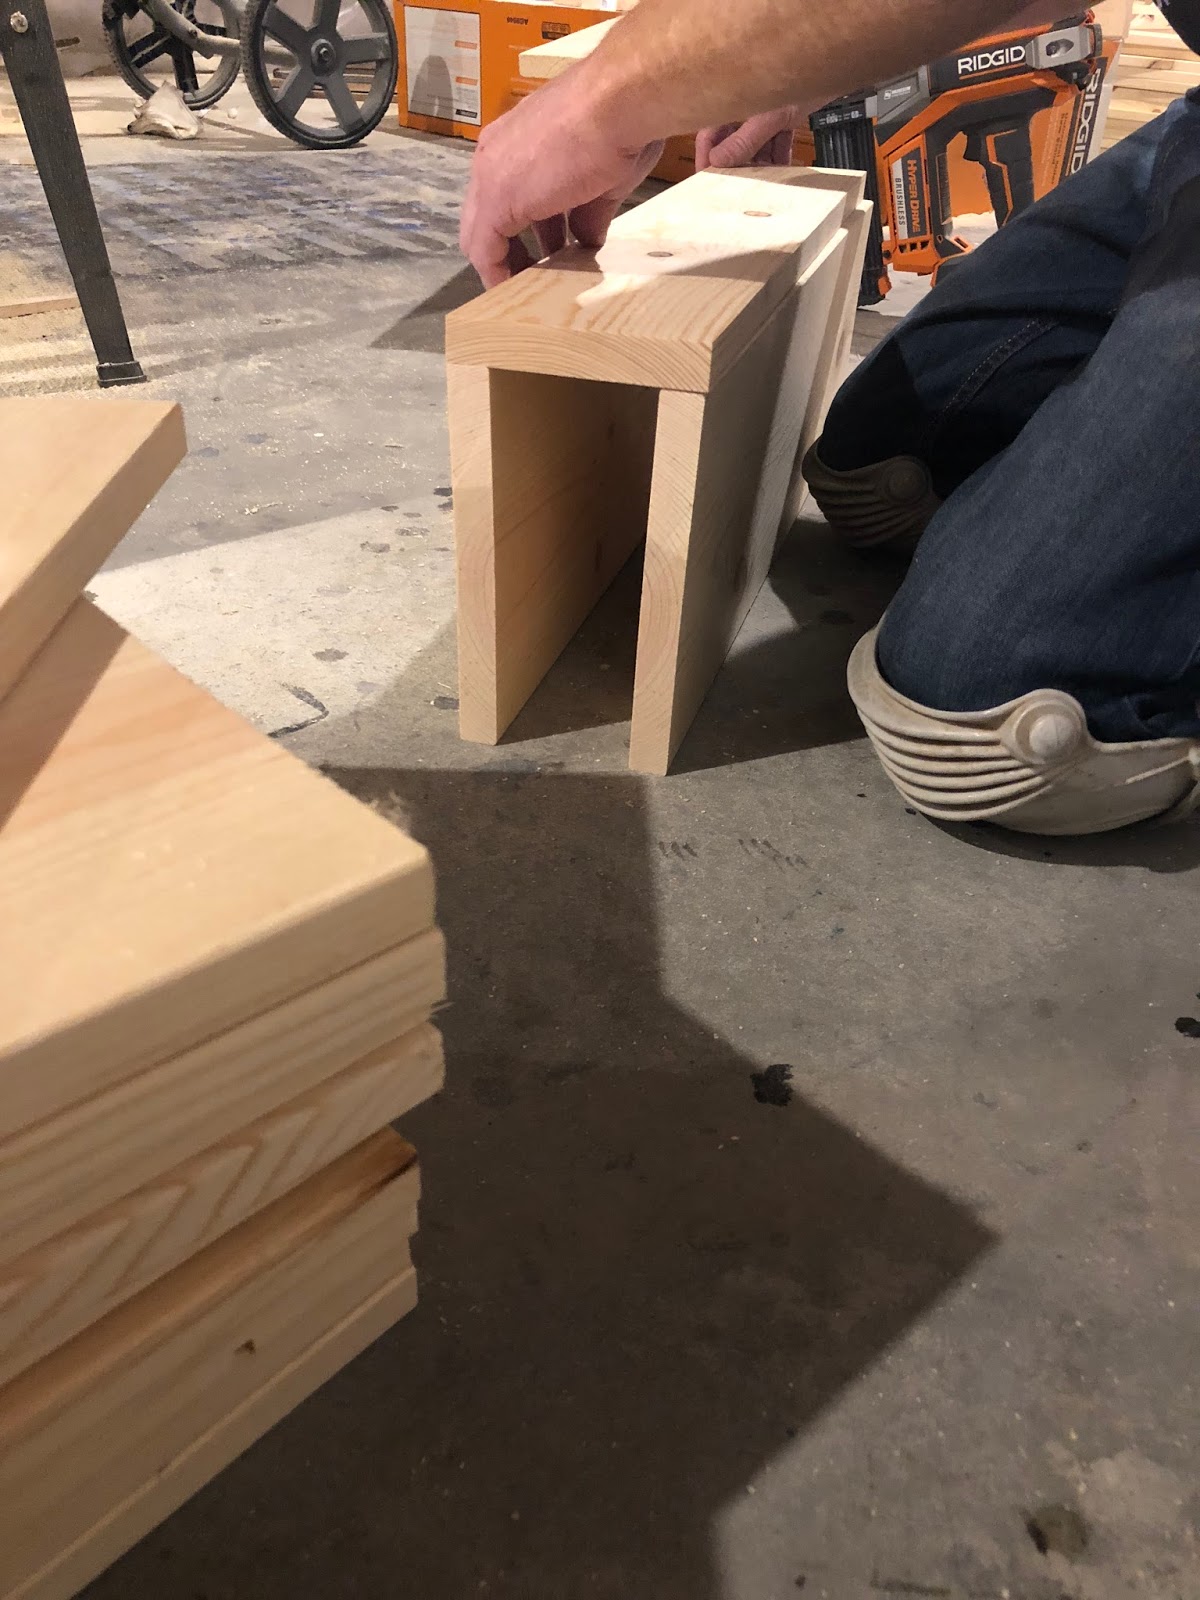
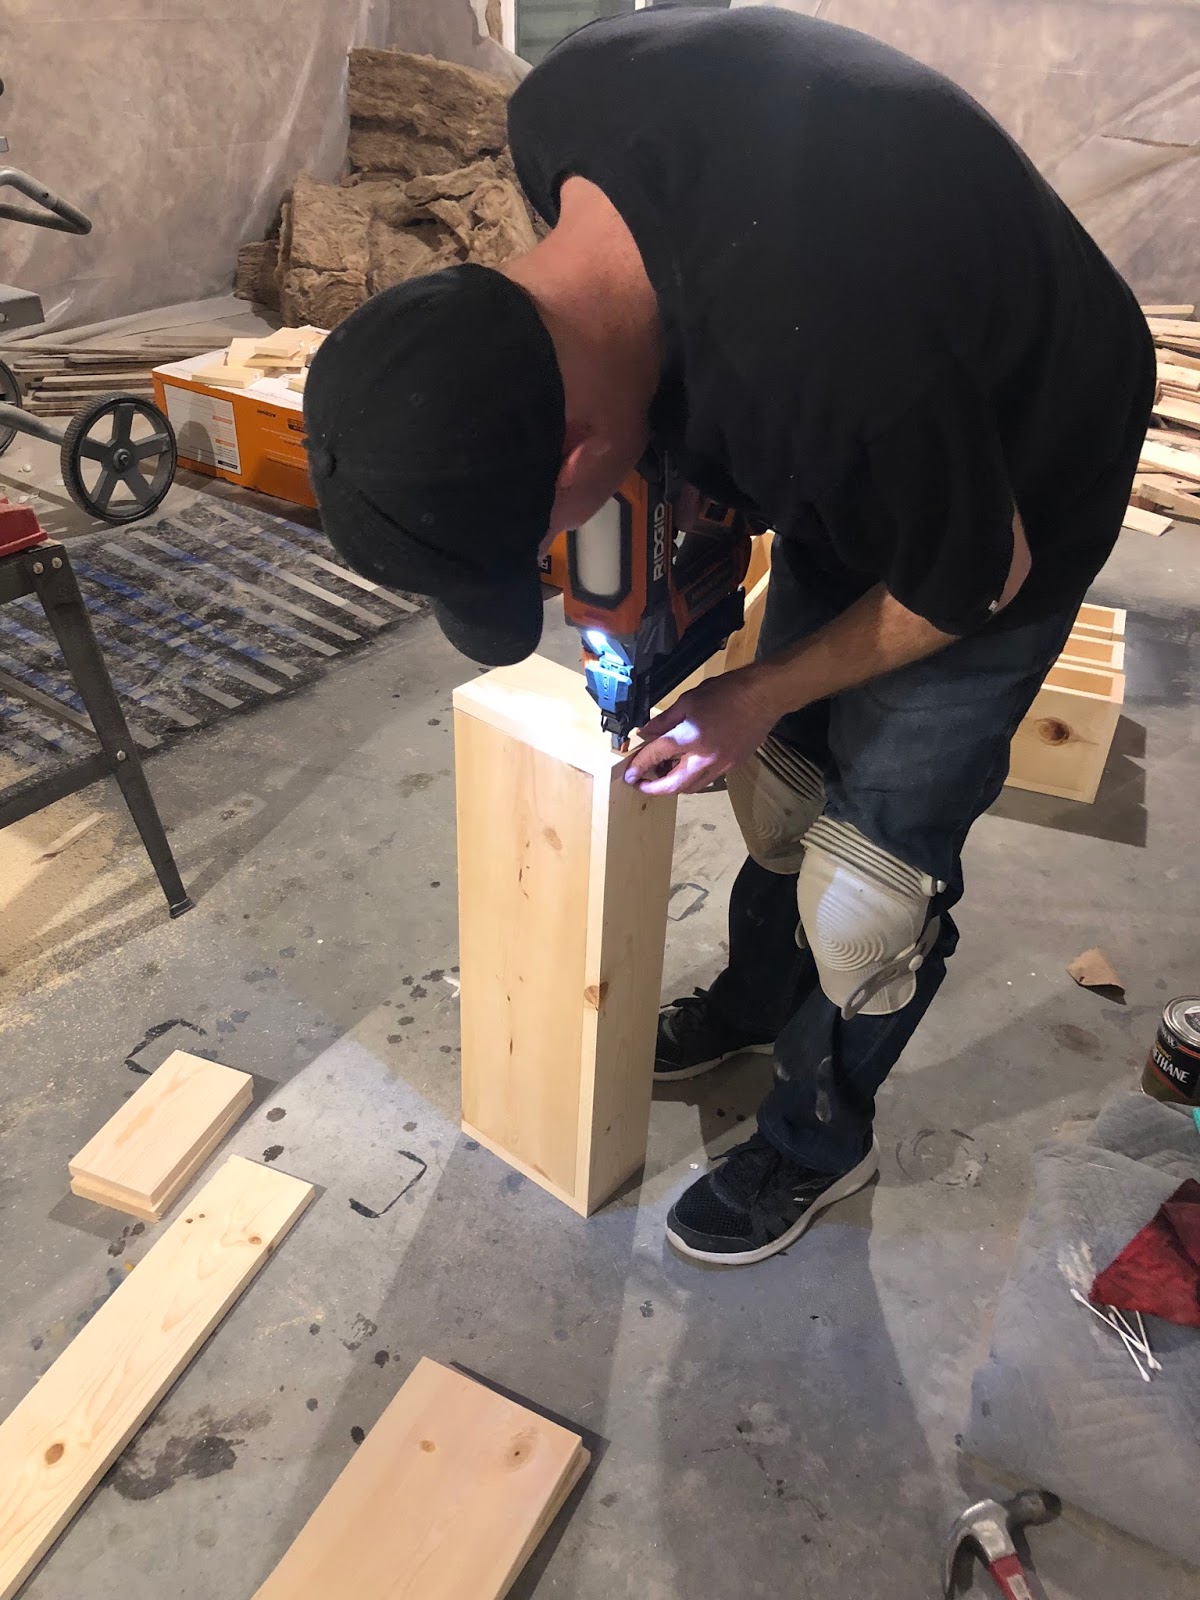
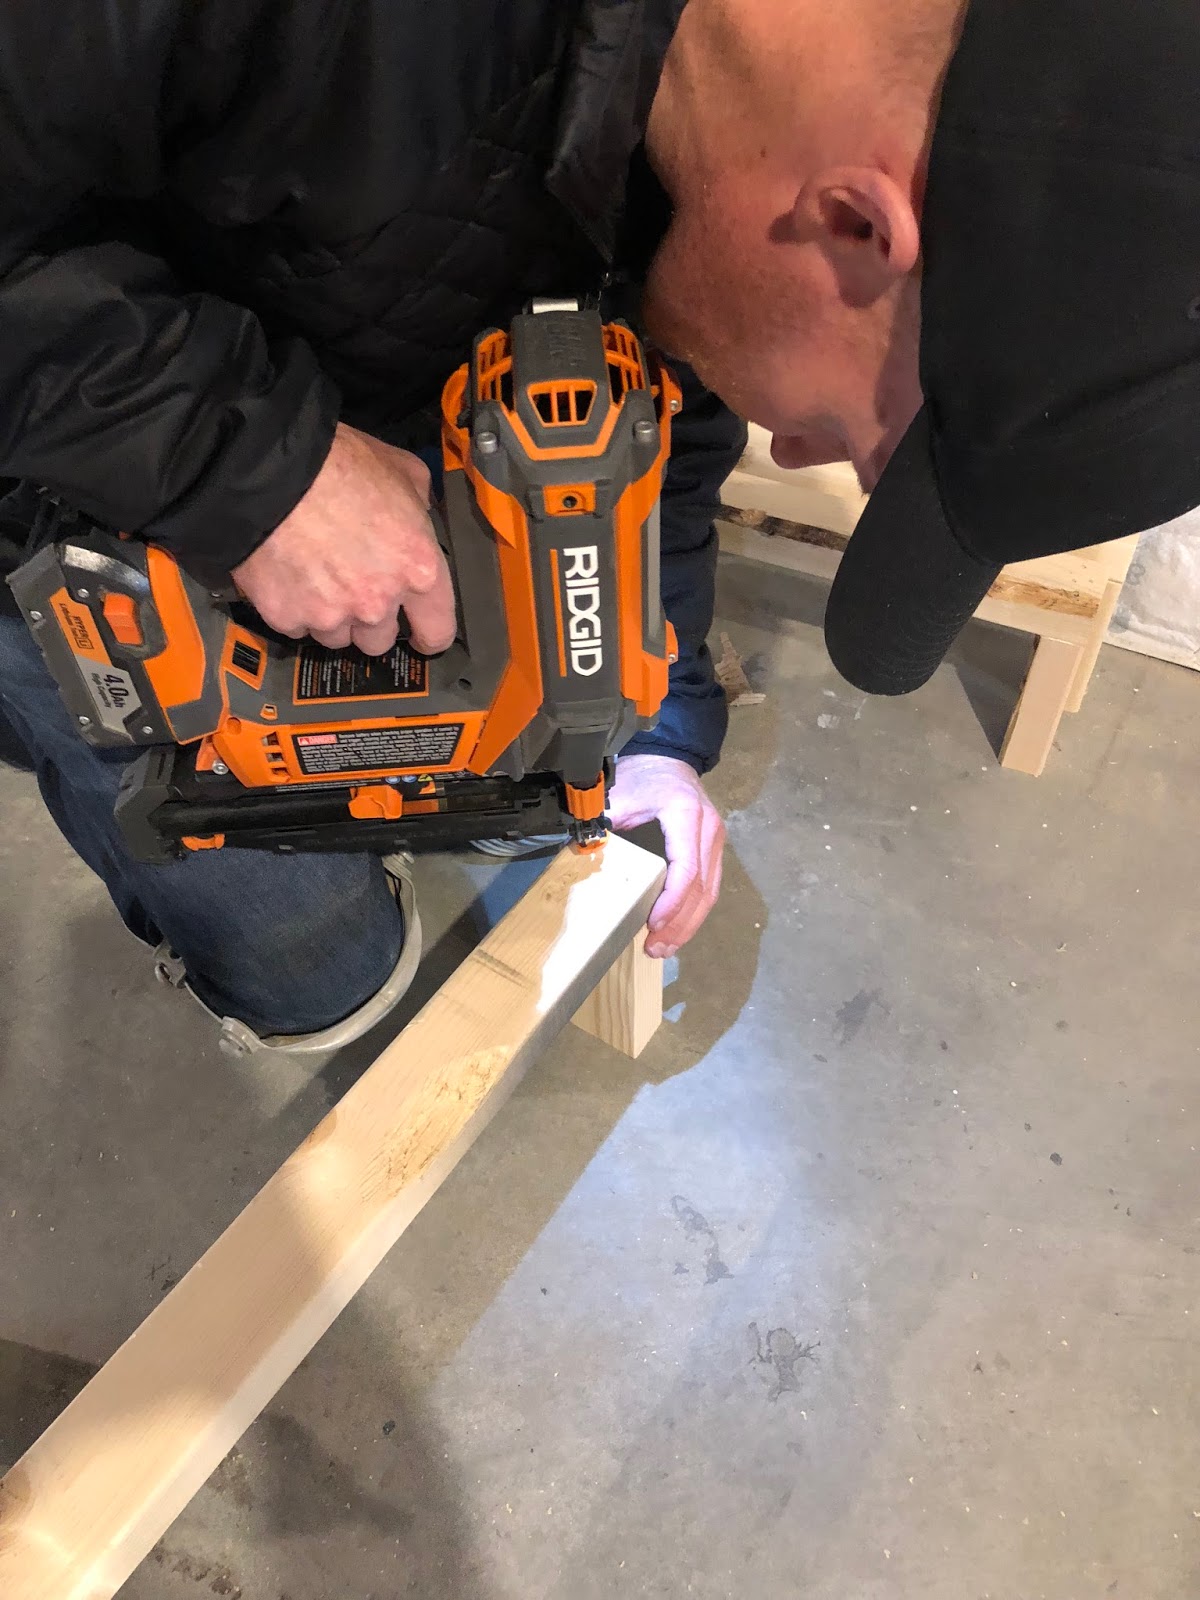
Once you have installed the cleats you can start building the shelves. You are basically building a simple wood box that is missing one side. Cut the top, bottom, and face boards all to the same length. This length should be approximately a half inch longer than the width of your cleat (so the shelf will easily slide on). Secure the face board to the top and bottom boards as shown in the picture below. I recommend using glue and 1.5″ brad nails.

                
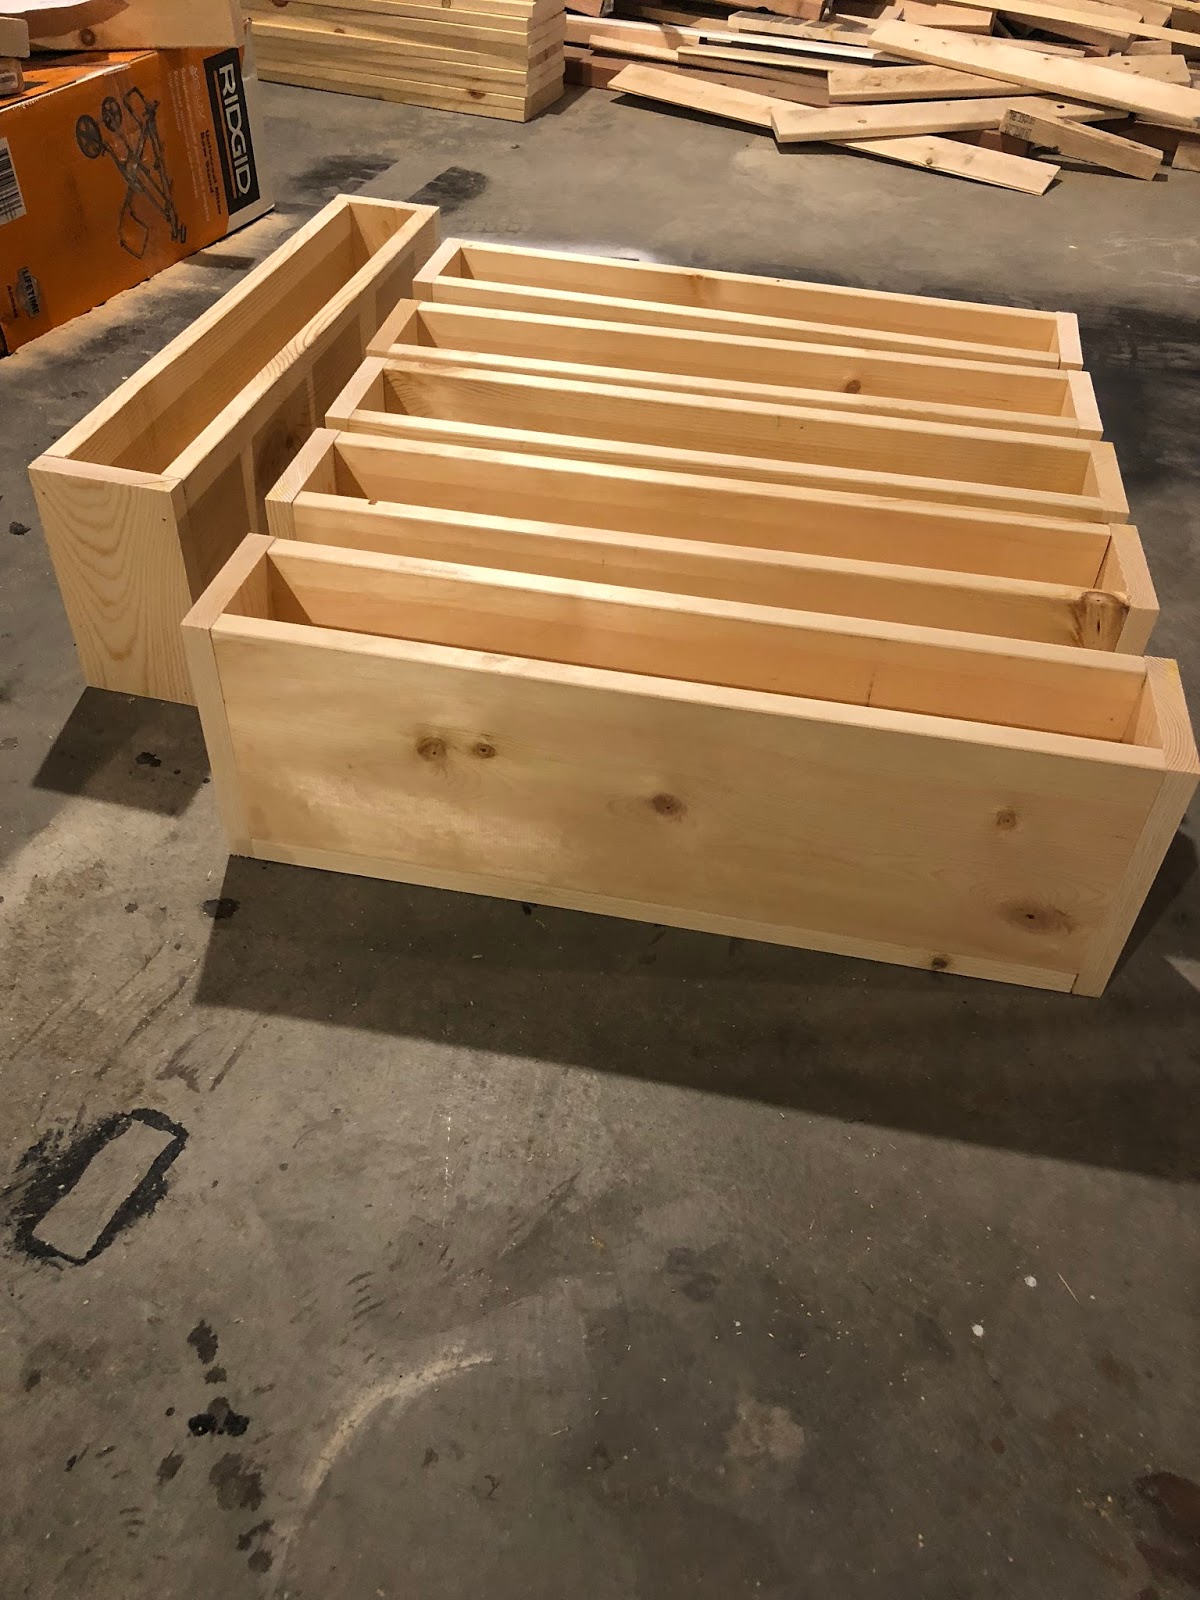
After the 3 sides are secured, cap the ends using scrap wood. Carefully measure and cut the caps so they fit exactly. Secure the caps with glue and 1.5″ brad nails. 
Step:4
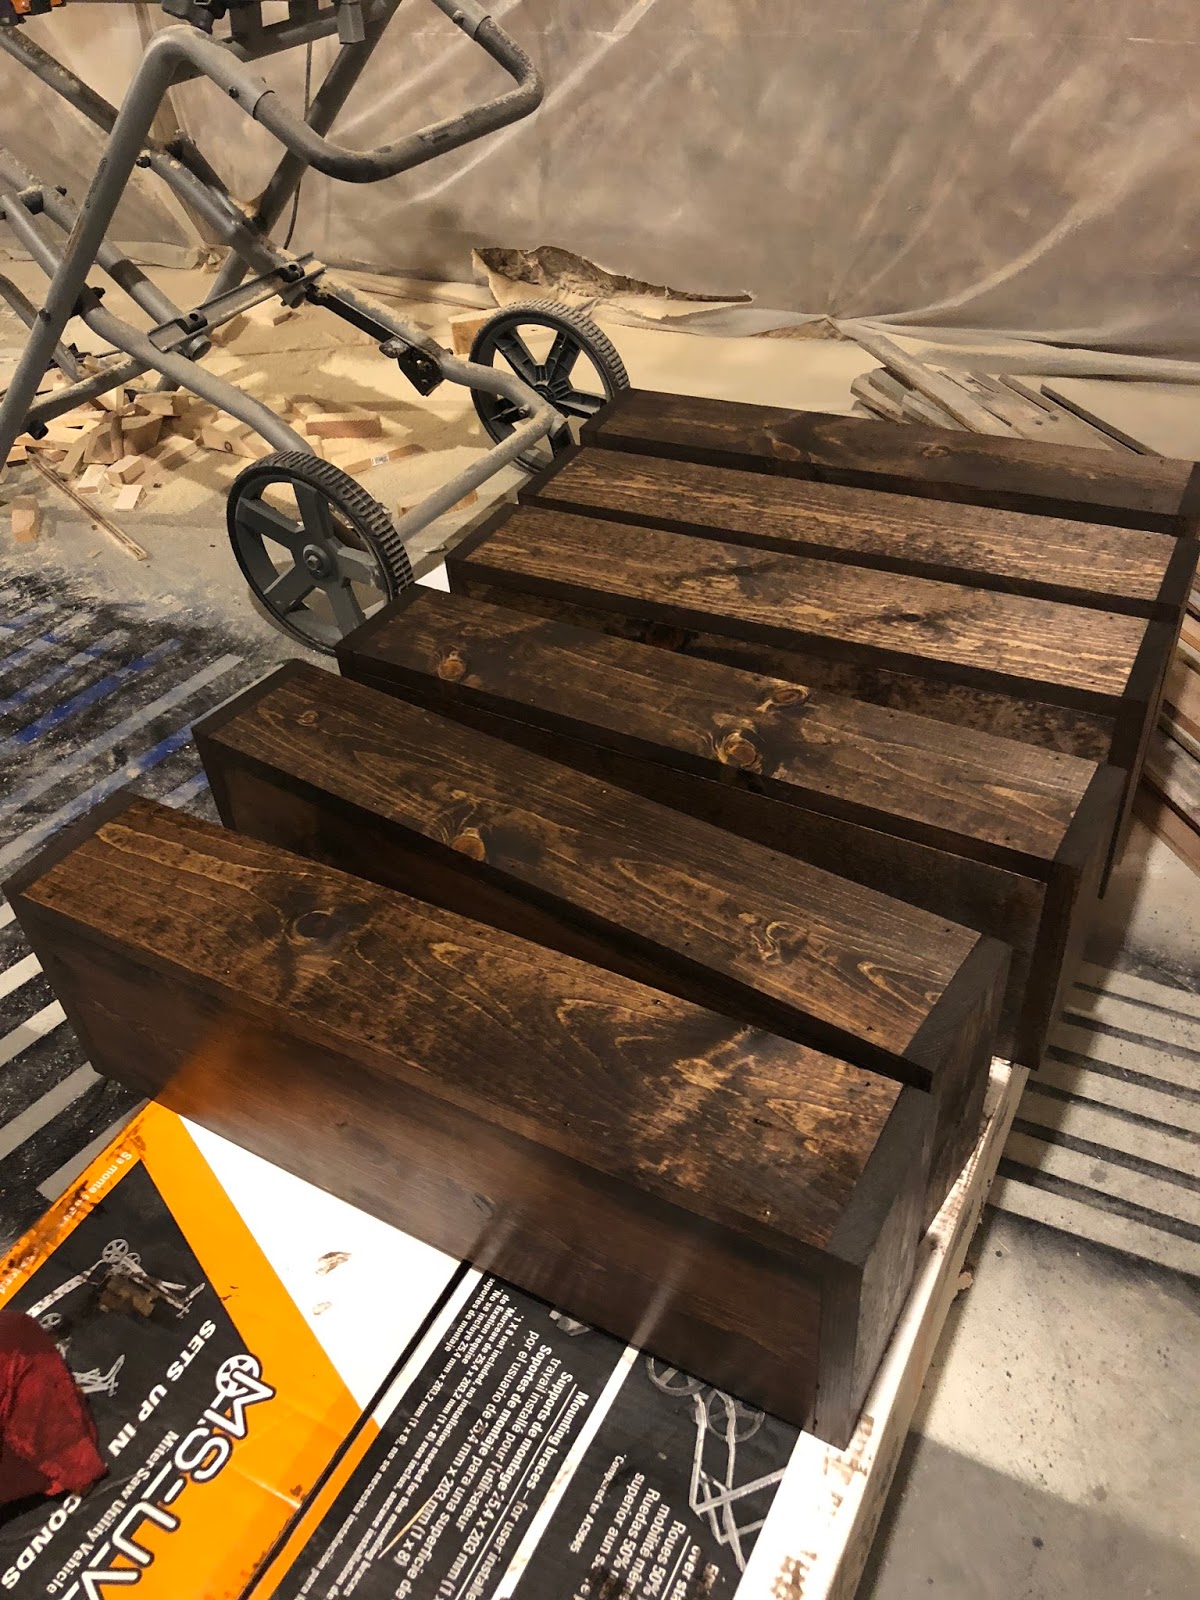
Sand the shelves so that the wood joints are nice and smooth. You can hand sand them but I recommend using an electric sander. Next, stain or paint the shelves. We used Minwax Expresso 273 oil stain without a pre stain. We also added 2 coats of satin polyurethane to make the shelves easier to clean and to add a slight sheen.
  

Step:5
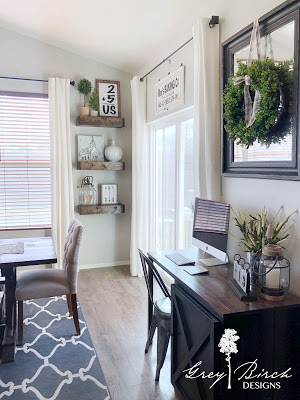
Finally the fun part! Slide the shelves onto the cleats and check for level. If they are not level simply remove the shelf, add a thin piece of wood or folded paper to the top of the side of the cleat that is too low, and replace the shelf. Lastly, secure the shelf to the cleat with several brad nails to hold it in place.


-Grey Birch Designs-


Styling My Favorite Tiered Tray

Uncategorized

read more

Grey Birch Designs Instagram Post
April 14th, 2018
 

Shop this photo below
Click on the photo to be directed to the product, to view more items
click on arrows to view everything linked in this post!


Styling My Floating Shelfs

DIY Projects

read more

Grey Birch Designs Instagram Post
April 14th, 2018

Shop this photo below
Click on the photo or link to be directed to the product


  • Farmhouse sign was a DIY project
  • Olive tree topiaries were a DIY project, check my Instagram page to see how I made them. Blog post on these coming soon!

Grey Birch Designs Home Tour

Uncategorized

read more

Our home was video taped a couple months ago for advertisement purposes and we were luck enough to get a copy of the amazing footage. I’m so excited to release the full tour of our home to you! I hope you enjoy our very first home tour as much as we have!!

Subscribe to our YouTube channel so you won’t miss any of our videos!
-Grey Birch Designs-

Easy DIY Blanket Ladder

DIY Projects

read more


There are so many different ways you can make a blanket ladder, and I have made a few different styles myself, but I think this is the most straight forward and easy way I have found!


Supplies list
  • Miter Saw
  • Finish Nail gun
  • Nails
  • Wood dowels (you will need 2 or 3 depending on how many slats you want)
  • 1″x 2″ pine board (these are for the sides so you will need 2 of these)
  • Wood Glue
Step 1
First thing you are going to want to decide is how tall you want your ladder and about how many slats you want to have. I made mine 90″ tall and cut my dowels to 11 3/4″ I wanted a thinner look with more slates so that’s why I picked those measurements. Once everything is cut lay out your pieces and decide how far apart you want the spacing to be, mine are 7″ apart. Then mark the side pieces so you know where to attach each dowel.
Step 2
Now to assemble it you will want to put a dab on wood glue on one end of the dowel, line it up with the mark you made on the side piece and carefully fire a nail into the wood. Attach each dowel to the piece of wood you are using for the sides of the ladder then repeating the steps until all your dowels are attached to one side. Once that’s done you can turn it on its side and attach the other piece of wood with the same steps!
Step 3
Sometimes you ladder can be slightly bent after its assembled and that is completely normal due to the face that the wood isn’t perfectly straight most of the time. To fix this problem lay your assembled ladder on a flat surface and put some heavy objects on the top and the bottom and leave them there until your ladder is dry, I let mine sit overnight. Once the glue is dry its will stay in it’s new straight position. Now you can paint or stain it whatever color you like!

Hope you enjoyed this super easy and quick DIY Ladder!

-Grey Birch Designs-

Get on the List!

sign up to the newsletter to get the latest updates