


read more
This is that chocolate Bundt cake. The one I make when I need a dessert that feels homemade but doesn’t require a million steps or fancy ingredients. It’s rich, super moist, packed with chocolate, and honestly hard to mess up—which is always a win in my book.

This is my go to recipe for a reason. It uses a cake mix, but trust me, no one will ever know. The pudding mix, sour cream, and chocolate chips take it to another level, and it turns out perfect every single time.
Why You’ll Love This Cake
• Incredibly moist and chocolatey
• One bowl, no fuss
• Perfect for holidays, gatherings, or “just because”
• Looks impressive with basically zero effort

The Easiest Chocolate Bundt Cake (Everyone Asks for This One)
Ingredients
- 1 (15.25-ounce) package devil’s food cake mix
- 1 (5.9-ounce) package instant chocolate pudding mix
- 1 cup sour cream
- 1 cup vegetable oil
- ½ cup warm water
- 4 large eggs
- 2 cups semisweet chocolate chips
Instructions
1. Preheat & Prep
Preheat your oven to 350°F (175°C).
Grease and flour a 12-cup Bundt pan really well—this step is very important so the cake doesn’t stick. I don’t rush this part.
2. Mix the Batter
In a large bowl, beat the cake mix, pudding mix, sour cream, vegetable oil, warm water, and eggs until smooth and well blended. The batter will be thick and glossy.
3. Add the Chocolate Chips
Stir in the chocolate chips by hand so they’re evenly distributed throughout the batter.
4. Bake
Pour the batter into your prepared Bundt pan and smooth the top.
Bake for 50–55 minutes, until the top springs back when lightly touched and a toothpick inserted into the center comes out clean.
5. Cool (Don’t Skip This!)
Let the cake cool in the pan for at least 1½ hours. This helps it release cleanly and keeps it from breaking when you flip it.
6. Serve
Carefully invert the cake onto a serving plate. Sprinkle with powdered sugar if desired, slice, and enjoy.
Notes
Tip From My Kitchen
• If you’ve ever had a Bundt cake stick, you know why greasing and flouring matters—take the extra minute.
• This cake gets even better the next day, making it perfect for prepping ahead.
• You can serve it as-is, with powdered sugar, or dress it up with a drizzle of chocolate ganache if you’re feeling fancy.
This is one of those recipes I always come back to because it’s reliable, comforting, and everyone loves it. If you make it, don’t be surprised if people ask for the recipe—every single time.
-Grey Birch Designs-
read more

Family Favorite Chili Recipe
This Chili is a mix of sweetness with a mild kick!
Ingredients
- 1/2 white onion
- 1 tbsp. olive oil
- 1 clove of garlic
- 1 lb ground turkey or ground beef
- 1/2 tsp. pepper
- 1/2 tsp. salt
- 1 tsp. cumin
- 4 tbsp. light brown sugar
- 2 tbsp. chili powder
- 1 tbsp. unsweetened cocoa powder
- 2 15oz. cans kidney beans
- 2 15oz. cans crushed tomatoes
- 1 15oz. can beef broth
Instructions
- Saute onion, garlic and meat in a pot with the oilve oil until the meat it browned
- Add all the spices and stir to combine
- Add tomatos, beans and broth to pot and bring to a boil then reduce to a simmer until thickened, about 30 mins uncovered
- Serve with schredded cheese, sour cream and cornbread if desired!
Notes
This makes for great leftovers and is even better the next day, if it lasts that long!
-Grey Birch Designs-
read more

Worlds Easiest Chicken Noodle Soup
I love making this recipe as a way to use leftover chicken or if I just want a easy week day meal.
Ingredients
- 1/2 white onion
- 1 cup chopped celery
- 1 small bag chopped baby carrots
- 1-2 cloves of garlic, minced
- 1 tsp. kosher salt
- 1/8 tsp. pepper
- 1/2 tsp. dried thyme
- 1/2 tsp. dried rosemary
- 2-3 bay leaves
- 1/4 tsp. basil
- 3 32oz. cartons of chicken stock
- 2 cups cooked chopped chicken
- 1/2 a bag of wide egg noodles
- 1 bouillon cube
- 1/2 cup heavy whipping cream
Instructions
- Add all the ingreadents to the slow cooker except the noodles and heavy wipping cream. Cook on high for 4 hours
- The last 20 mins add the noodles and heavy wipping cream. Cover and cook the remaing time
- Keep in your fridge cooked for 3 days or freeze up to 3 months
Notes
This soup is a huge hit with my kids, and its even better the next day!
read more
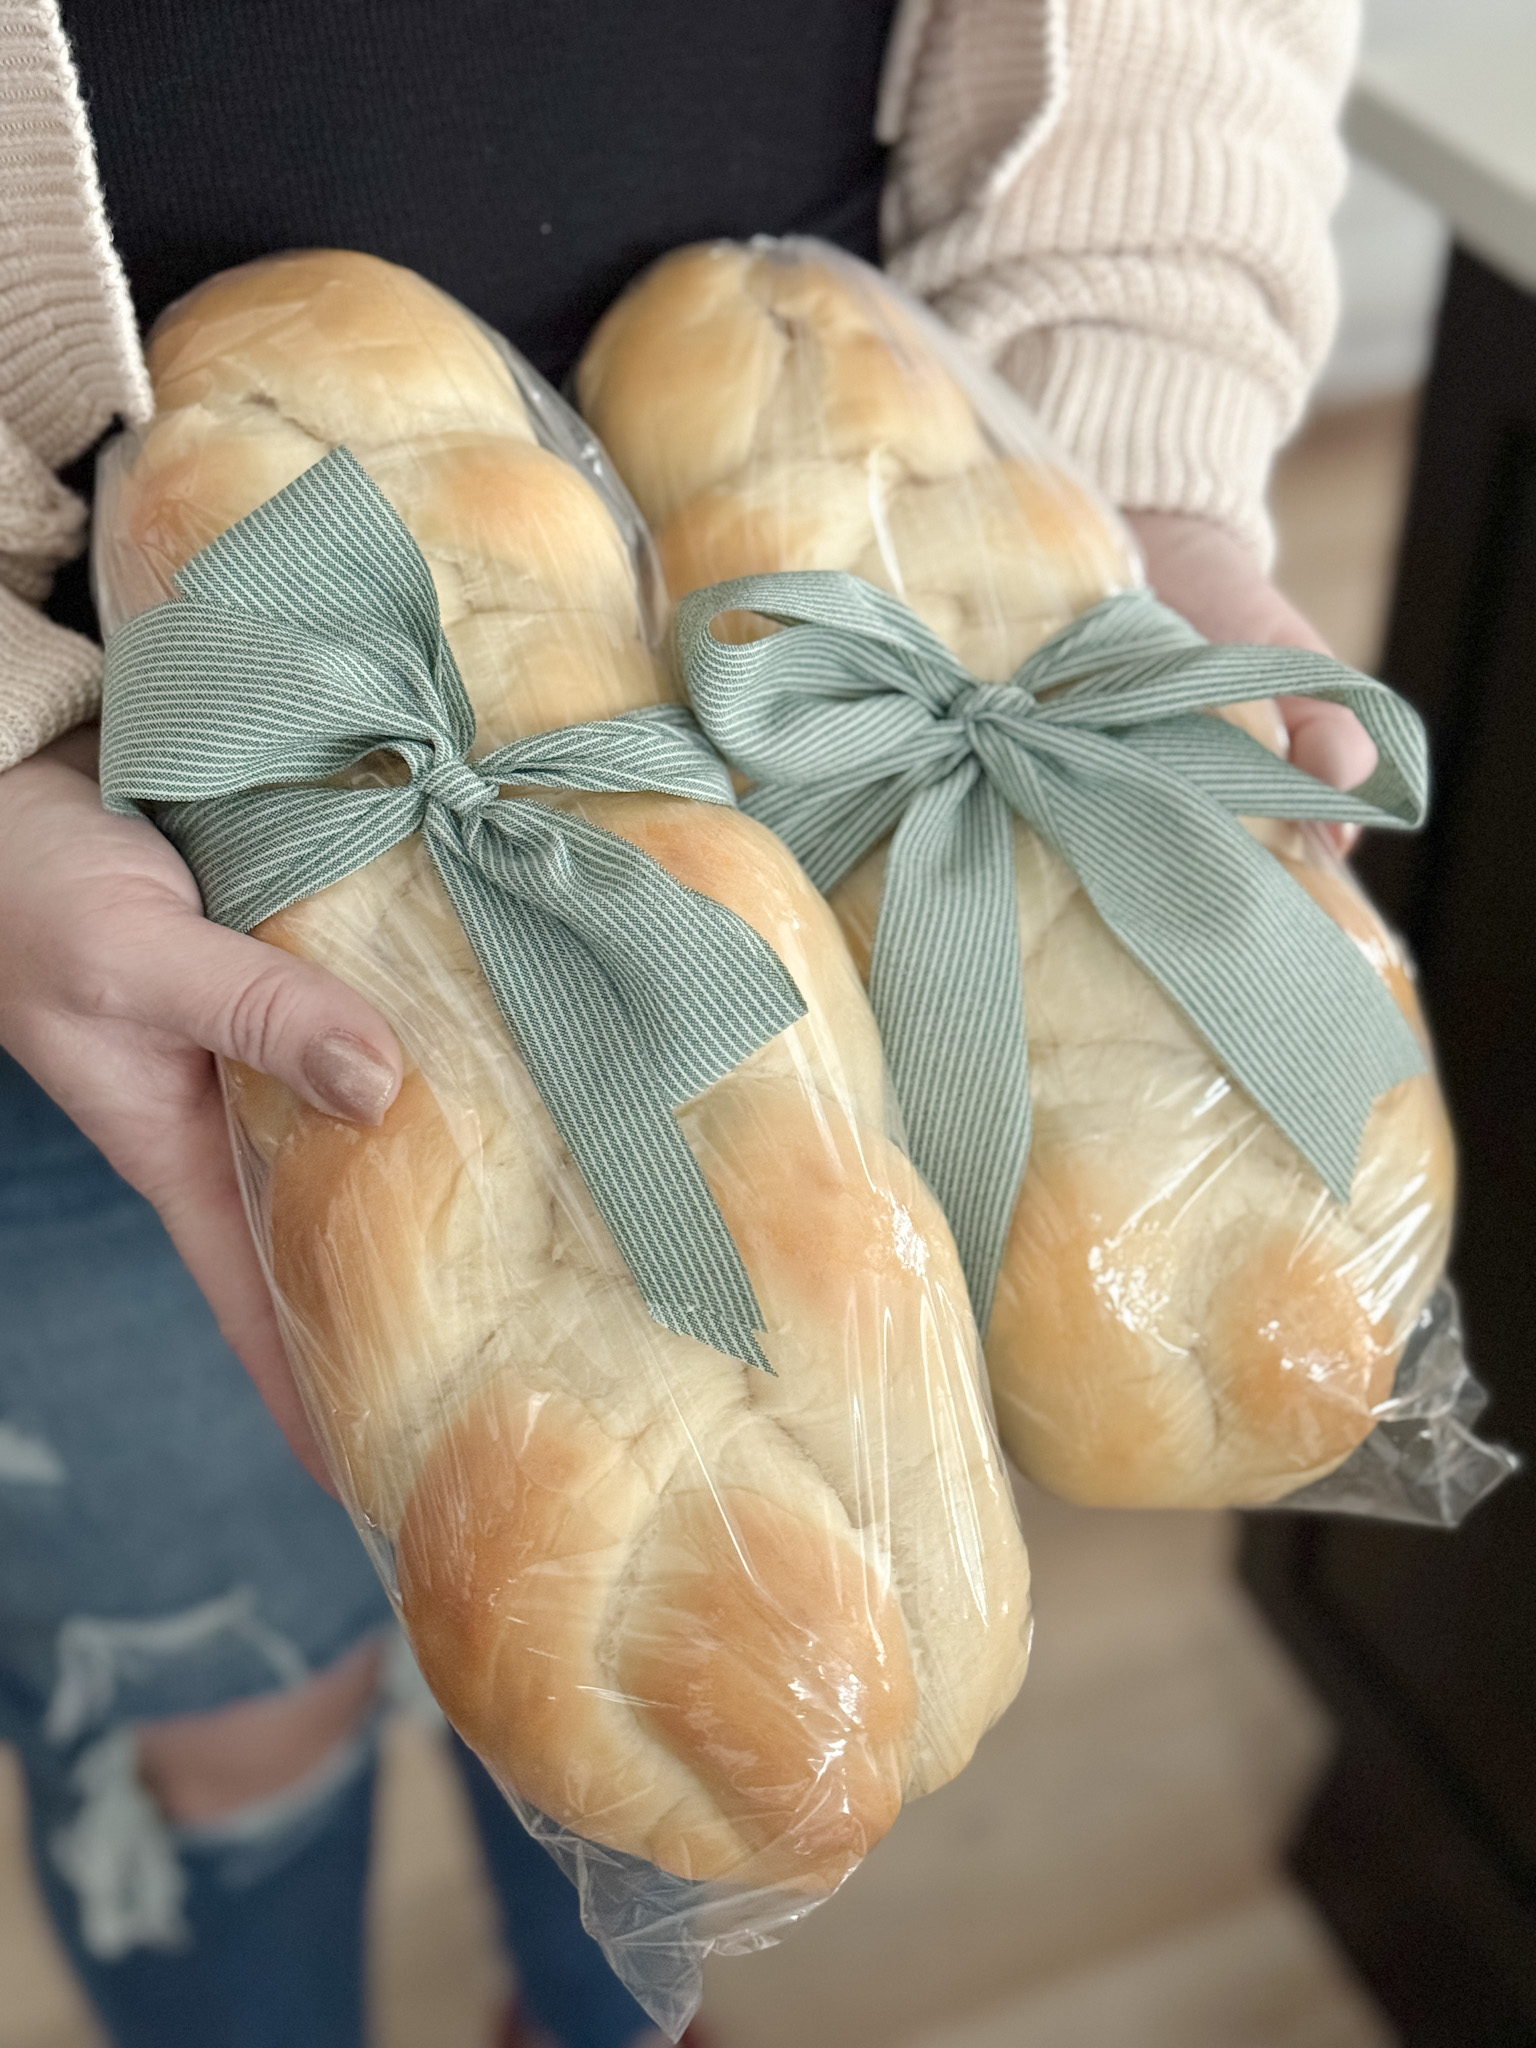
It’s a great gift idea and it’s easy to make! I hope you give this recipe a try!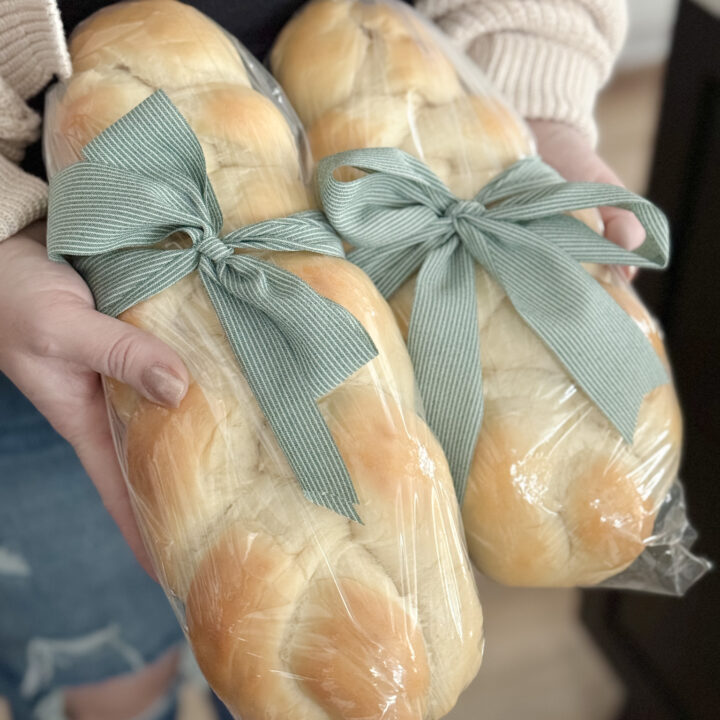
My Family's Homemade Bread Recipe
Ingredients
Instructions
Knead in mixer for 5 minutes then check to see if elastic enough, it shouldn’t be very sticky.
Bake at 350 for 22 minutes if doing 2 loafs of braided bread. If doing in a loaf pan bake 25-30 minutesNotes
I have always loved making bread and have been doing it since my kids were little. From the amount of different bread recipes in our family cookbook I can see now it must run in my blood! My favorite one is a recipe from my relative Dorisa. Her bread recipe is made with simple ingredients that we all have in our home, and it’s easy to make and absolutely delicious!
This recipe will yield 2 loaves of bread or 24 rolls. My favorite way to make this is to turn my loaves into braided bread, like I have done here!

-Grey Birch Designs-

read more
Growing up in sunny southern California where every day is 75 degrees was something I definitely took for granted. These days I love being outside in our backyard, watching our kids play, and having dinner outside on the patio. Now that we live in Utah we can’t do this year round, only a handful of months a year. This year I decided to try something that would make it possible to enjoy dining outside a bit longer, even through the cooler months of Fall!

We built our outdoor dining area a couple years ago – I can’t believe how far the backyard has come! We had the cement pad poured and built a covered gazebo with a dining set underneath. I decorated the space with outdoor string lights, hanging basket lights, a cute rug, and some real and faux plants. The one thing I didn’t until this year was an outdoor heater.
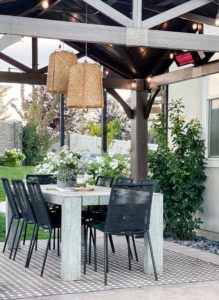
I hesitated in the past because all the heaters I have seen before were larger and took up too much space. Since this area is only 10ft x 10ft, space is a huge factor. That’s when I came across the Dimplex DIRP15A10GR. It’s an electric plug and go mountable heater! It’s the perfect solution for this area. We mounted it inside the roofline of our gazebo and it was super easy to do. We just plumed it in and we were ready to go! This particular model is also remote controlled, which was a huge selling point for me.
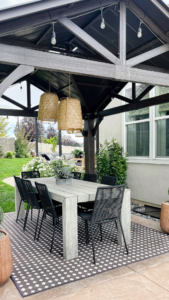
One of these units is enough to heat a 10ft x 10ft space so it worked out perfectly! This will now make it possible to enjoy our outdoor dining space through the Fall and I could’t be happier about it. I see lots of chili and cornbread, soups, and stews being enjoyed out here this year!
If your family is like ours chili is a staple when the weather cools down and there is only one recipe I have that everyone loves, even my picky eaters!
-Grey Birch Designs-
Chili Recipe
Ingredients
- 1 pound ground turkey or beef
- 1 onion
- 1 clove garlic, minced
- 2 15-oz. cans diced or crushed tomatoes
- 2 14-.5 oz. kidney cans, rinsed and drained
- 1 15-oz. can beef broth
- 3 tablespoons brown sugar
- 2 tablespoons chili powder
- 1 teaspoon ground cumin
- 1 tablespoon unsweetened cocoa powder
- 1/2 teaspoon freshly ground black pepper
- 1/2 teaspoon kosher salt
- Sour cream and shredded cheddar cheese for topping!
Instructions
- Heat 1-2 tablespoons olive oil in a large pot over medium heat. Saute onion, garlic, and ground turkey until meat is cooked through.
- Add salt, pepper, cumin, chili powder, brown sugar, and unsweetened cocoa powder. Add the tomatoes, beans, and beef broth.
- Heat to boiling and then reduce to a simmer (uncovered), stirring occasionally, until thickened as desired (I like it about 30-40 minutes)
- Top with sour cream and shredded cheese, serve hot with fresh cornbread!
Notes
Recipe modified/inspired by Our Best Bites
read more
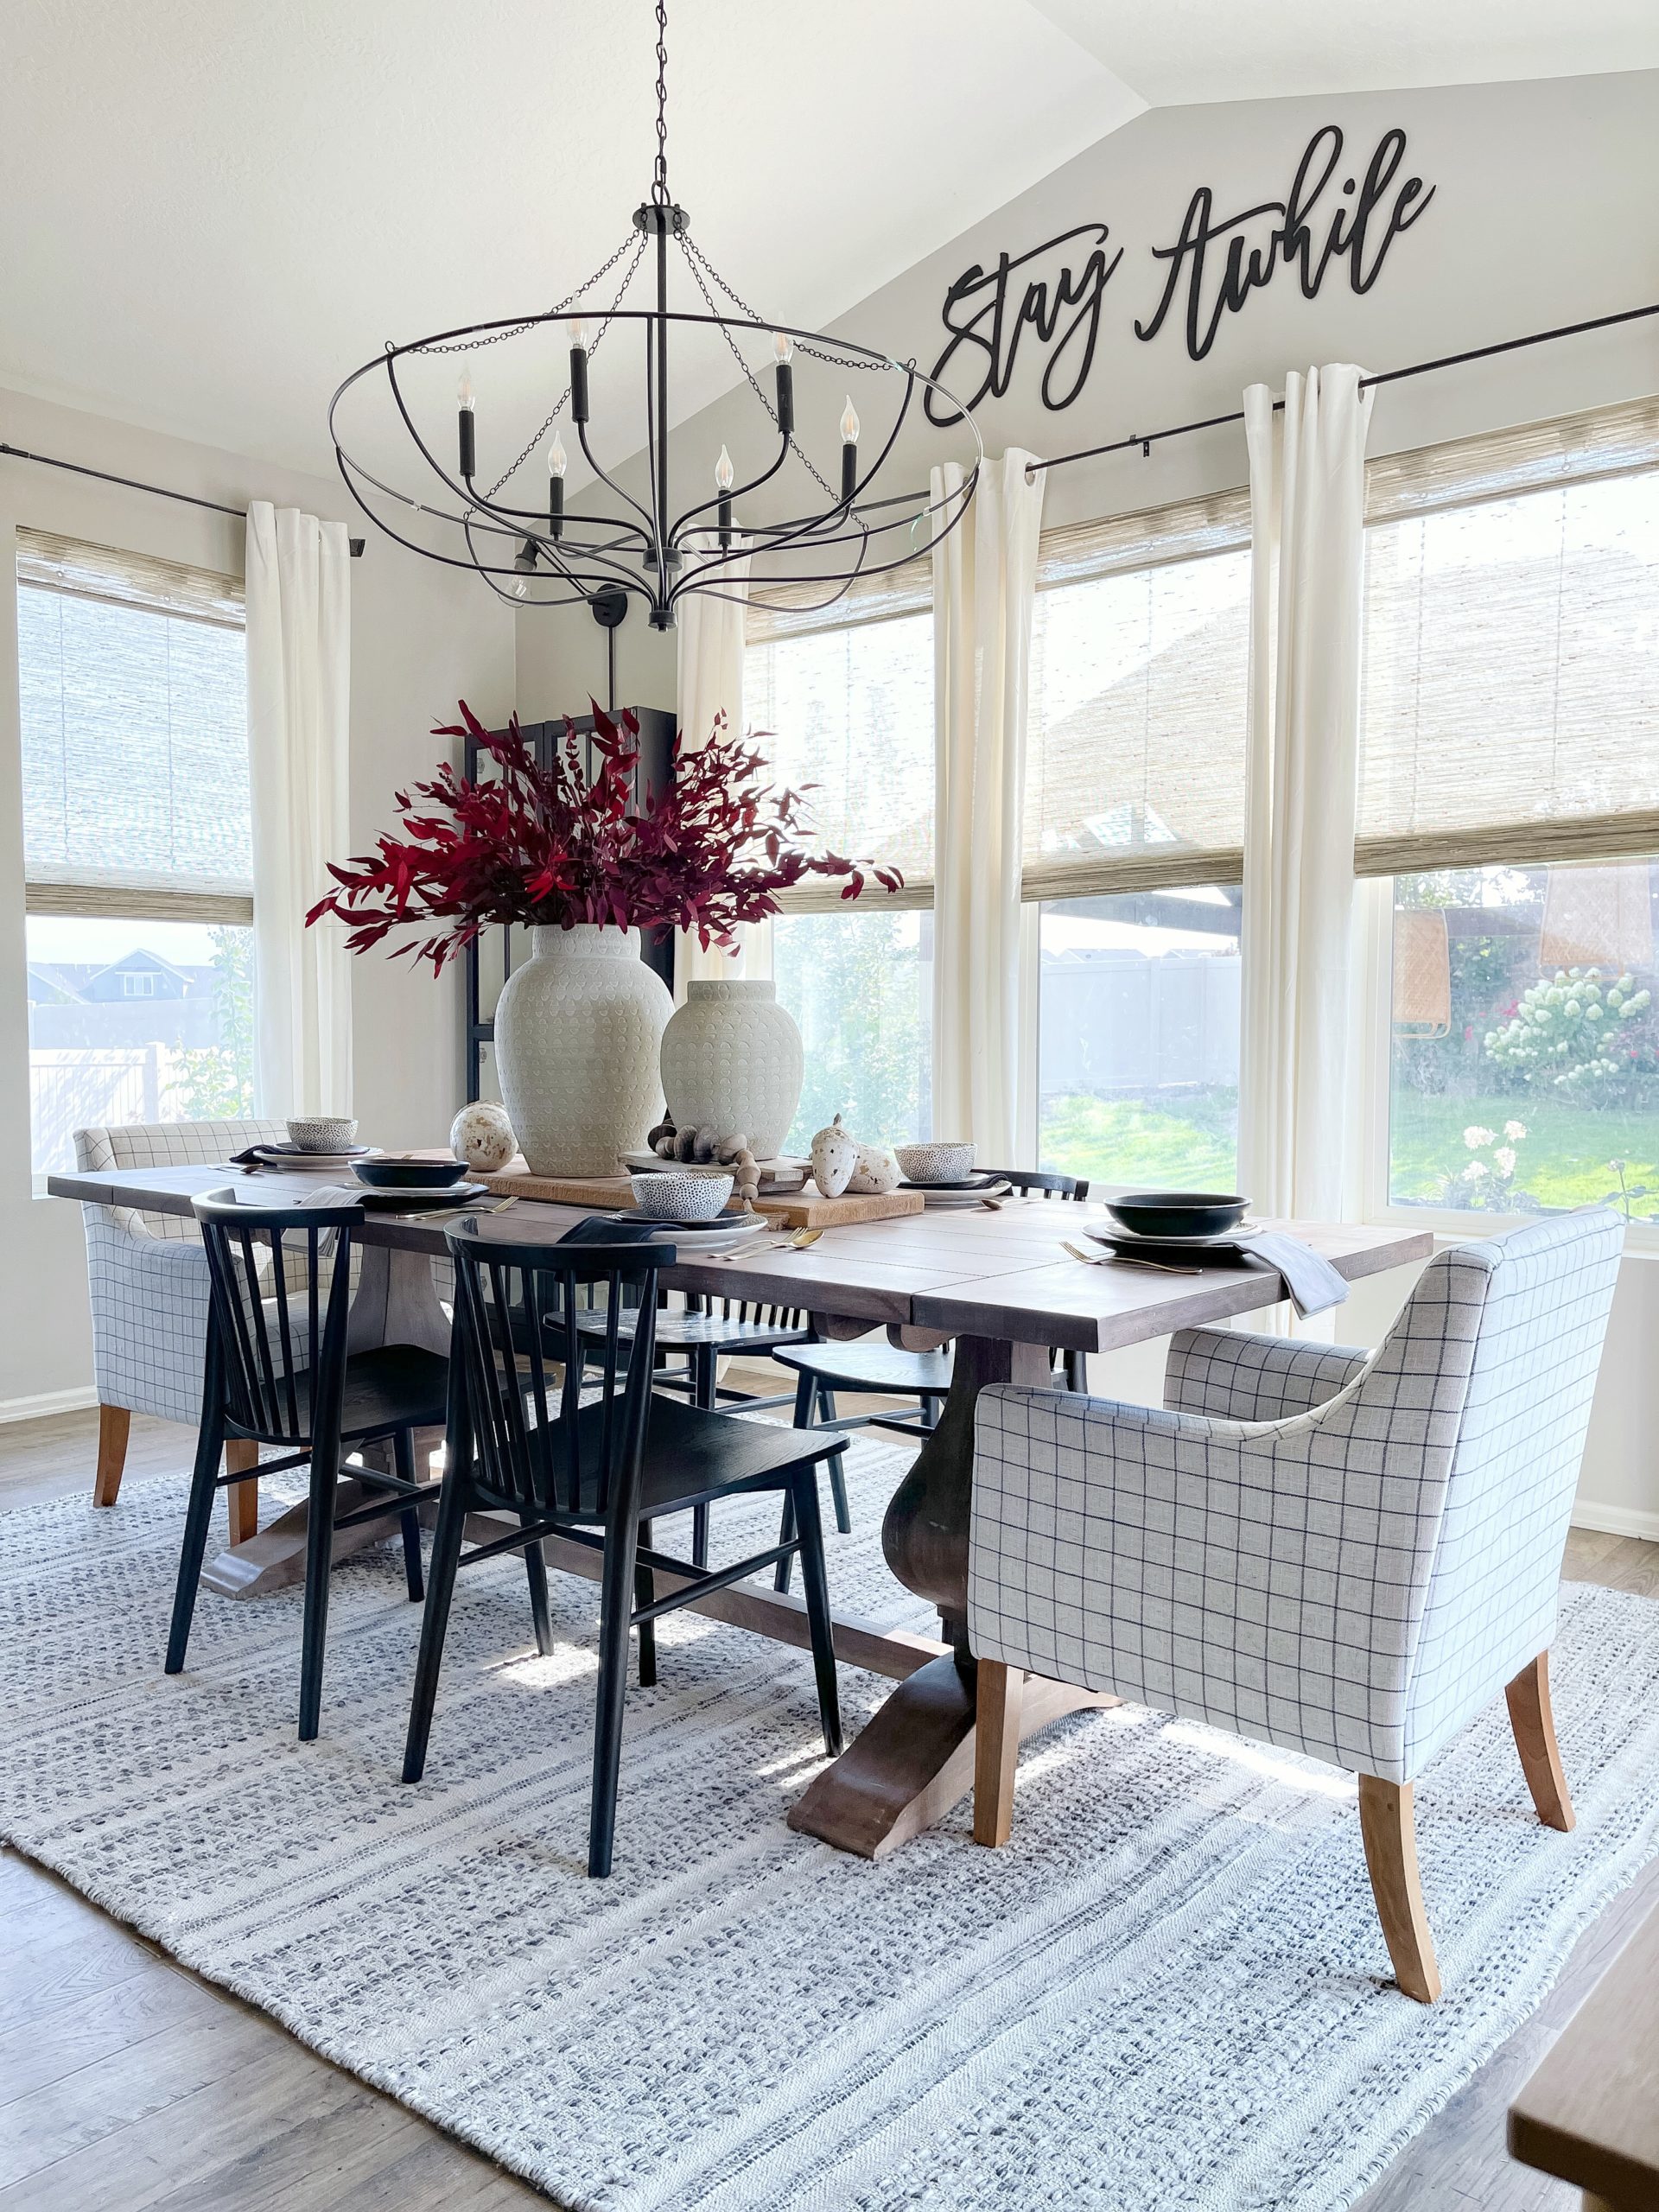
Fall is making its appearance around our home and I couldn’t be happier. This is my favorite time of year! I love the crisp cool air, the sweaters and boots, pumpkin spice everything, and of course the Fall decor!
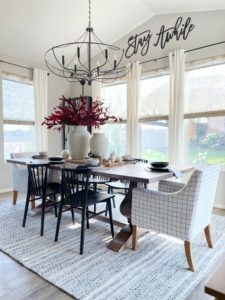
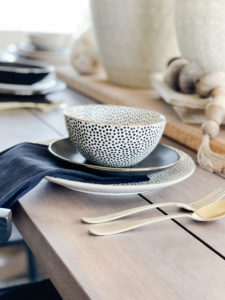
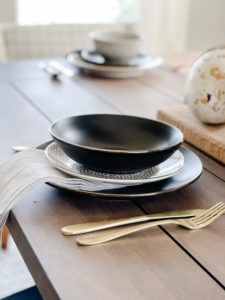
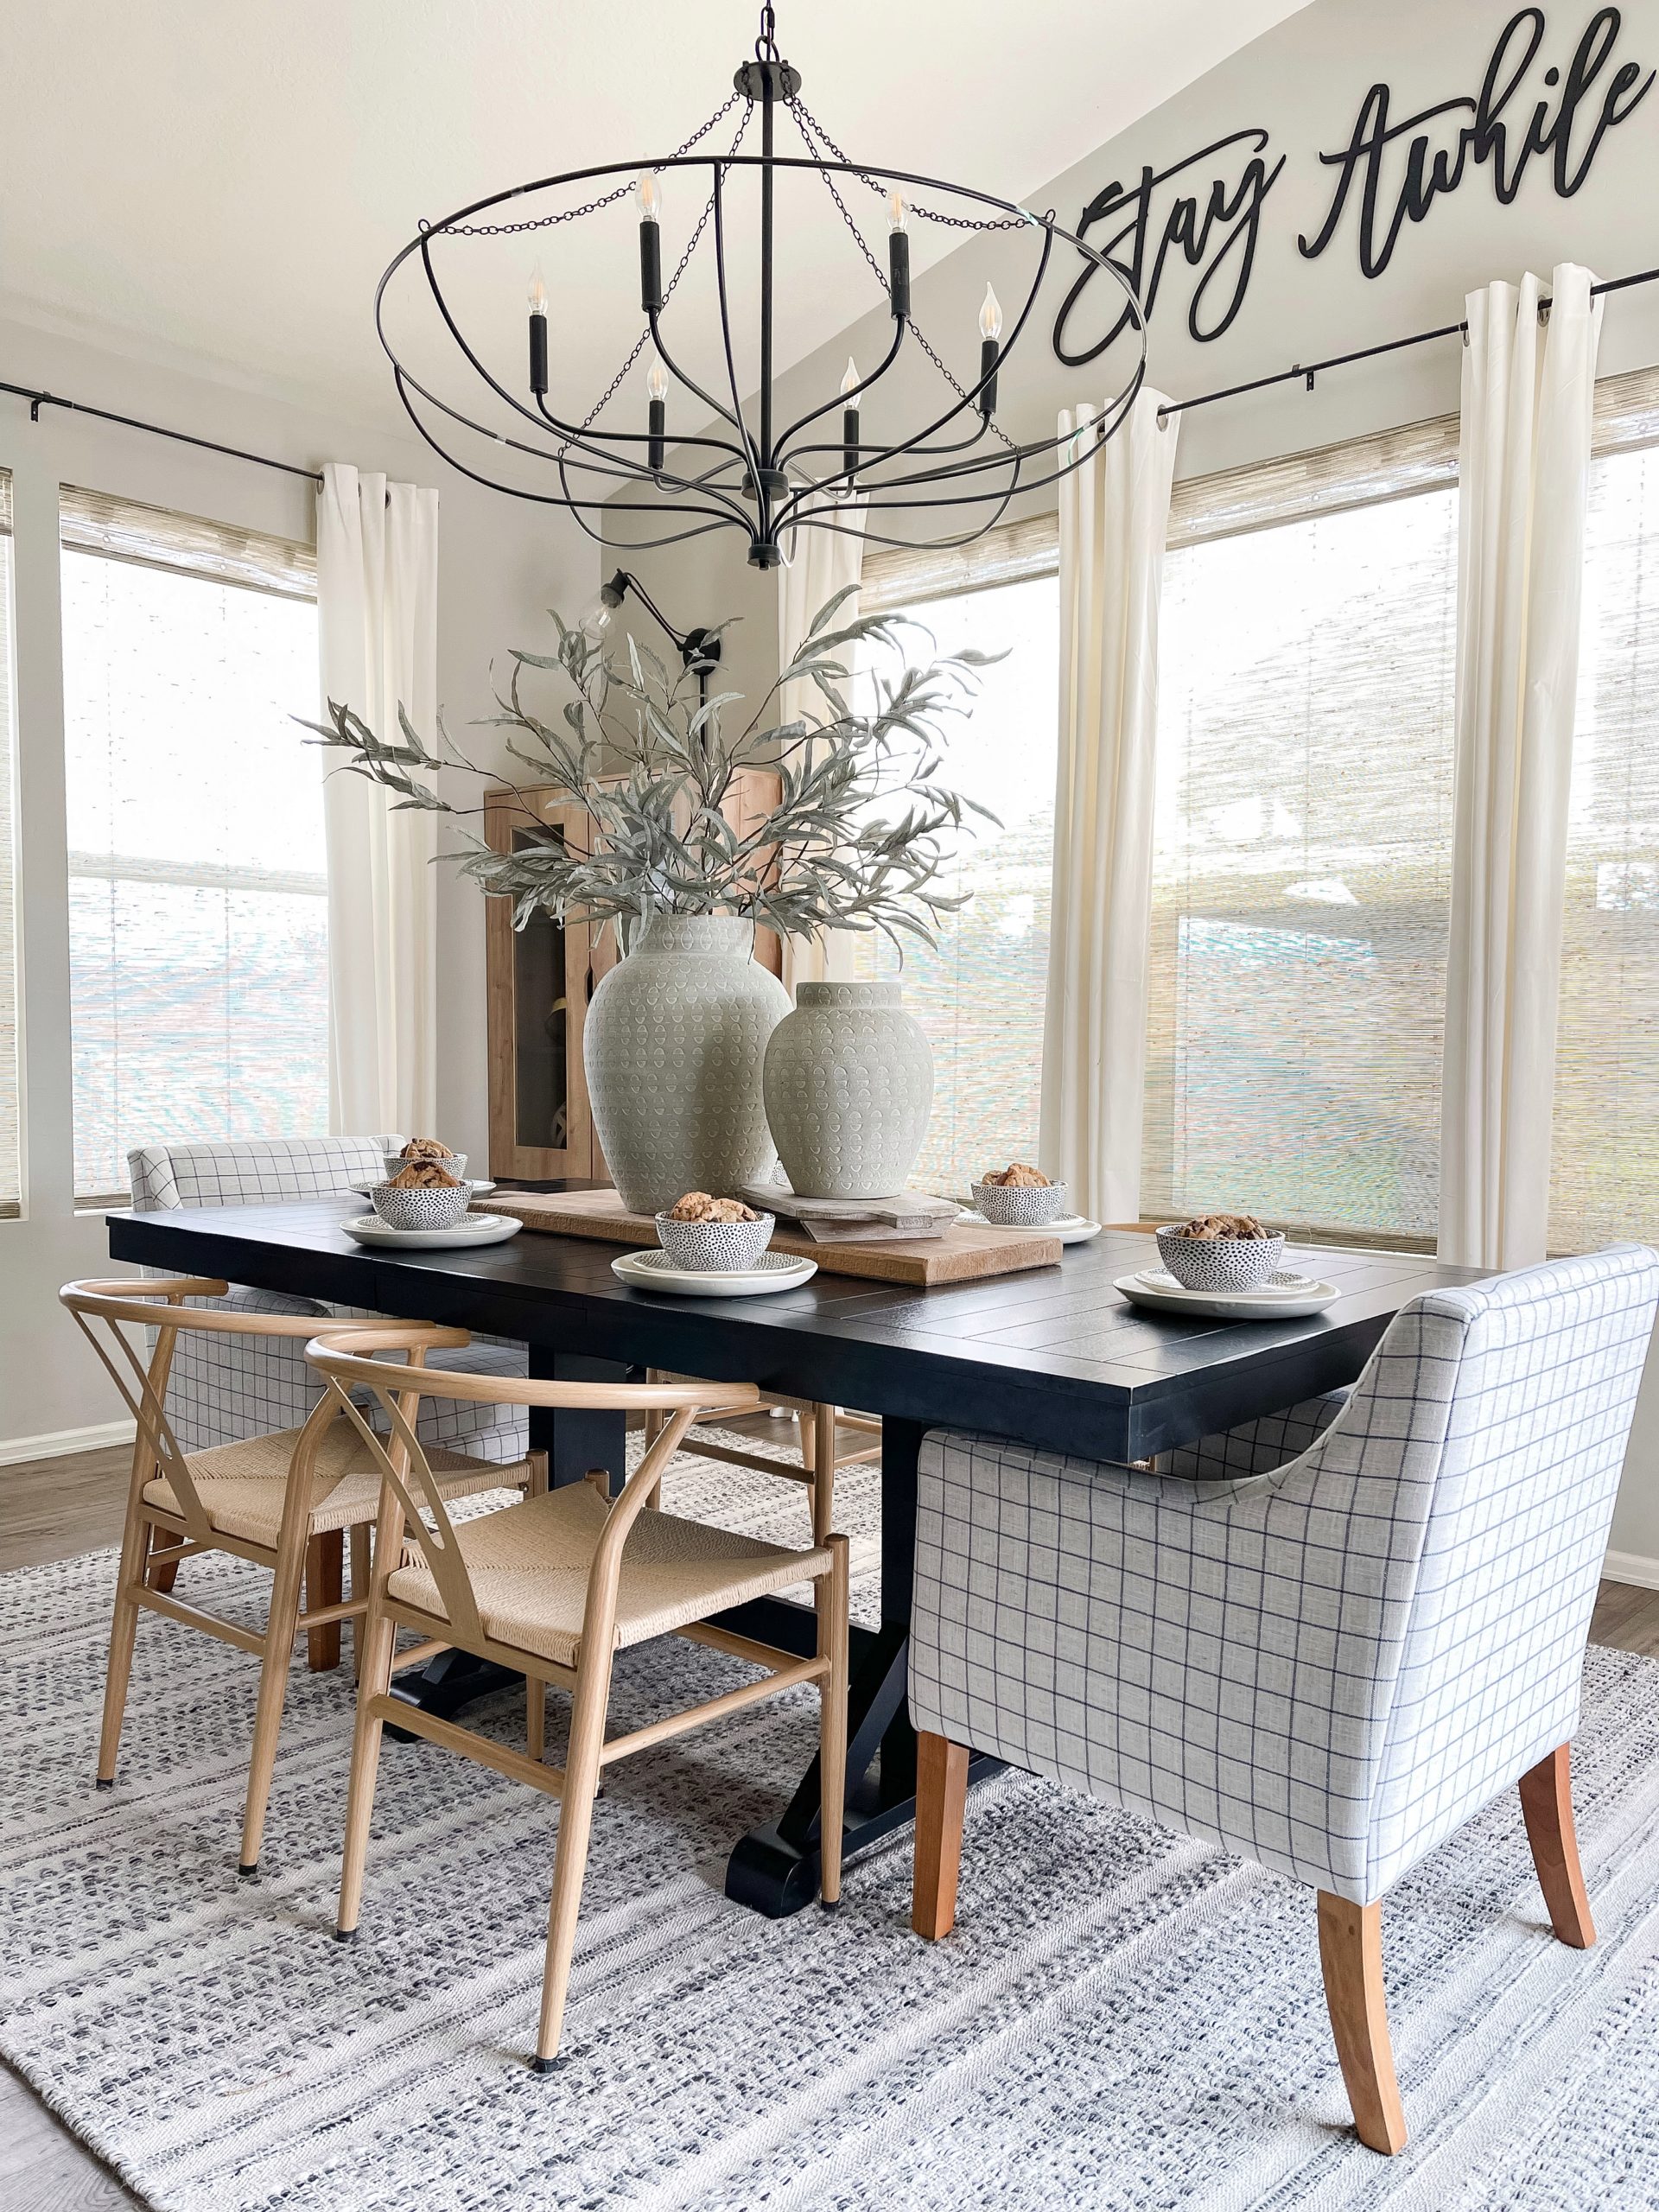
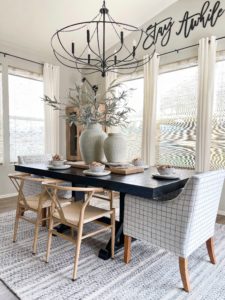
I love the warm color palette Fall brings to my home – it instantly gives it such a cozy vibe! This year I’m drawn to deep burgundy, gold, cream, and rust colors for the season. My dining room was one of the first places I decided to decorate this year, and that meant a trip to Walmart. It’s one of my favorite places to find affordable decor and this season they didn’t disappoint
Walmart is where I found my all time favorite dish set. They are great year round, but with the gold rim on this set and color palette I’m going with this Fall, they are perfect. I wanted to do a mixed table setting so I paired them with the black Onyx Stoneware set with the same gold detail around the edge that I love so much! These two sets together are beautiful and can be dressed up or dressed down for casual dining!
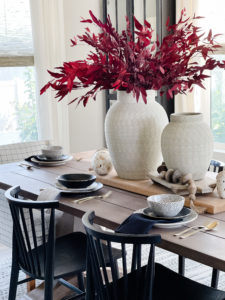

Next, I put together the centerpiece. I found the perfect dried eucalyptus in the deep burgundy color I’m loving right now. I grabbed a few bunches to add to my vase for a warm, classic feel for my dining room centerpiece.
I didn’t need a lot to make this space feel like Fall and I didn’t need to spend much either thanks to the prices at Walmart! The only thing missing to get fully into the season is my favorite Pumpkin Chocolate Chip Cookies! I have been making this same recipe every year since my kids were little. It’s going on 15 years now and we all look forward to it each year! Here’s my favorite Pumpkin Chocolate Chip Cookies recipe:
Pumpkin Chocolate Chip Cookies
Ingredients
- 1 cup pumpkin puree
- 1 cup granulated sugar
- 1/2 cup vegetable oil
- 1 large egg
- 1 Tablespoon vanilla extract
- 2 cups all-purpose flour
- 2 teaspoon baking powder
- 1 teaspoon baking soda
- 1 teaspoon ground cinnamon
- 1 teaspoon pumpkin spice
- 1/2 teaspoon sea salt
- 1.5 cups chocolate chips
Instructions
Preheat oven to 350°F. Line a baking sheet with a baking mat. Combine pumpkin, sugar, vegetable oil, vanilla and egg in a large bowl. Mix until smooth.
Add flour, baking powder, baking soda, cinnamon, pumpkin spice and salt. Mix until all combined. Stir in chocolate chips, don't over mix.
Use a cookie scoop or spoonfulsof the dough and place them about 2 inches apart. Bake for 10-13 minutes, or until a toothpick comes clean.
Remove from oven and let cool on pan for 5 minutes, then transfer to a cooling rack.
read more
What are your favorite things about summer? For our family it’s swimming, boating, riding bikes and of course eating lots of ice cream! I recently picked up this ice cream maker from Walmart and it has been the best purchase. With ice cream being my kids’ treat of choice it’s been getting a lot of use!

read more
With the holidays around the corner, one of my favorite things to make in the kitchen is a charcuterie board. There are so many different varieties but my favorite is the traditional cheese and meat board. Before I head off to the market, I like to make a list of everything I need. My Samsung refrigerator has a super cool voice controlled assistant called Bixby that makes things really easy. I say “Hey Bixby, add Brie cheese to my grocery list” and it does the rest. Then I can quickly send the list to my phone and head out the door. On the off chance I forget to send the list, I can view the inside of my refrigerator from my phone at the market. Pretty cool!


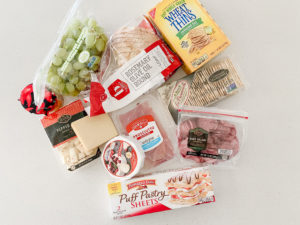
When I build a charcuterie board I like to include fruit, crackers, meats such as prosciutto and salami, and a variety of cheese. My favorite is baked brie. For my baked brie recipe you’ll need:
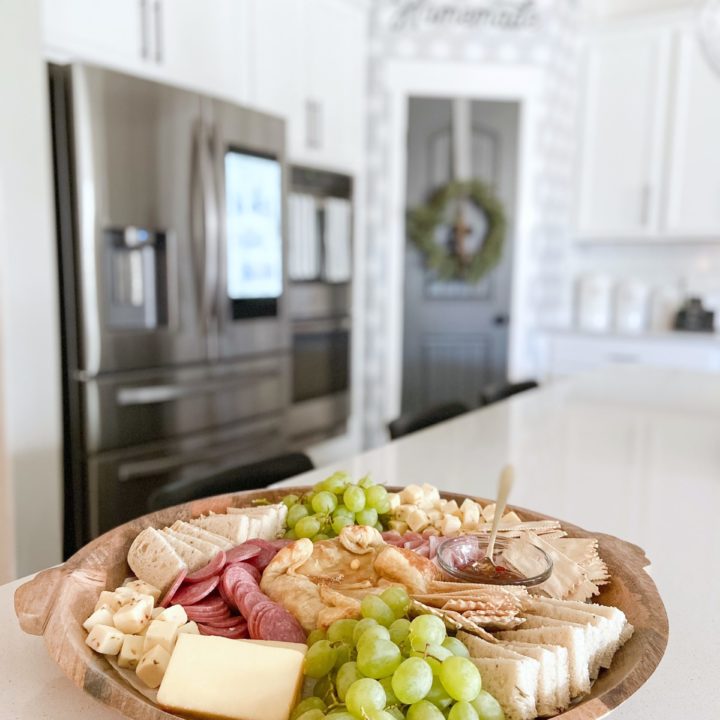
Charcuterie Board Baked Brie
Brie cheese wrapped in a puff pastry with added sweetness from brown sugar, jam and a hint of maple syrup!
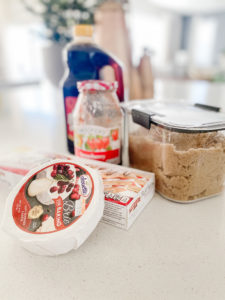
Ingredients
- One sheet of puff pastry dough
- One round brie cheese
- 2 table spoons strawberry jam
- 1 table spoons brown sugar
- 1/4 cup maple syrup
Instructions
- Pre-heat the over to 350 F
- Slice the top off the brie (optional but it will help the puff pastry stick to the cheese)
- Place the brie on top of the puff pastry. Spread the jam on top of the brie and fold the dough over it
- Sprinkle the top of the dough with brown sugar and maple syrup
- Bake at 35oF for 30 minutes.
Notes
Let cool for 5-10 minuites before serving. Place in the center of your charcuterie board and add fruit, crackers, meats, jams and other cheeses to finish builded your board!
This recipe is delicious! I have a lot of fun making these charcuterie boards with my family and awesome appliances like my Samsung refrigerator make it stress free! To read more on some of the awesome kid friendly features our Samsung Family Hub Refrigerator has to offer check out my blog post here

-Grey Birch Designs-