

Looking for an easy DIY outdoor project the whole family will love? This DIY cornhole game is a fun and affordable backyard project that’s perfect for summer nights, BBQs, birthday parties, or just a little friendly competition. With just a few tools, some paint, and a free weekend, you can create your own custom cornhole boards that are just as fun to build as they are to play.
Supplies You’ll Need:
-
Two sheets of 2′ x 4′ birch plywood (for the board tops)
-
2×4 lumber (for the frame and legs)
-
2″ wood screws (for attaching the frame)
-
3/8” x 4” carriage bolts (for foldable legs)
-
3/8” washers
-
3/8” nylon stop nuts
-
Black paint (or any color of your choice)
-
Polycrylic (for sealing and protecting your boards)
-
Drill, miter saw, jig saw or 6″ hole saw, measuring tape, and sander
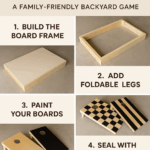
Step-by-Step: How to Build DIY Cornhole Boards
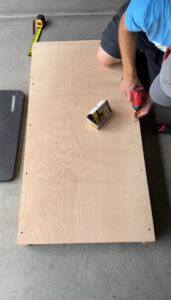
1. Build the Board Frame
Start by building a basic 2×4 frame exactly 24″ wide and 48″ long (same size as the sheets of plywood).
-
The standard size for each board is 48″ long by 24″ wide, which is great for regulation play and backyard fun.
-
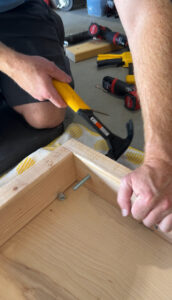
Screw the plywood onto the 2×4’s from the top using wood screws. Pre-drill and countersink each screw.
-
Double check that everything is flush and squared up before tightening all the screws.
Use this diagram for exact cuts and hole placement:
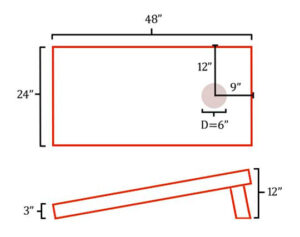
This shows the correct placement of the 6” diameter hole (on center 9” from the top and 12” from each side), and the side profile including board height and leg angle.
2. Add Foldable Legs
Next, cut the 2×4 legs. They should be about 12” tall to give the board the correct incline. The top of the legs will need to be rounded off in a half circle for proper clearance.
-
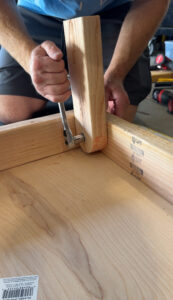
Clamp or hold the legs to the inside of the frame and drill a centered hole through the sides of the frame and through the leg pieces.
-
Use 3/8” x 4” carriage bolts, 3/8” washers, and 3/8” nylon stop nuts to secure the legs so they can pivot and fold underneath when not in use.
-
Make sure the legs swing easily and hold steady when the board is set up.
Foldable legs make the boards easy to store and carry but if this sounds too tricky you can mount the legs directly to the insides of the frame with wood screws.
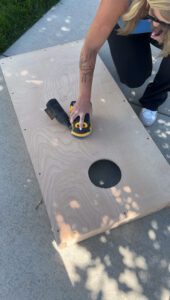
3. Drill the Hole
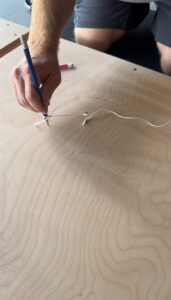
Measure and mark a 6-inch wide hole centered near the top of each board.
-
Place the center of the hole 9” from the top and 12” from each side.
-
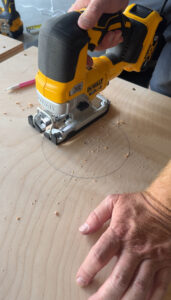
Use a jigsaw or a hole saw to carefully cut the hole.
-
Sand the edges for a smooth finish.
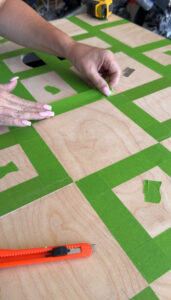
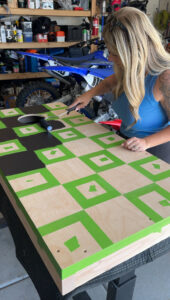
4. Paint Your Boards
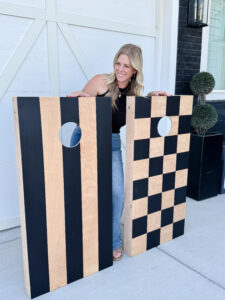
This is your chance to get creative!
-
We painted one board with a checkerboard pattern and the other with bold stripes using black paint.
-
Painter’s tape works great for clean, crisp lines.
-
Let each layer fully dry before adding more or removing tape.
5. Seal with Polycrylic
To protect all your hard work:
-
Apply three coats of polycrylic to seal and protect the boards.
-
Lightly sand between each coat for a smooth, professional finish.
-
This step helps the boards stay durable and weather-resistant.
Why We Loved This DIY Outdoor Project
This project actually started because our kids asked us to build a cornhole set — and now it’s become one of our favorite games to play together. It was a great way to spend time as a family, build something with our hands, and create a game we’ll use for years.
Whether you’re a beginner or a seasoned DIYer, this is a fun, family-friendly weekend project that’s budget-friendly and easy to customize.
📌 Save or Share This Project!
Looking for more DIY outdoor projects or family weekend builds? Pin this tutorial or share it with a friend who loves a hands-on challenge!


