


read more
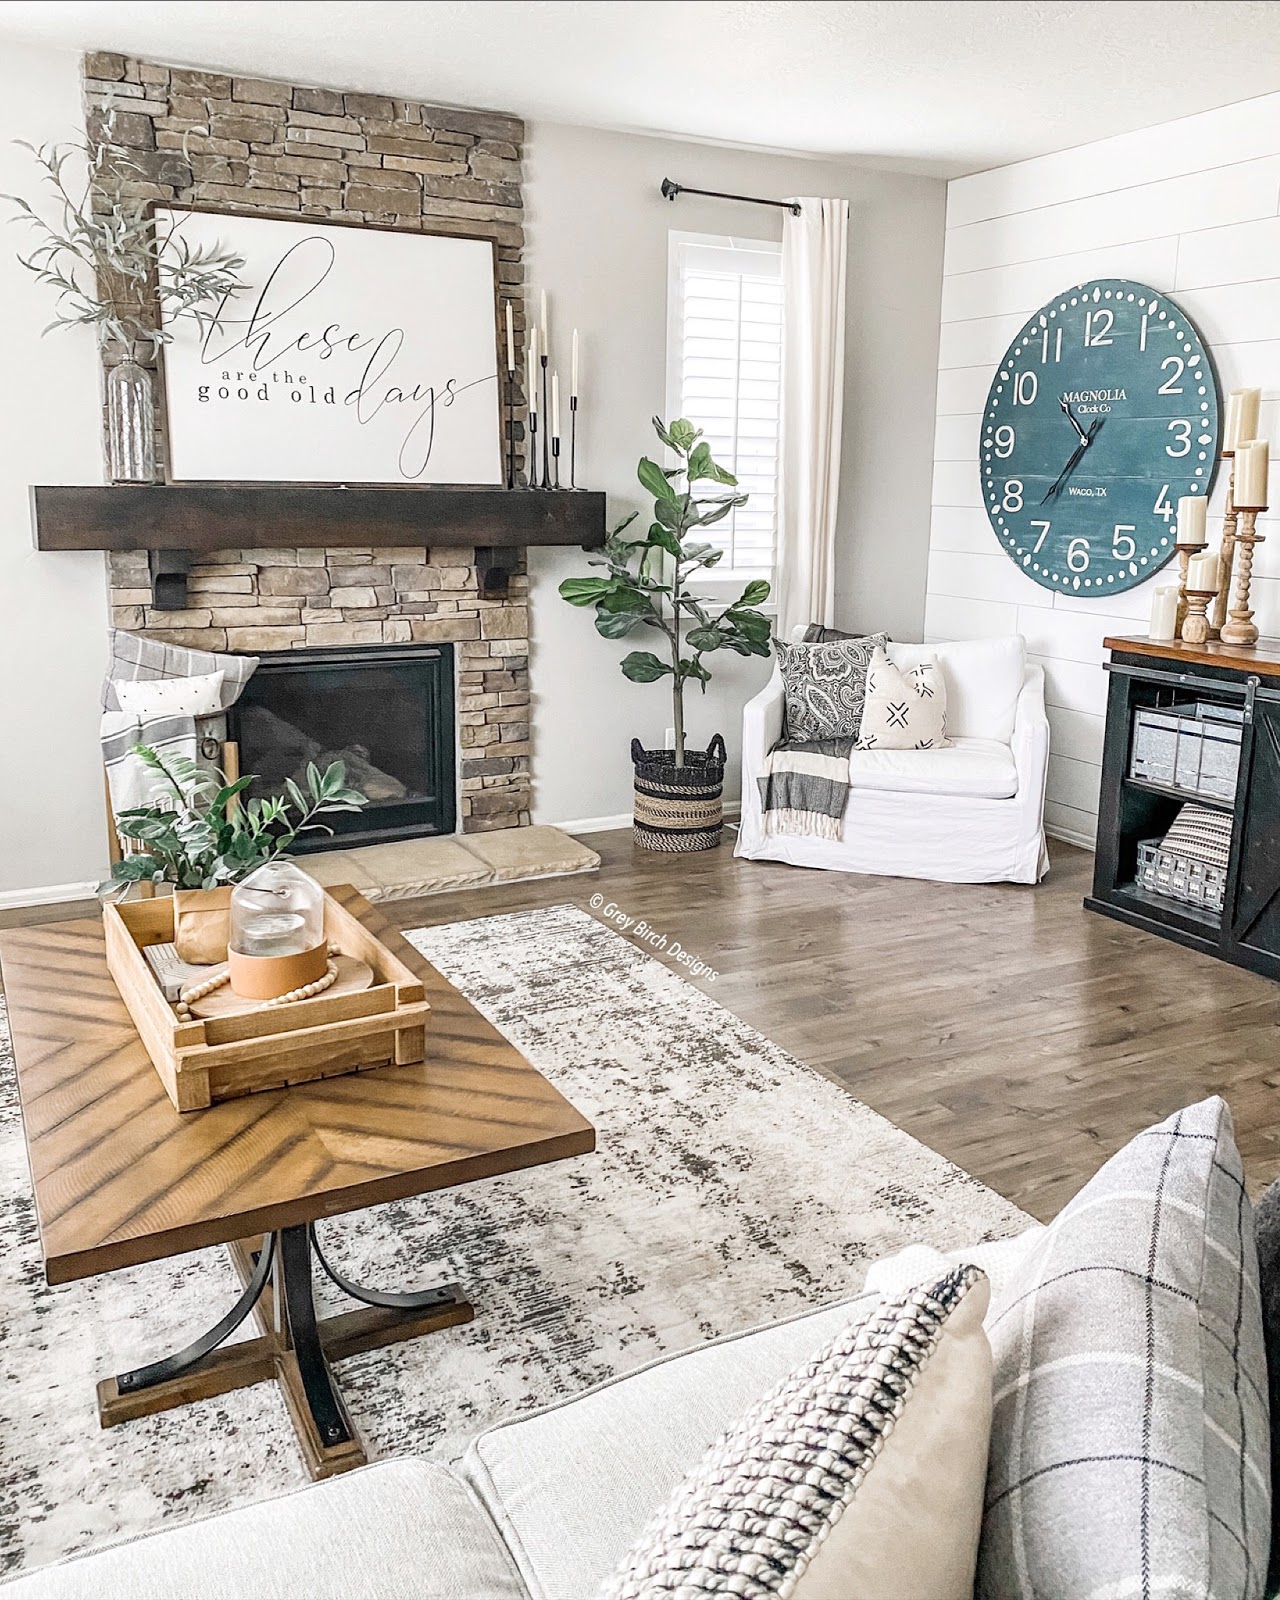
When designing our living room I always envisioned creating a cozy, relaxing sitting area; a place I could see myself curling up next to the fireplace reading a book or watching a movie with my kiddos. Can you visualize it?? Now fast forward to my reality……
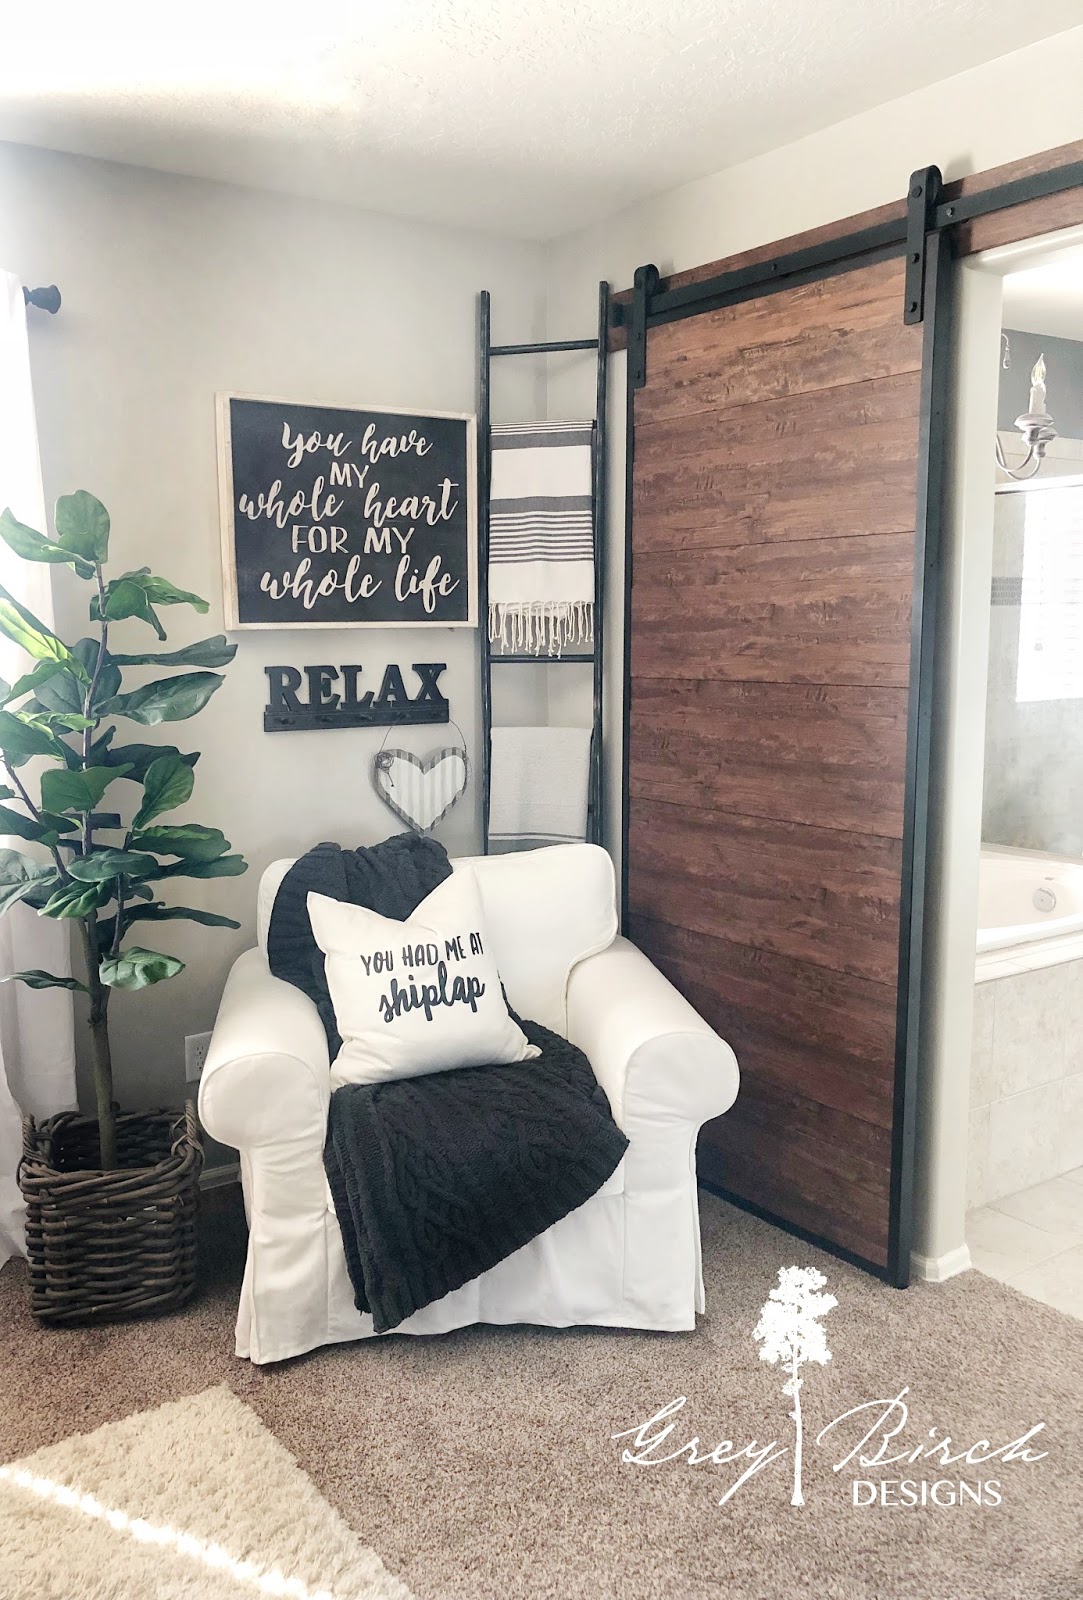
I tried a few different chairs but they either lacked the cozy factor or were comfortable but not stylish. This was a lot harder then I thought it would be, maybe because I had been creating this little corner in my head for so long and I had some serious wish list items! This was when I decided I needed to go custom. This way I could pick the comfort level and style so it would match my other living room furniture.
That’s when I found this gorgeous Amelia Chair from Sixpenny! It’s an oversized chair big enough for cuddling with my kids and bringing my vision of the perfect sitting area to a reality- exactly what I was looking for! The first step was picking the fabric. I ordered a bunch of their samples so I could get a good look at how they would work with the other furniture in my living room. I decided to go with the Cotton Linen in the Pacific Pearl and it’s simply beautiful. For the chair fill I wanted something ultra cozy so I picked the feather down fill and it didn’t disappoint!
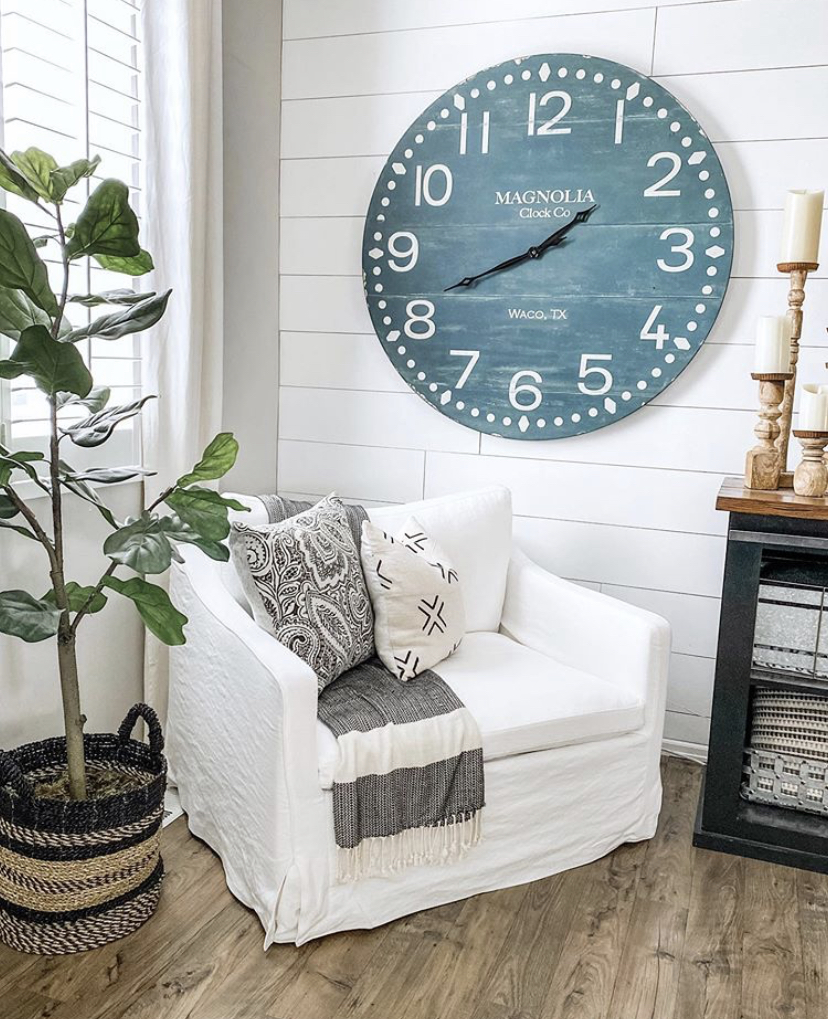
Next I added a throw blanket and a few pillows with some fun patterns and great texture to give it that cozy welcoming feel. Then I completed the look with some faux greenery and a few of my favorite pieces of decor!
This little corner has become the best seat in the house, literally!! I thought I would spend a lot of time here but truth be told, I have to fight my kids for a turn in our new sitting area….haha!! Needless to say we are thoroughly enjoying it and because this chair has a slipcover I don’t have to worry about spills and sticky fingers.
-Grey Birch Designs-
read more
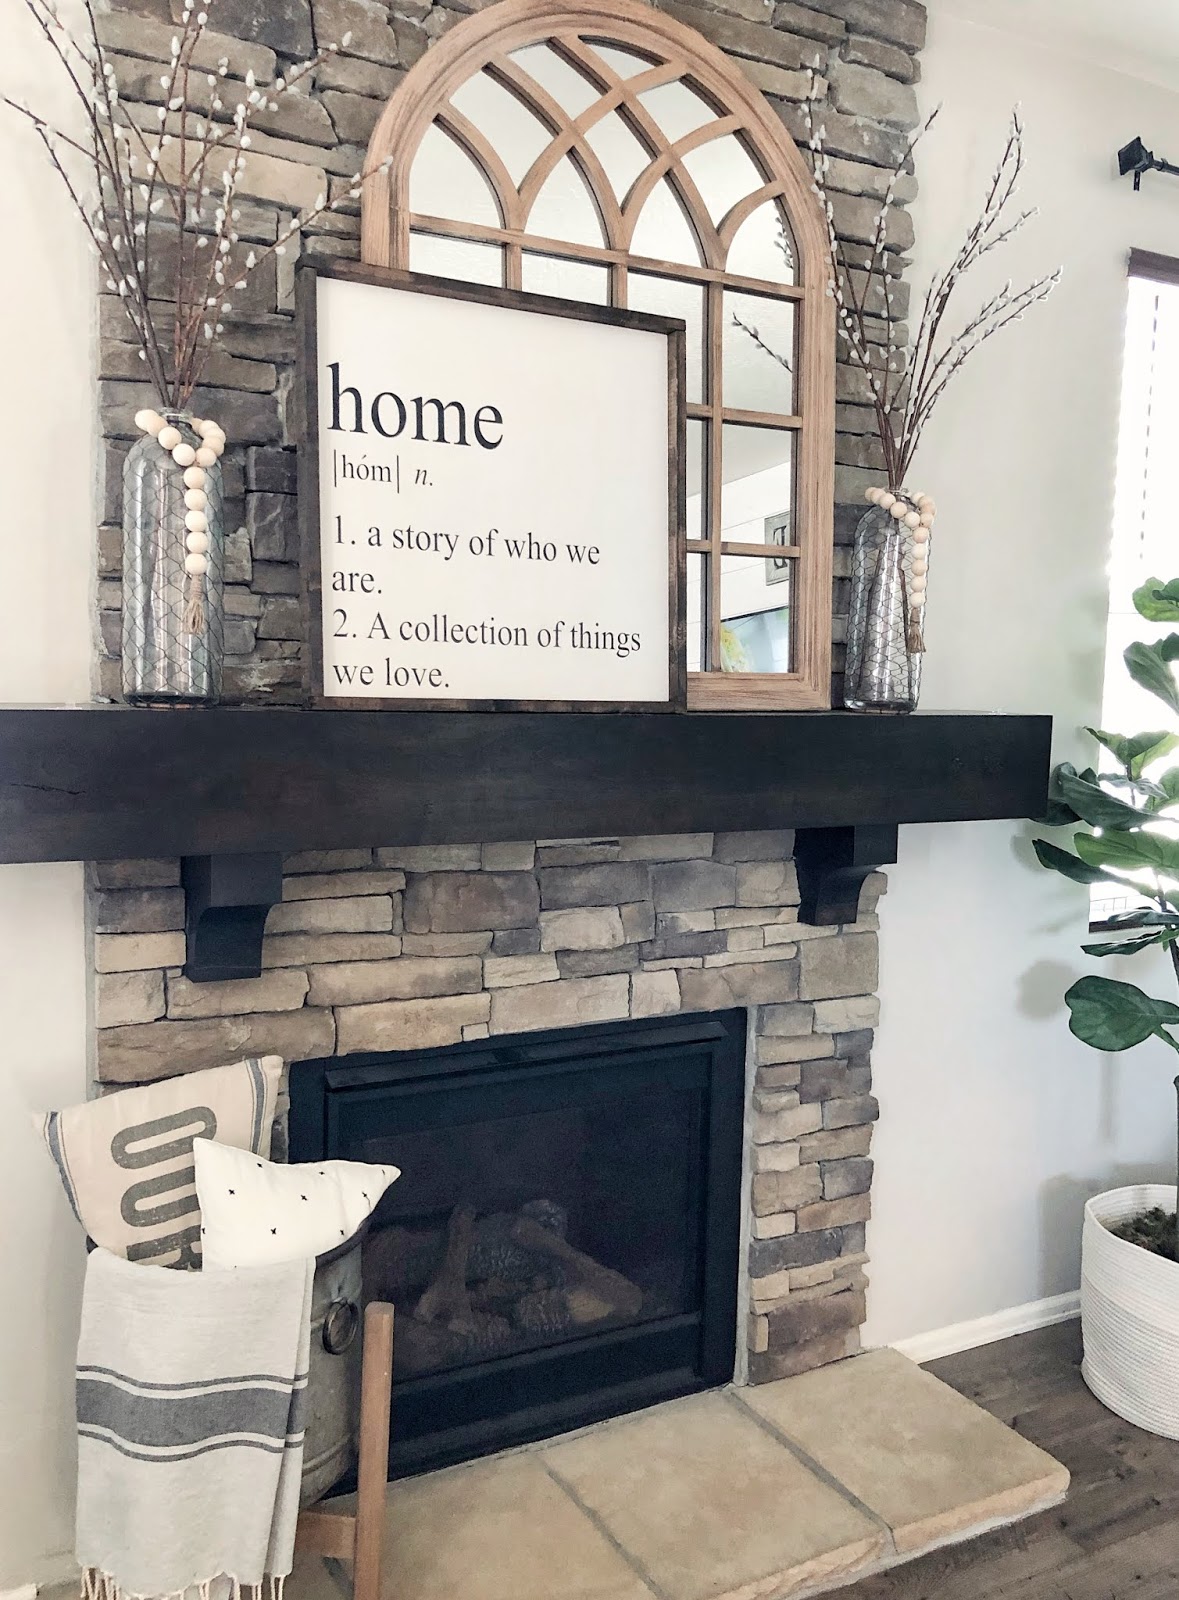
Decorating your fireplace mantel can be tricky, and if you’re like me and want a new look for each season/holiday it can get expensive. I have come up with three ways you can style your mantel using the same core anchor pieces, making it easier to switch out the smaller decor from season to season!
Everyday Look
First let’s establish our anchor pieces that will be used throughout all the different looks. My biggest focal point is the larger mirror. I chose this one because it is a perfect piece to use in layering without being distracting. The wood frame and simple design draws your eye in but doesn’t distract from the sign that’s in front of it. The other anchor pieces I have are the vases with tall flowers on each side. This works great to get everything symmetrical, making it ok to keep the mirror and large sign off-center because the vases bring balance to the whole display. Finally, for this everyday look, I added the “home” sign and wood beads as decor. They look great and are easy to switch out!
Spring Look
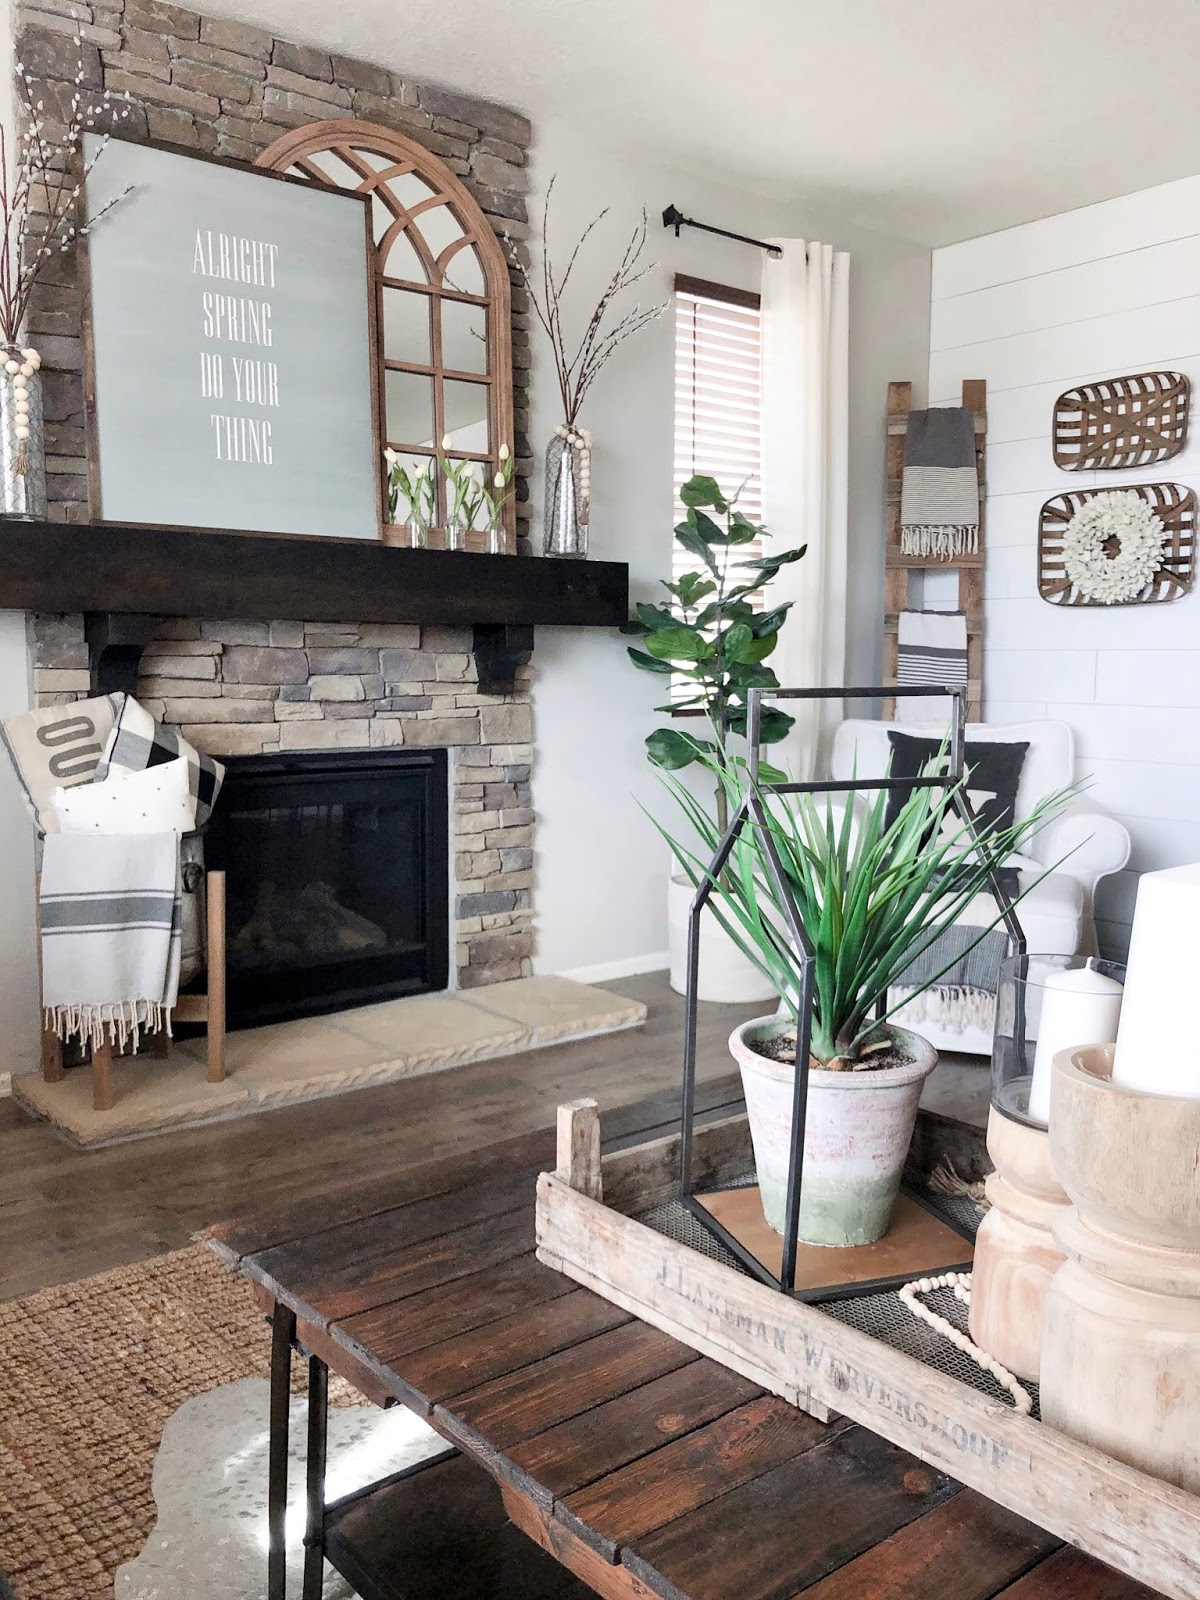
For my spring look I swapped out my “home” sign for this larger spring sign, and added some wood beads on the vases. I also found these cute glass bottles at the Target dollar spot and put some real touch tulips in each one to give it a spring touch. By keeping the anchor pieces I didn’t have to change a lot but got a whole new look for spring!!
Summer Look
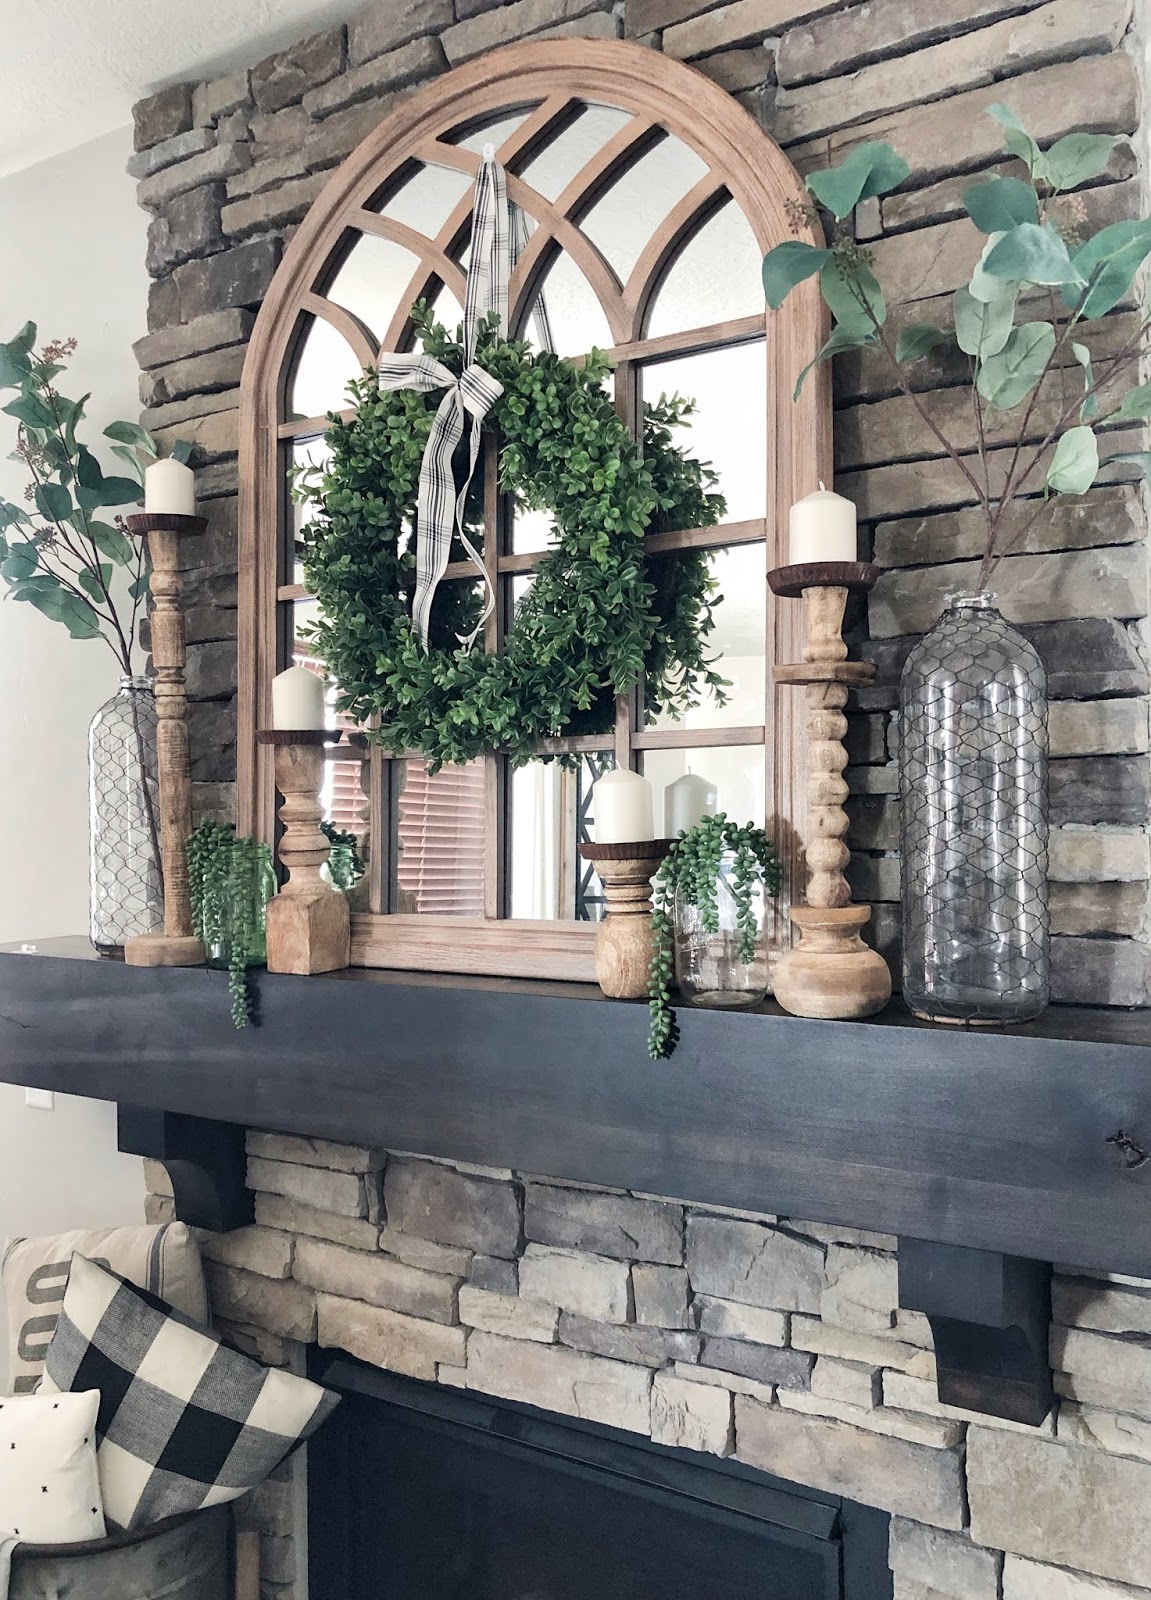
For my summer look I did something a little different than before. I love lots of greenery in the summer so I wanted to show that. I changed the cotton stems I had in the glass vases to some faux seeded eucalyptus, added some faux succulents inside 2 different color mason jars, added a faux boxwood wreath over my mirror, and added some fun vintage candle sticks and candles. Just like before, I kept my anchor pieces the same and incorporated smaller/different decor for a new season and fresh look!!
-Grey Birch Designs-

DIY’s on Monday
Joy In Our Home | Timeless Creations |The Tattered Pew | CityGirlmeetsFarmboy | Life On Kaydeross Creek
Vignettes on Tuesday

anderson + grant | Follow The Yellow Brick Home | White Arrows Home | Worthing Court | Camelot Art Creations
Front Porches on Wednesday

Mantels on Thursday

DIY Beautify | The Painted Hinge | Making It In the Mountains Grey Birch Designs | The Homemaking Momma
Recipes on Friday

read more
There are so many different ways you can make a blanket ladder, and I have made a few different styles myself, but I think this is the most straight forward and easy way I have found!
Supplies list
- Miter Saw
- Finish Nail gun
- Nails
- Wood dowels (you will need 2 or 3 depending on how many slats you want)
- 1″x 2″ pine board (these are for the sides so you will need 2 of these)
- Wood Glue
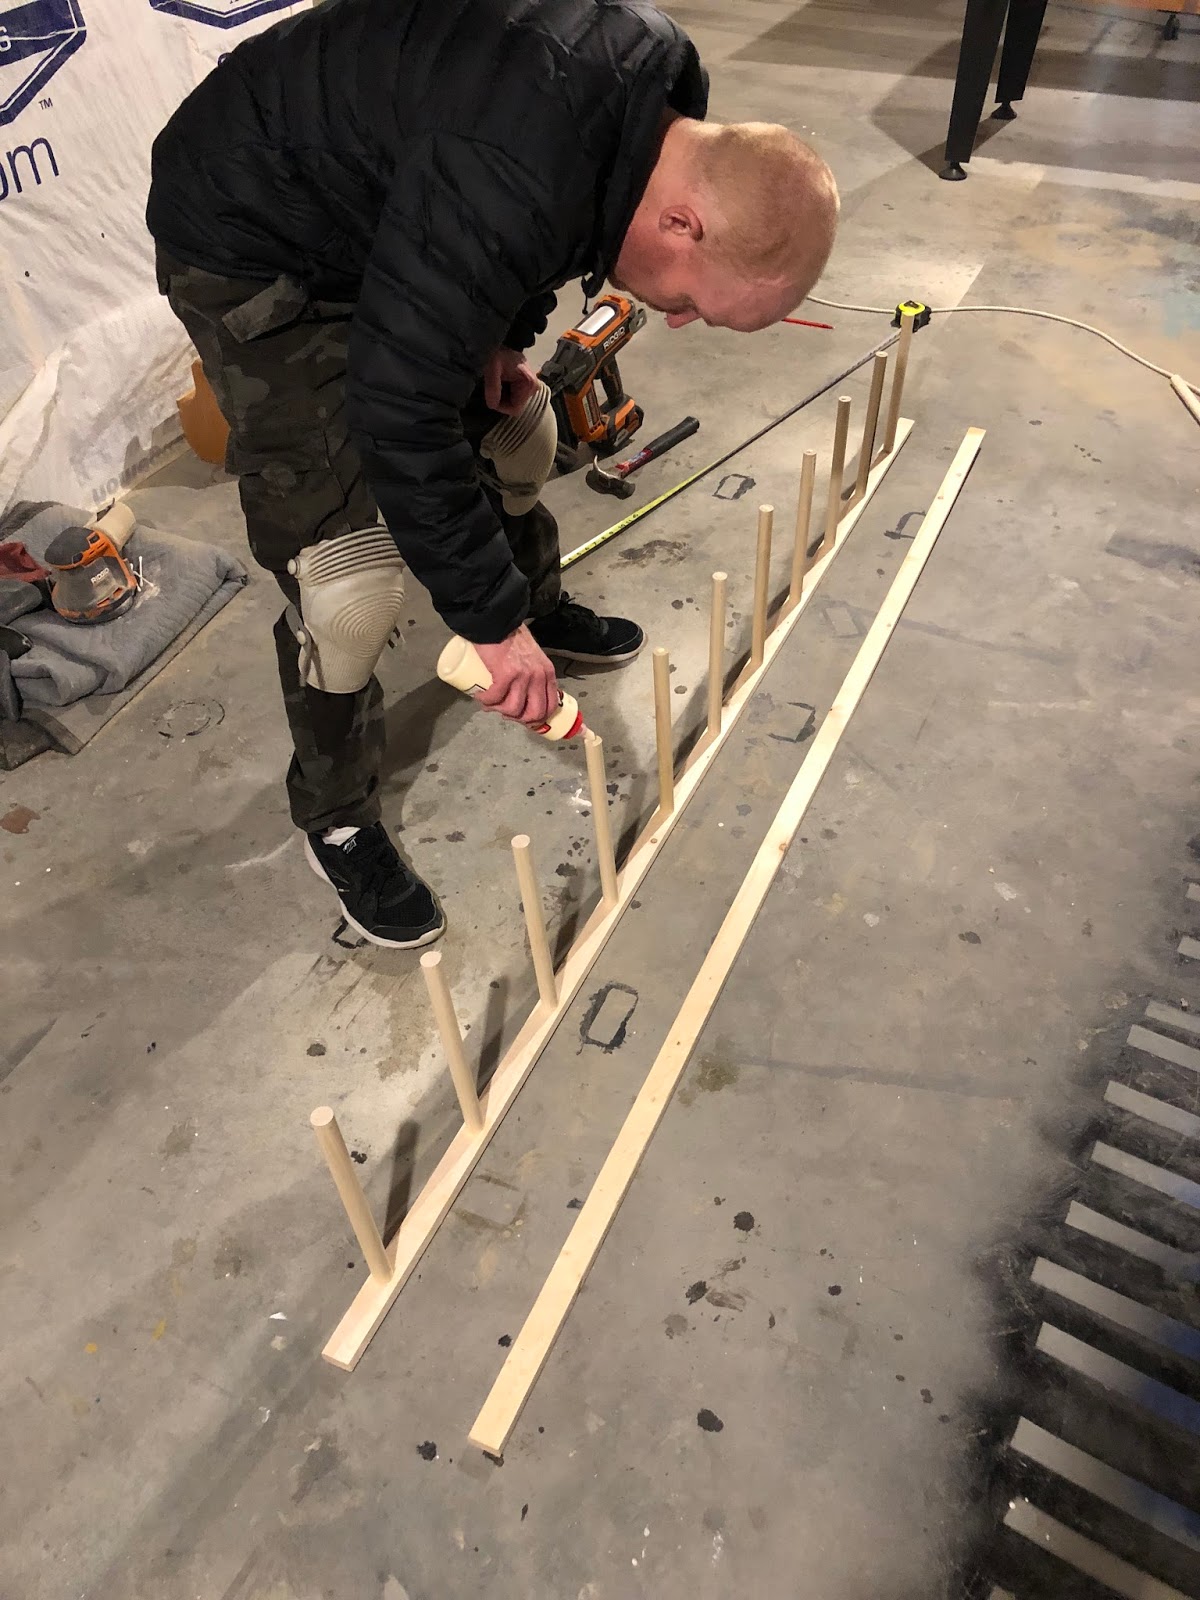
Step 1
First thing you are going to want to decide is how tall you want your ladder and about how many slats you want to have. I made mine 90″ tall and cut my dowels to 11 3/4″ I wanted a thinner look with more slates so that’s why I picked those measurements. Once everything is cut lay out your pieces and decide how far apart you want the spacing to be, mine are 7″ apart. Then mark the side pieces so you know where to attach each dowel.
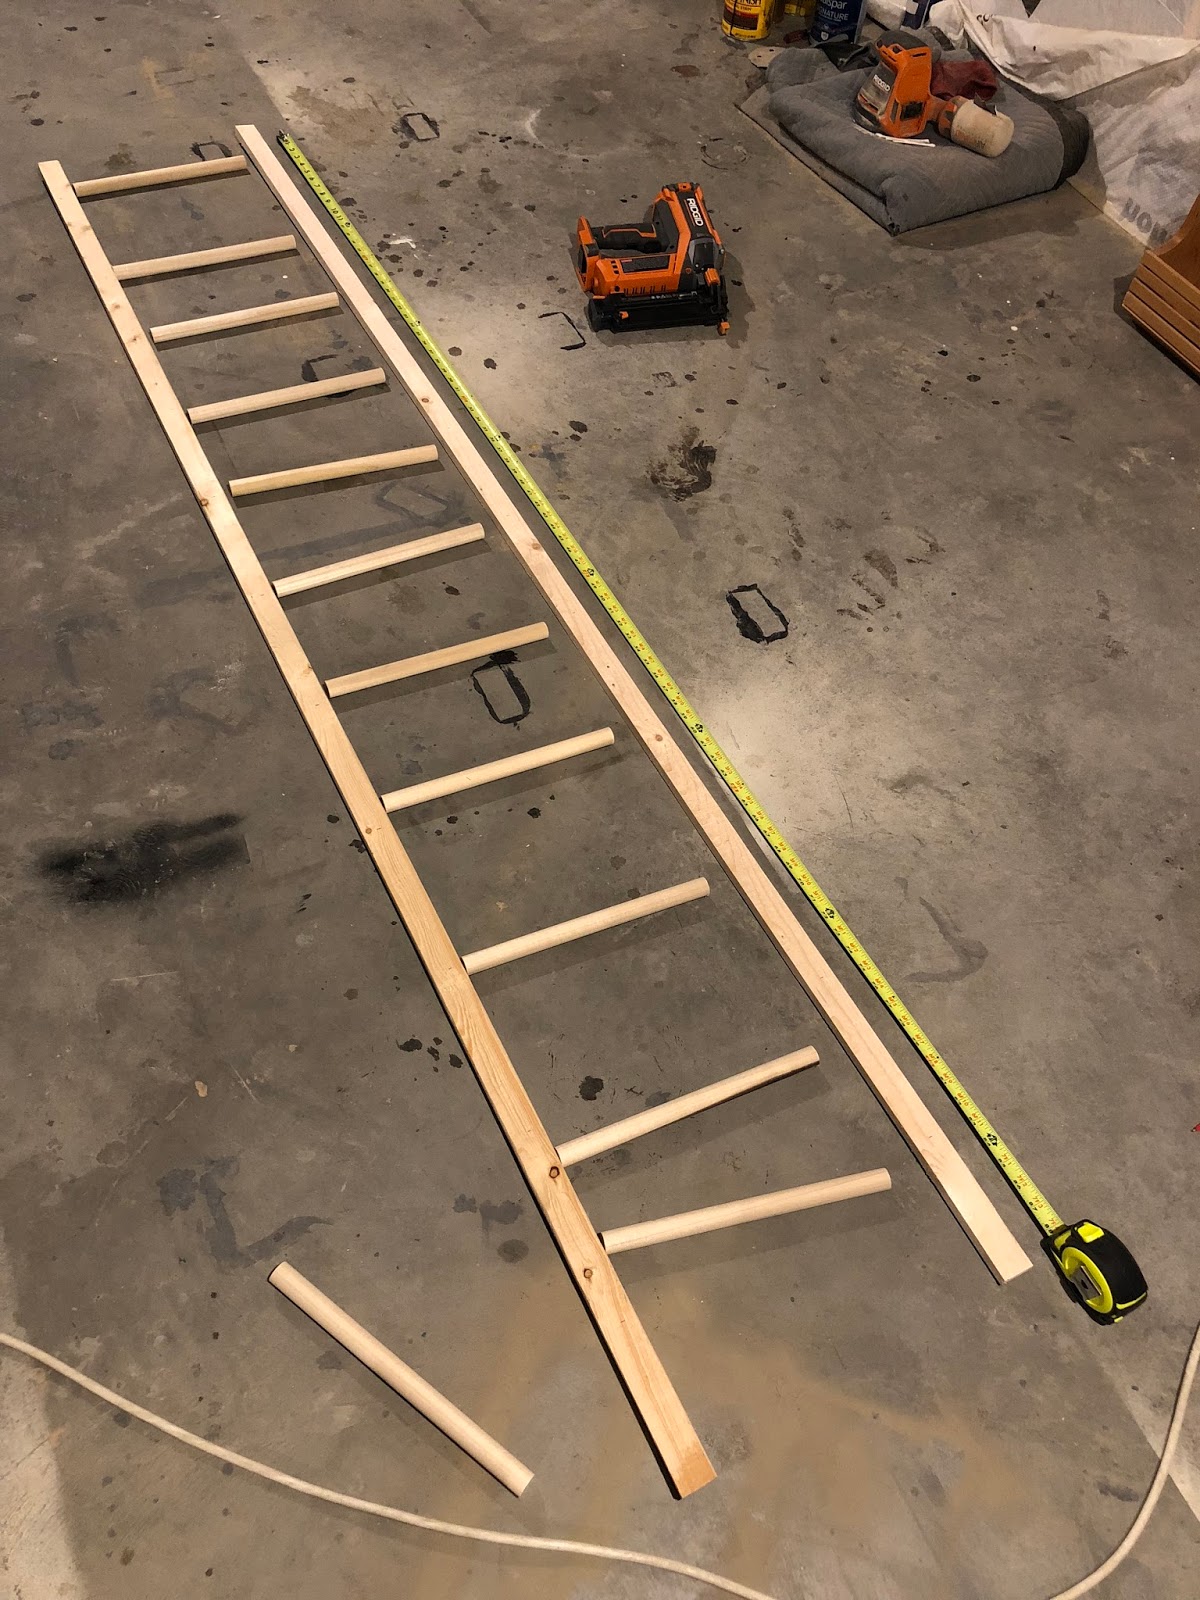
Step 2
Now to assemble it you will want to put a dab on wood glue on one end of the dowel, line it up with the mark you made on the side piece and carefully fire a nail into the wood. Attach each dowel to the piece of wood you are using for the sides of the ladder then repeating the steps until all your dowels are attached to one side. Once that’s done you can turn it on its side and attach the other piece of wood with the same steps!
Step 3
Sometimes you ladder can be slightly bent after its assembled and that is completely normal due to the face that the wood isn’t perfectly straight most of the time. To fix this problem lay your assembled ladder on a flat surface and put some heavy objects on the top and the bottom and leave them there until your ladder is dry, I let mine sit overnight. Once the glue is dry its will stay in it’s new straight position. Now you can paint or stain it whatever color you like!
Hope you enjoyed this super easy and quick DIY Ladder!
-Grey Birch Designs-
read more
Welcome to my little 2017 Christmas Home Tour!! I had so much fun decorating our home this year I thought I would share it with you all, hope you enjoy it as much as I did decorating it!
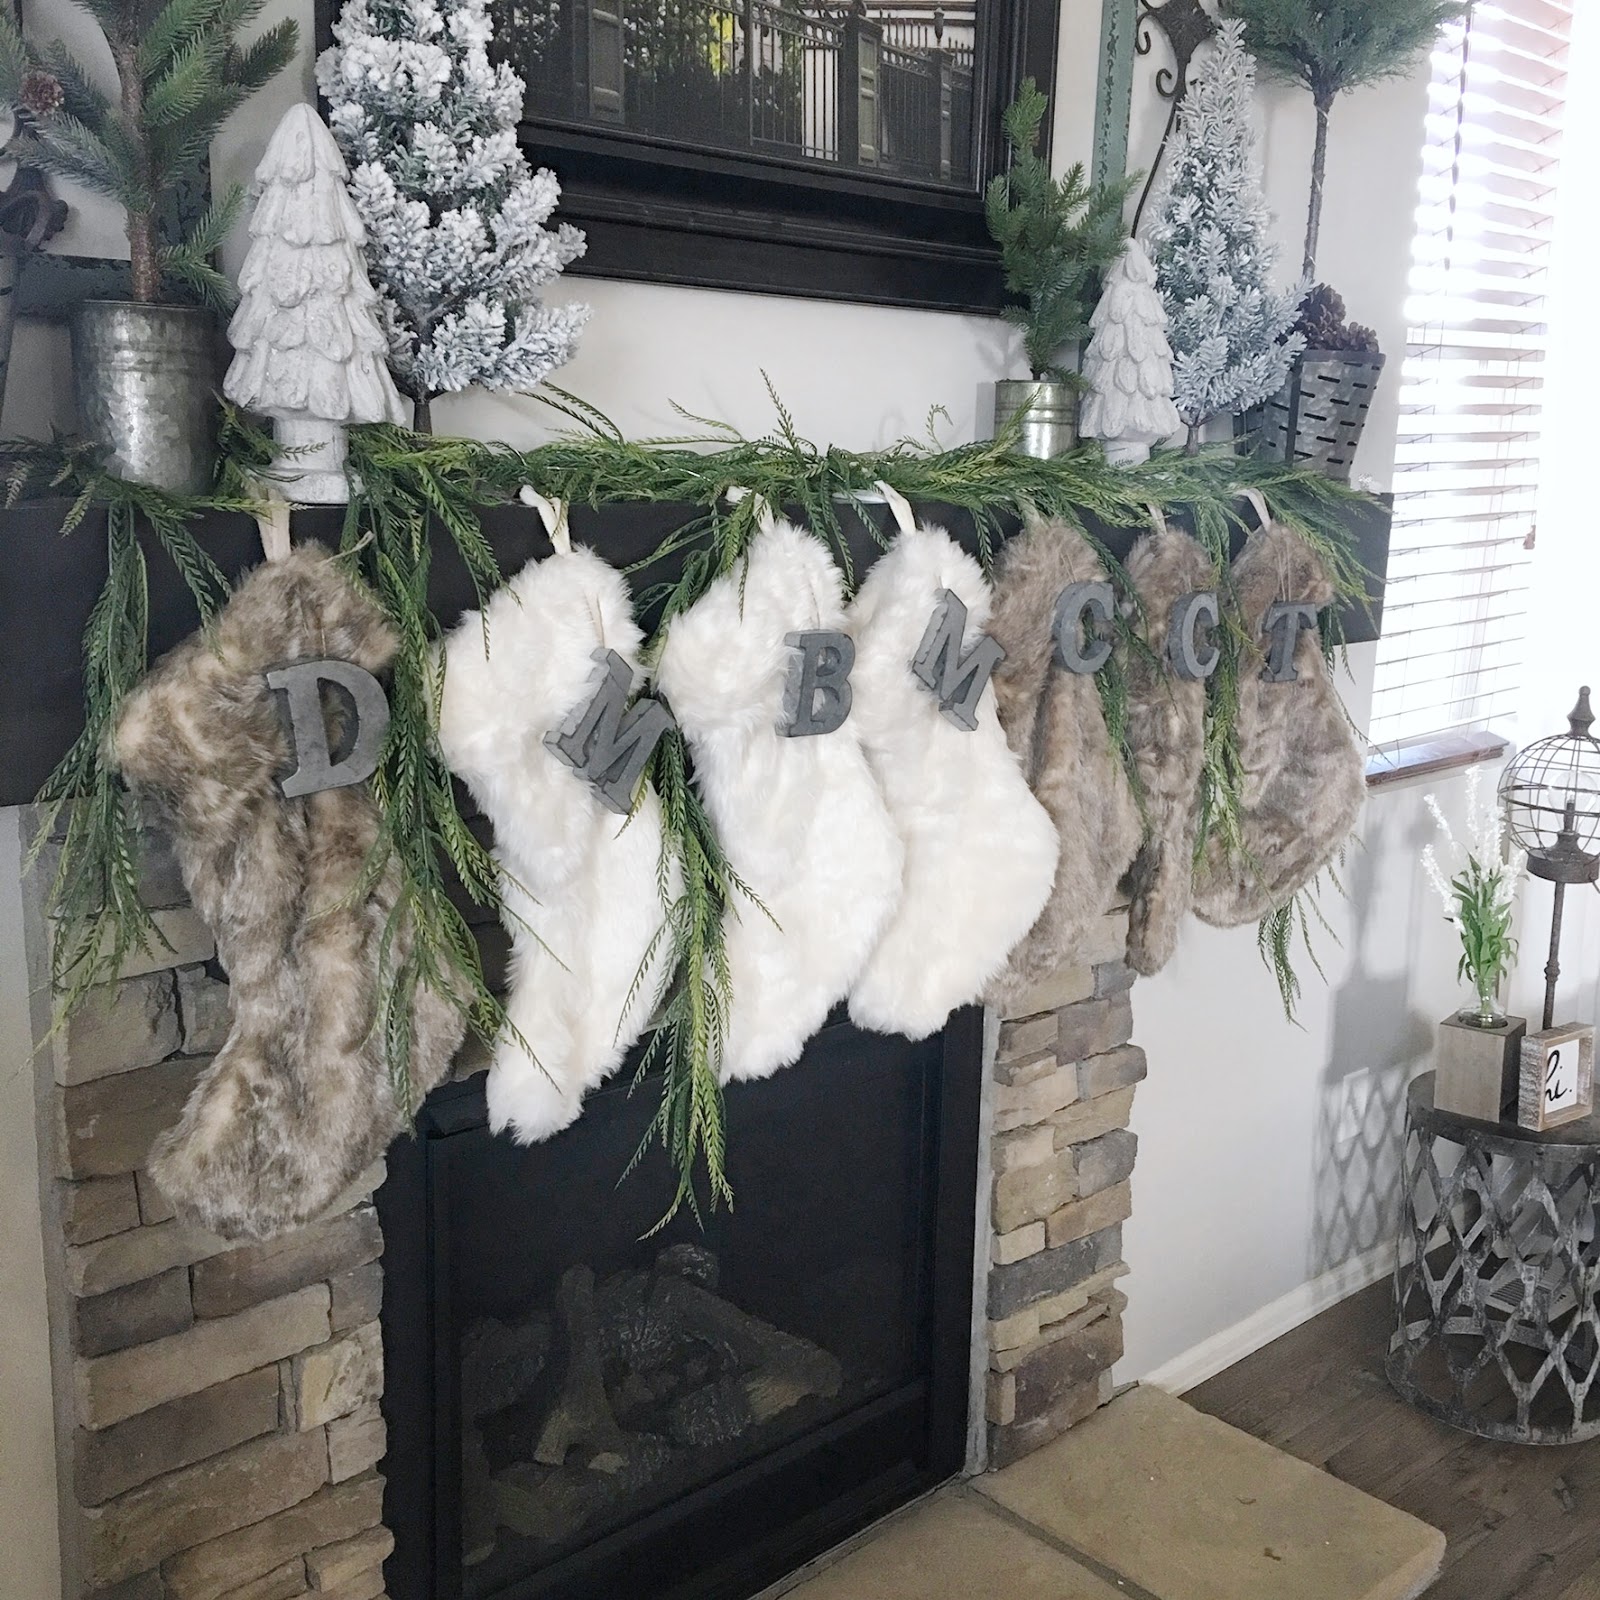
Our fireplace mantel is one of my favorite and first things I decorate when changing from season to season. This year I used this faux hanging greenery, concrete trees, small flocked Christmas trees, and a couple faux pine trees in tin cans to dress it up. I added small white lights in my rosemary trees and along the top of the hanging greenery. I set them on timers (best idea EVER) so each night they turn on and I don’t have to do anything!
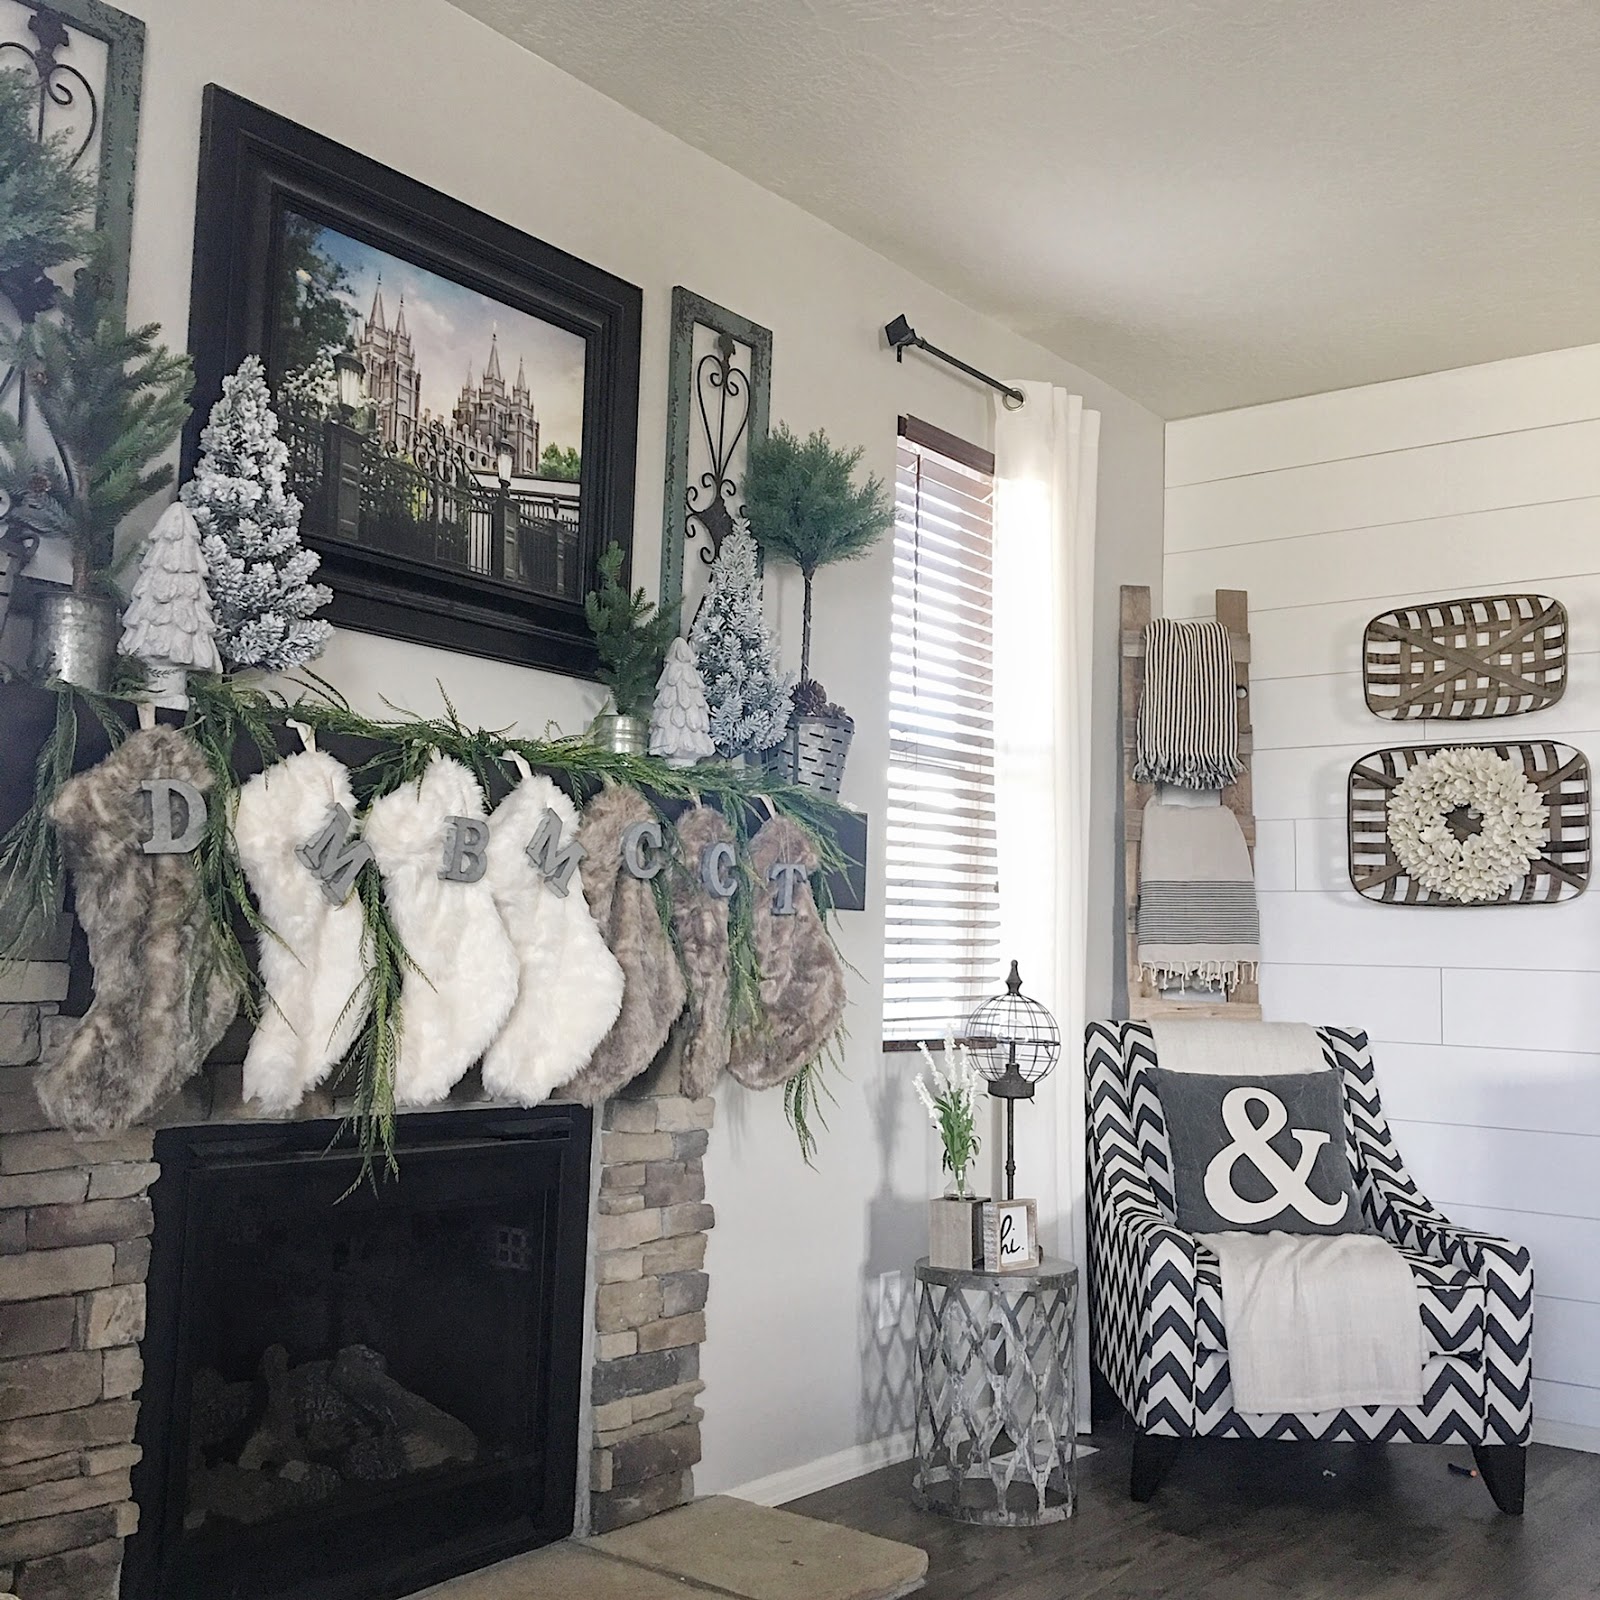
I’m absolutely in love with our stockings. I had been wanting something neutral but with great texture and was so excited when I found these at Target last year. The metal letters are the first letter of each kid’s name (except the M and D for mom and dad) I laced them up with some jute and hung them on each stocking, brown for the boys and white for the girls!
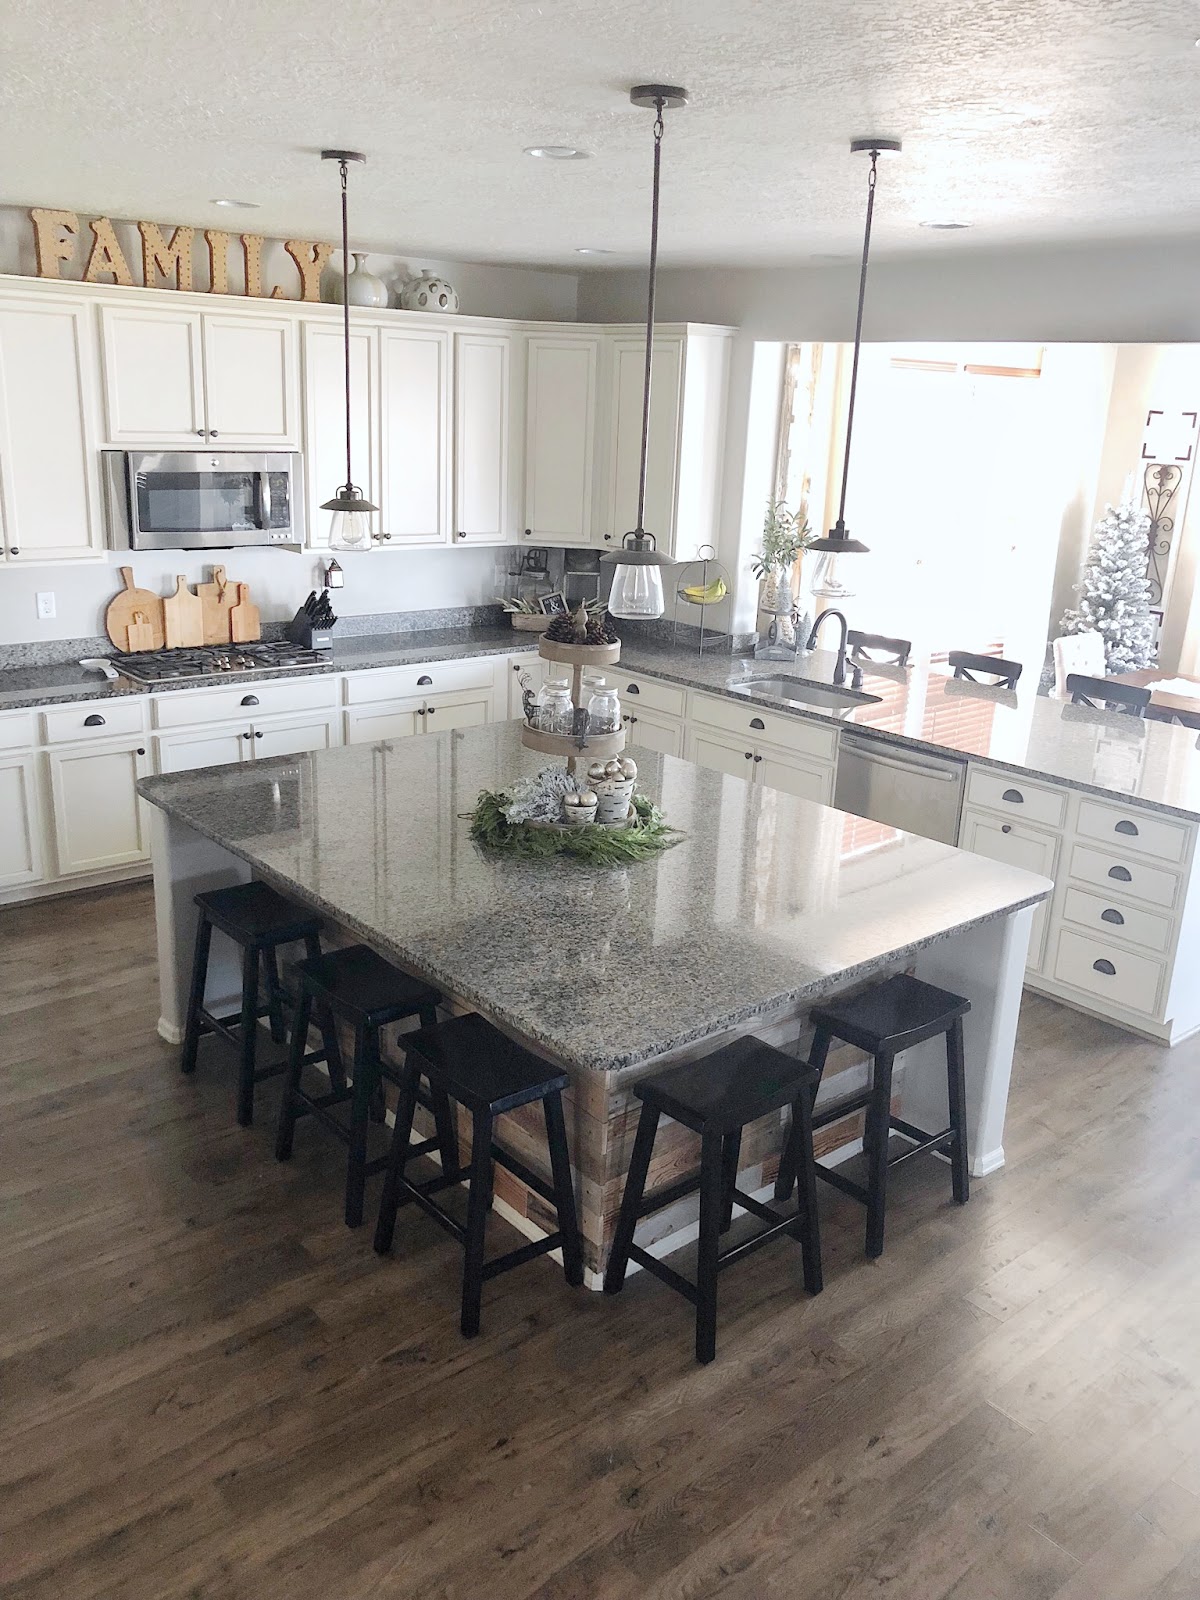
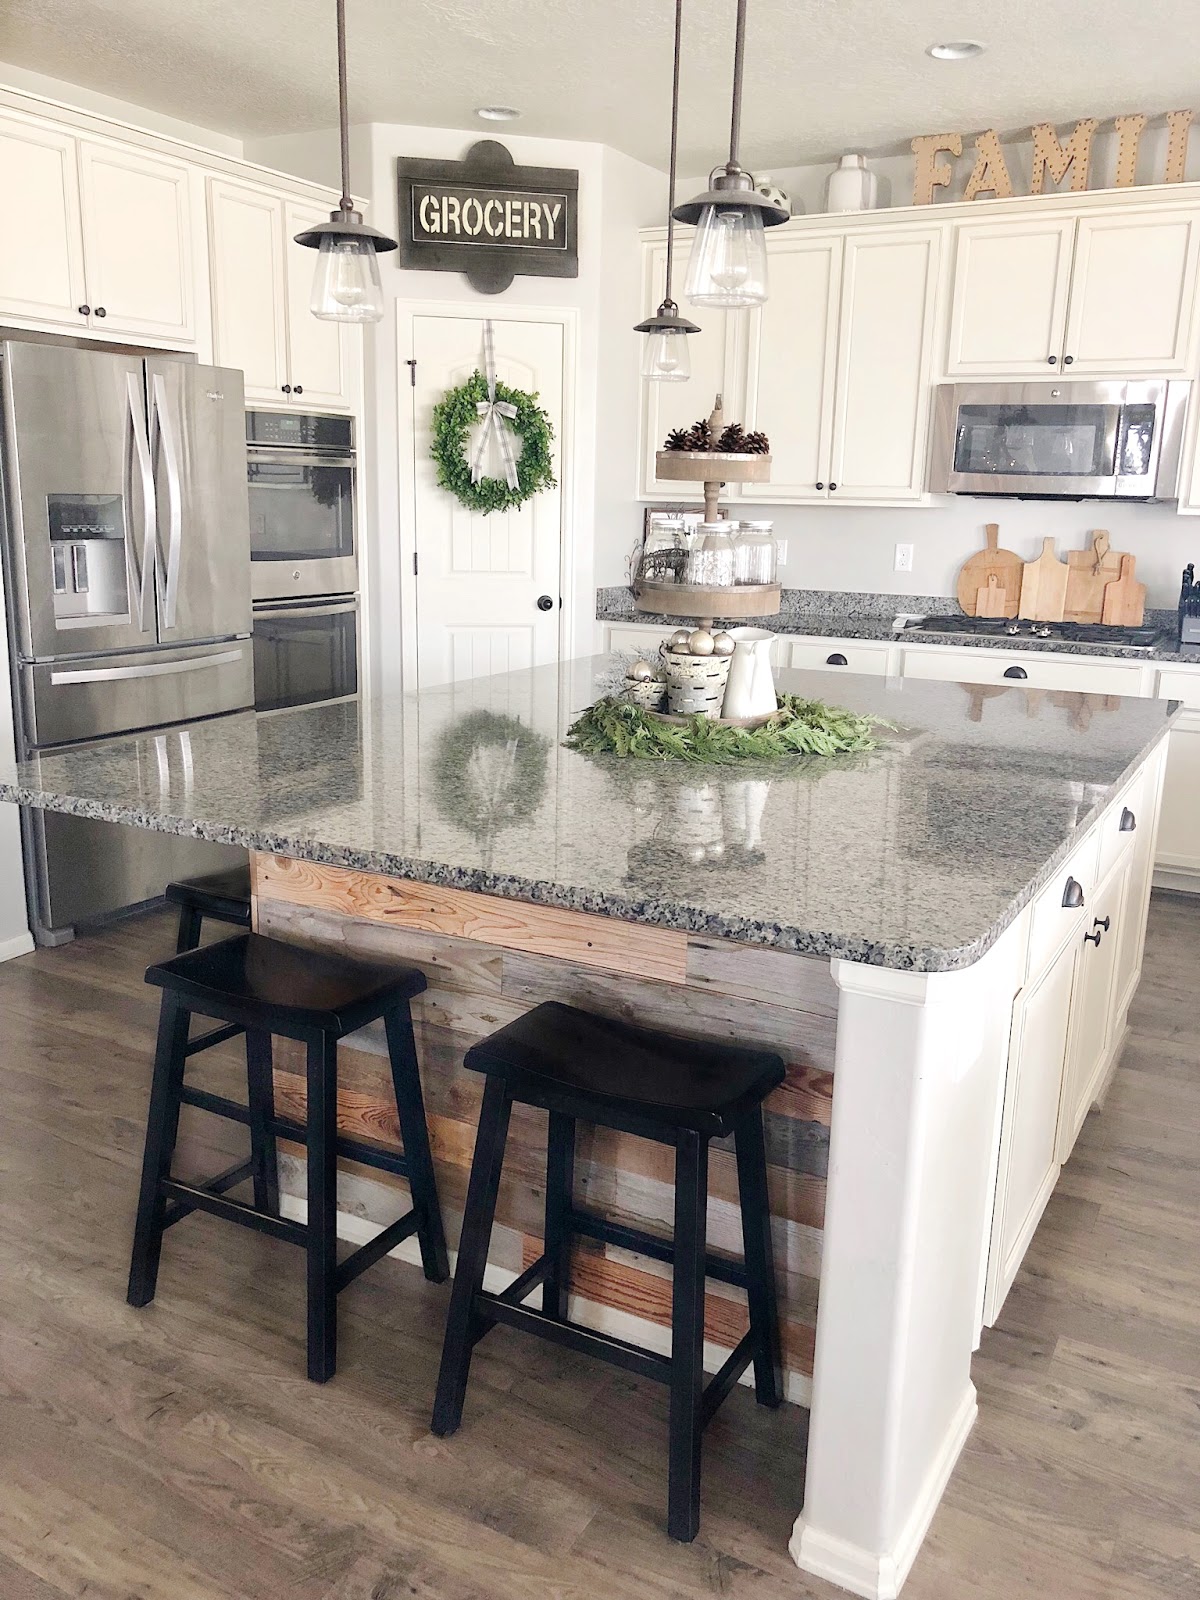
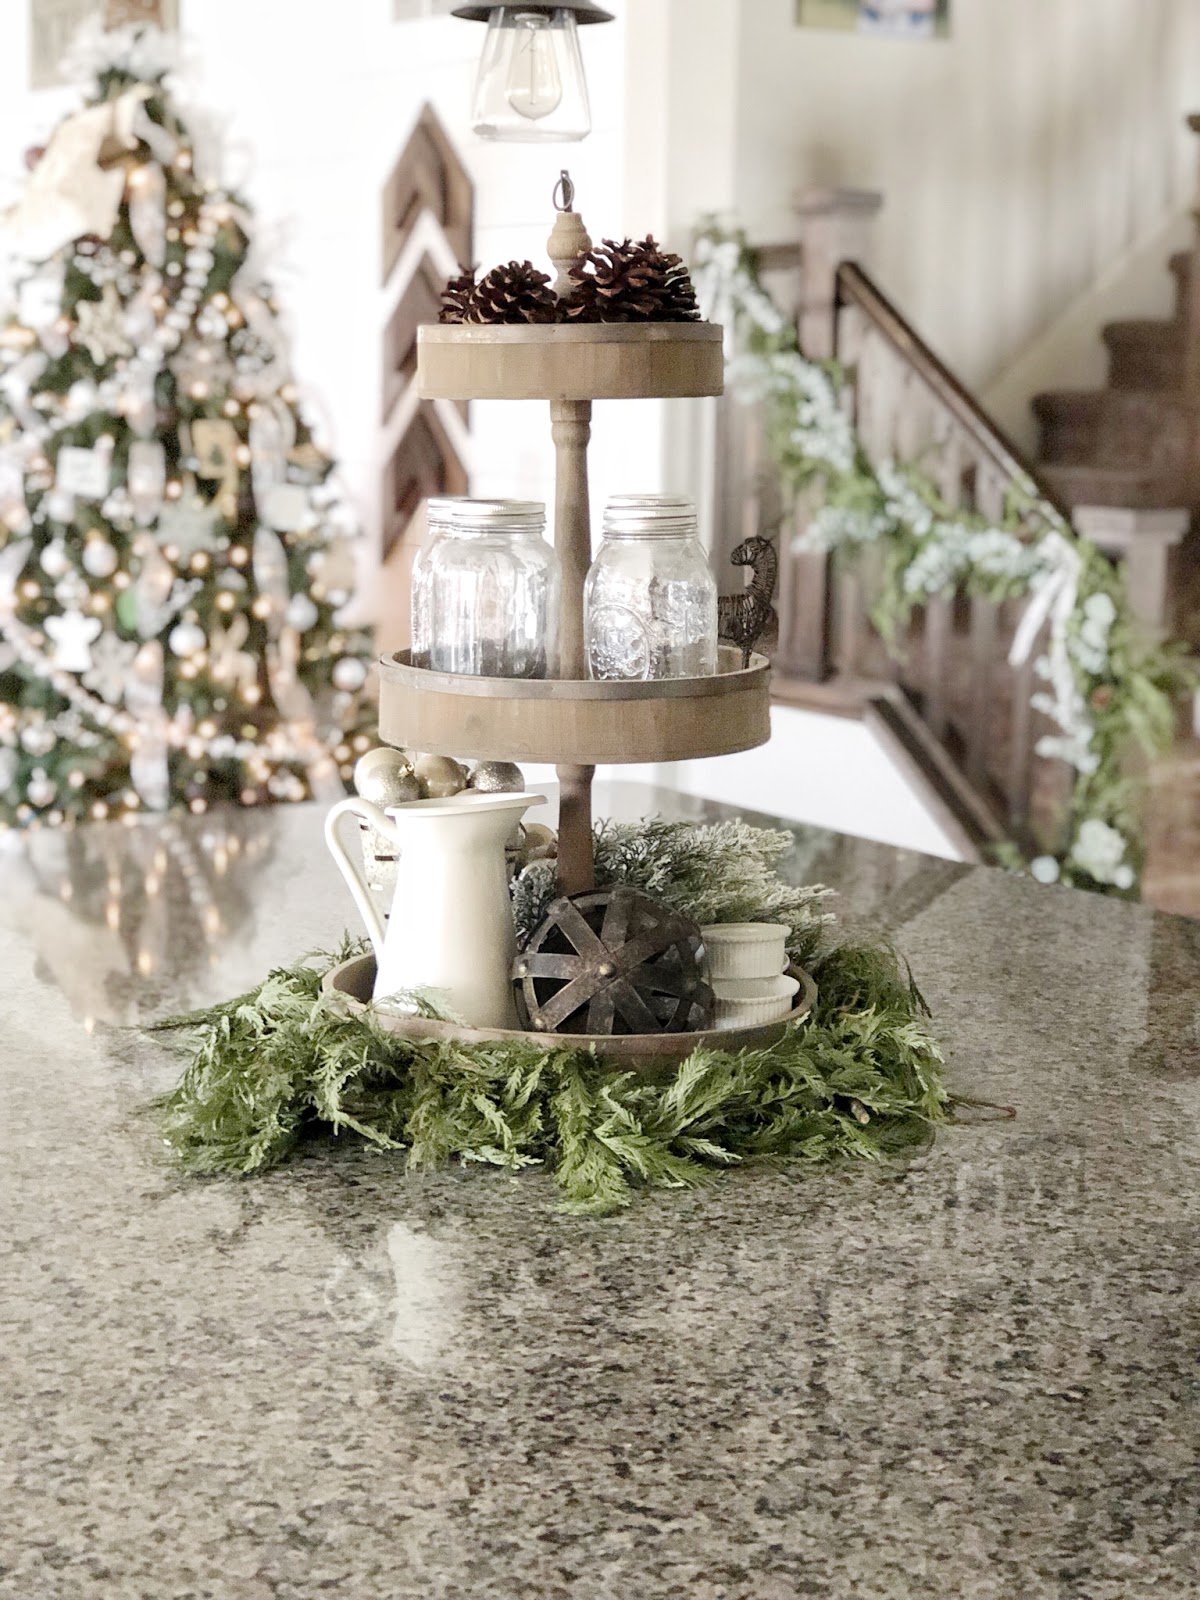
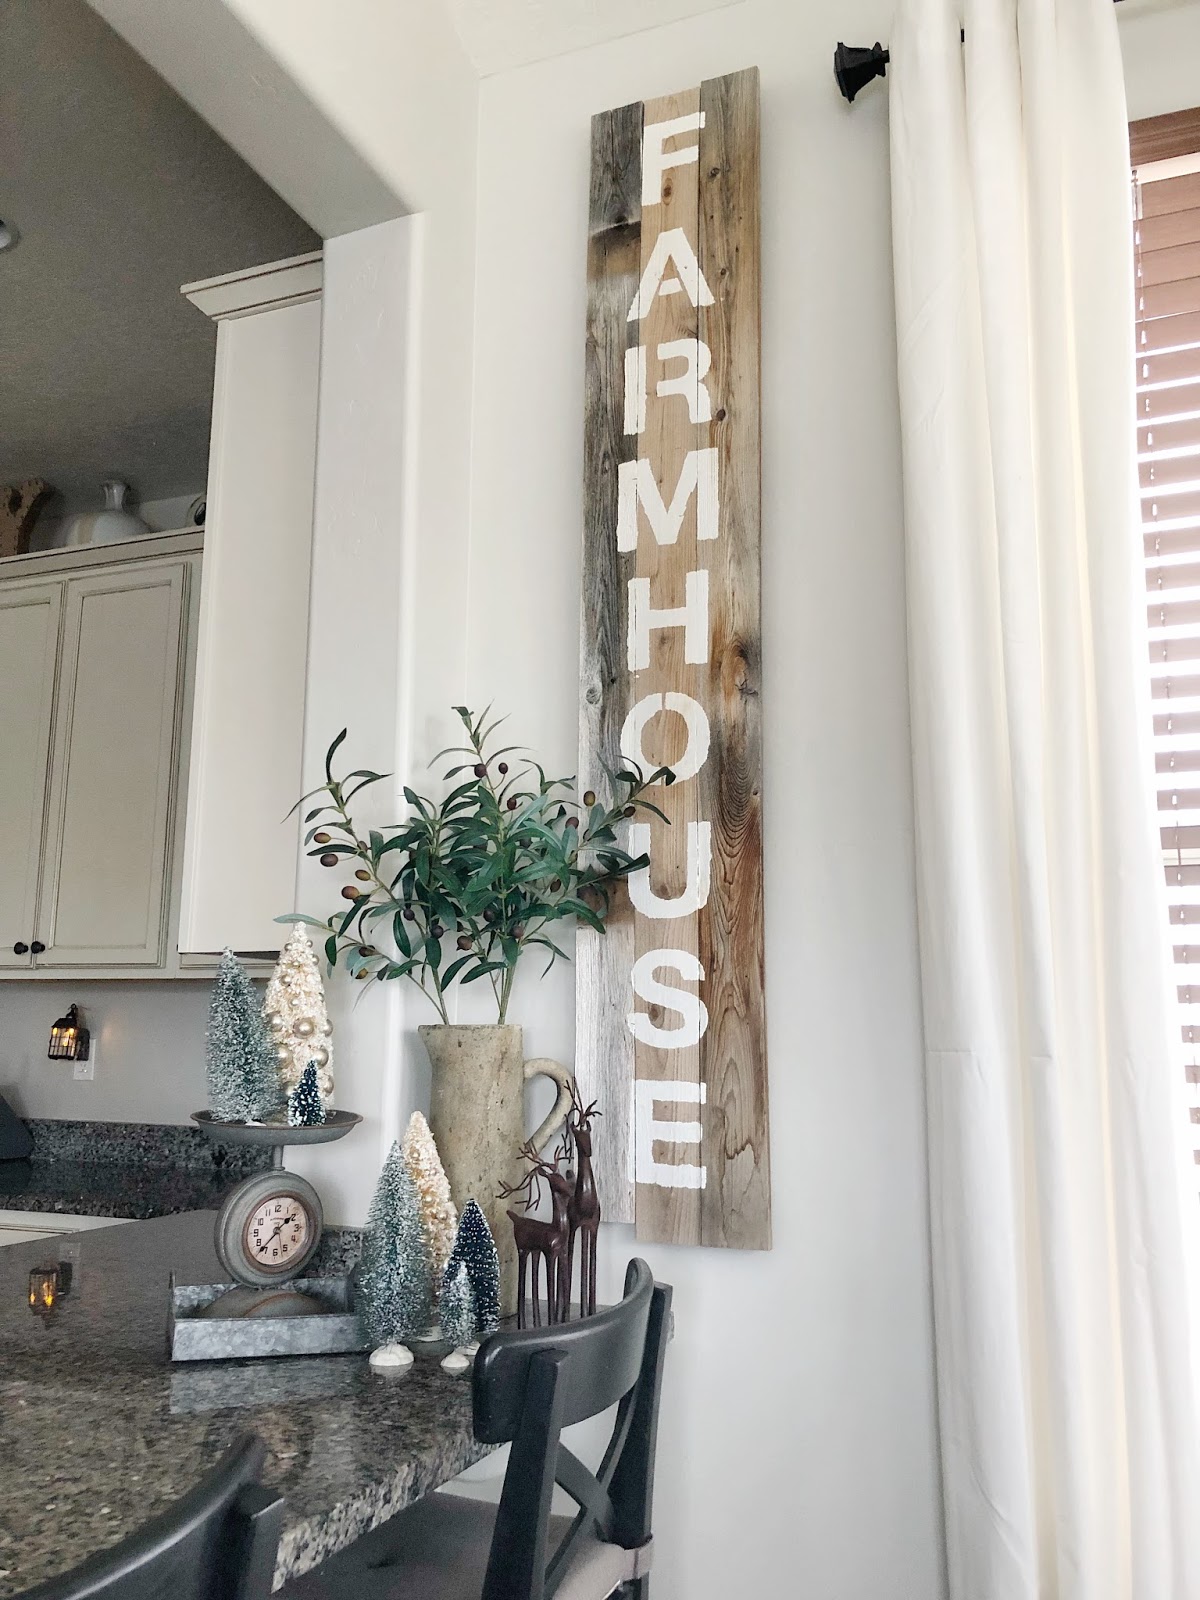
I kept our kitchen fairly simple since it flows into all the other room and there is a lot more going on in the other rooms. The tall 3 tiered tray is another piece that is so fun and easy to change out with the seasons. I found mine on Amazon but have seen them on other online farmhouse decor shops.
I dressed my tray up with some wire reindeer I have had for years and years, and cinnamon pinions (that smell like heaven, seriously!). I filled my little olive buckets with some gold and silver ornaments from the dollar store and made a little wreath around the bottom from the left over fresh garland I used on our banister. Cute and very budget friendly!
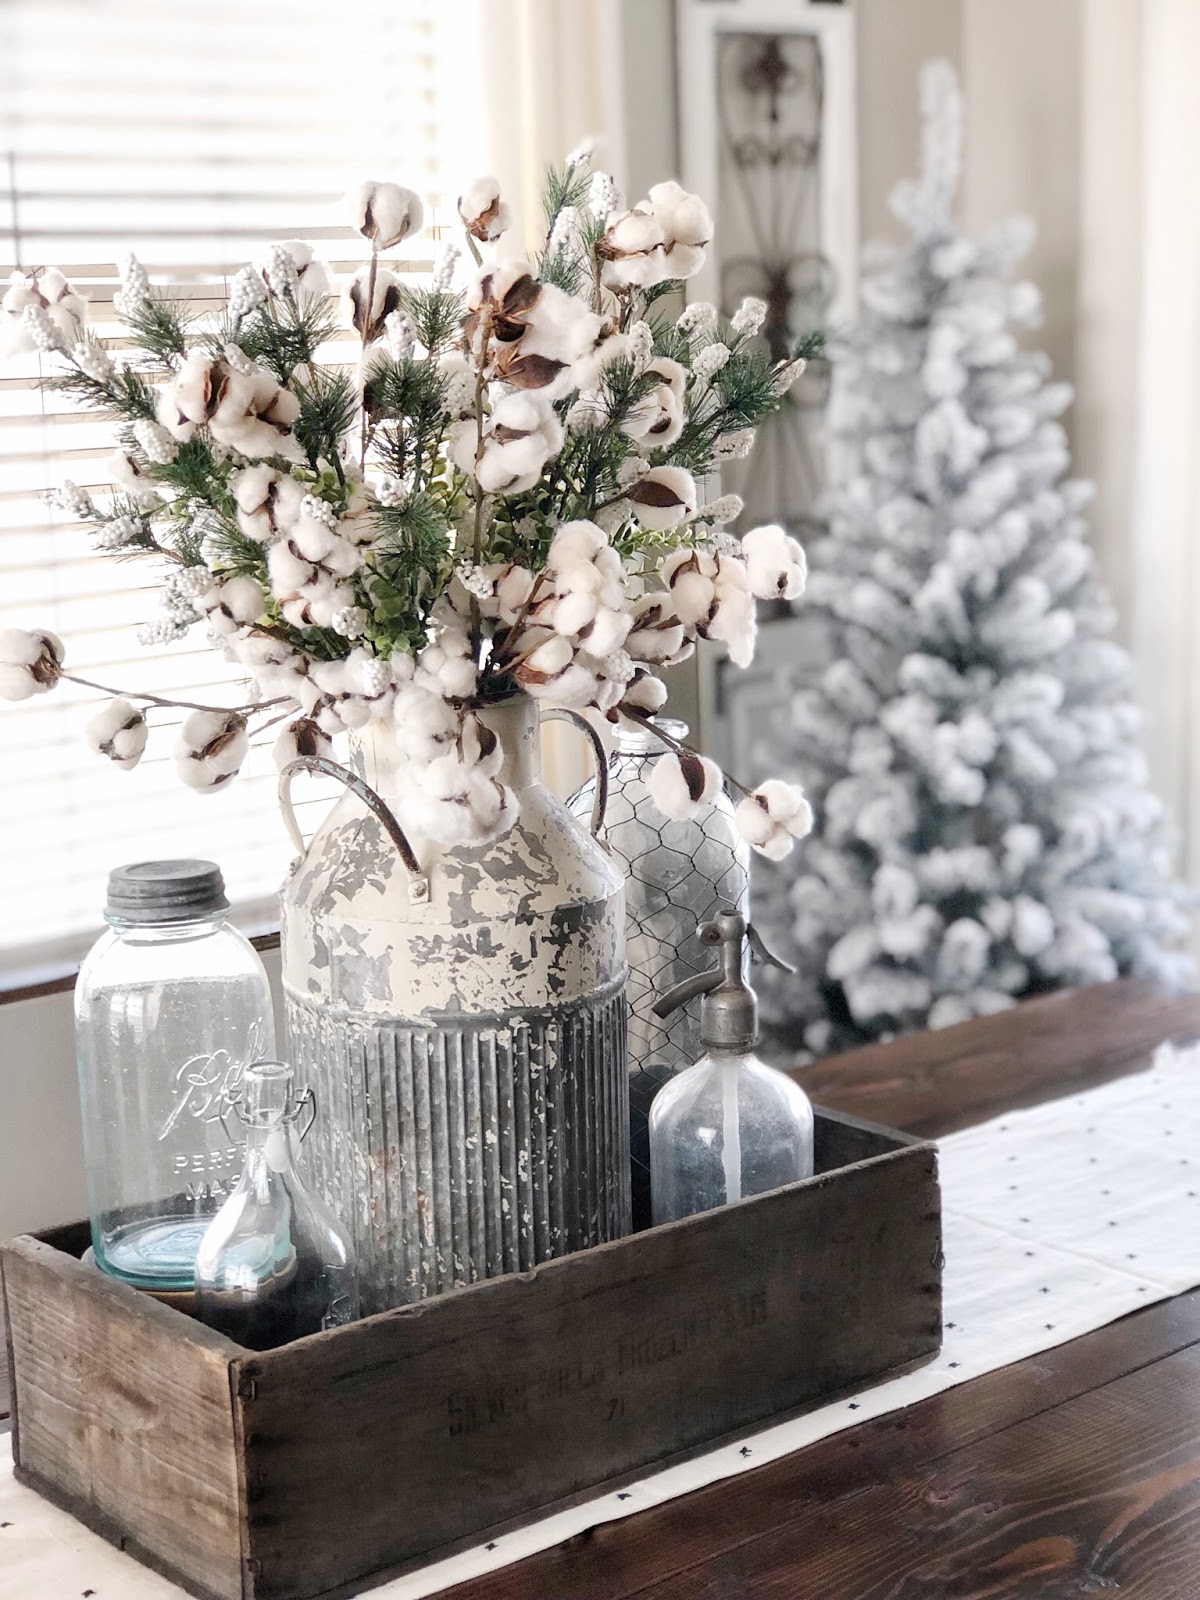
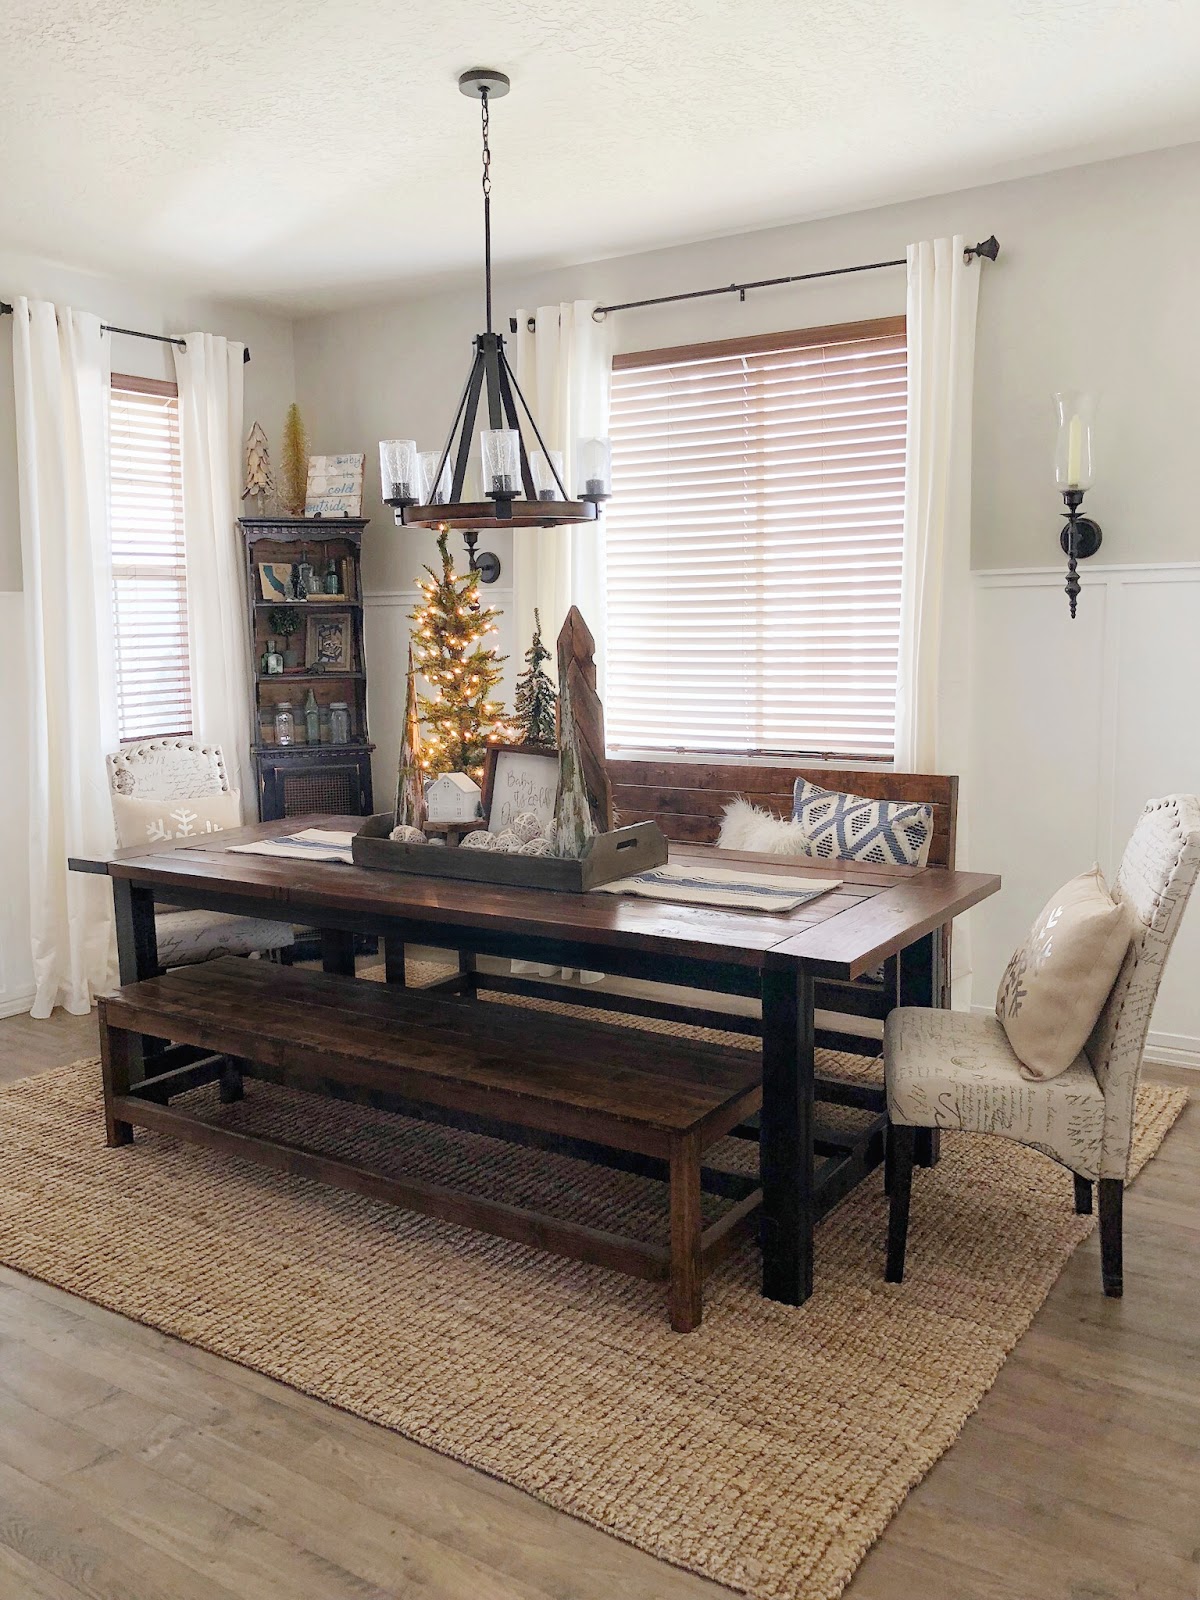
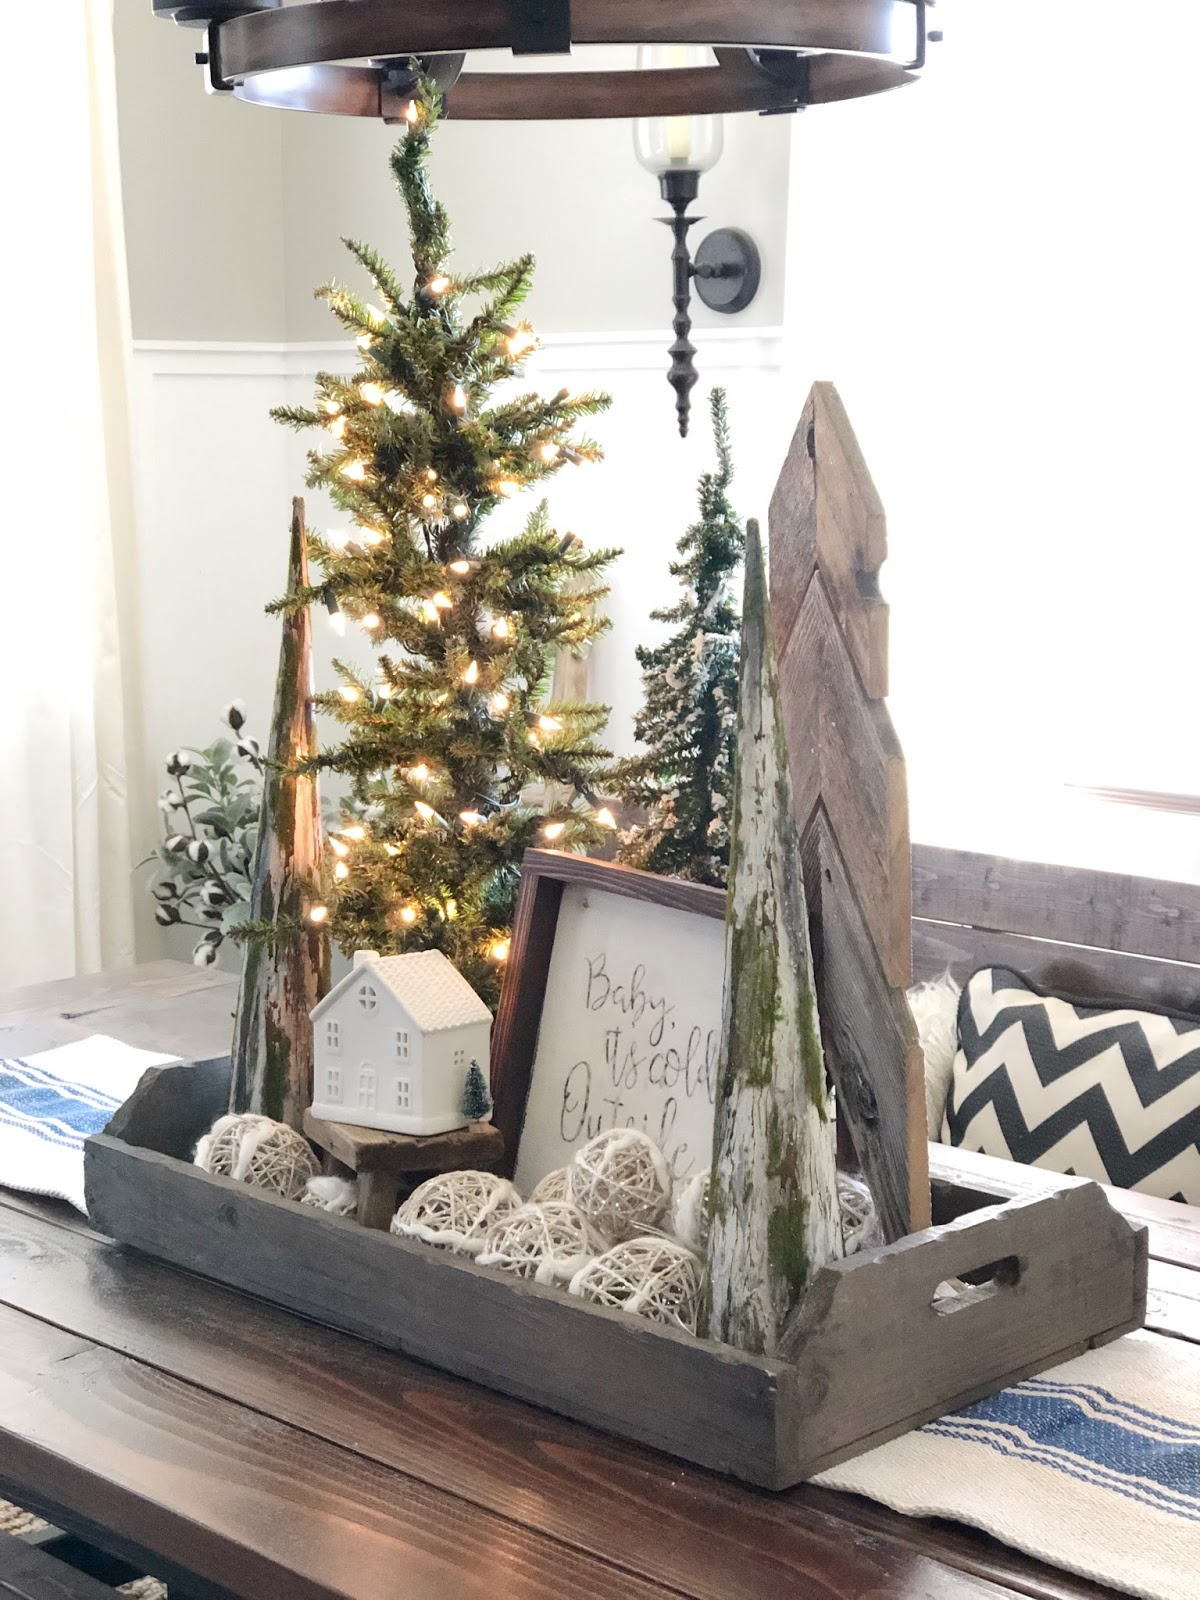
The sunroom off our kitchen is one of the most used spaced in our home. We eat all our meals here and lots of family games nights. I tried to keep it functional but still have some Christmas cheer. I added some stems of faux frosted white berries to the cotton stems I already had in my centerpiece. I also set up the 6′ faux flocked trees I found at Walmart for only $30 each!! I took the bases off and stuck them in some cute metal buckets and placed them in each corner to balance out the room.
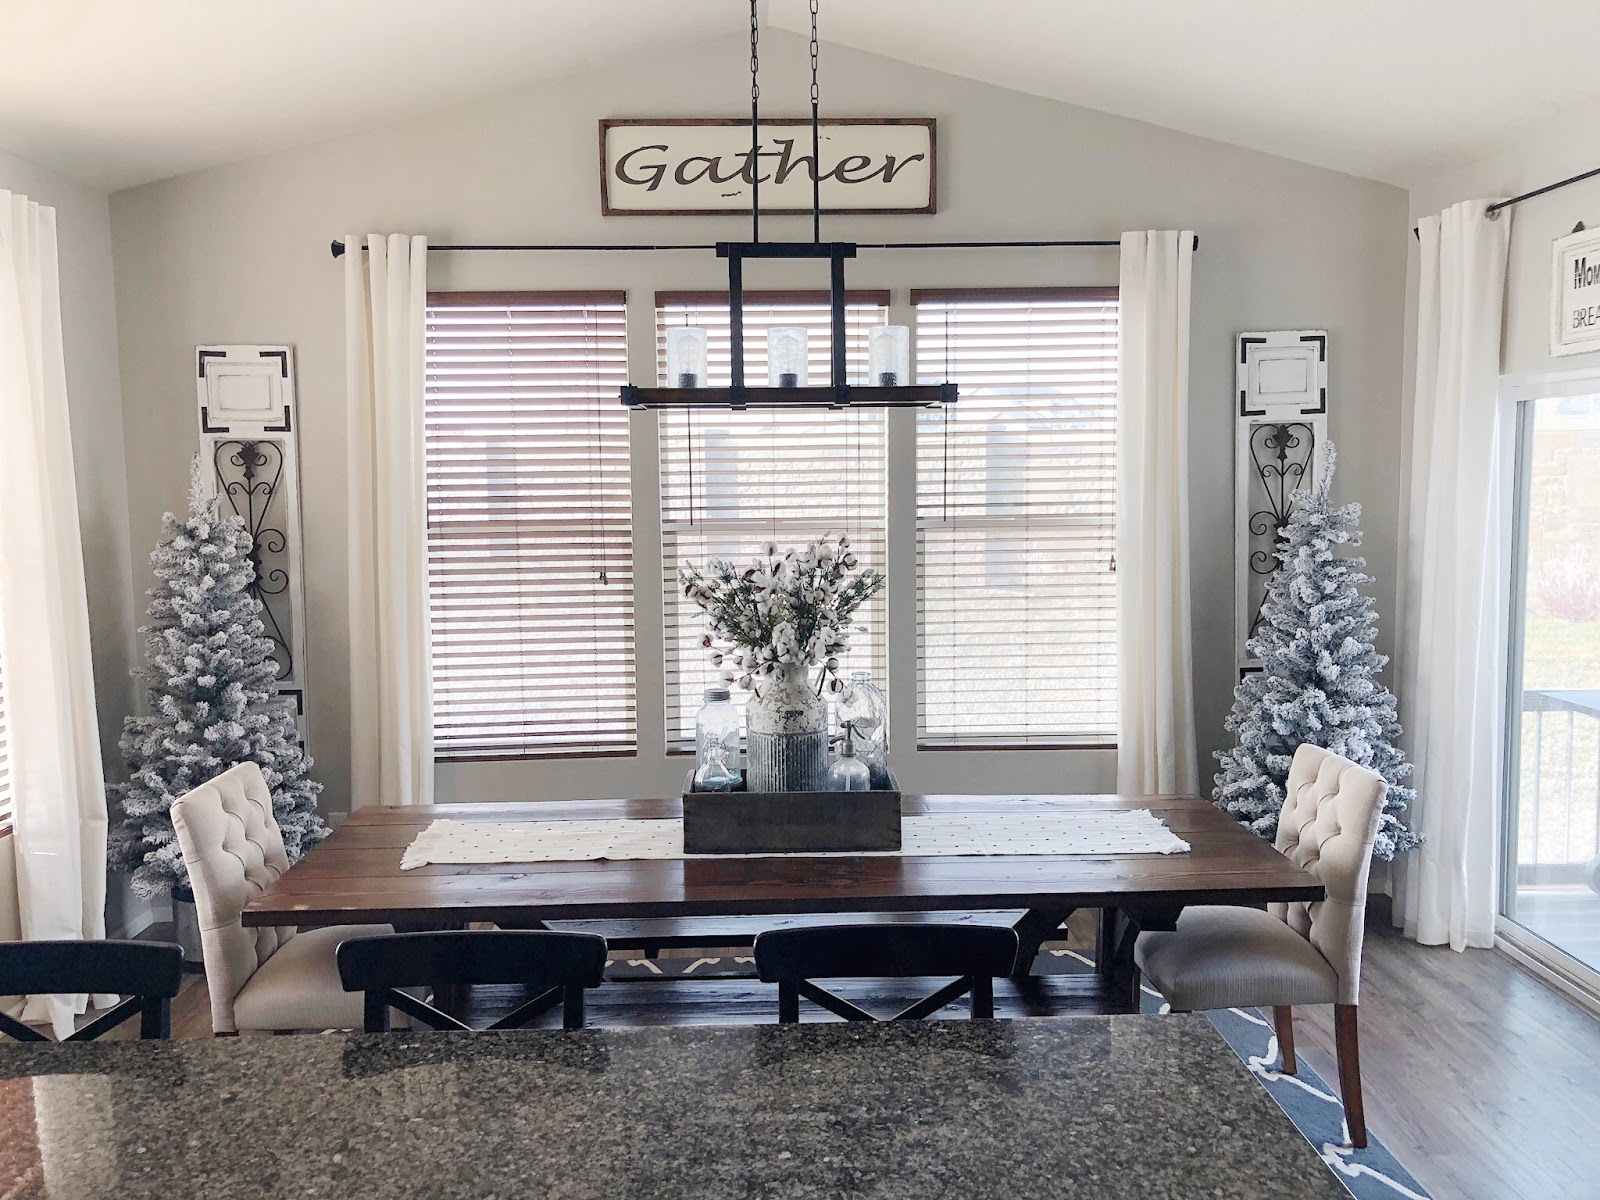
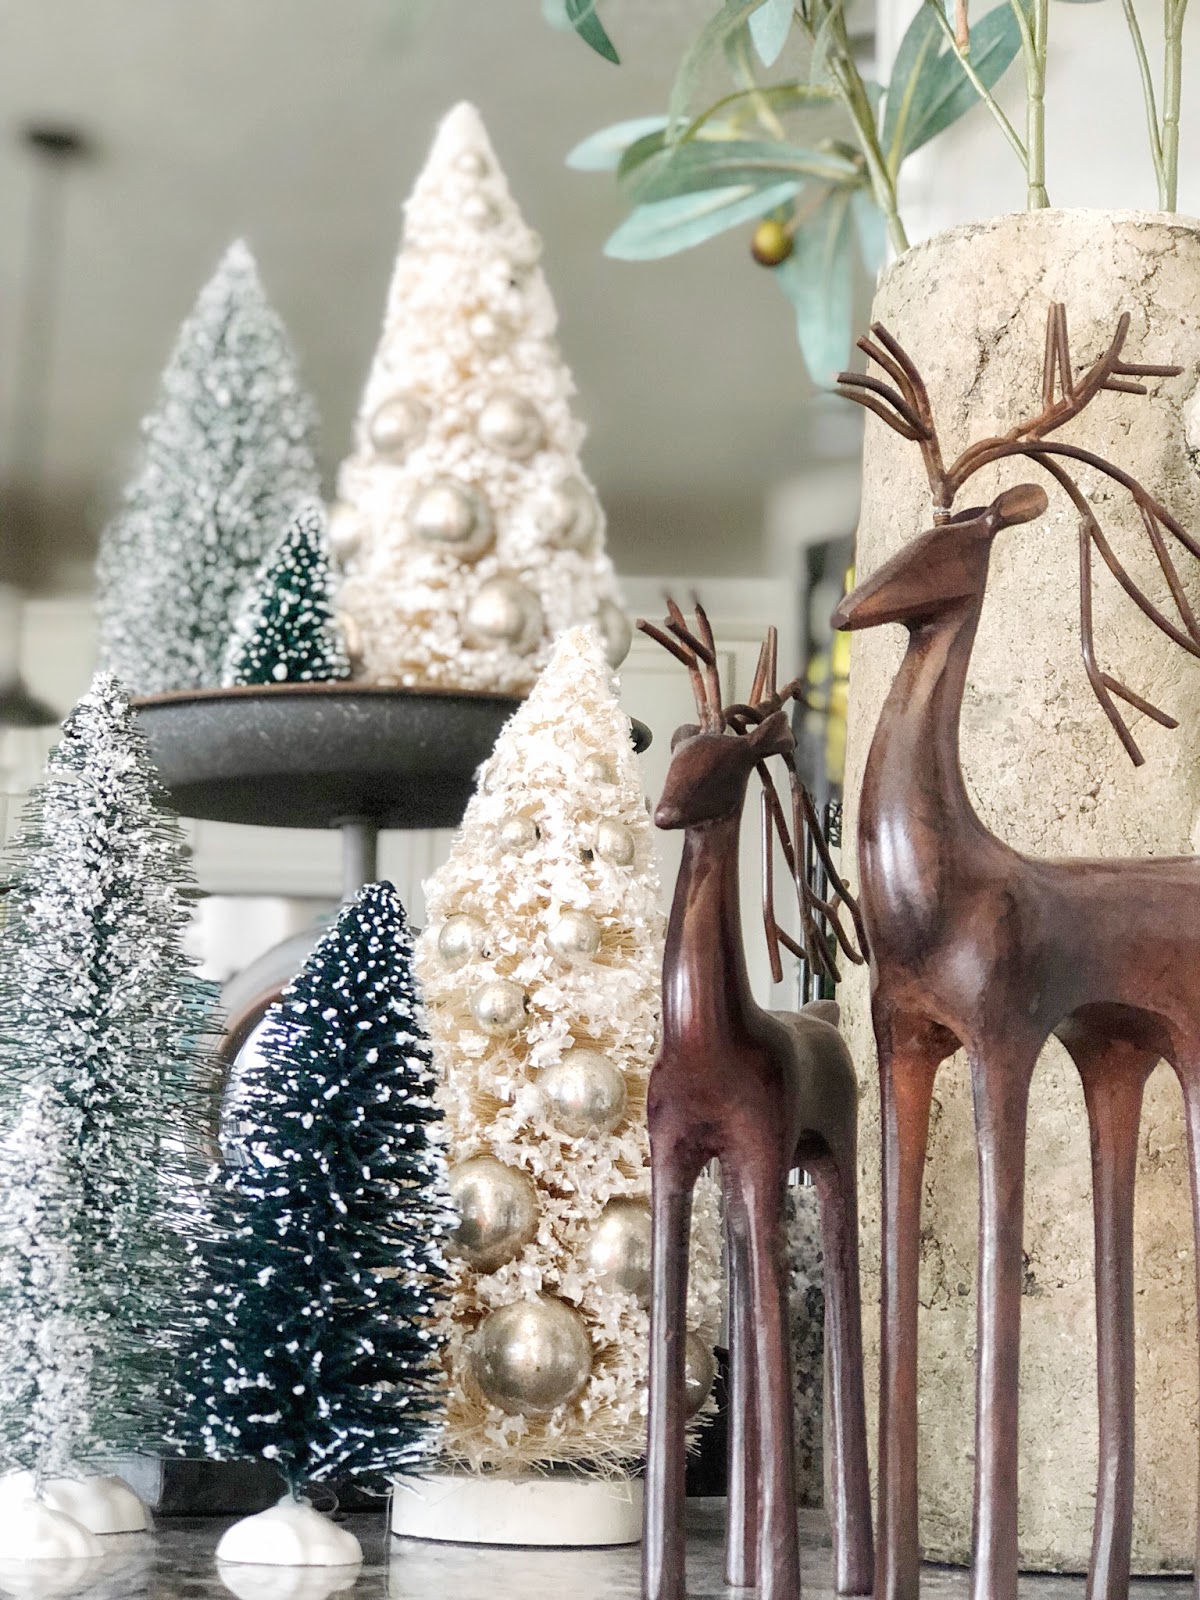
Off to the side of our sunroom on the bar top I put this cute little vignette with metal reindeer and some bottle brush trees that I’m in love with this year!! The white sparkly ones are my absolute favorite!
The center piece in our formal dinning room was one of the last things I put together. I had all these left over decorations that I love but didn’t have a spot for, so I decided to throw it all together and see what I could come up with. I was so happy with how it turned out that this just may be my go to center piece each year!
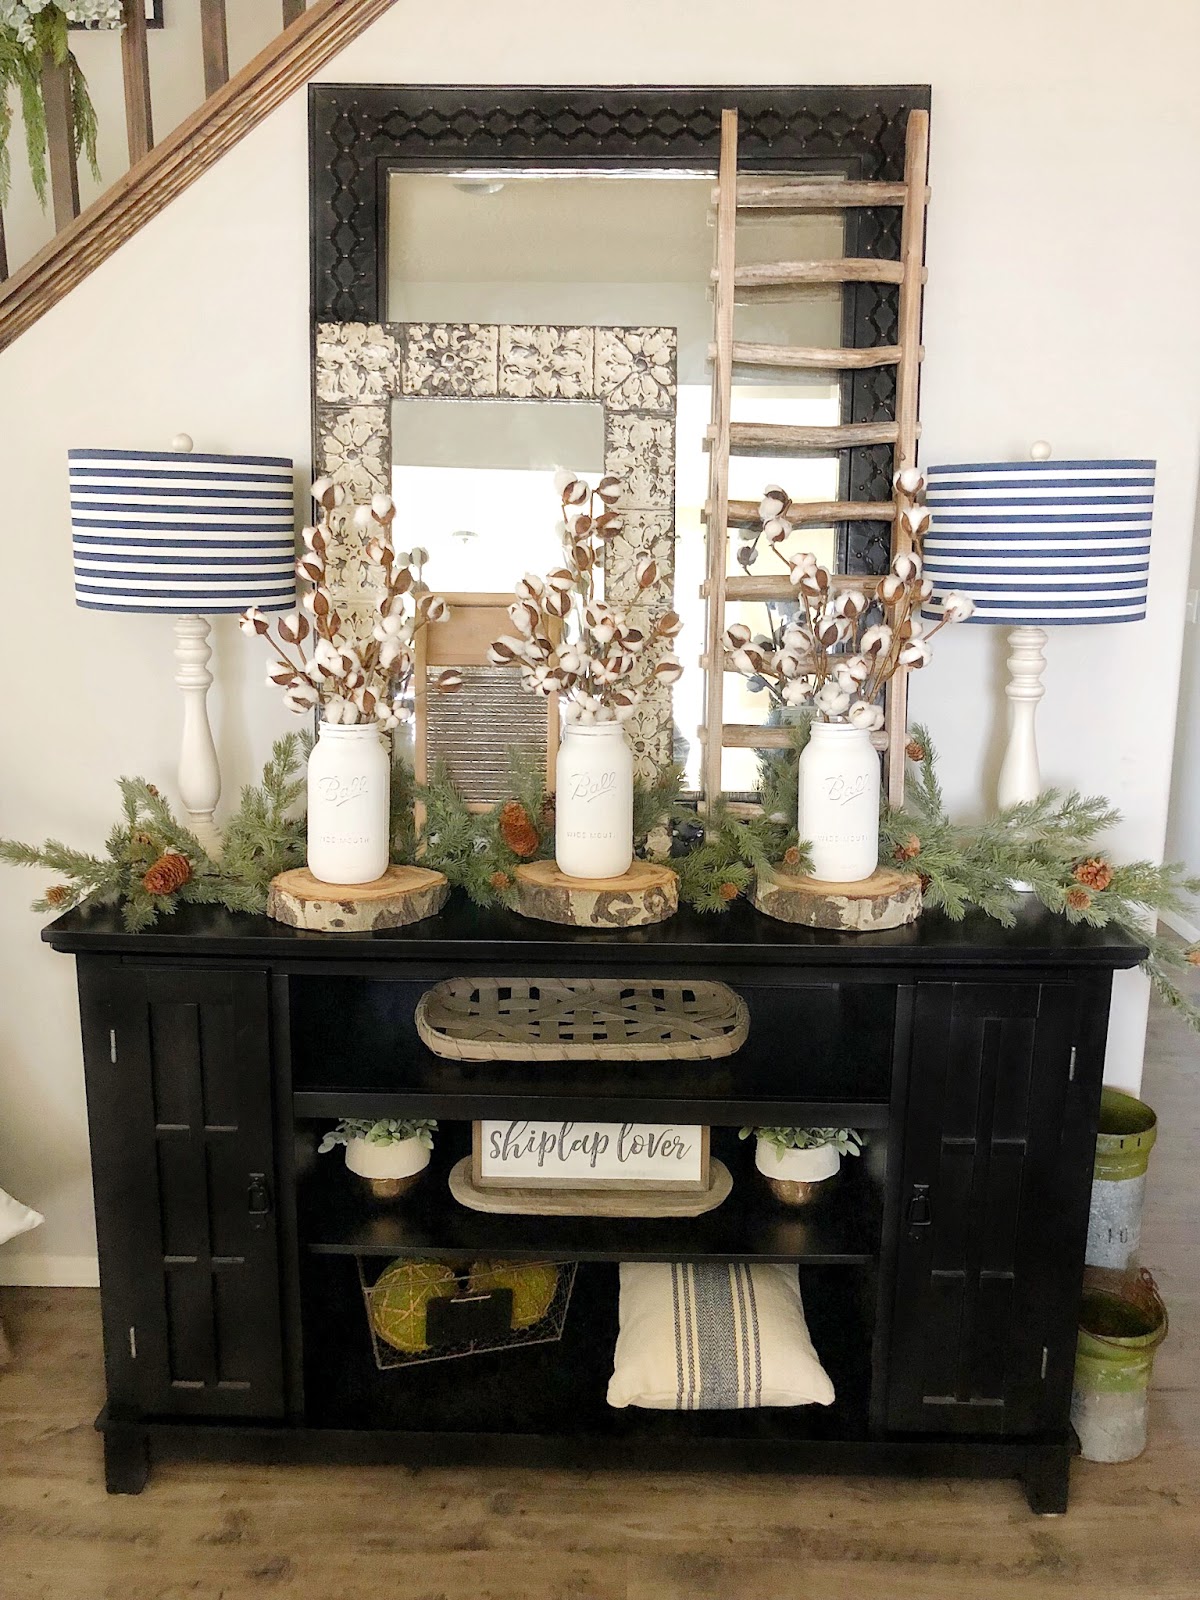
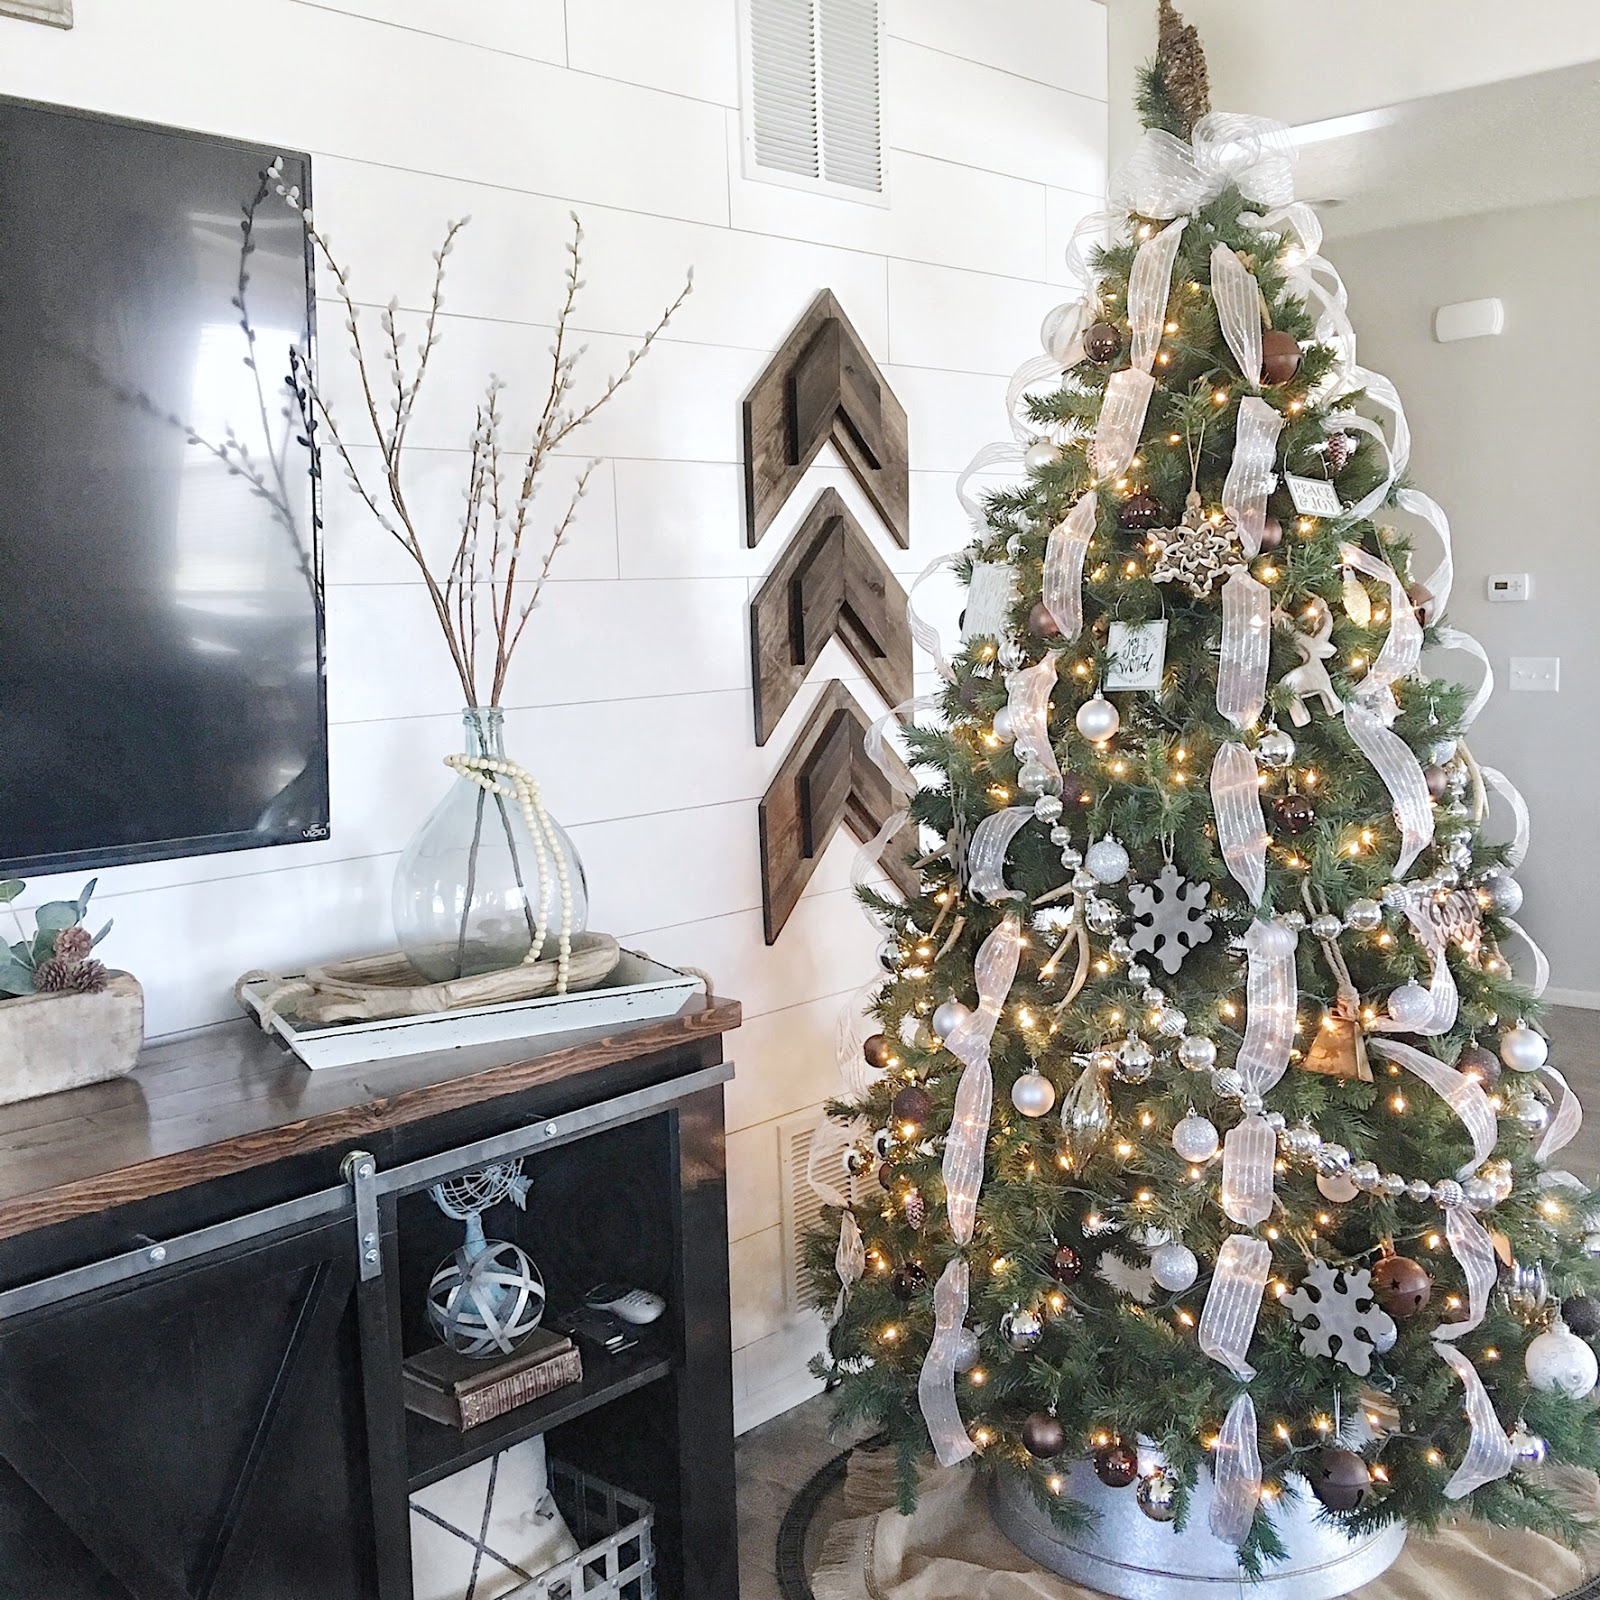
I just recently changed up our entry way. I turned this old entertainment cabinet into a cute entryway table by removing the doors in the middle, and changing up the shelves. On top I layered 2 different size mirrors with matching lamps flanking each side. The mason jars were an easy DIY project, (just white paint and sand paper) and then I filled them with my favorite cotton stems! For the Christmas season I added this faux pine garland and pinecones.
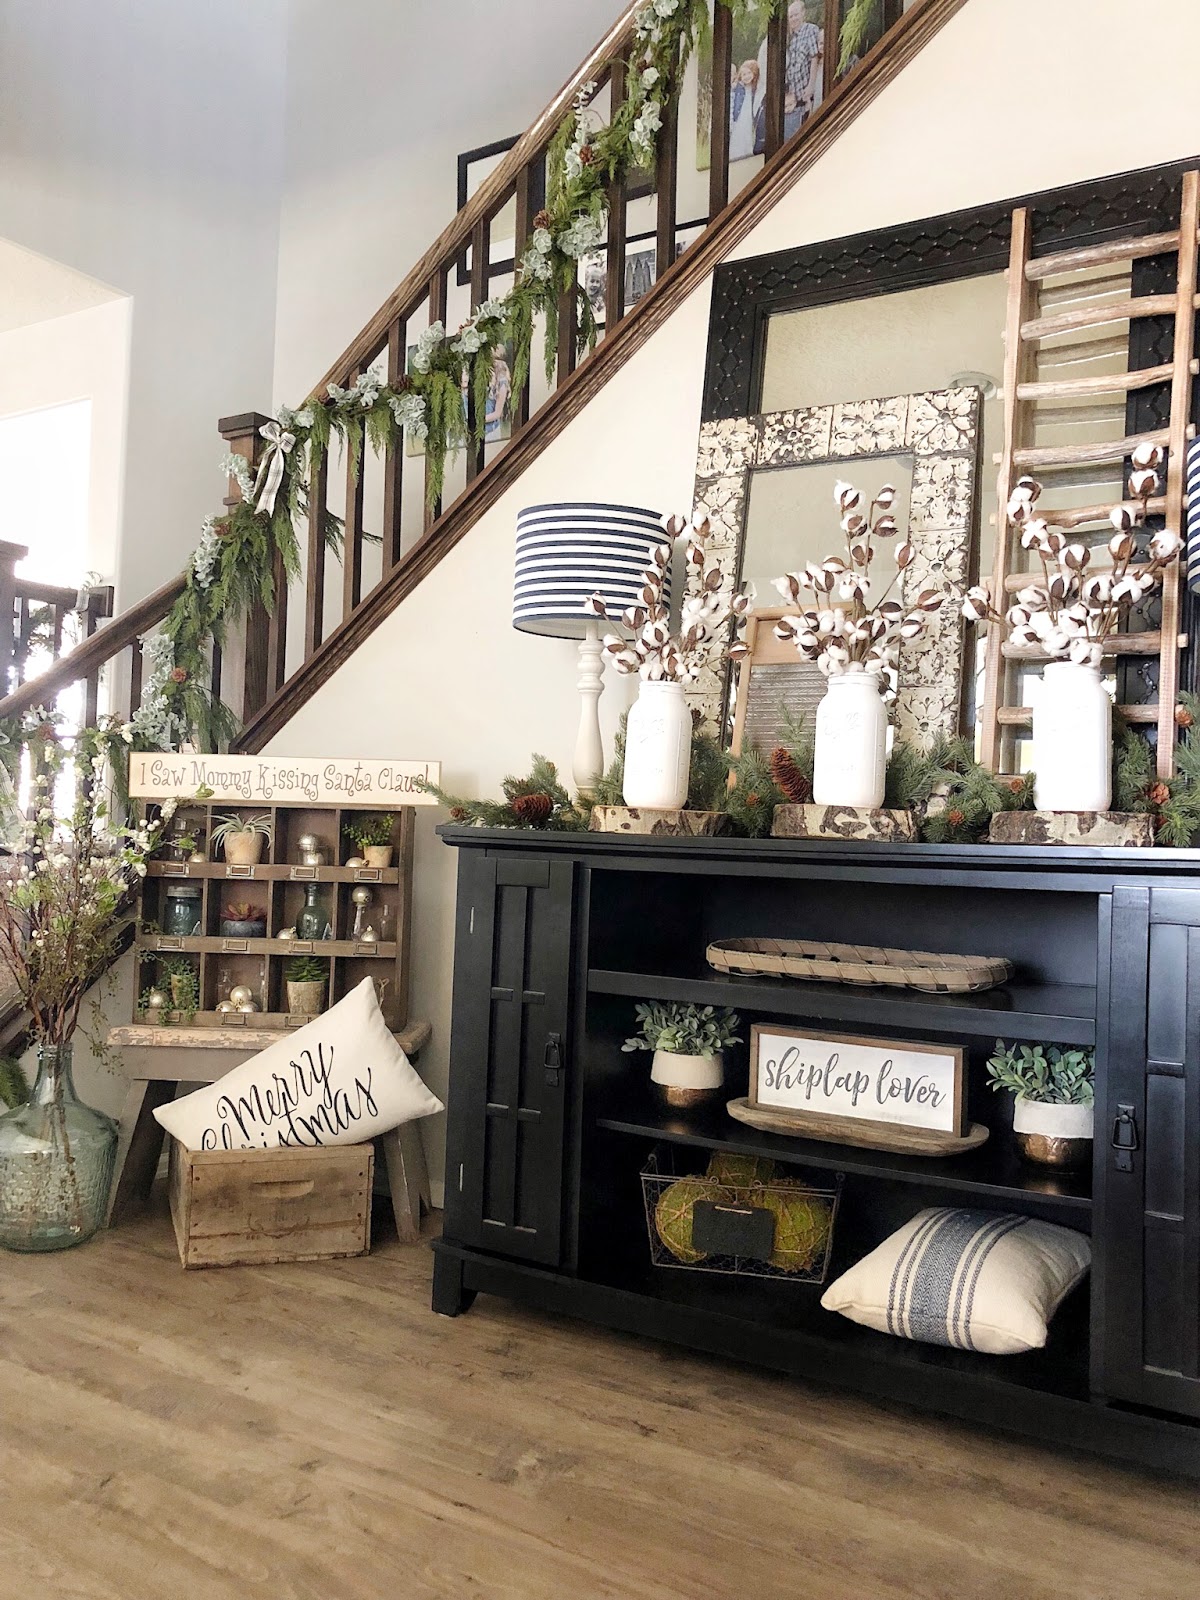
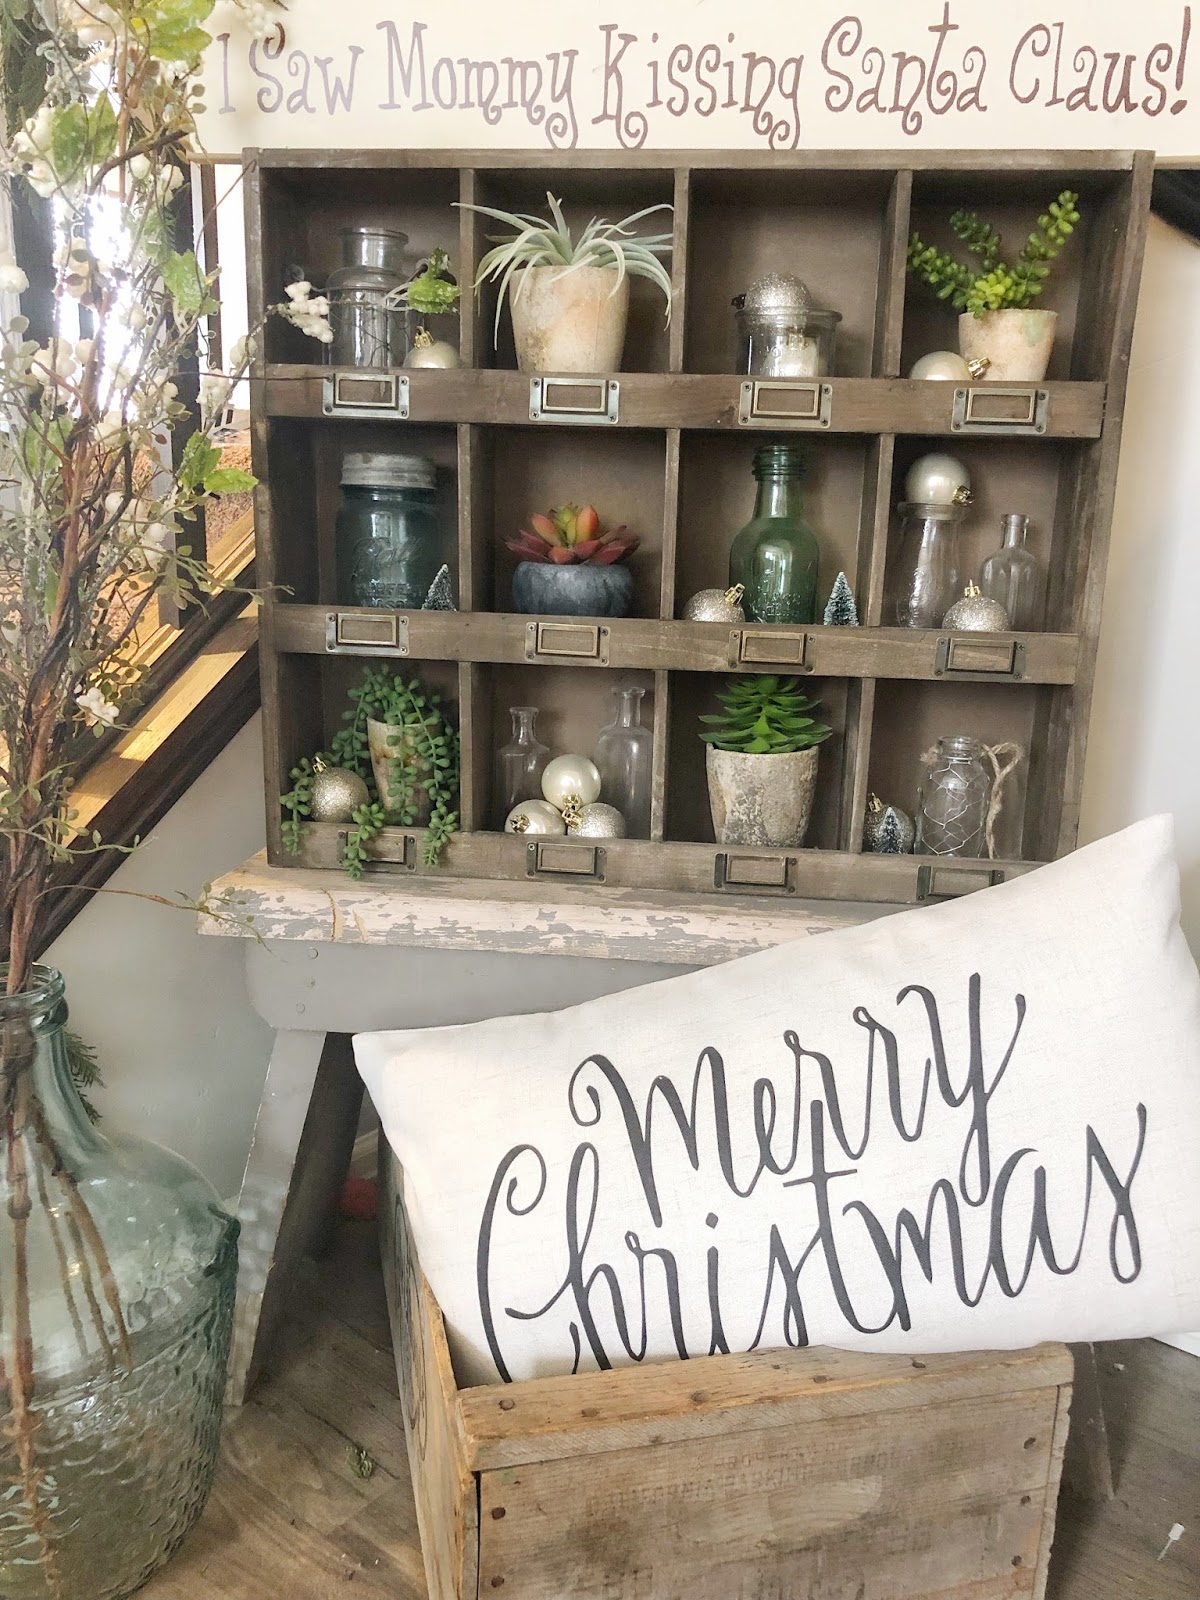
In the corner I have an antique, chippy stool with my wood cubbies on top. I filled the cubbies with more of those dollar store ornaments and some little trees. On top is my favorite sign, “I Saw Mommy Kissing Santa Clause”. This is the first year my two oldest kids understand the meaning of this sign. In the past they would tell me not to kiss Santa and only to kiss Daddy, haha!! Finally to finish up this space – underneath the stool is an antique crate I found that is perfect to hold my Merry Christmas pillow from a local craft show I went to this year.
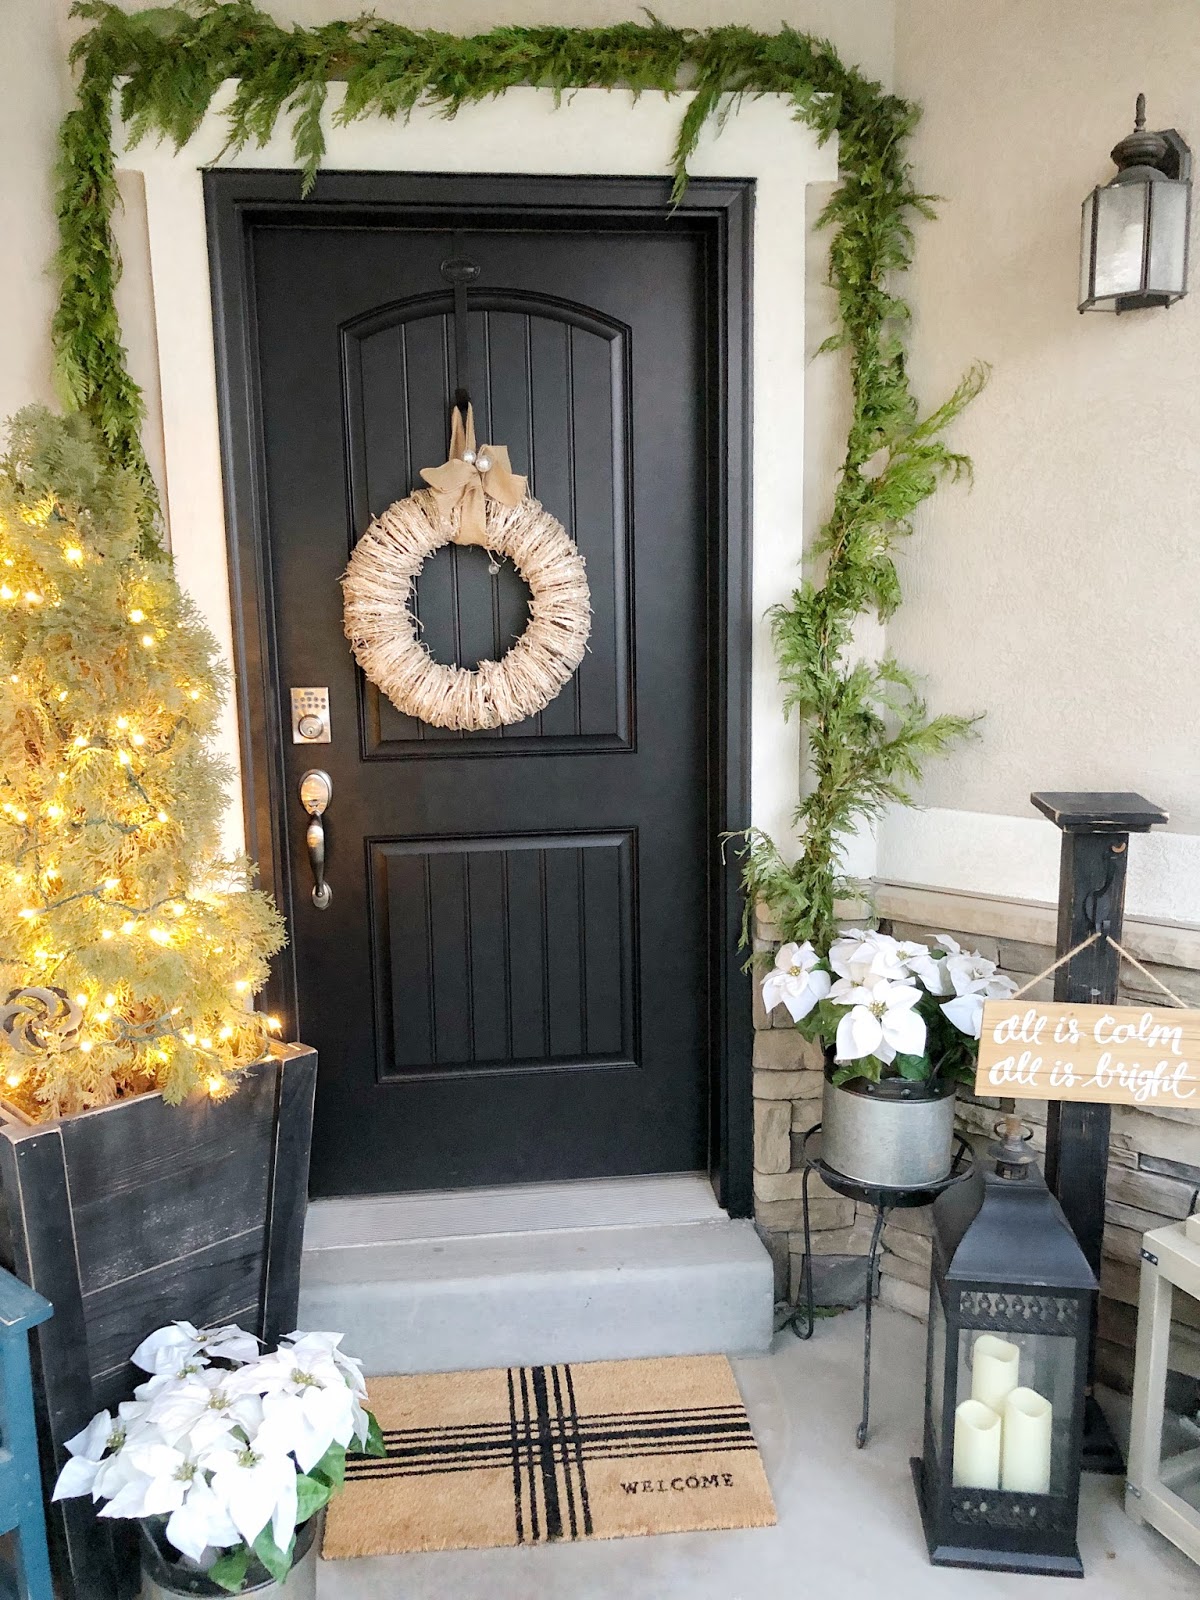
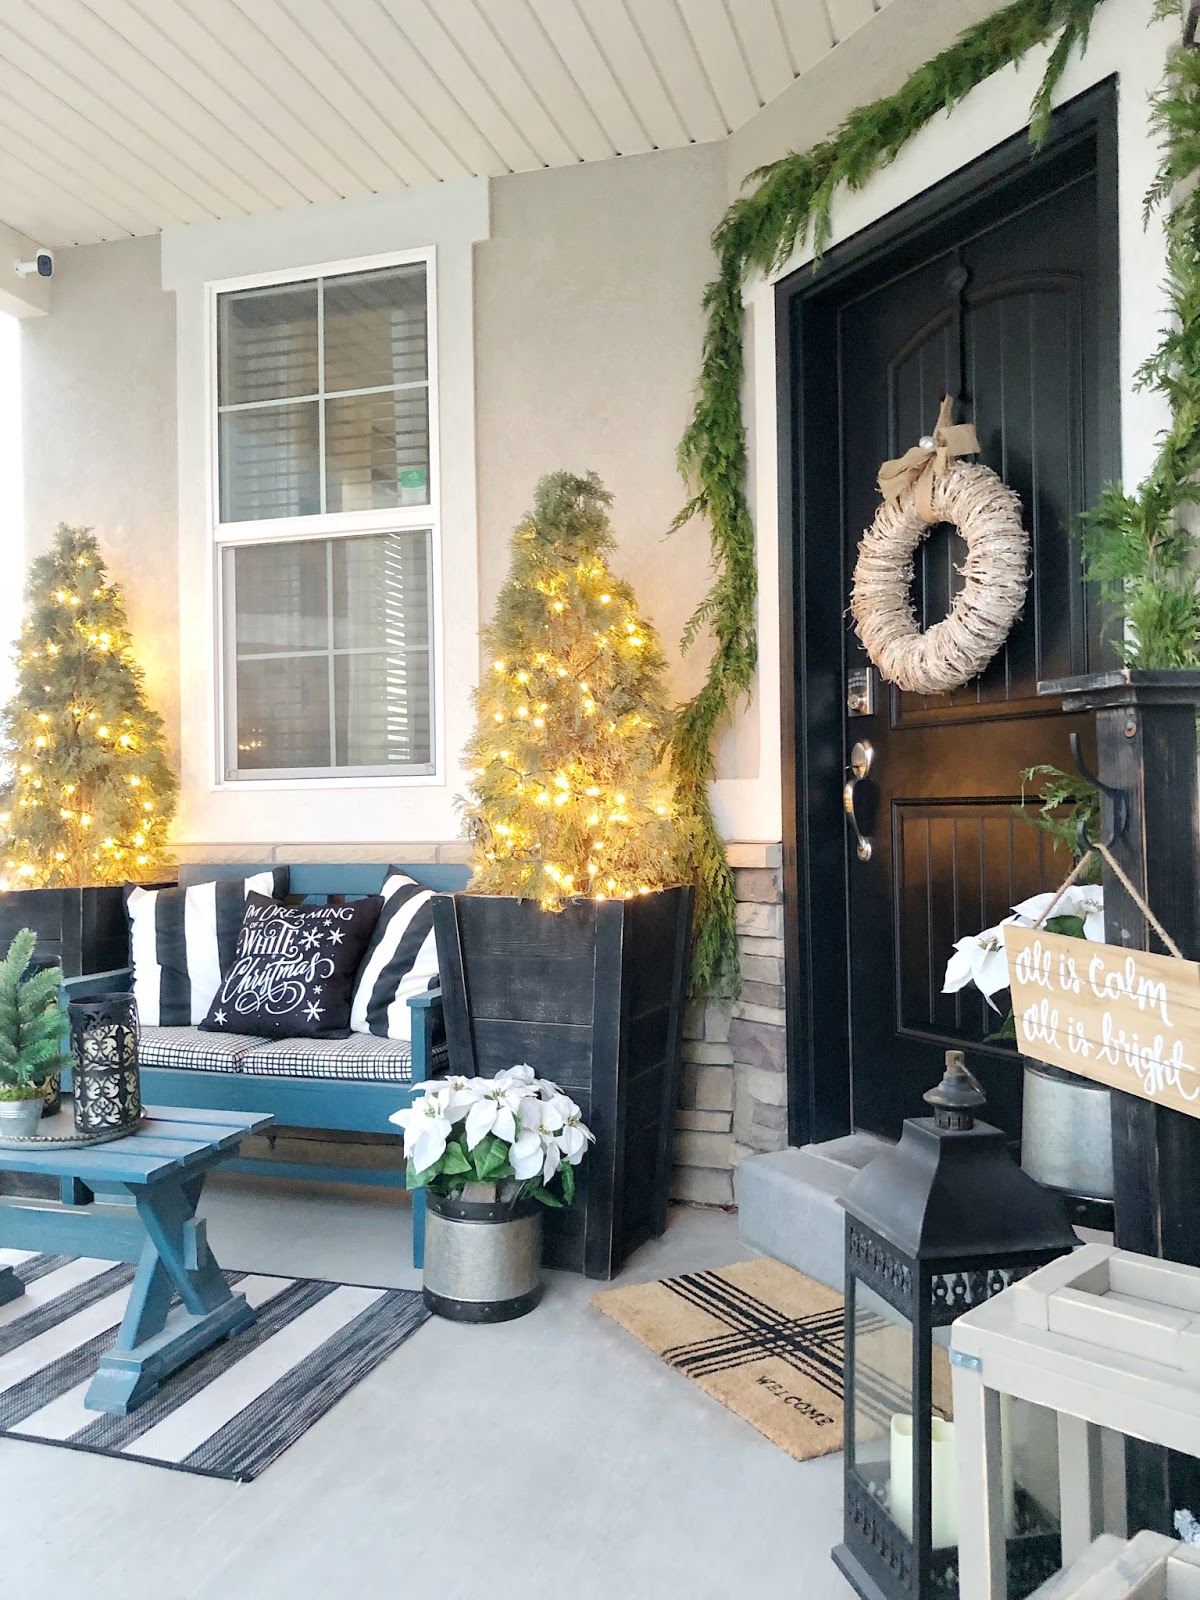
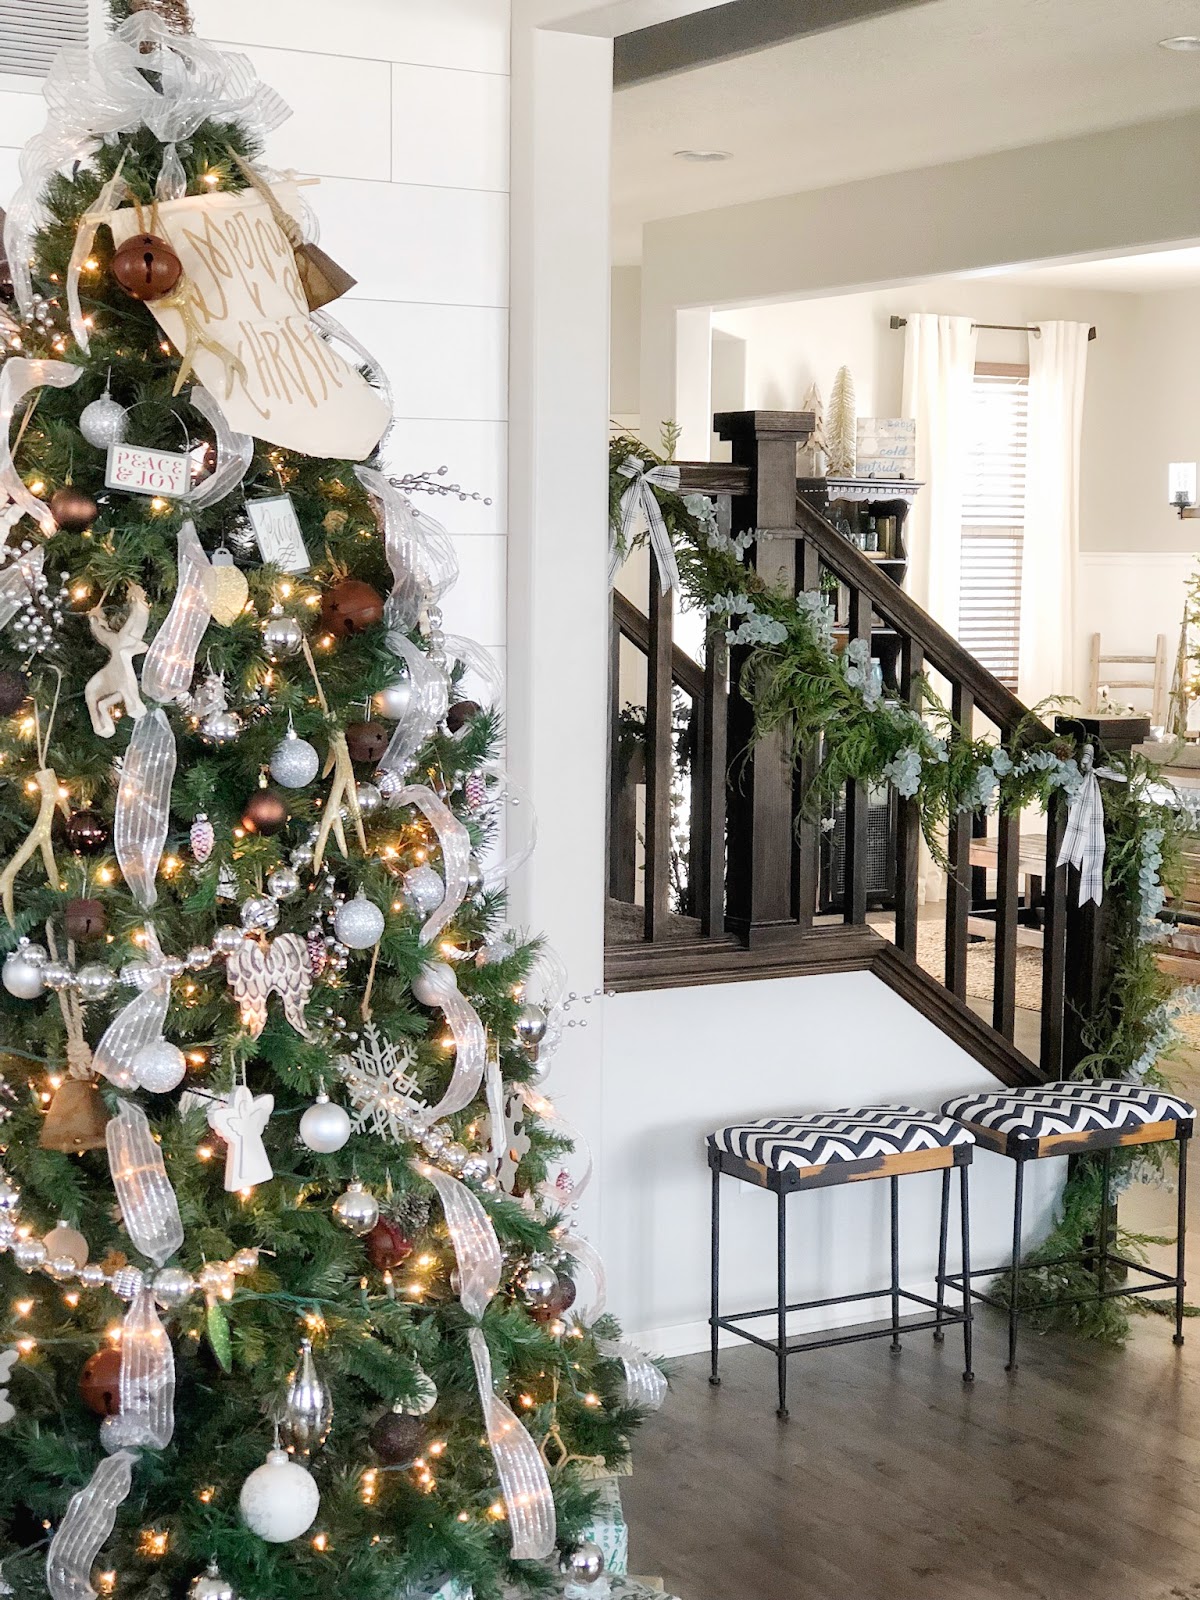
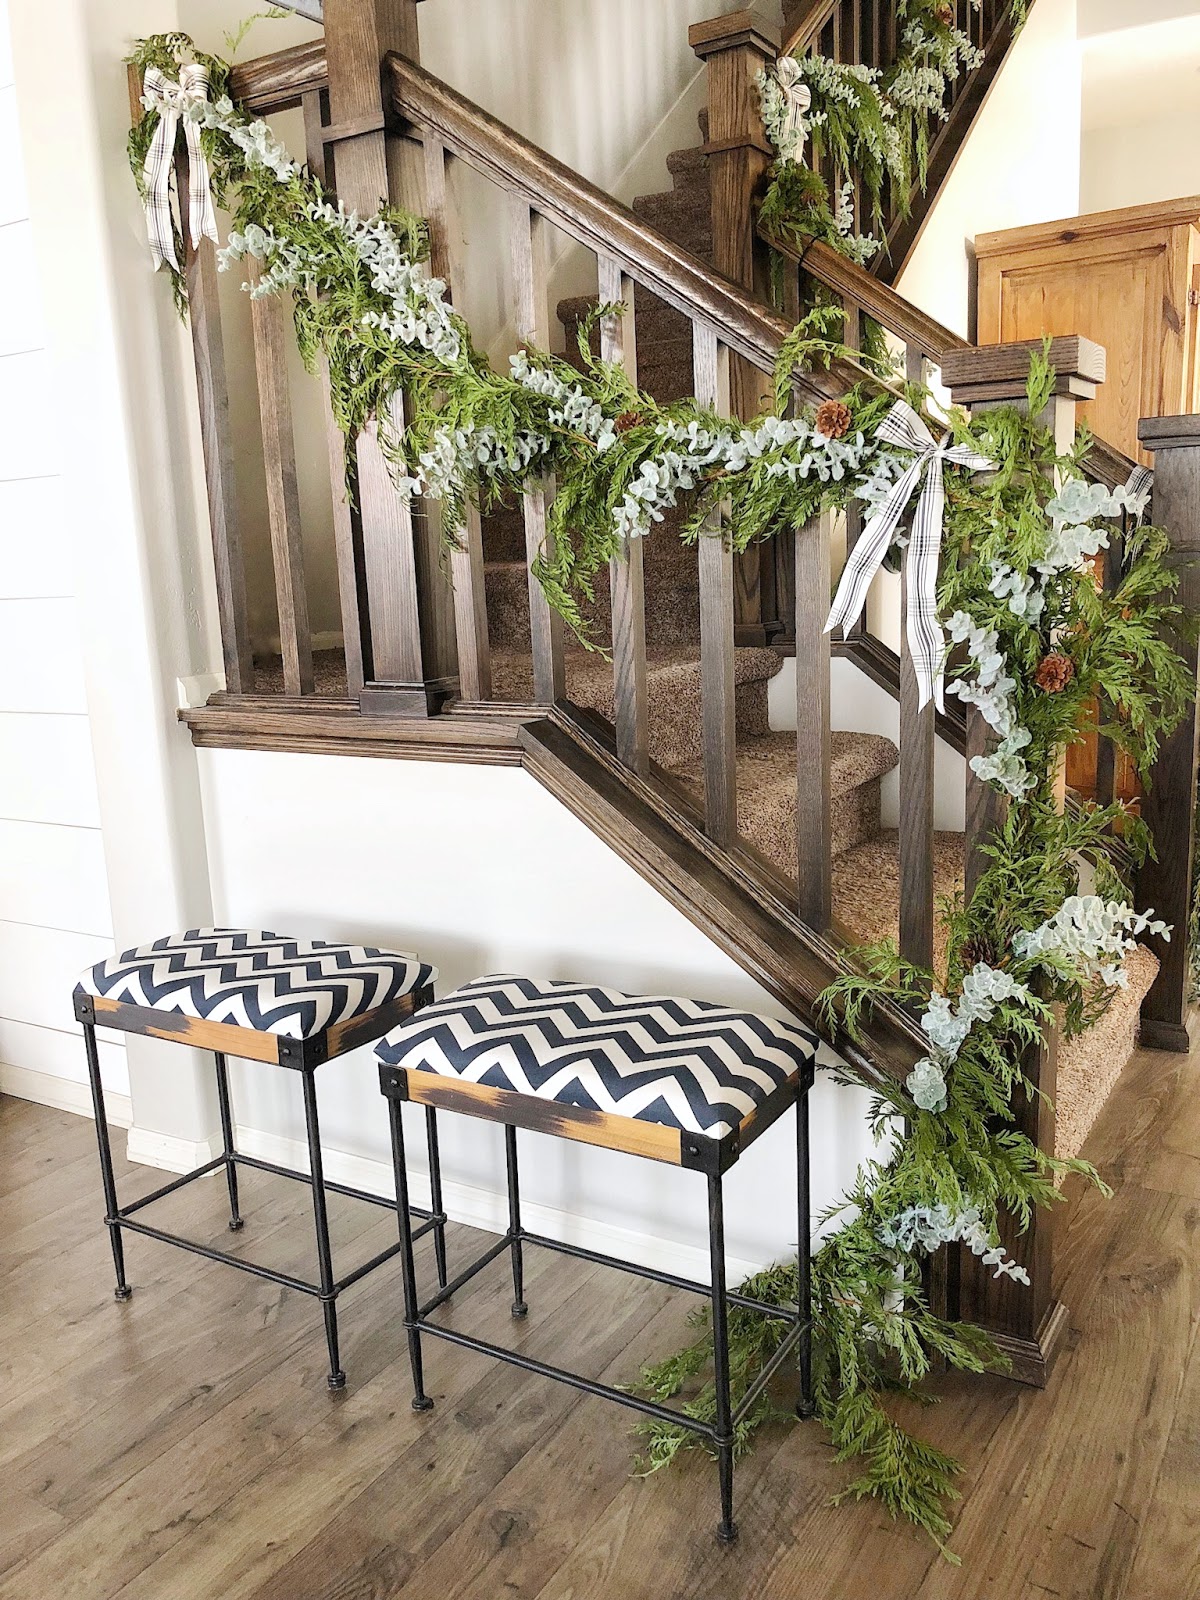
This year I decided to use fresh garland from Costco and I LOVE it!! They are so long, I got 2 and it was enough to do my whole railing, the wreath around my tray on our kitchen island, and over our front door!! Such a great value and smells amazing! To make it feel a little fuller I added some faux frosted eucalyptus and small pinecones to the garland, then I tied bows with this adorable ribbon from the Hearth and Home collection at Target.
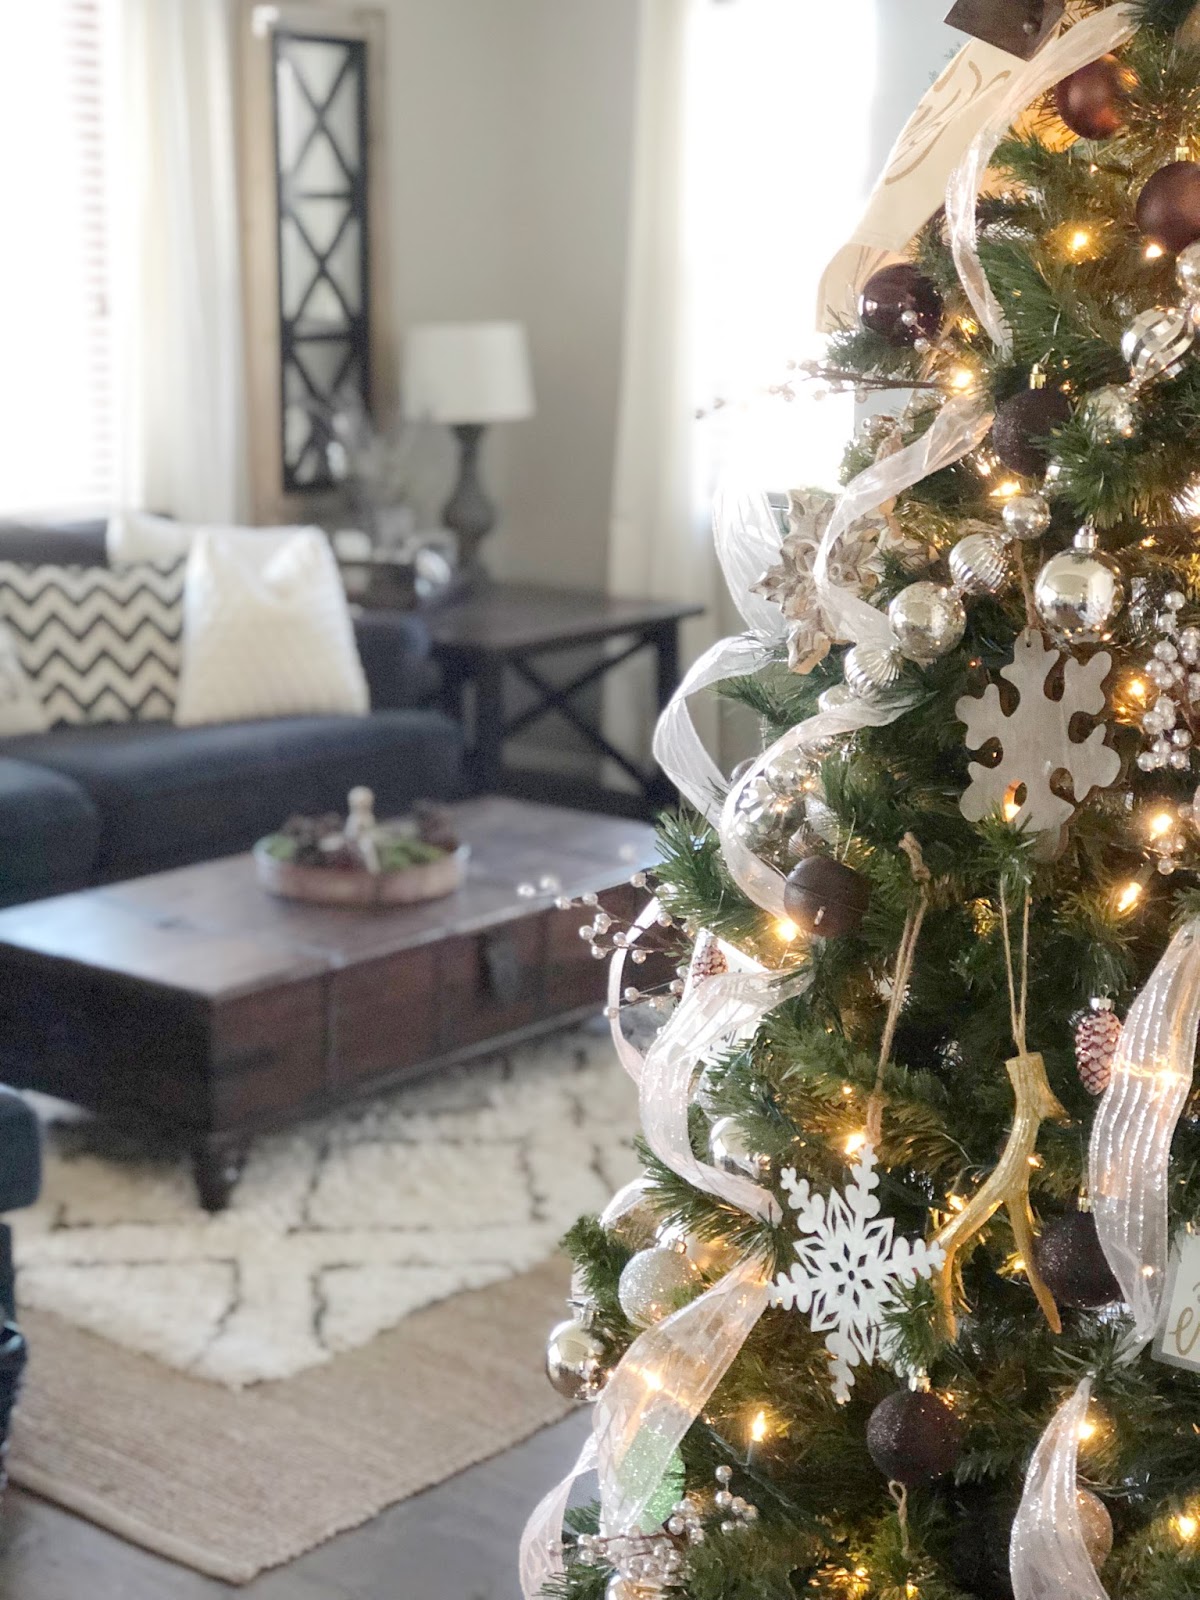
Finally our tree!! I played around with it for weeks until I was happy, and I have to say I’m so in love with it. It is filled with so many rusty, sparkley, chippy wood and galvanized metal yumminess that it makes my little farmhouse loving heart happy!
Thanks for looking at my Christmastmas home tour, I hope you enjoyed it and found some inspirations for your own home this holiday season!
-Grey Birch Designs-