


read more
The beginning of the year for us, like so many others, started out looking very different. We had decided to sell our home and move to the next city over and build a cute farmhouse in a fun community. That all quickly changed largly due to the pandemic that hit us hard in March. Although at the time it was hard for me to see, I soon realized this was a HUGE blessing in disguise!!
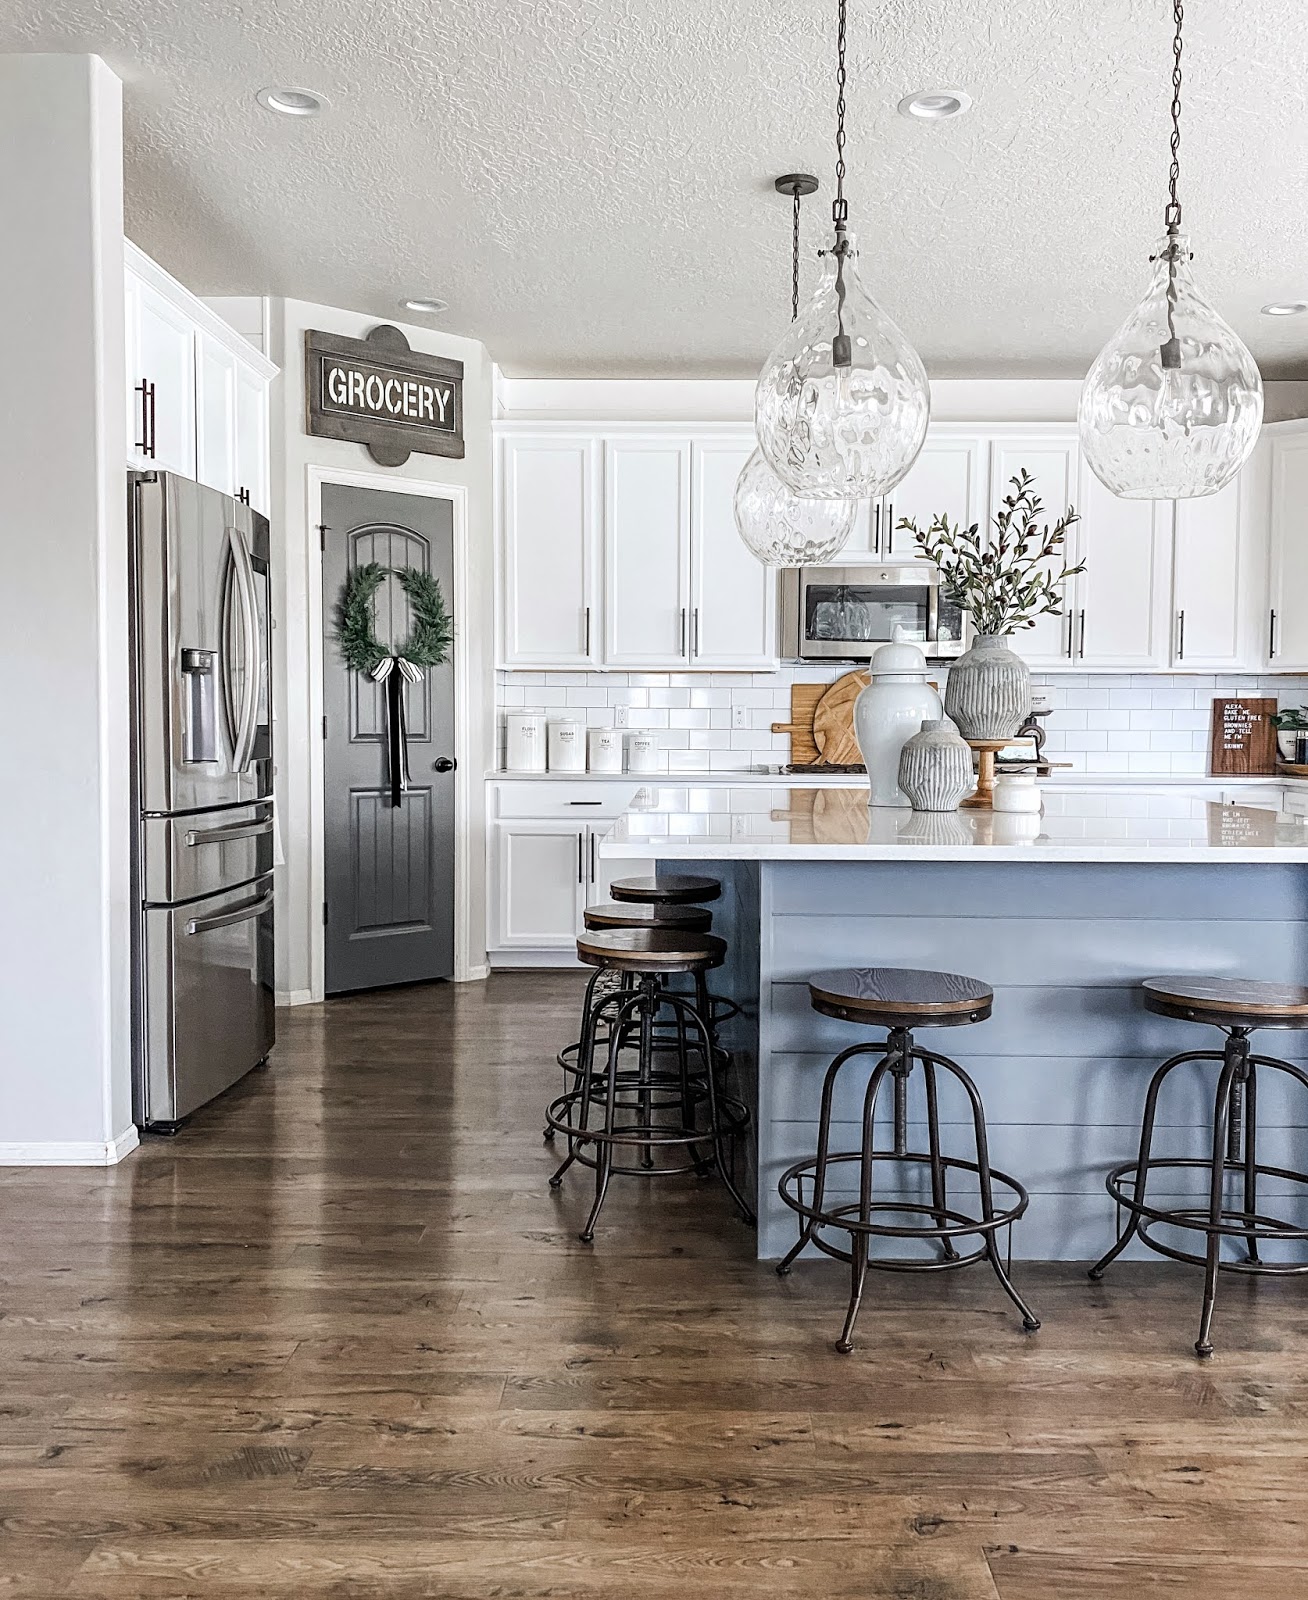
I was always a little sad about the thought of leaving our current home because we put our blood, sweat, and tears into making it what is is today. The one area of our home I always wanted to make changes to was our kitchen. I originally picked out off-white cabinets but they always looked a little yellow to me.
Fast forward to late March – I’m not going to lie, I cried like a baby after we found out we weren’t going able to get the new house. But I have the world’s best husband and he knew my heart was broken. So he said to me “how about we do a kitchen remodel and turn our current house into everything you wanted” Seriously this made me cry happy tears way more than sad ones!
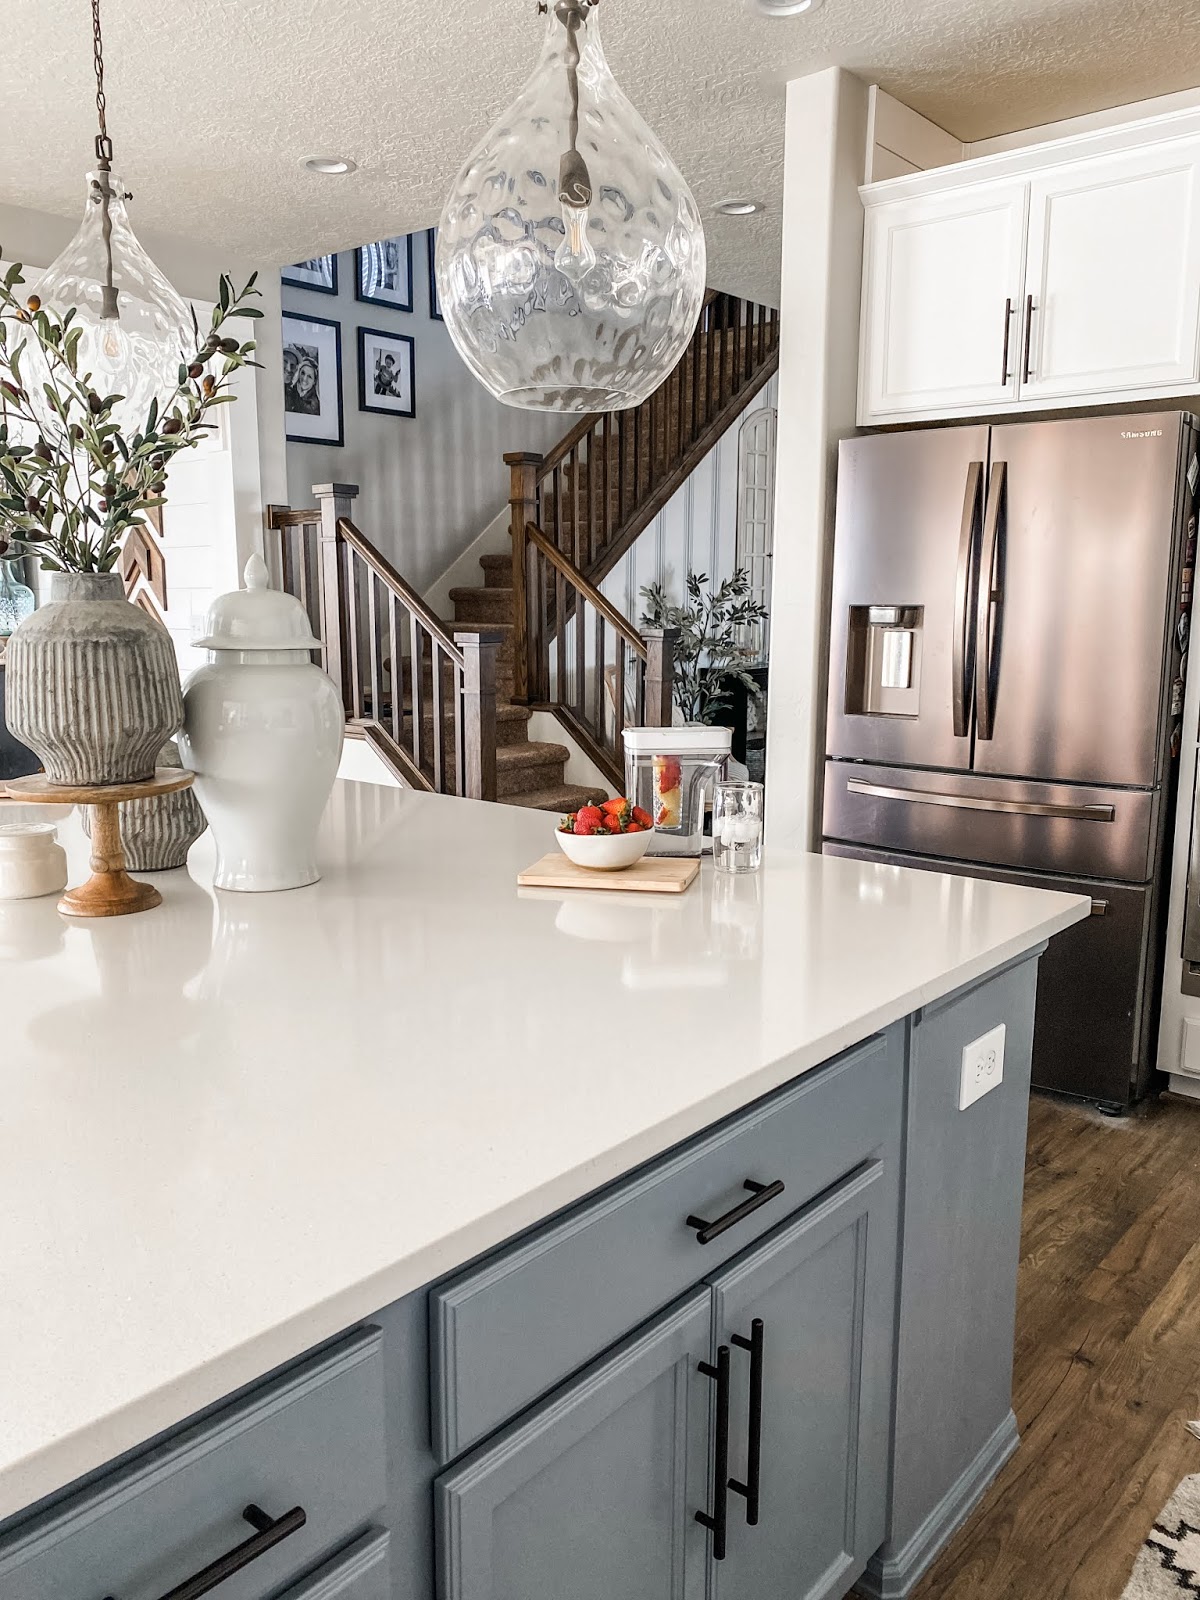
This project was mostly cosmetic. I love the layout of our kitchen – it was one of the big reasons we choose to build this model home back in 2015. What I wanted to change was the cabinets, countertops, and of course a farmhouse sink!!!
I had all my cabinets painted bright white (this is just the white base color without any additional color added in). I find this to be the truest bright white. We had the island painted Nevermore Grey by Sherwin Williams. We then had new white quartz countertops installed and modified the sink cabinet to accommodate the most beautiful farmhouse sink I found from BLANCO.
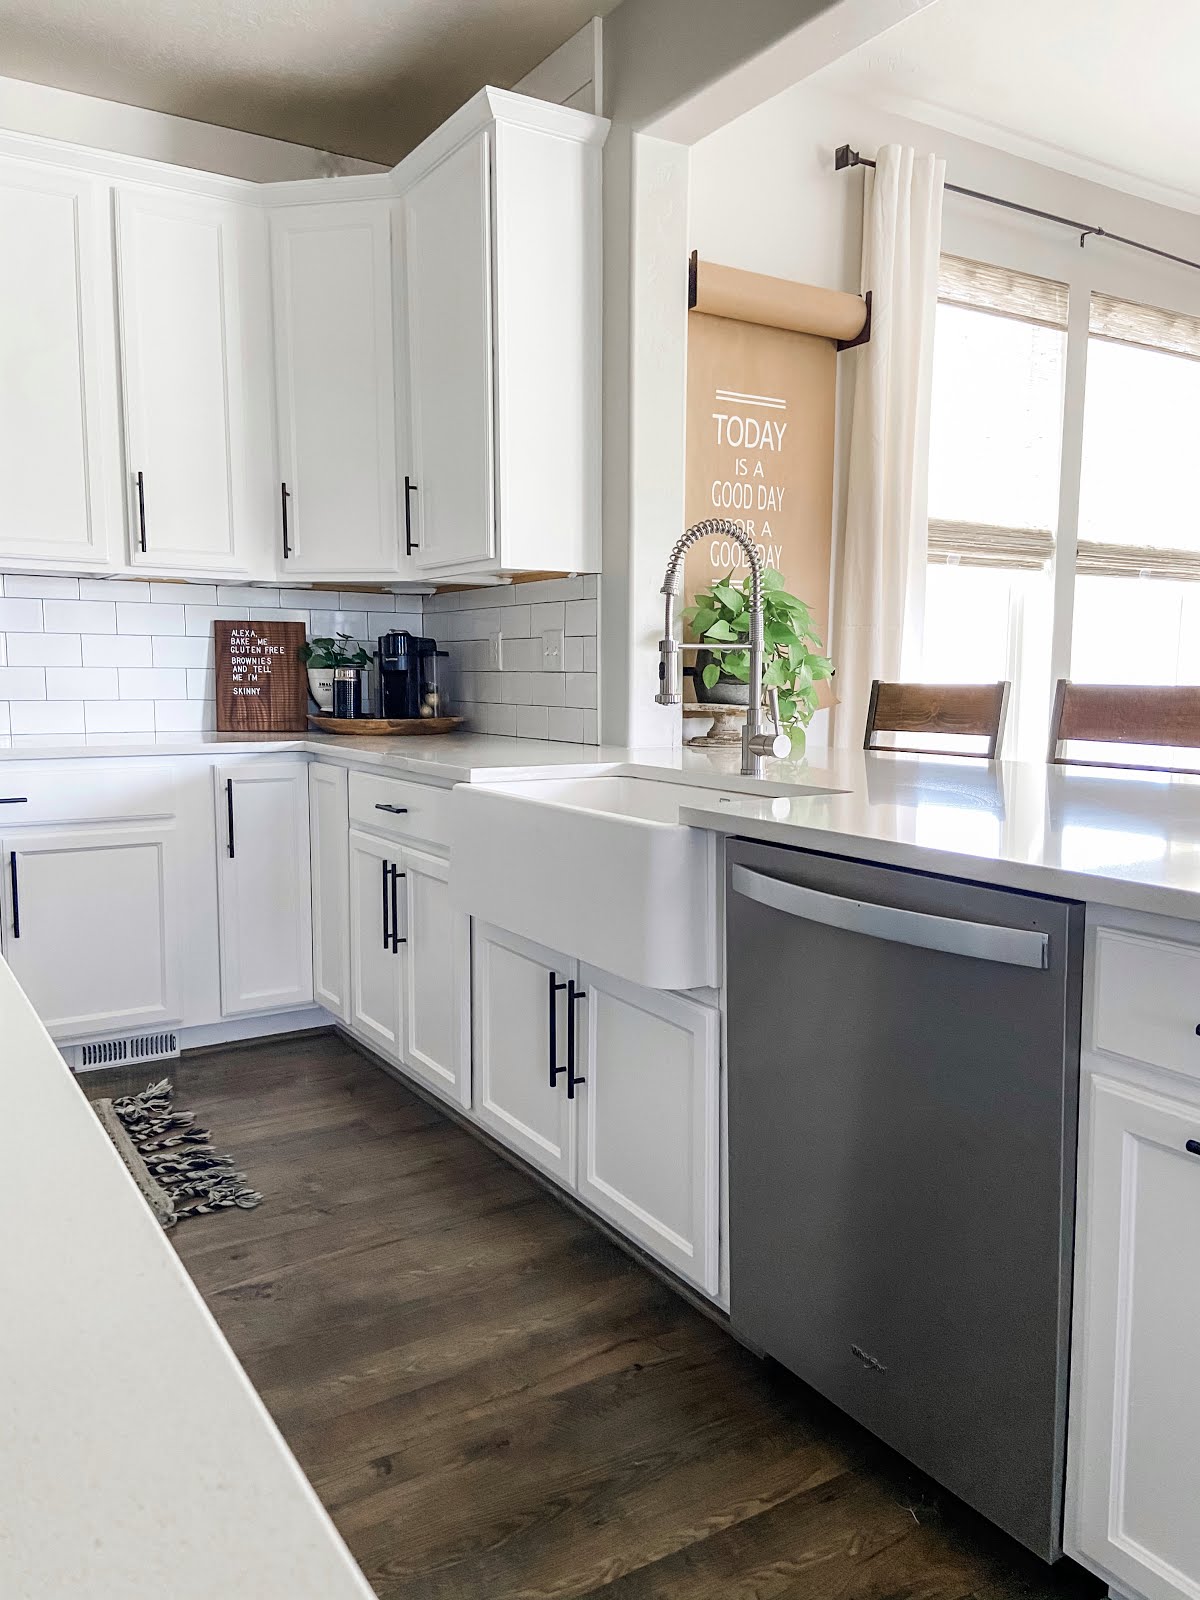
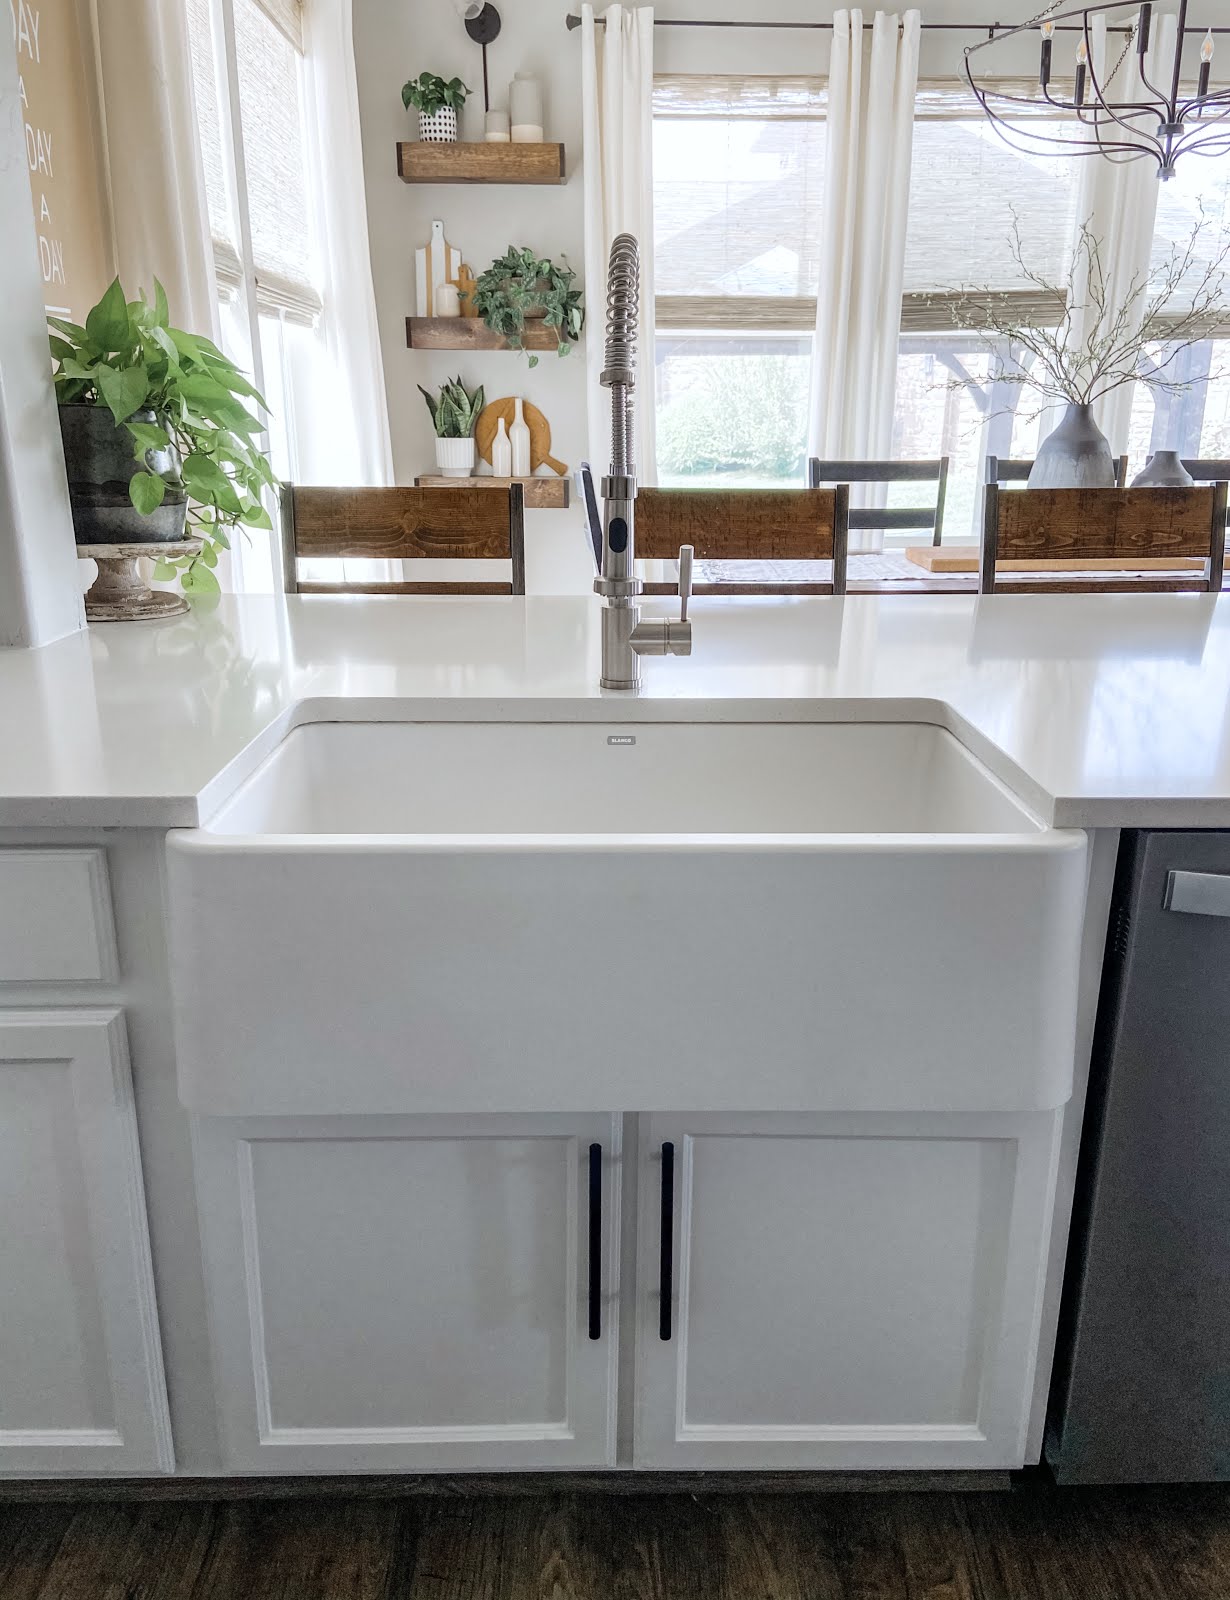
I chose the IKON® 33″ sink for a couple reasons. It’s a granite composite material that is stain and scratch resistant, which is super important with 5 kiddos in the house! It’s also a matte finish which gives it a more modern feel. This fits in perfectly with the new modern farmhouse design I’m going for in this kitchen remodel. I also picked out this gorgeous MERIDIAN™ faucet from BLANCO. It’s design makes me feel like a professional cook even when I’m not!! In all seriousness it’s not only beautiful but one of the best faucets I have ever had!
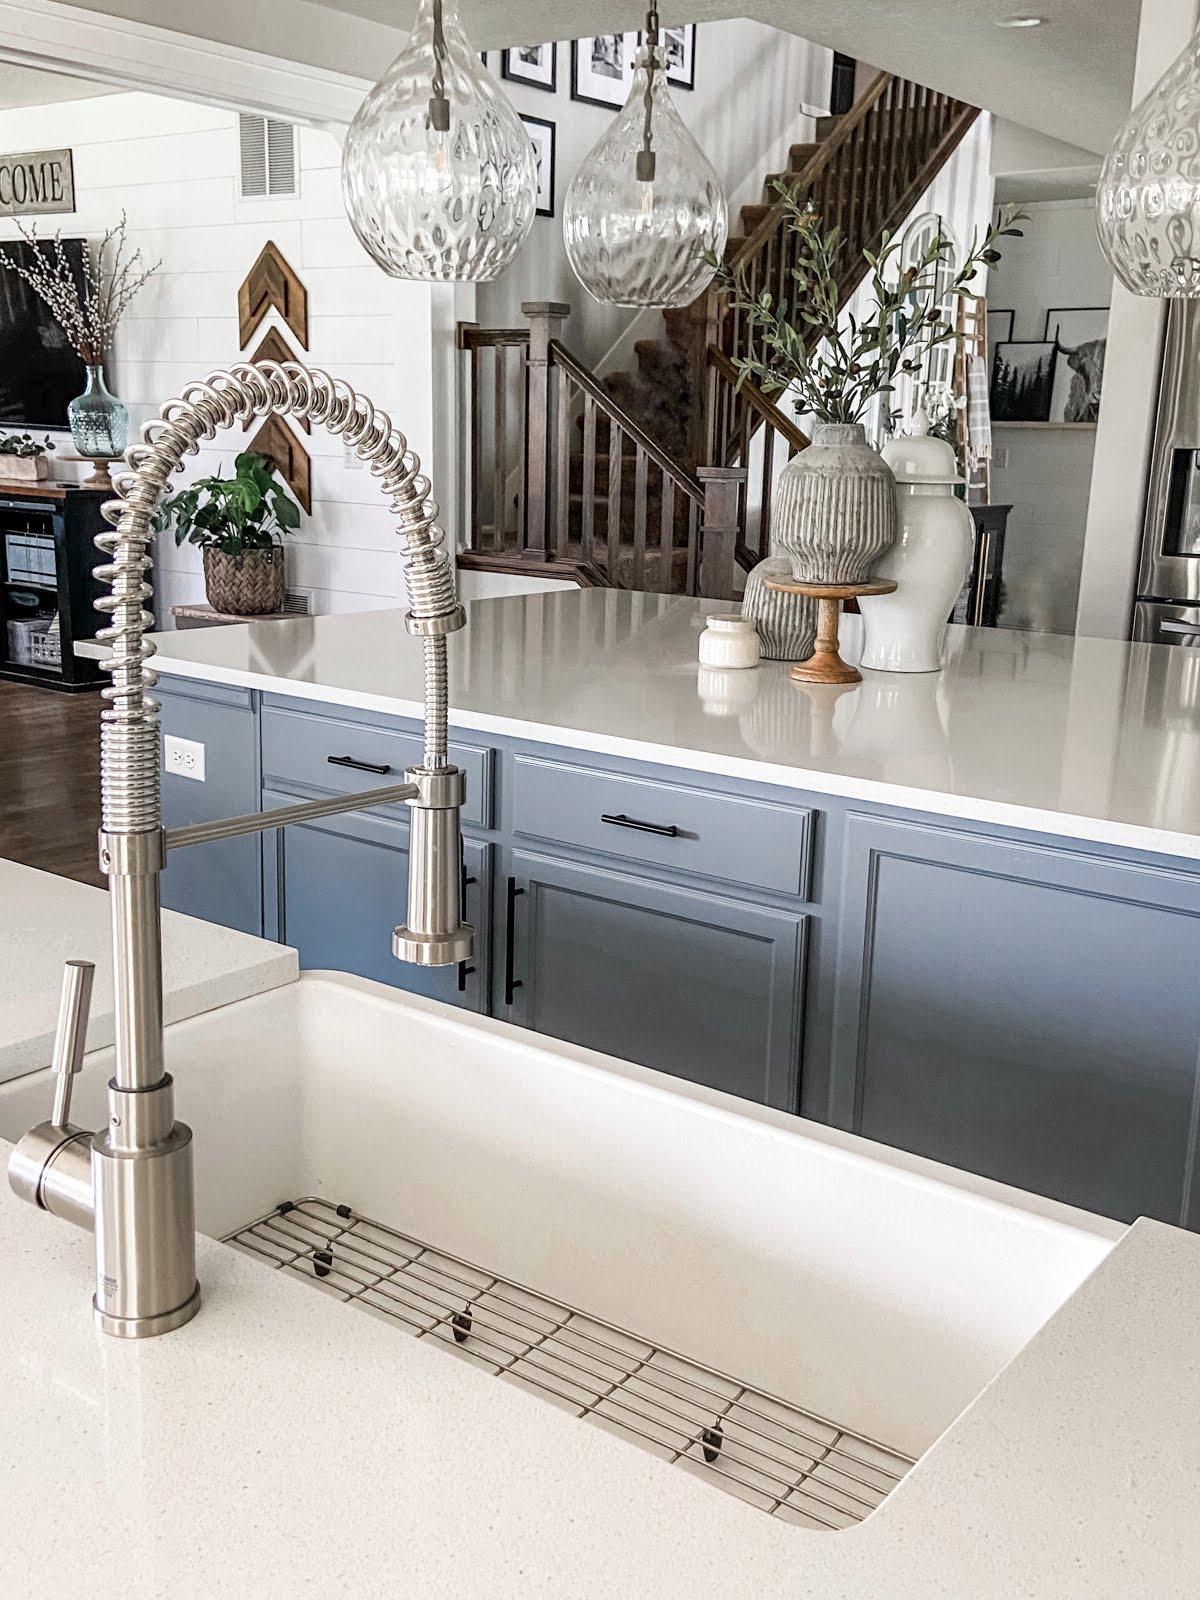
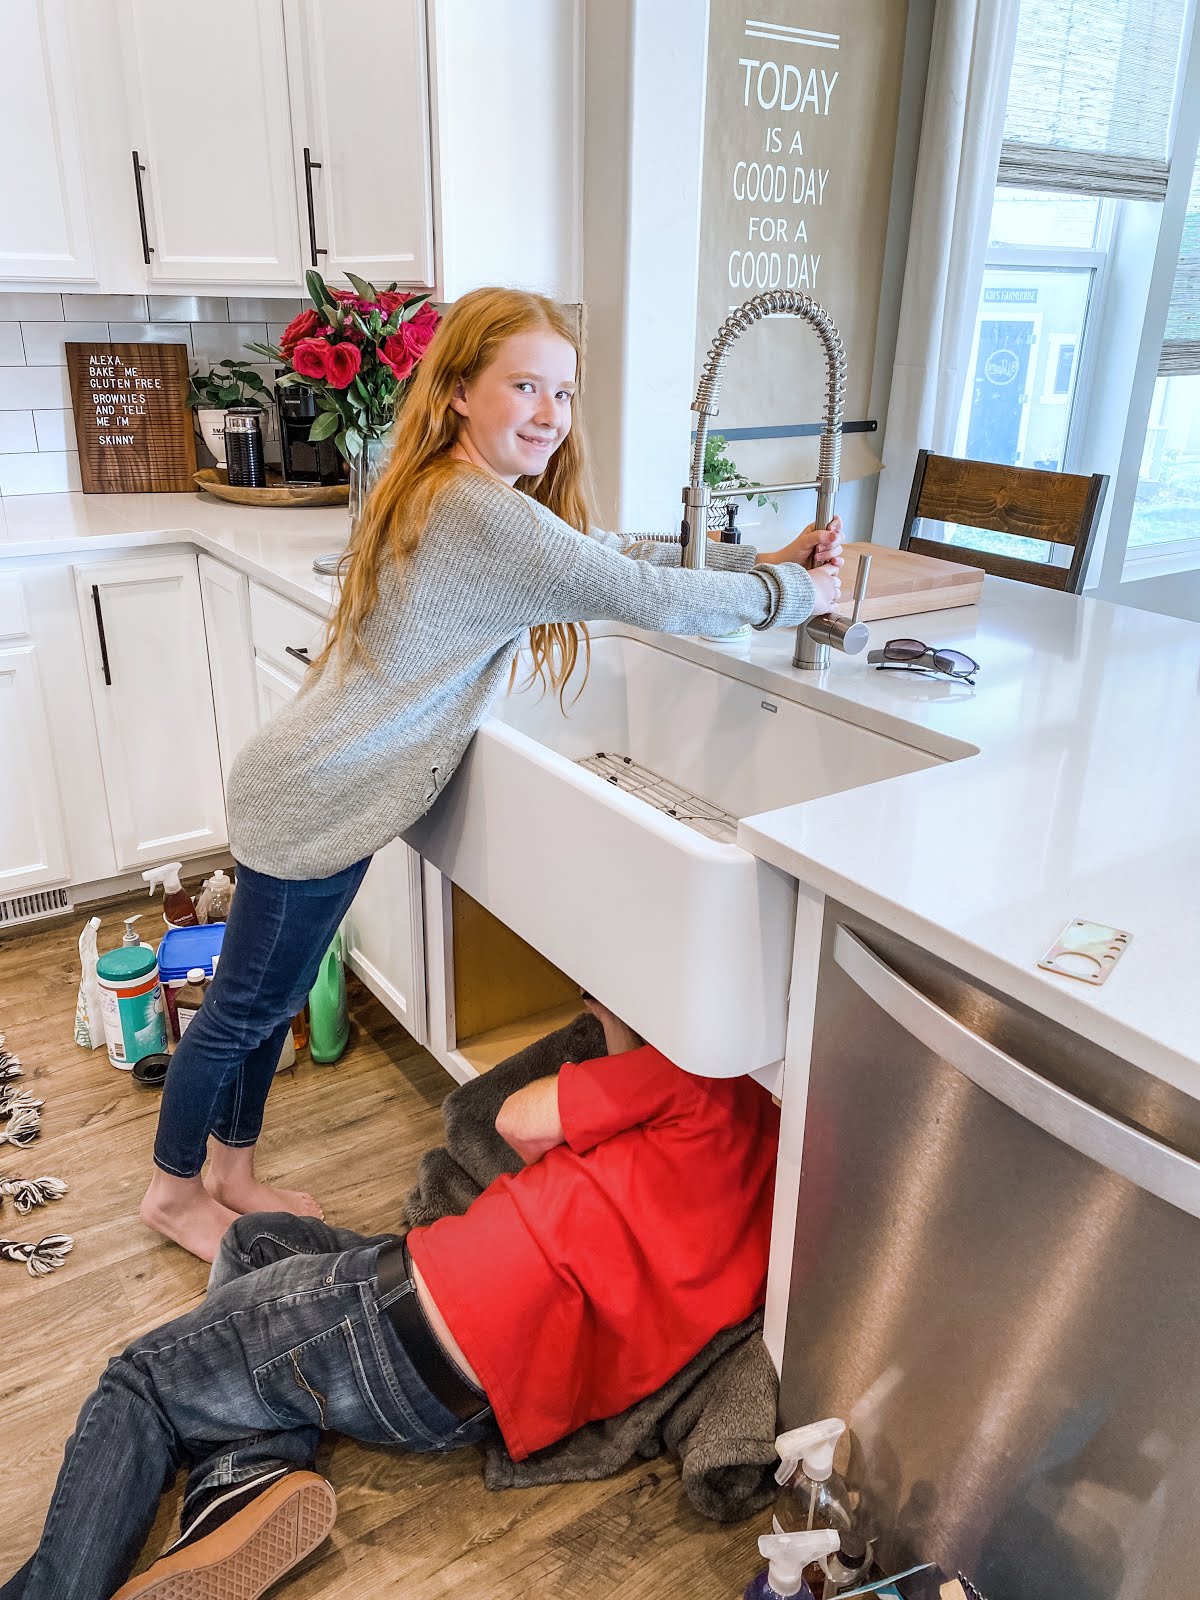
We took our sink cabinet doors to a custom cabinet maker to have the doors cut down to size. My farmhouse sink has a 10″ apron but our older sink was just a basic drop in. That meant our doors were too tall and didn’t fit under the sink anymore. We also had to change the support braces to hold the sink properly. We built small brackets inside the cabinet for the sink to sit on and lowered part of the horizontal cabinet face. Now my dream of having a farmhouse sink is a reality!!

This kitchen remodel is the largest project to date that we have done on our home and easily the most rewarding!!
BLANCO is a fantastic company and we have been extremely happy with their products. Our BLANCO farmhouse sink and faucet can be found here:
IKON® 33″ FARMHOUSE SINK
MERIDIAN™ FAUCET
-Grey Birch Designs-
read more
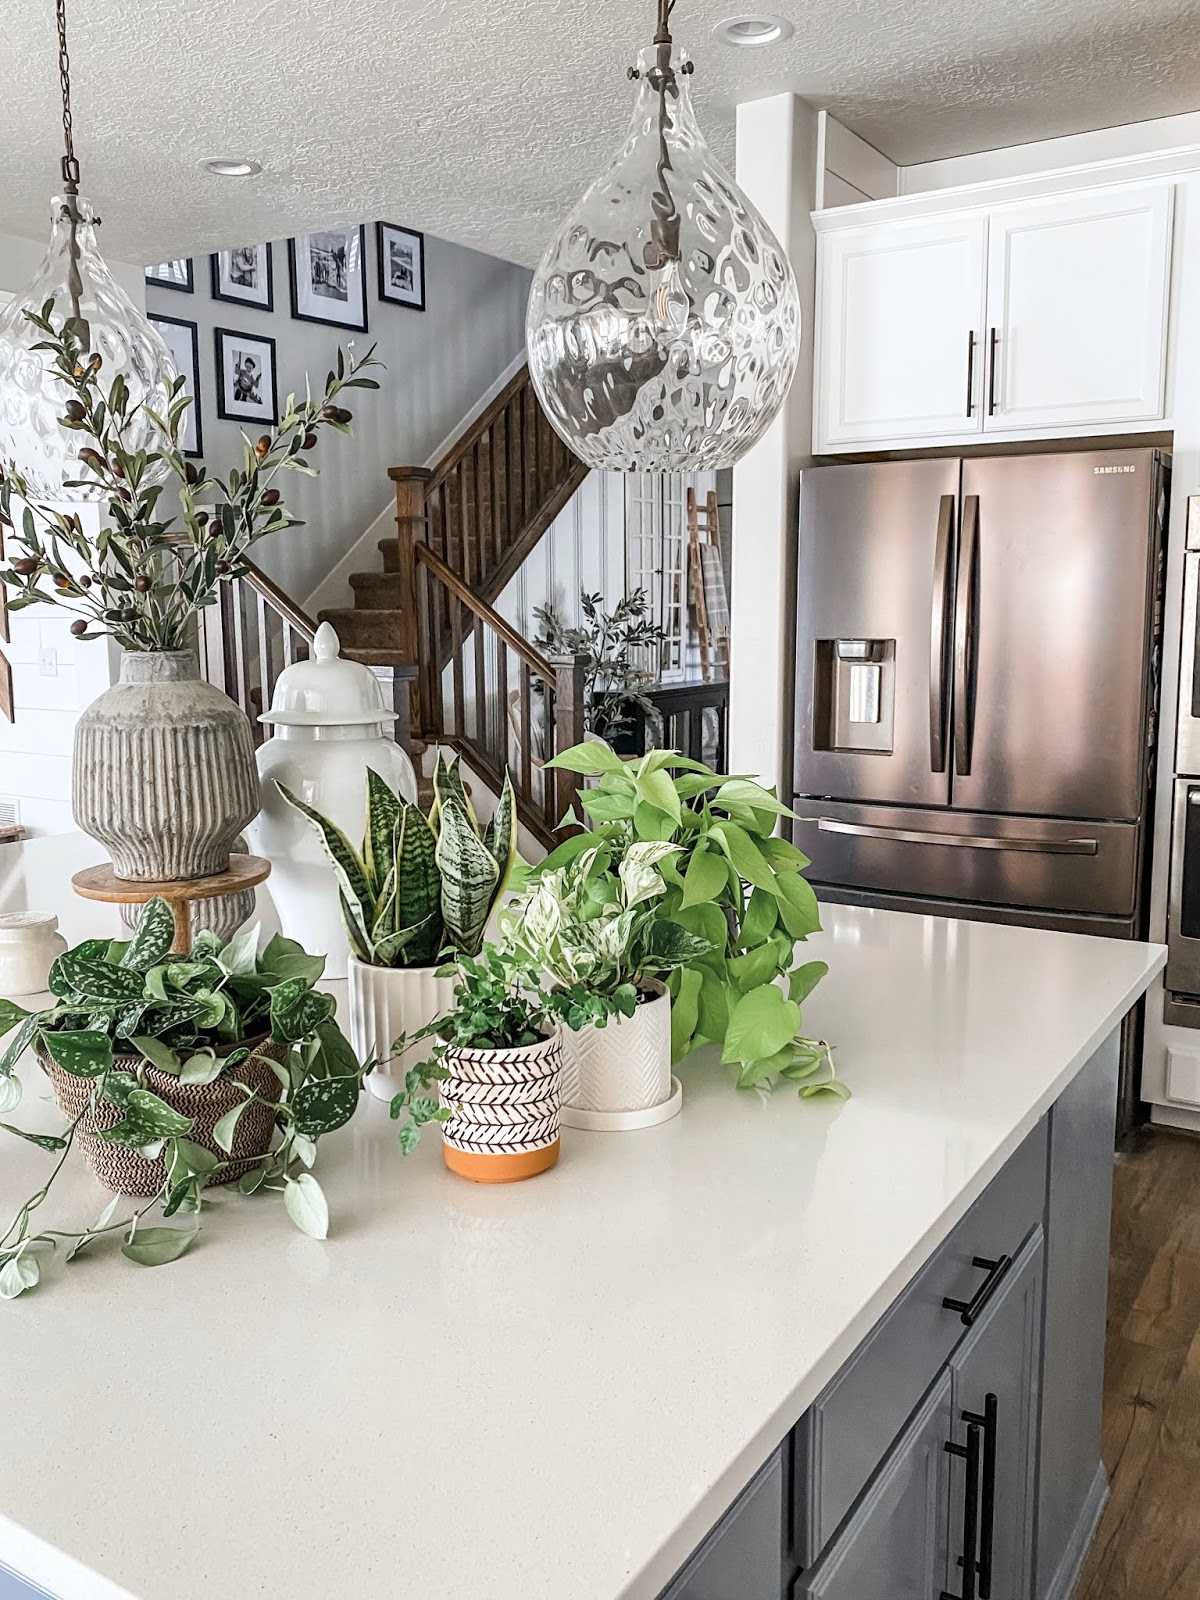
I have always wanted to be a plant lady! I have bought and killed many plants in my lifetime and thought I would forever have a black thumb. Every time I walked through the plant section at the home improvement store I thought to myself “I can do many things, but keeping plants alive is just not one of them.” They would tempt me every time as I walked the isles picking out my next victim. That is until I bought a ZZ plant 2 years ago. TWO YEARS I have kept this plant alive and thriving!! This got me thinking that maybe there are other plants that can work for people who are challenged in the garden like myself, so I did some research!
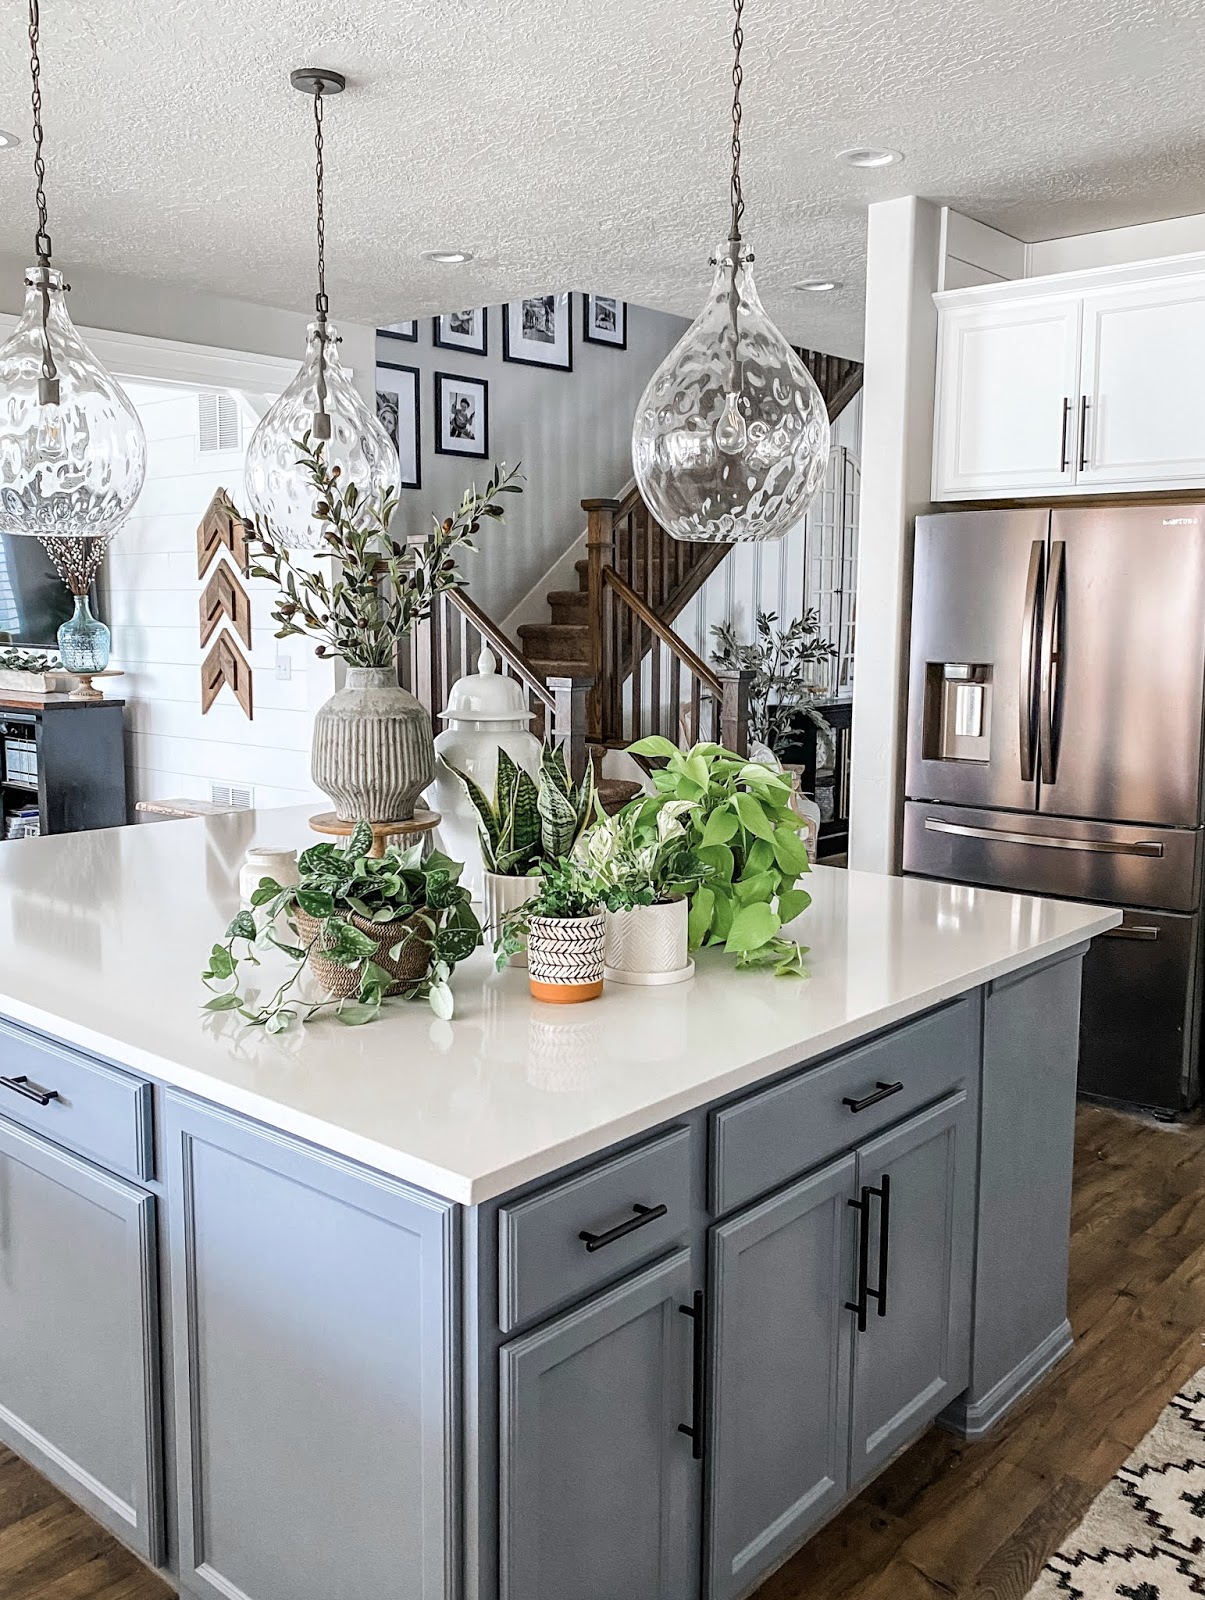
Oh boy was I excited to find a huge variety of these un-killable plants. I couldn’t wait to boost my self confidence in gardening and bring my dreams of becoming a plant lady to reality!! Here is my list of my top 5 favorite house plants for beginners!
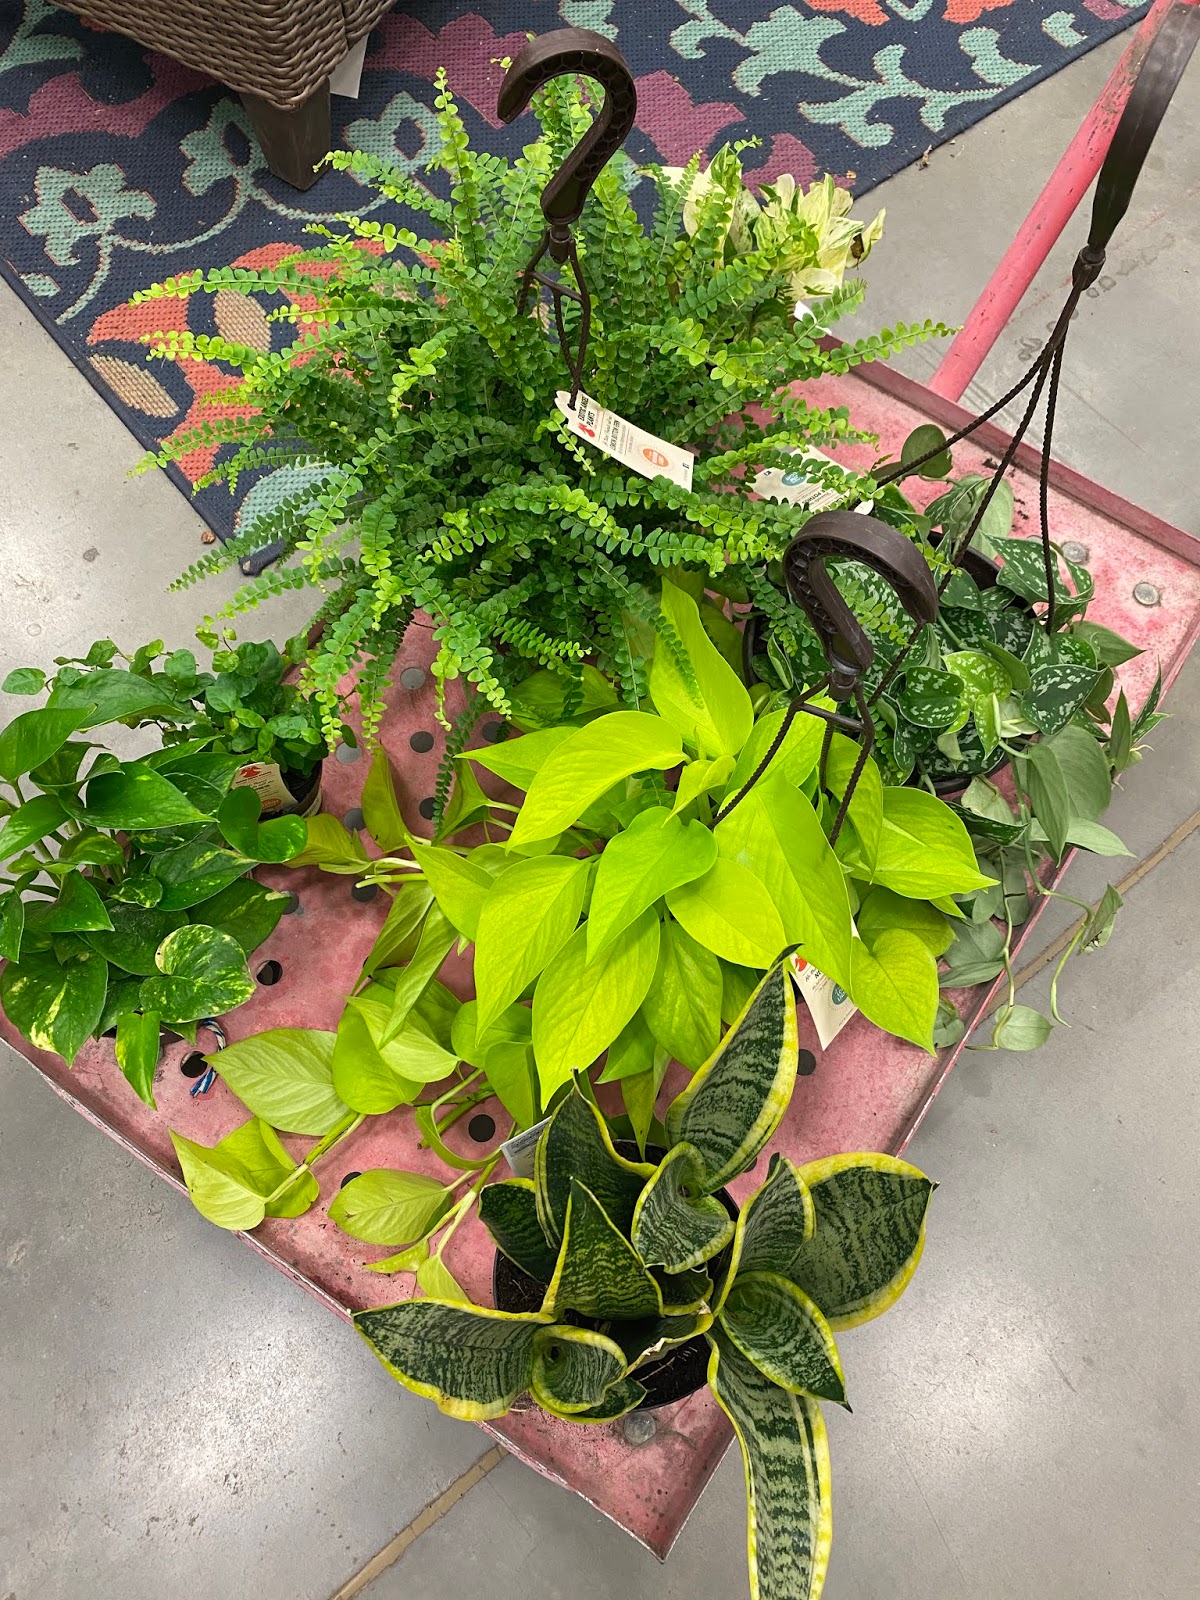
- ZZ Plant This is the one I stumbled on over 2 years ago and it is thriving! Truth be told, the more I ignore it the happier it is, that’s my kind of plant! It has a beautiful deep green leaf and helps clean the air inside your home! These are my favorite house plants!
- Pothos These come in so many color variations and each one is absolutely beautiful!! Something really neat about these is you can easily propagate them with a clipping and then have more of these beautiful plants without having to go buy more!
- Snake Plant Although I HATE the name (I’m deathly afraid of snakes…) I love this plant! It’s similar to the ZZ plant since it likes to be ignored and only requires 1 cup of water every 2 weeks. It also likes low light and has beautiful colored leafs!
- Fern These are beautiful and easy to care for indoor/outdoor plants! You only water the soil when it is dry and they require medium light!
- Peace Lily If you want something that has a flower on it then these are a great option. They grow best in high light but can tolerate low light too, making them a go with the flow kind of plant. They do need to be watered weekly so on the scale of low maintenance plants these are a little more high maintenance but still easy!
Our Favorite Summer Time Drink!!
About a year ago I stopped drinking diet sodas. Since then, getting my kids and I to drink more water has become really important to me! This is why my favorite feature in my Samsung Refrigerator is the built in water pitcher. It has the ability to make fruit water, and automatically refills itself after every use! We love it and it’s a fun change for our kids when they get tired of plain water. We have tried a ton of different combinations and here are some of our favorites!
- strawberries, lemon, and mint leaves
- sliced cucumber and mint leaves
- strawberries and pineapple
- orange and lime
- kiwi and orange
You can use fresh or frozen fruit which makes it so easy! We just slice up the fruit, place it in the middle chamber of the water pitcher that came with our Samsung Refrigerator and then place it back inside the door. We can keep it for 2-3 days and then clean it out to make a new batch! Since it automatically refills itself we never run out!! My kids love making it and it has truly limited the amount of soda and other sugary drinks they drink each day!
I wonder if my plants get jealous of our yummy fruit water?? 😉 😂
-Grey Birch Designs-
read more
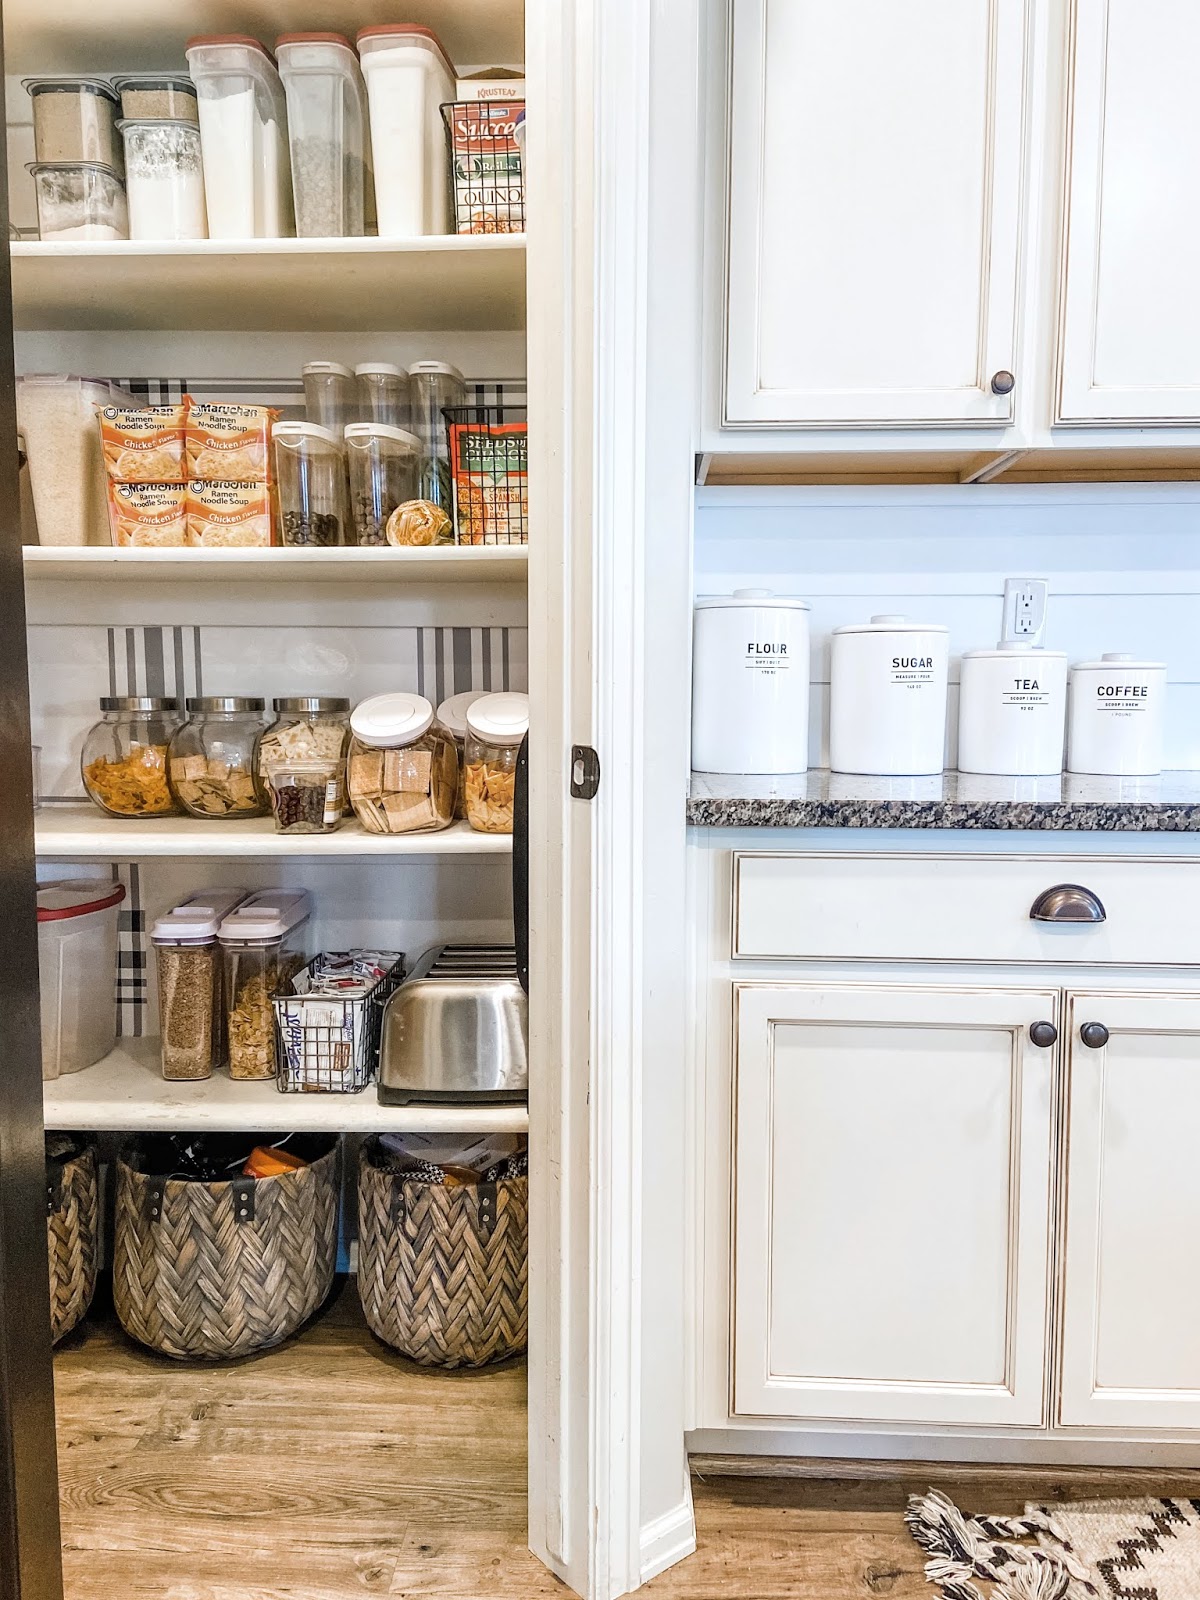
If you are like us then you are trying to keep your trips to the market to a minimum right now. For a family of 7 that means we have to stockpile things in our home, something we don’t normally do. The problem I find myself running into is how to store it all while still keeping my pantry organized. Thankfully I have come up with a few tips to fix this overflowing pantry problem!
Tip #1 – Get some storage containers – These have been a lifesaver! I find that they hold a good amount of food, are easy to fit in the pantry, and generally take up less space than boxes. They also keep me way more organized.
Tip #2 – Keep your clear bin of food full – Simply by doing this I eliminated a bunch of extra food bags and boxes, making more room for a stockpile!
Tip #3 – Get some large baskets – I recently added these baskets to the bottom of my pantry. They are perfect for the big packages of crackers or cereal. These bags of food are hard to store because you can’t stack them and they take up a lot of space. By having them in these baskets they are neatly tucked away but also easy to access when it’s time to refill the container! My kids can even handle that job!!
Tip #4 – Utilize the out of reach shelves – Having a tall pantry means the top shelf is hard to access and rarely used. This is the perfect space to stack those boxes from Costco that you’re not quite ready to open yet. It’s out of the way and off the shelves you use every day. Since they are still packaged you can stack those to the ceiling if you want to!!
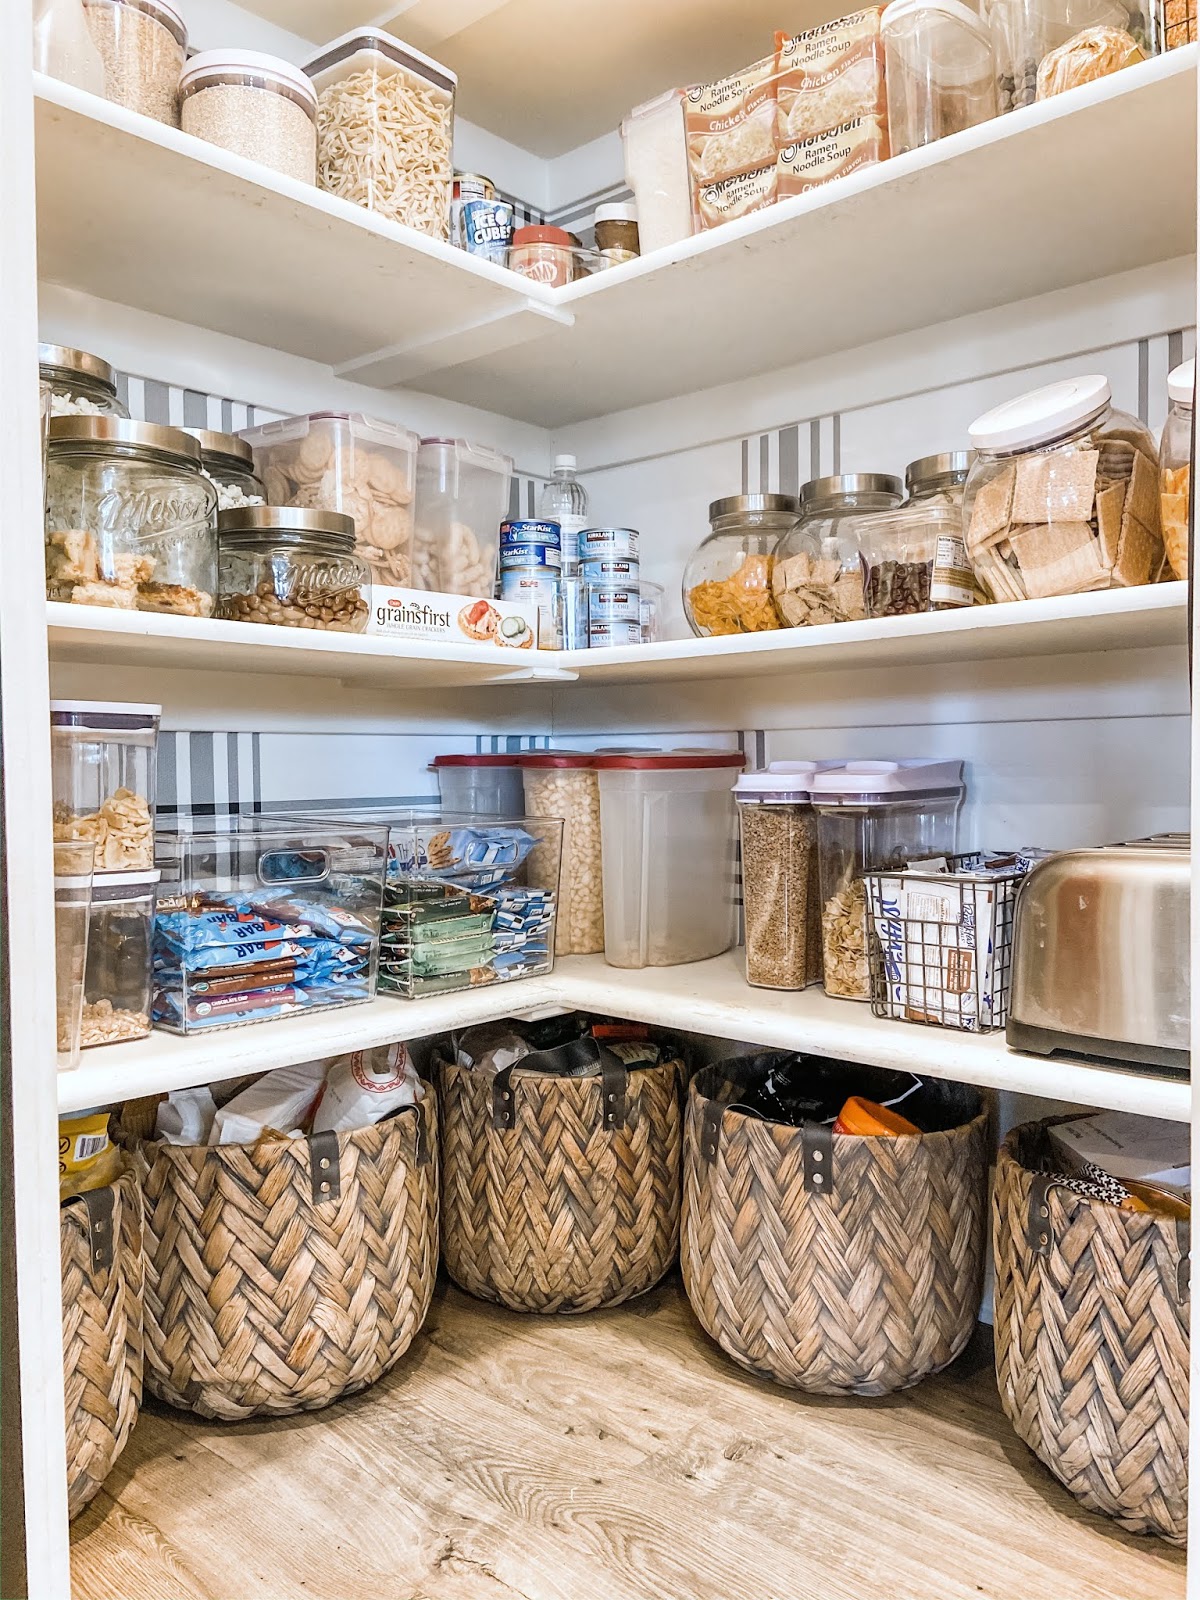
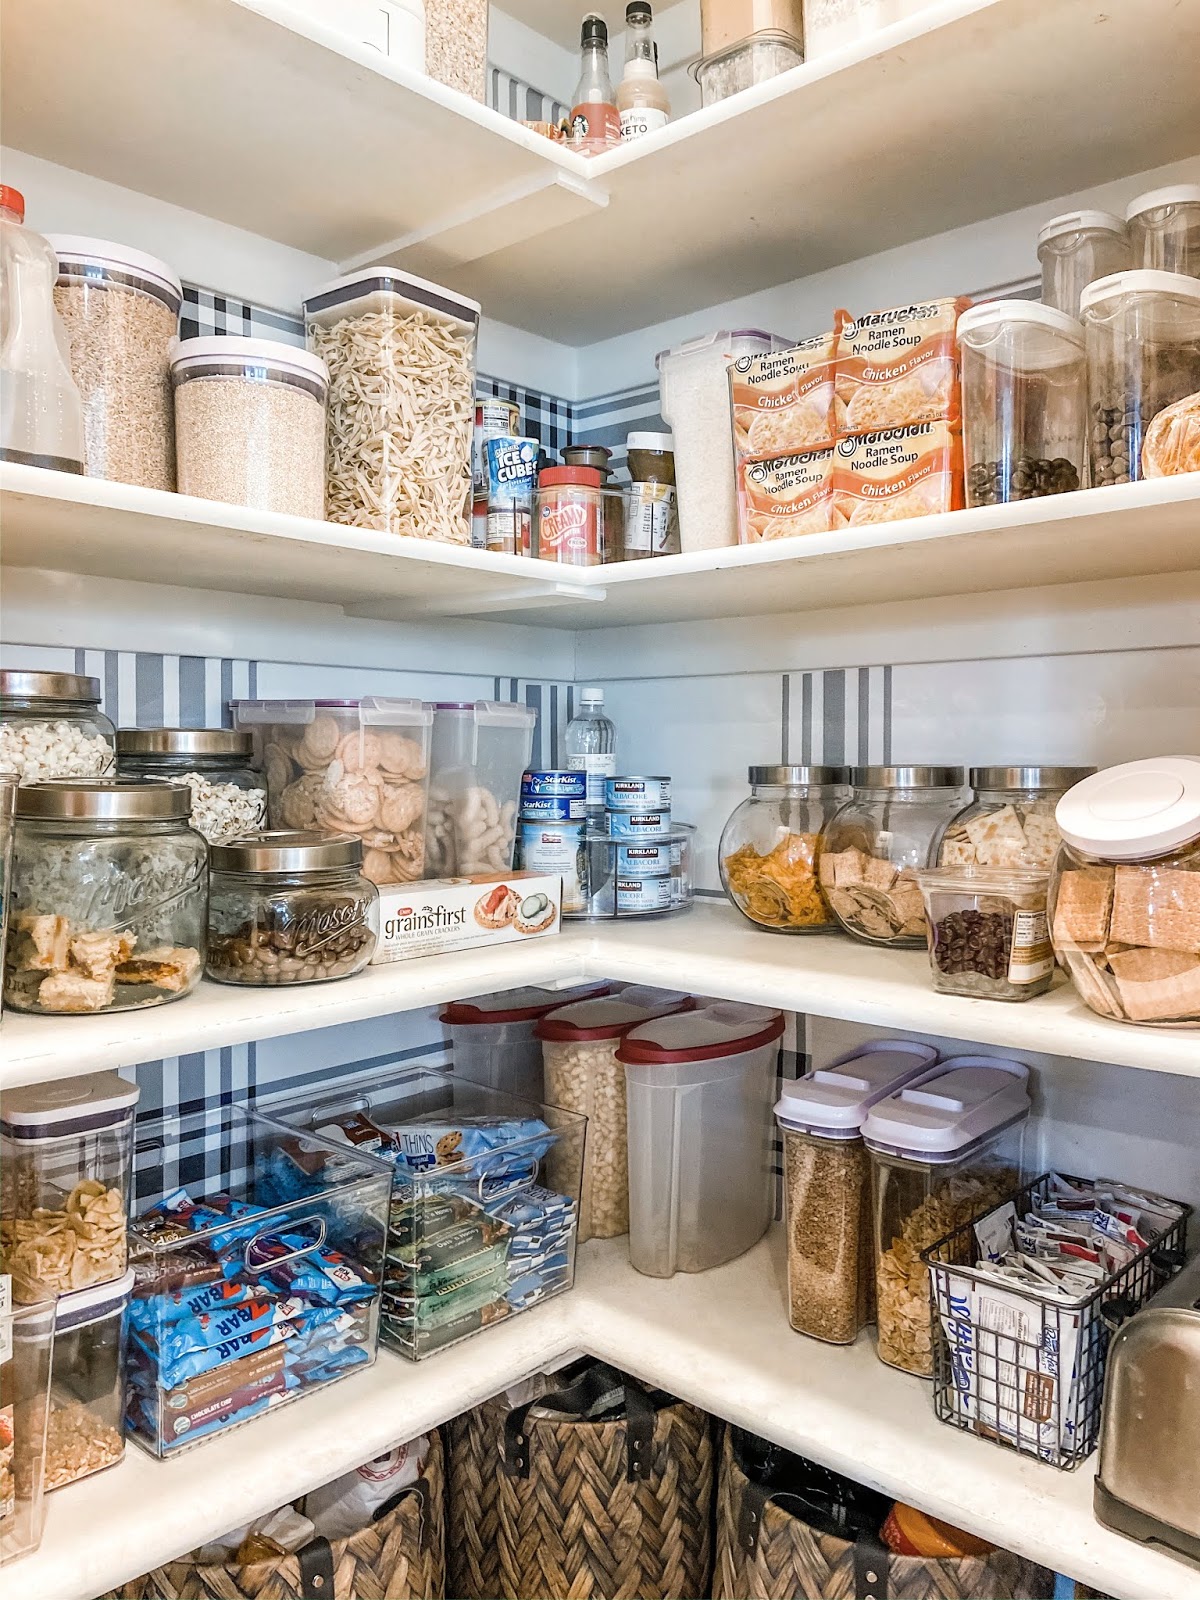
Here are the links to the products I used from Bed Bath and Beyond in my pantry storage project!! #ad
This was the most satisfying project I have done while stuck at home, and I’m loving how nice and organized everything is now!
Happy Organizing Everyone
-Grey Birch Designs-
read more
Our home was video taped a couple months ago for advertisement purposes and we were luck enough to get a copy of the amazing footage. I’m so excited to release the full tour of our home to you! I hope you enjoy our very first home tour as much as we have!!
Subscribe to our YouTube channel so you won’t miss any of our videos!
-Grey Birch Designs-
read more
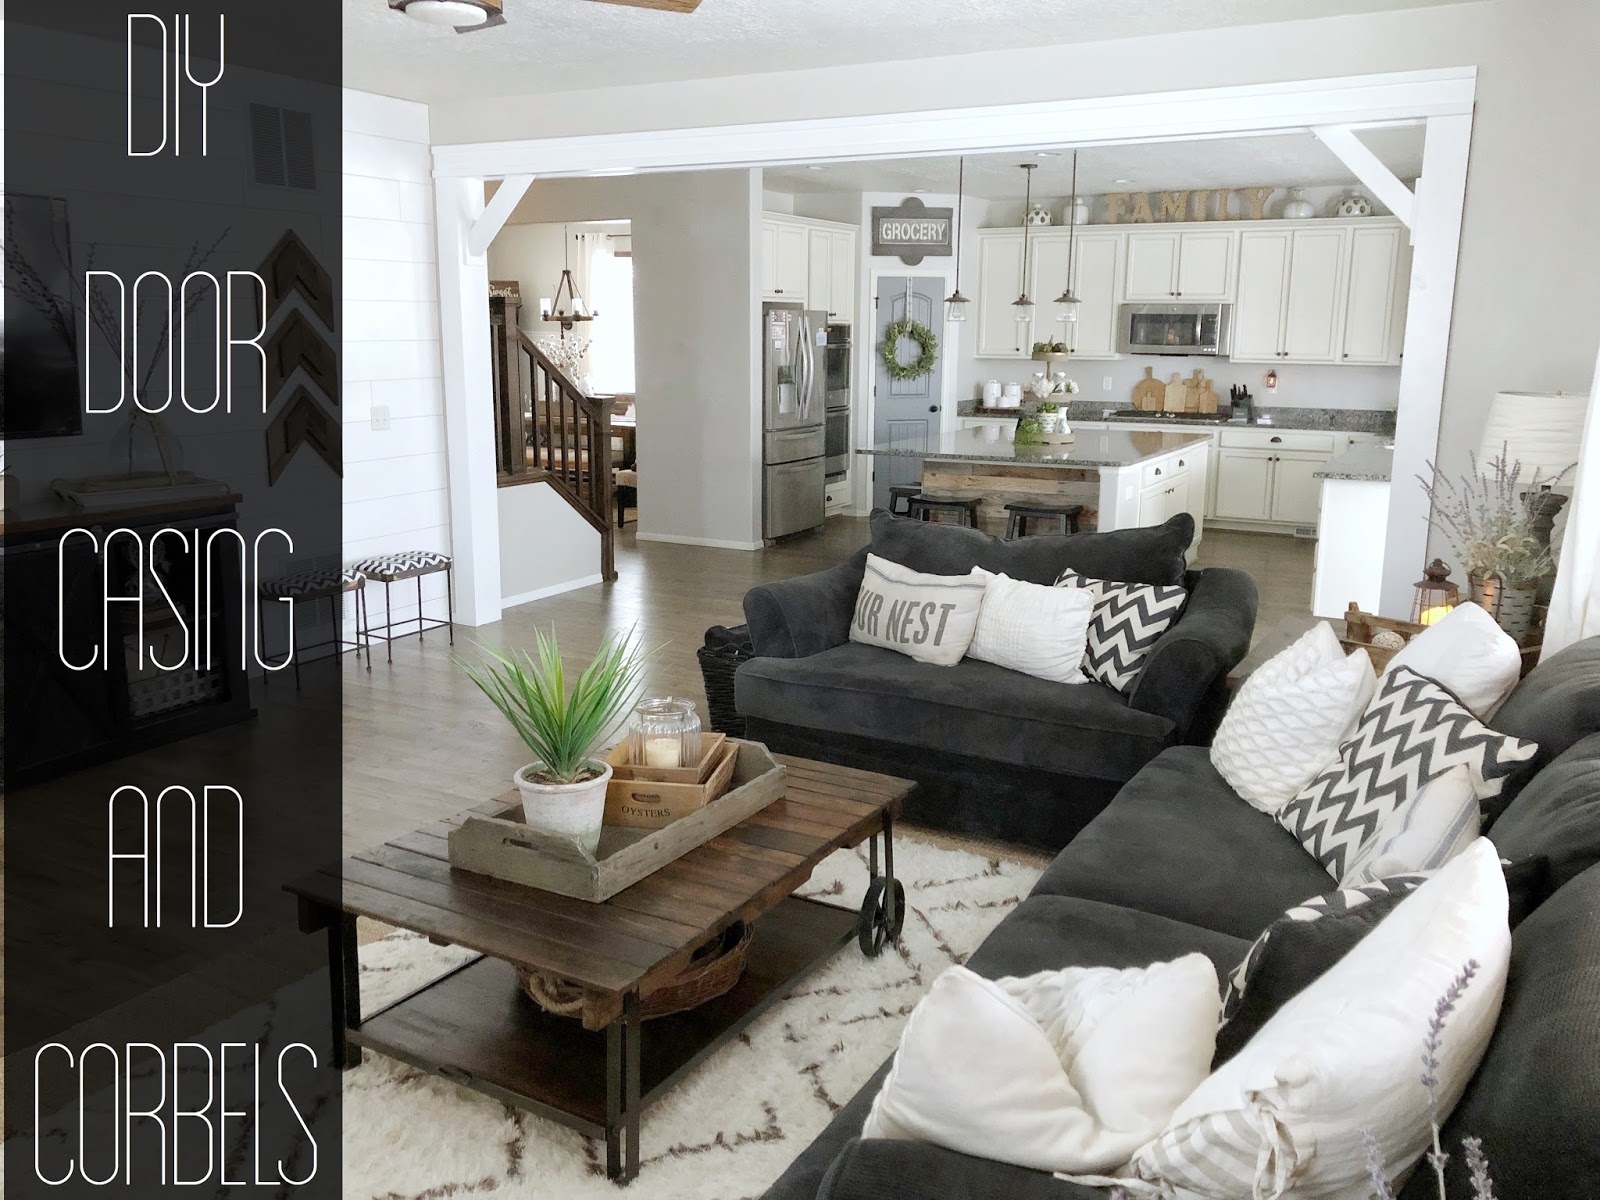
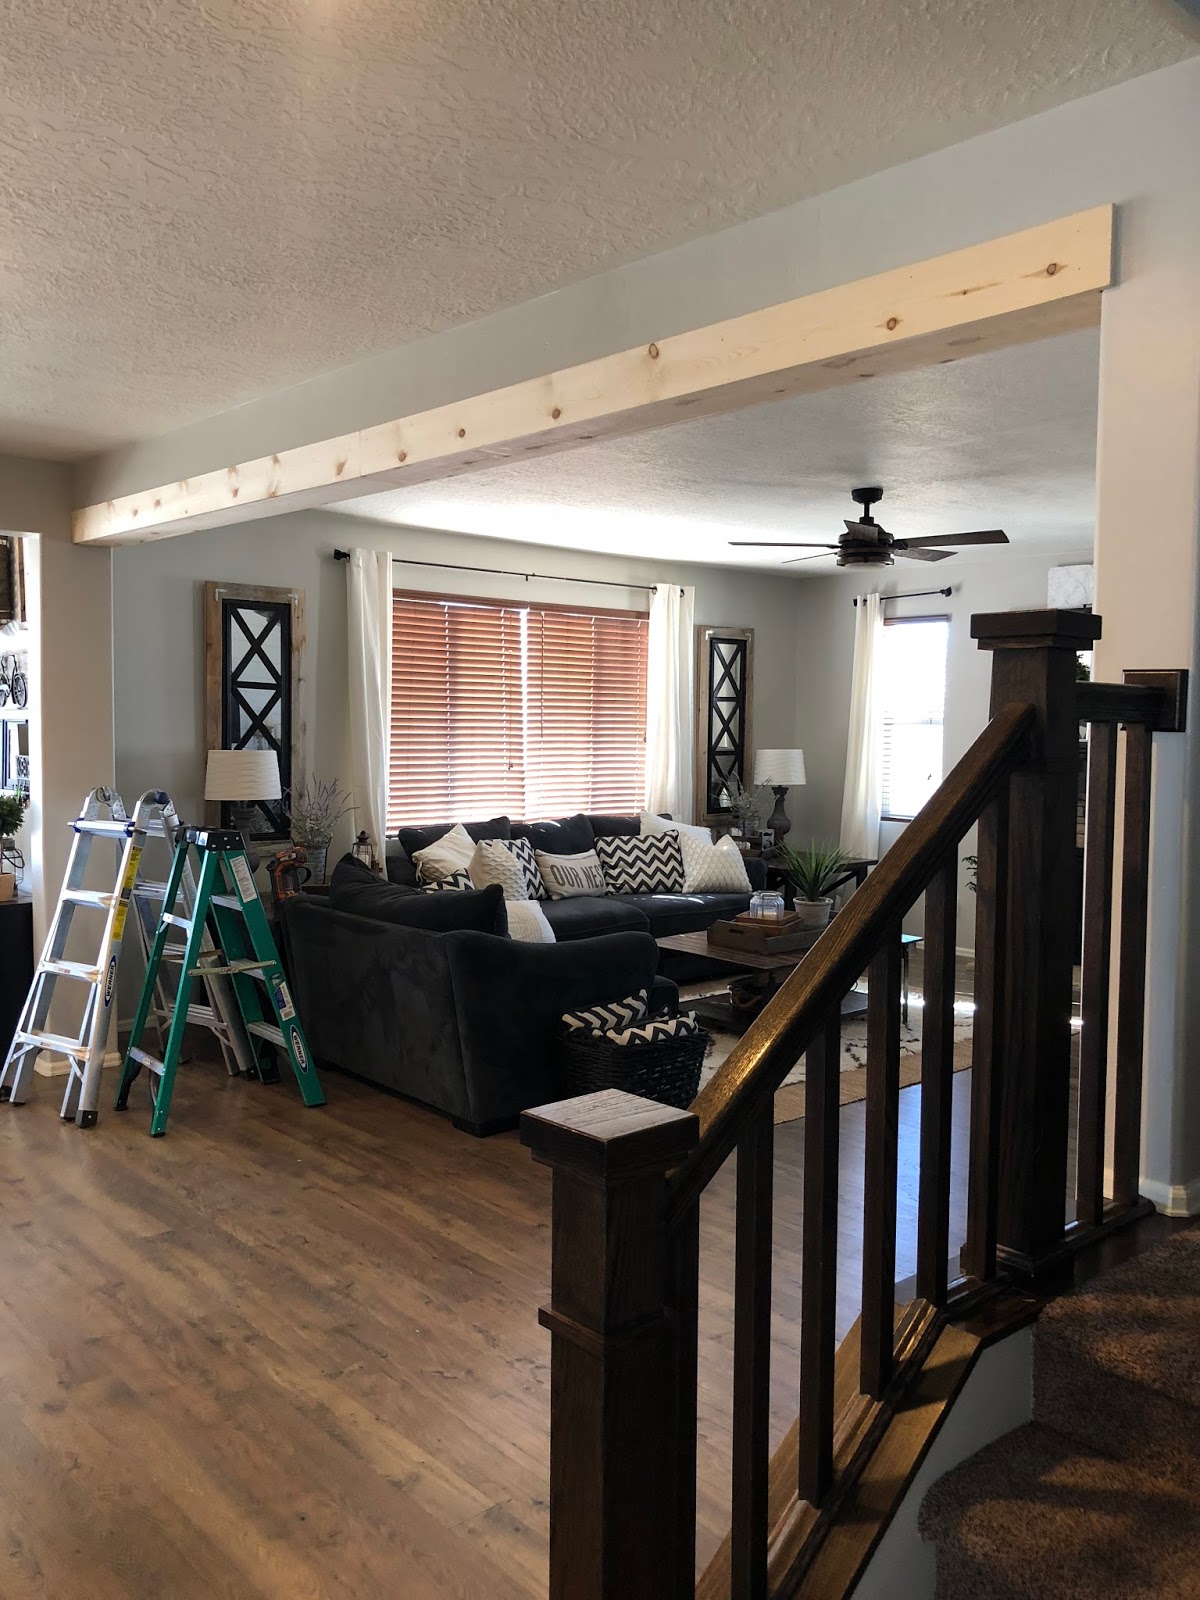
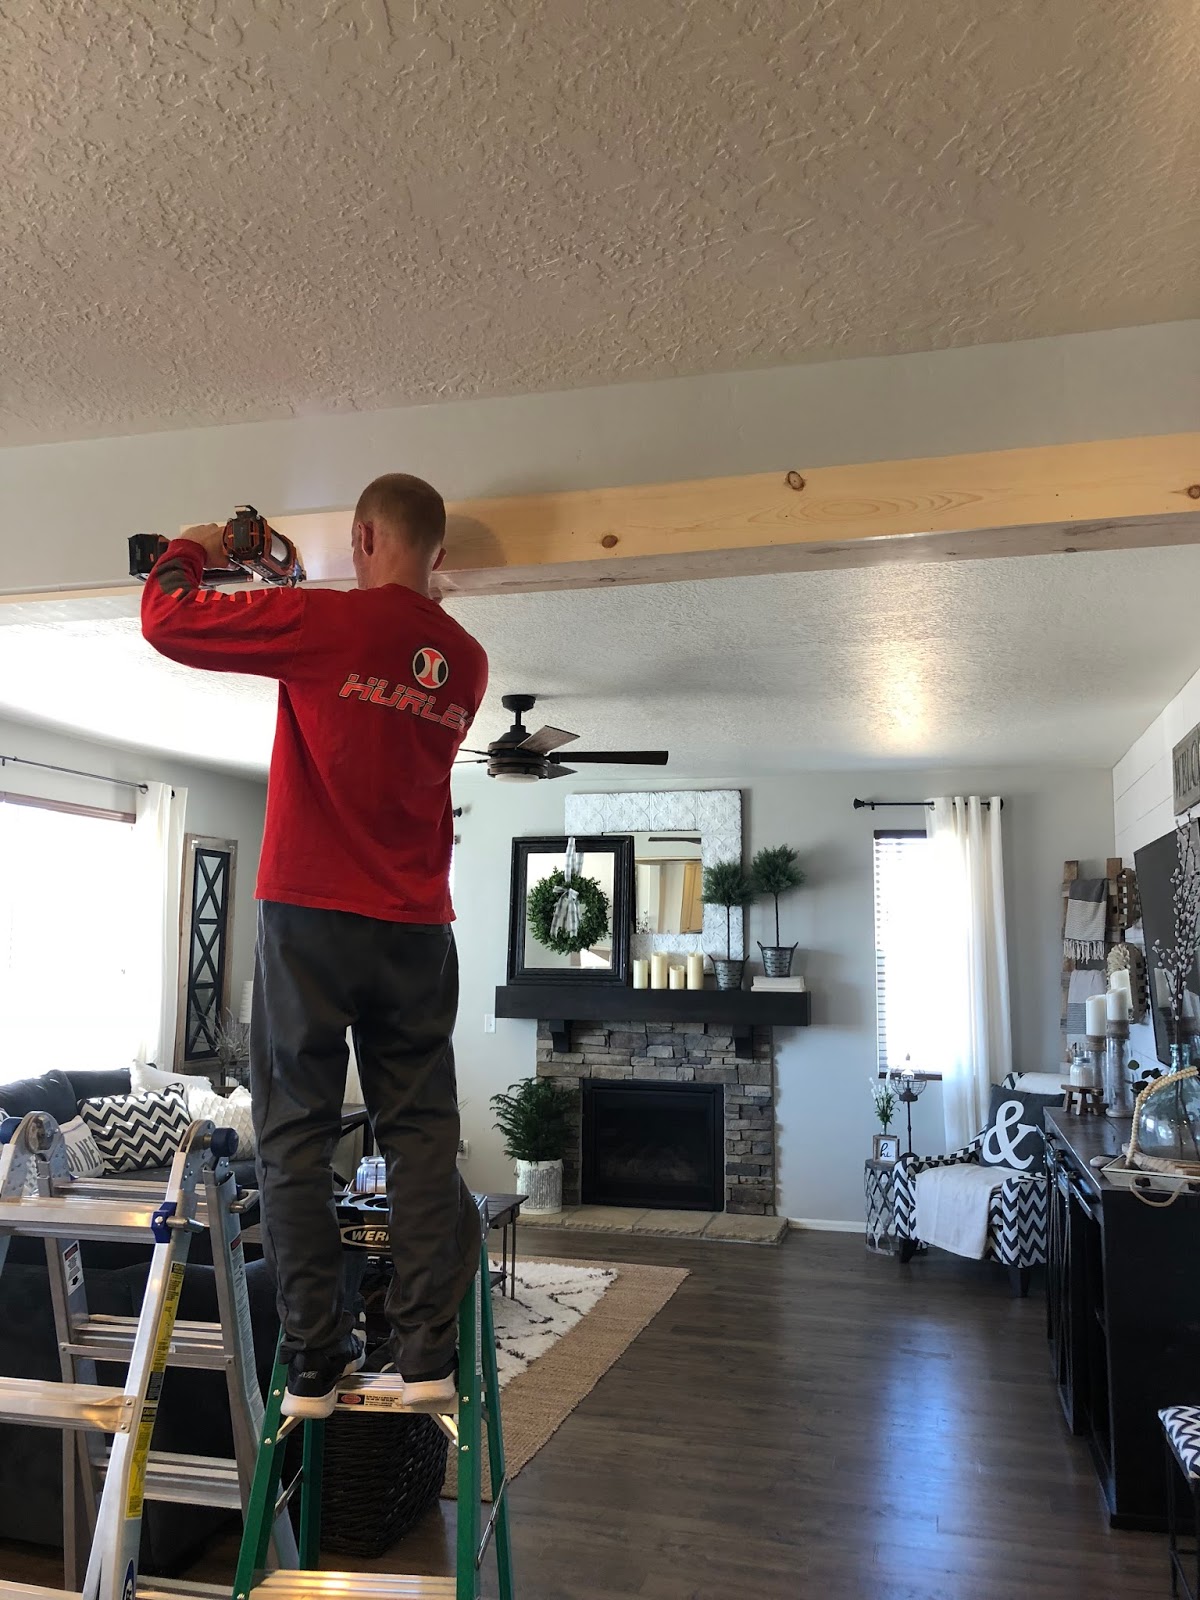
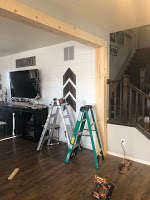
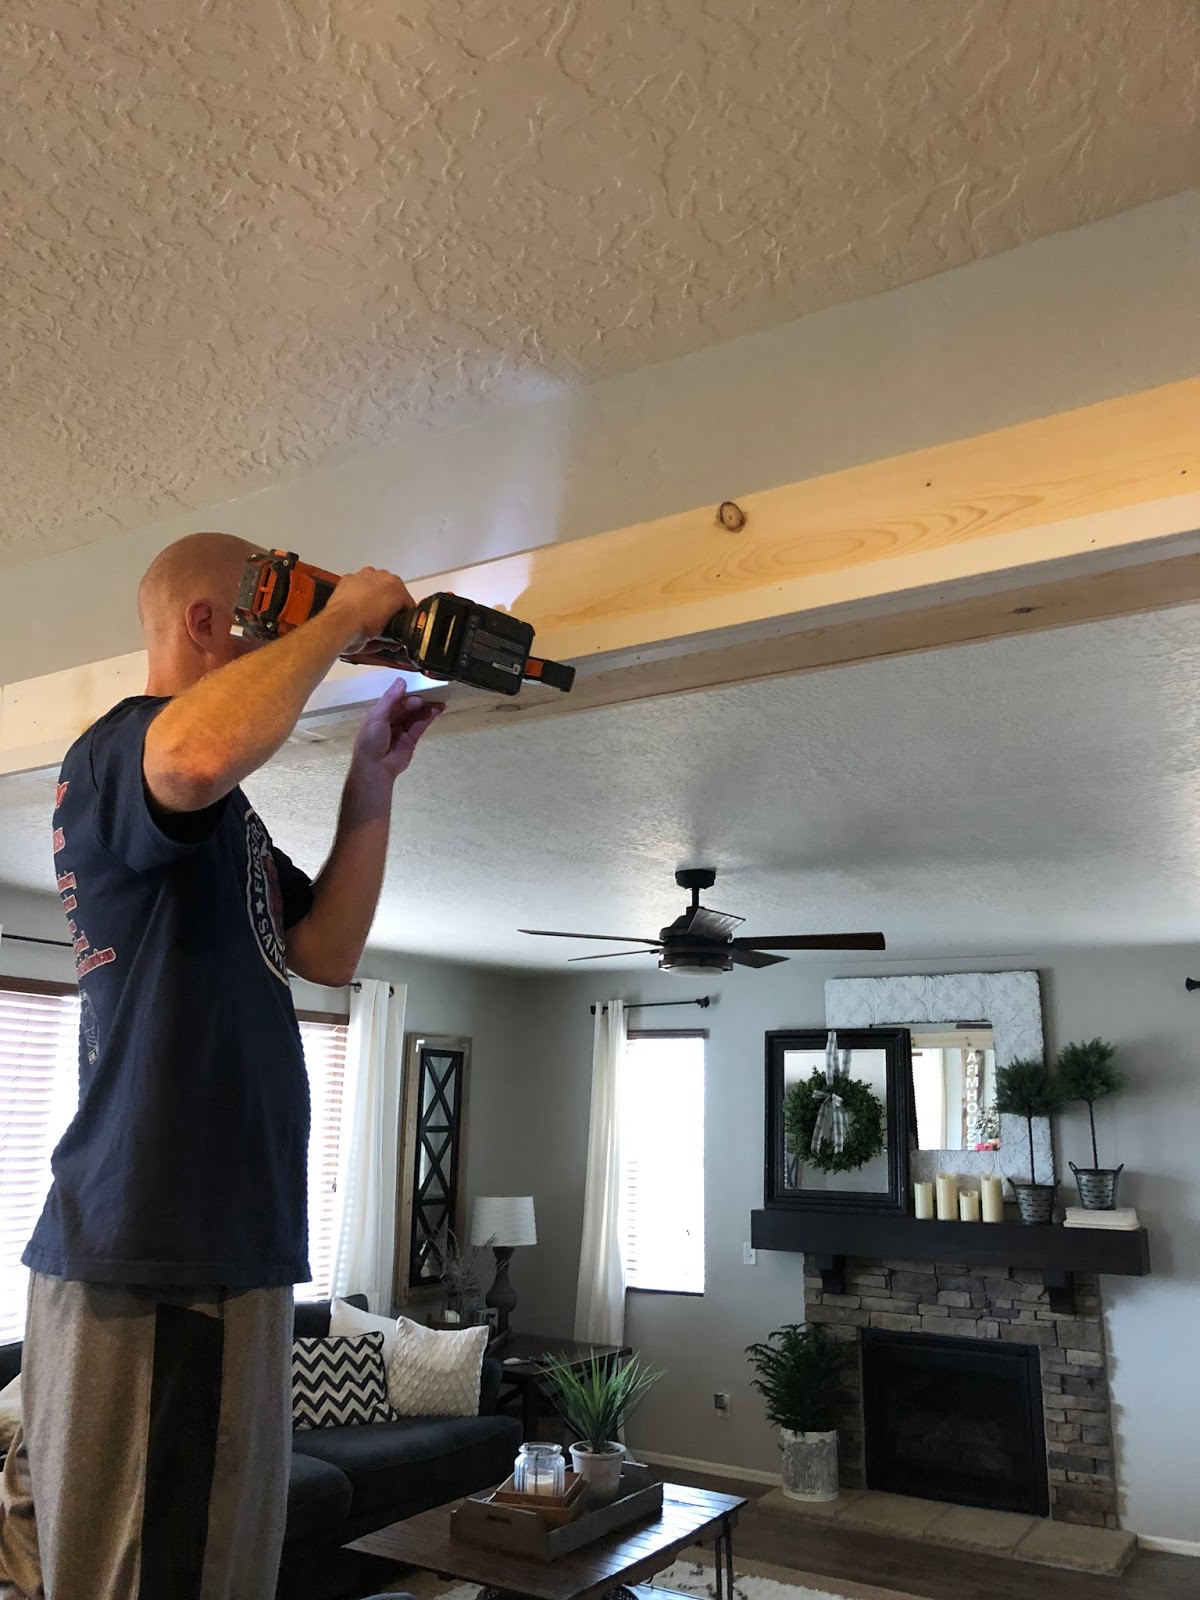
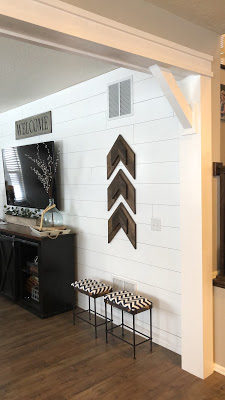
If you follow us on Instagram then I’m sure you saw our project this weekend that I shared through my stories. I’m absolutely in love with how it turned out – it looks like it was always supposed to be there. When we built our home we always felt like something was missing, something to make our home feel more like a custom home and less of a track house. We thought about putting beams in our living room and actually planned on do that, until I came up with this idea. So I explained to my husband the picture I had in my head and he ran with it, figuring out how to make it possible. I can design, but when it comes to construction, I’m at a loss……… so thank goodness for him! The project came together perfectly and I couldn’t be happier with the result and the way it has completely transformed the space! So as promised here is our tutorial for this project!!
(Since each home’s wall openings are different size, I cannot provide measurements, as you will have to do those based on your home and the entryway you want to do this in)
Supply List
- Miter Saw
- Table saw (optional)
- Brad Nail Gun and brad nails
- Tape Measure
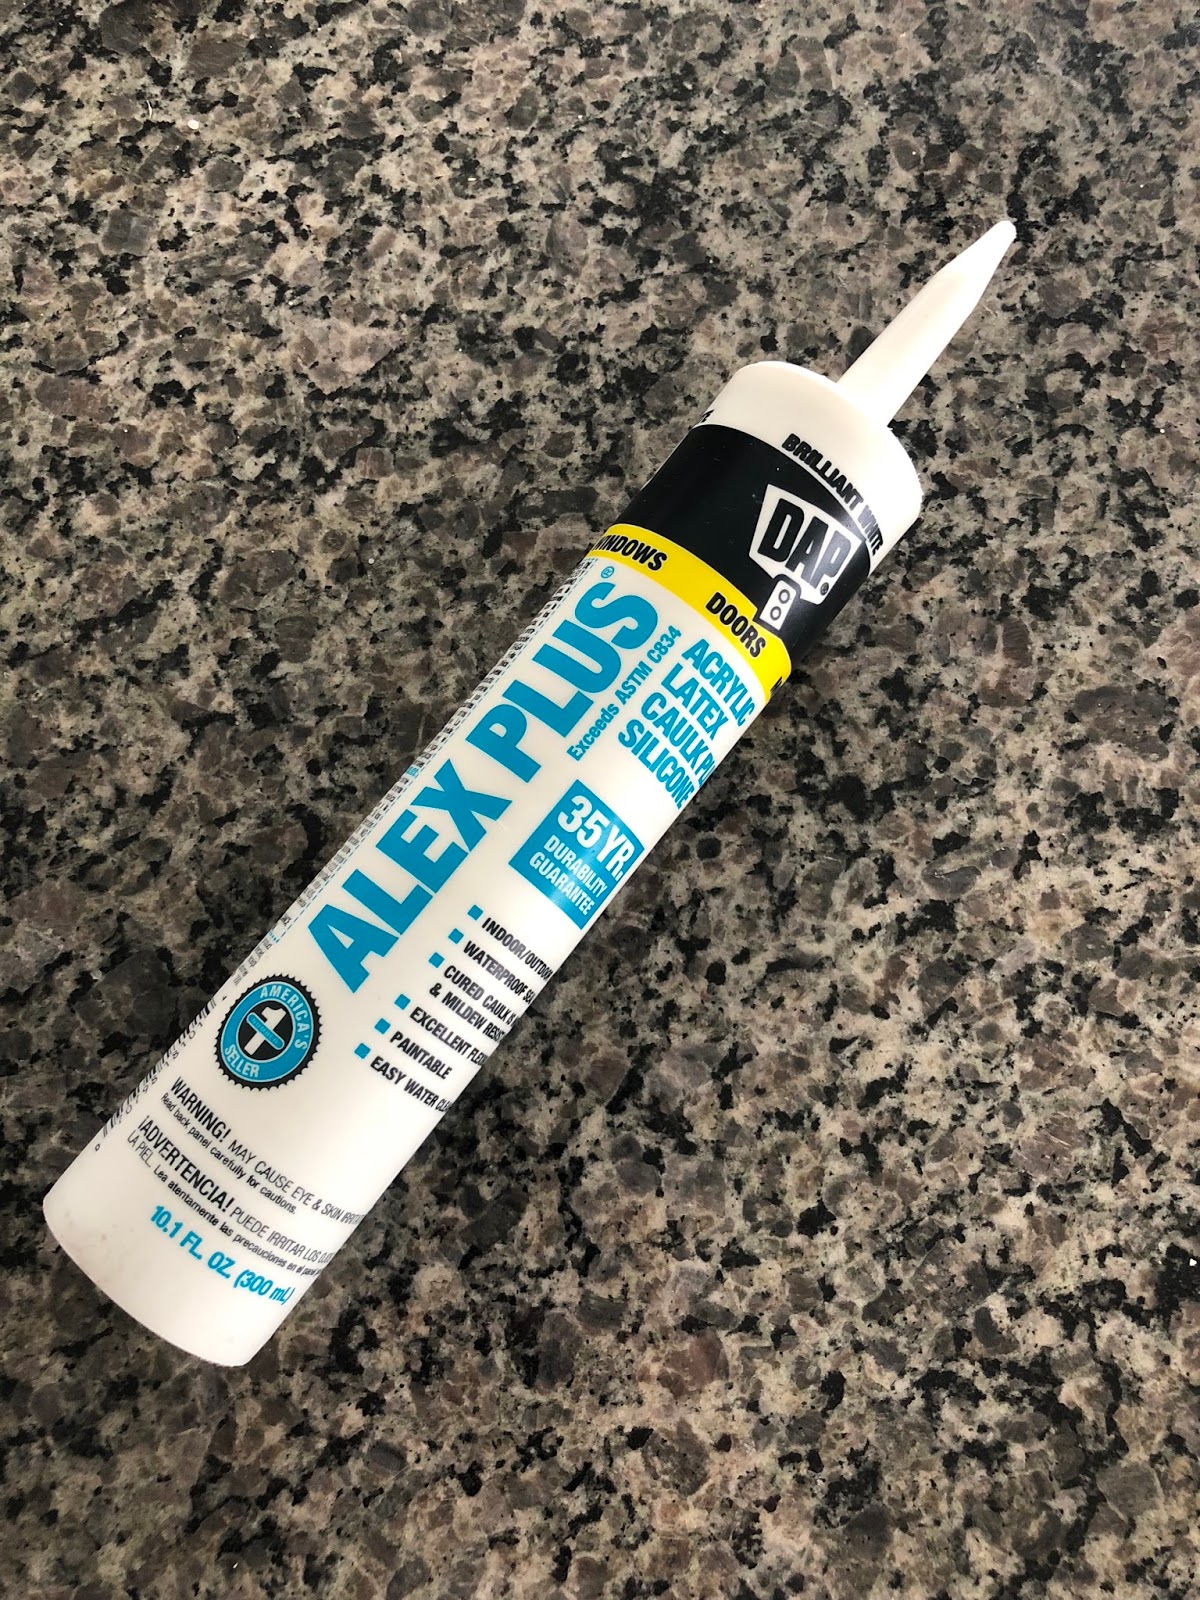
- Caulk Gun and caulk
- Multi Cutting Tool (to remove sections of base board)
- Pry Bar (Small)
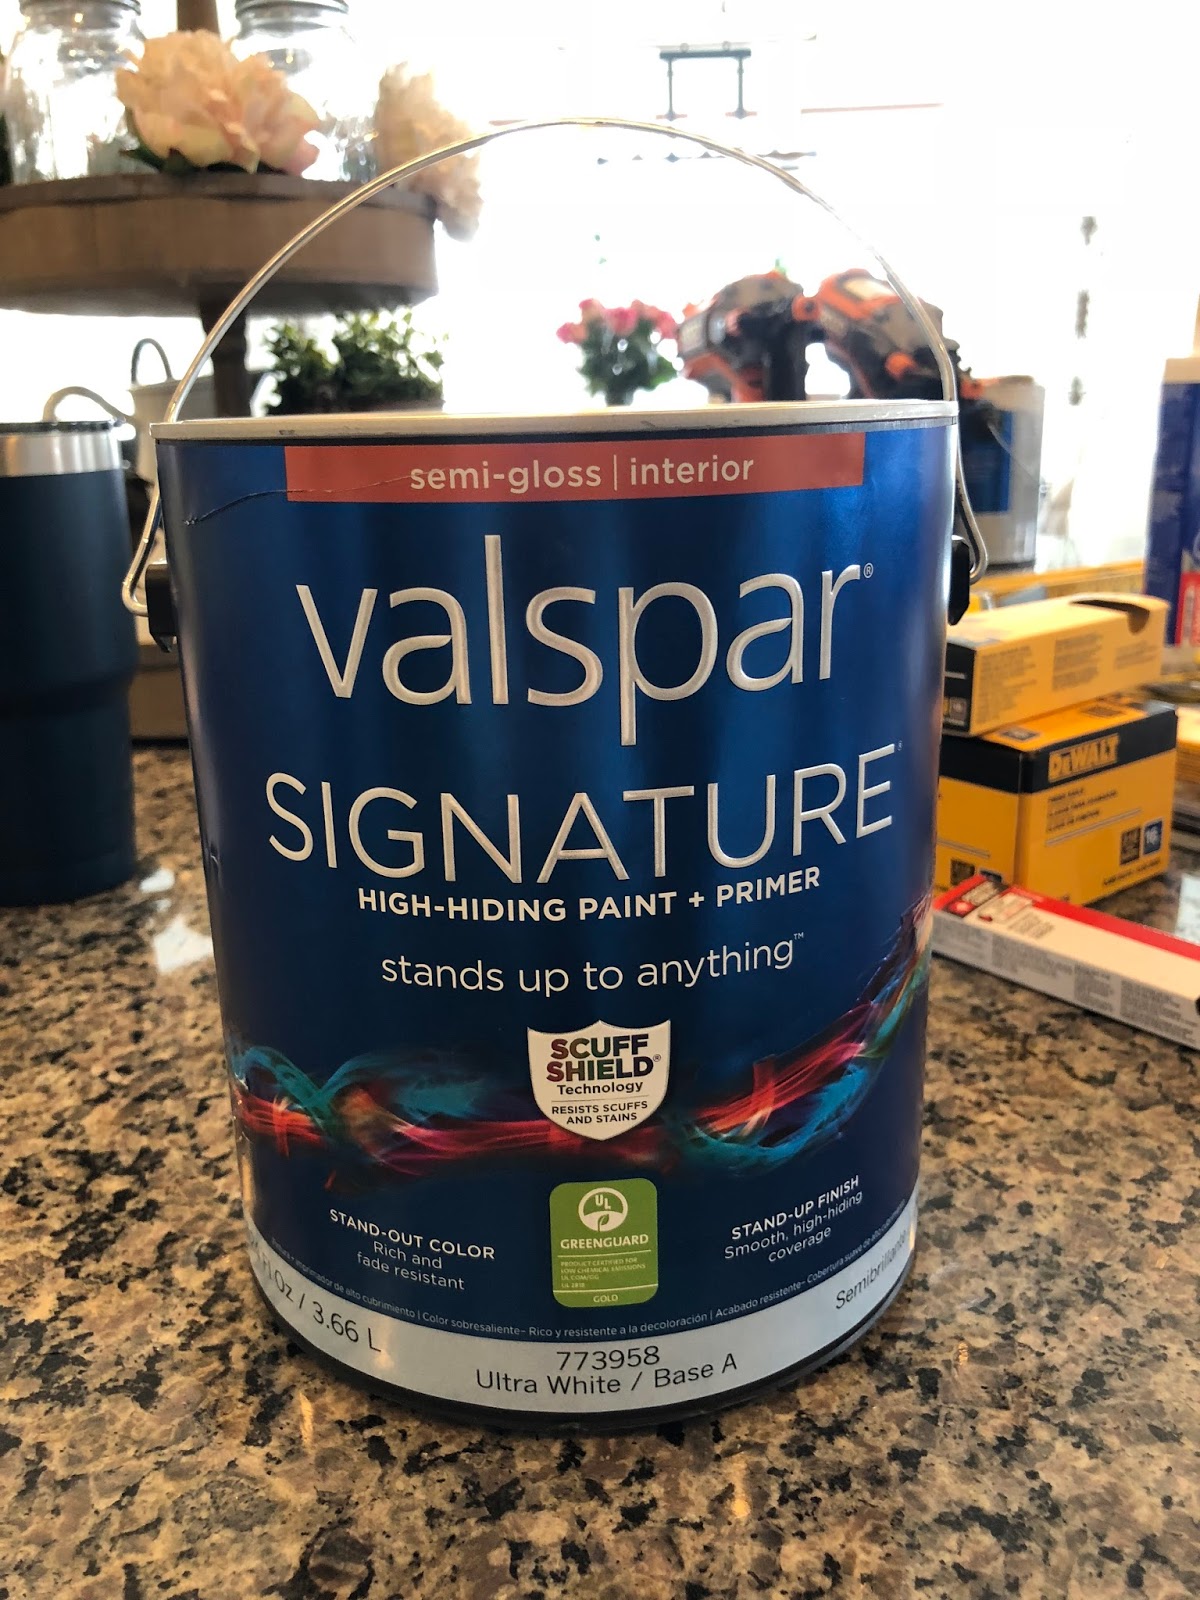
- Paint (we used a pure white paint by Valspar in a semi-gloss finish)
- Masking Tape
- Paint Brush, Short Paint Roller, Paint Tray
- Construction Adhesive
- 1″x 6″ Pine Boards (choose your length)
- 1″x 8″ Pine Boards (choose your length)
- 4″x 4″ Pine Board (this is to make the corbels so you just need 1)
- 1″x 2″ MDF Trim (this is for the trim on the top beam)
Step 1
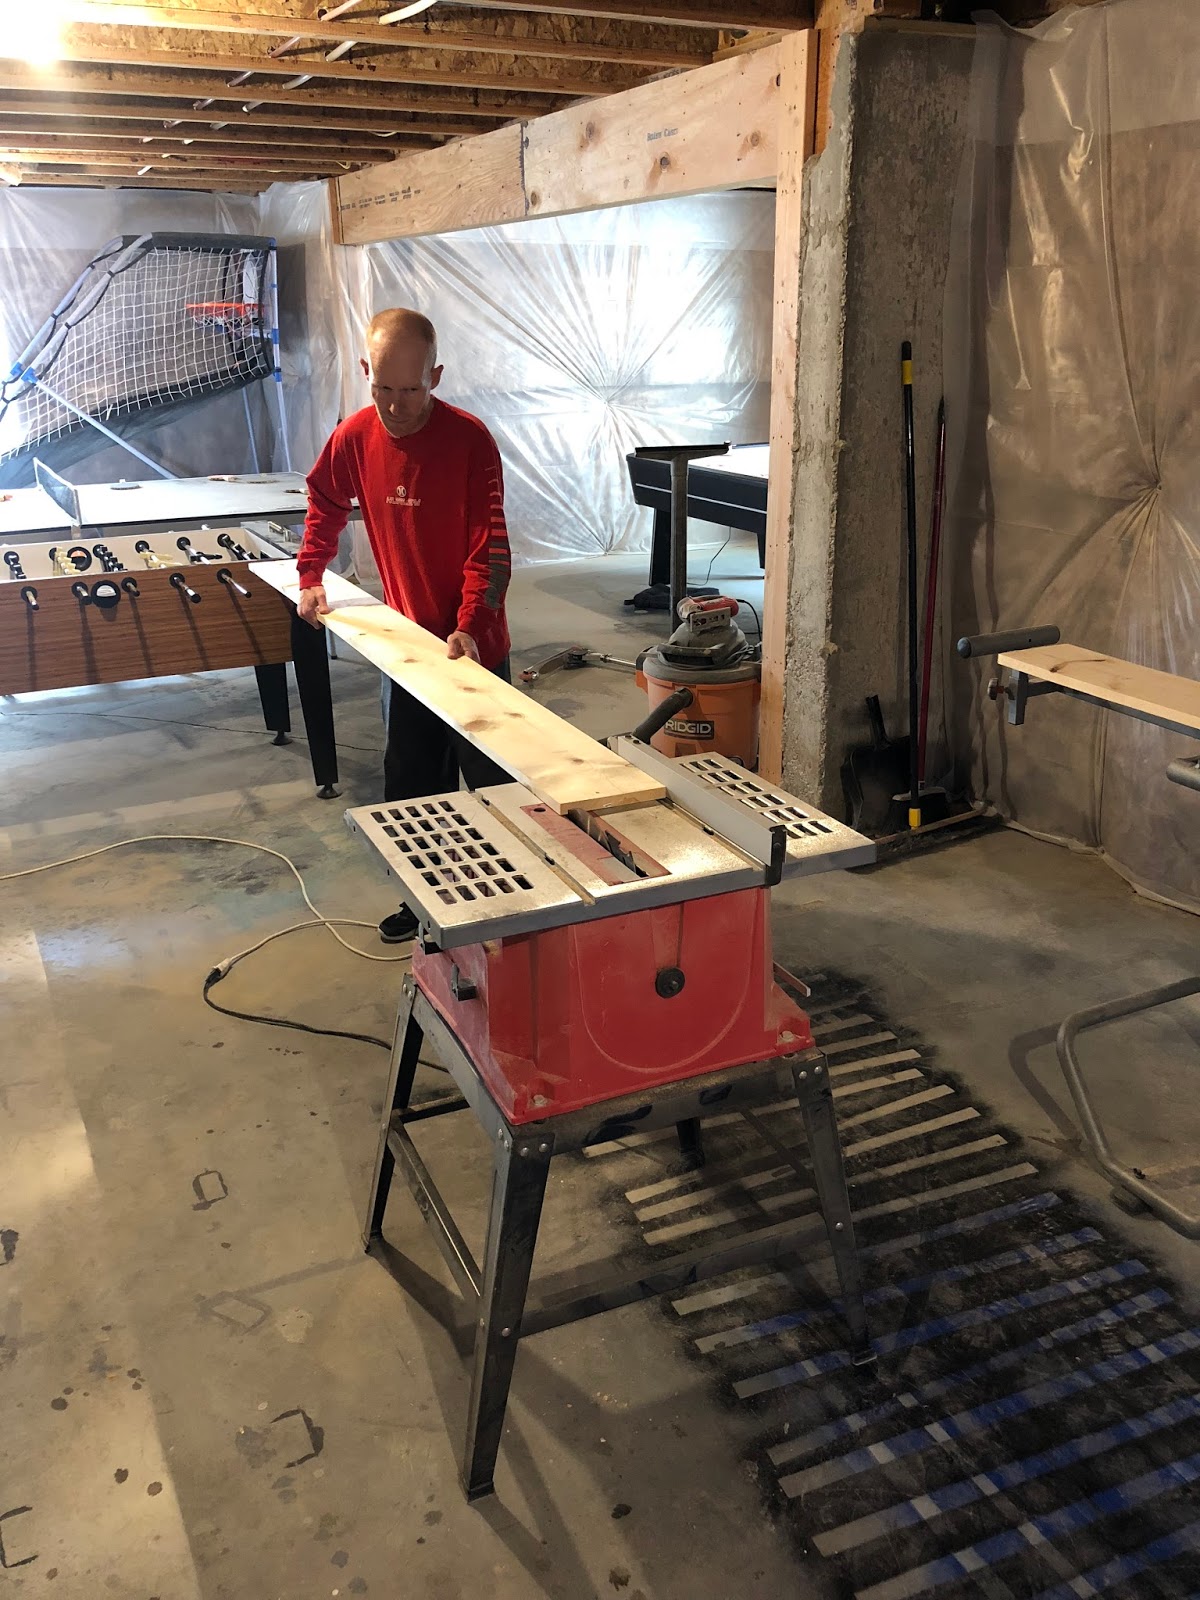
Before you start this project it’s important to get all your measurements so you know how much wood to buy. You will be making 3 hollow 3 sided beams, one on the top and one on each side. Our space was quite large (16′ wide) so we ended up needing eight 1″x 6″ boards at 8′ and five 1″x 8″ boards at 8′ for our beams, and twelve 1″x 2″ MDF trim pieces for the trim work.
Step 2
The first thing you are going to do is cut your boards to build your top beam. We decided to cut the width down a bit so we ripped our boards first and then cut them to the right length, (this step is optional and just personal preference)
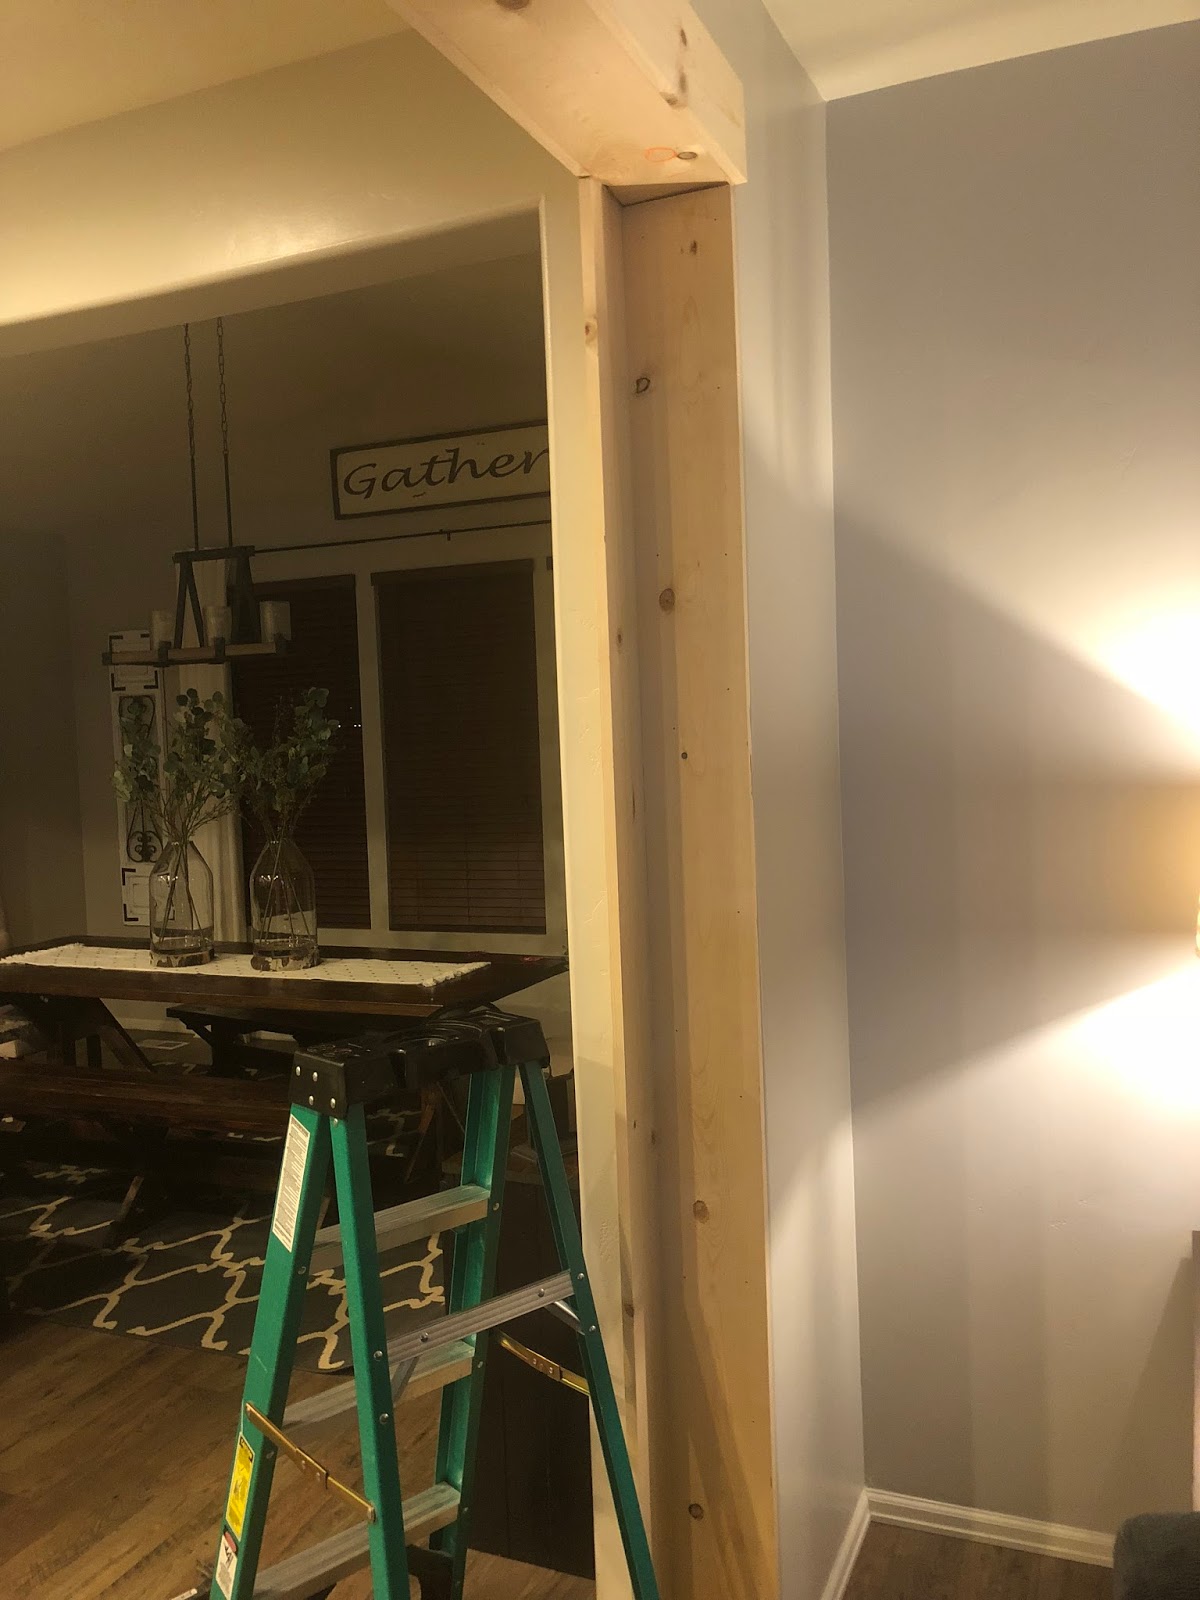
Step 3
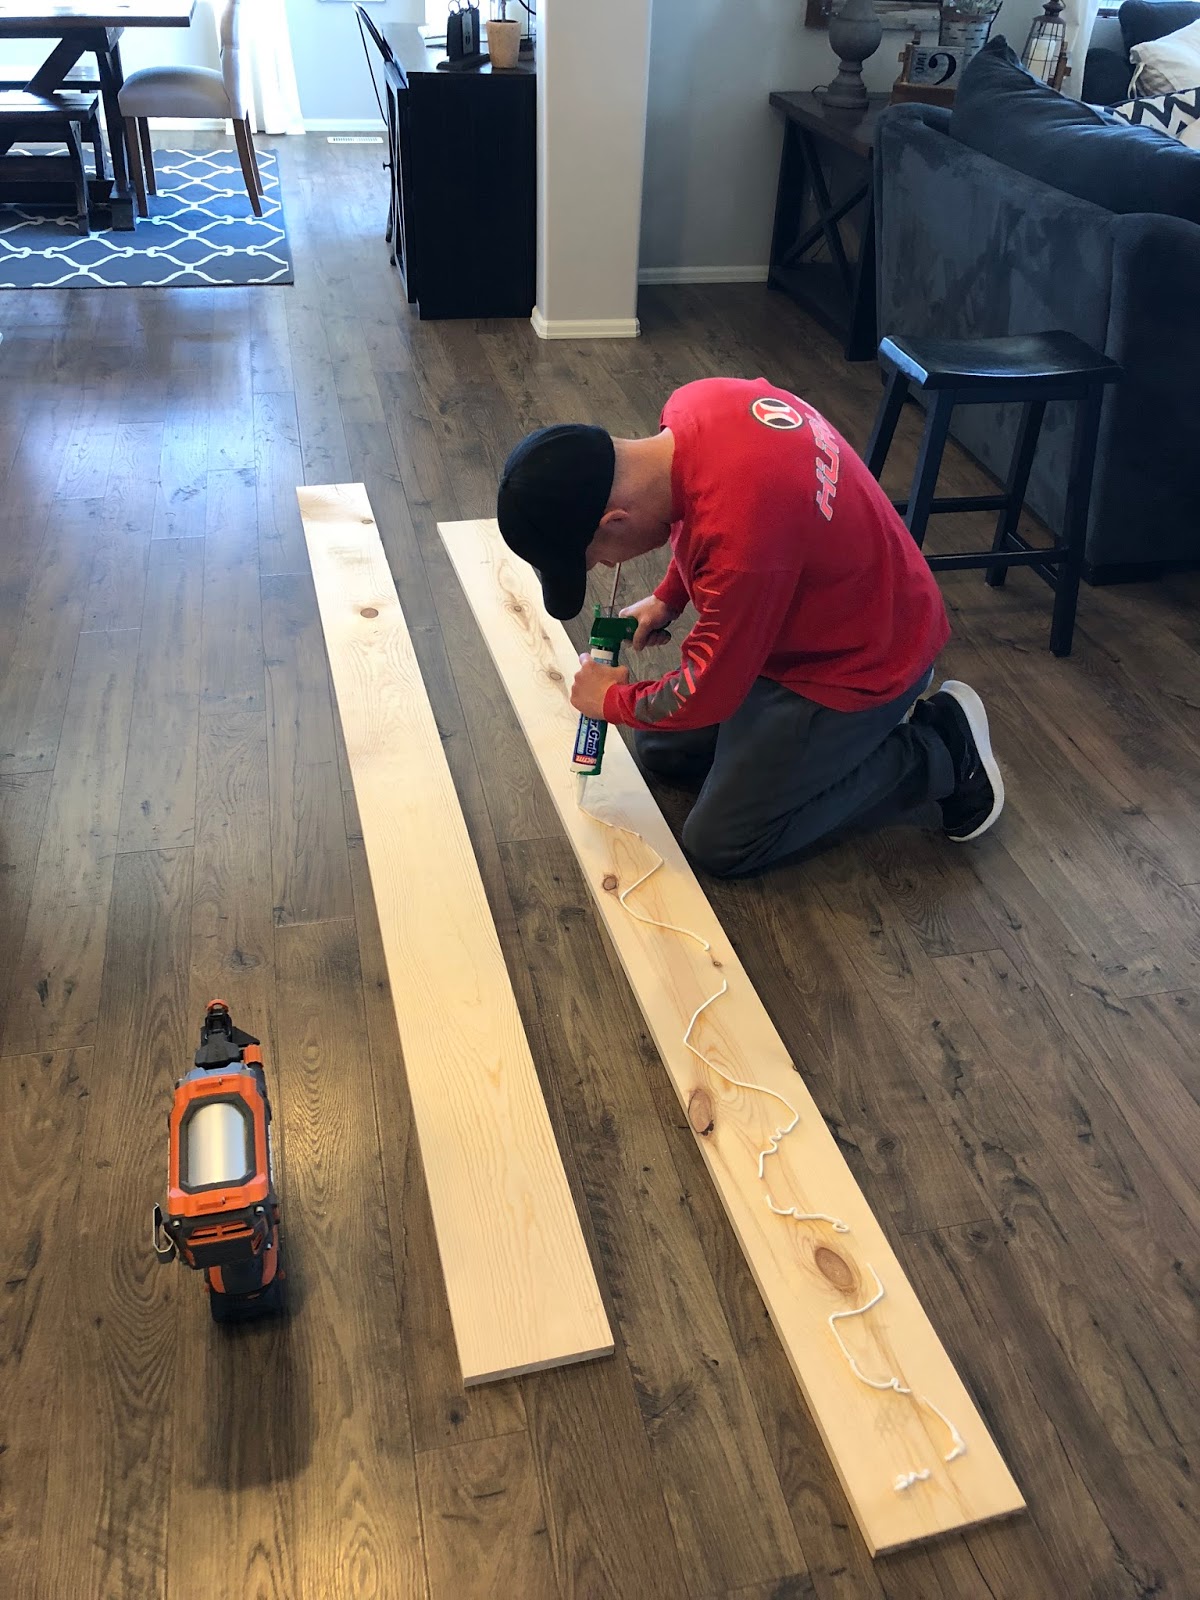
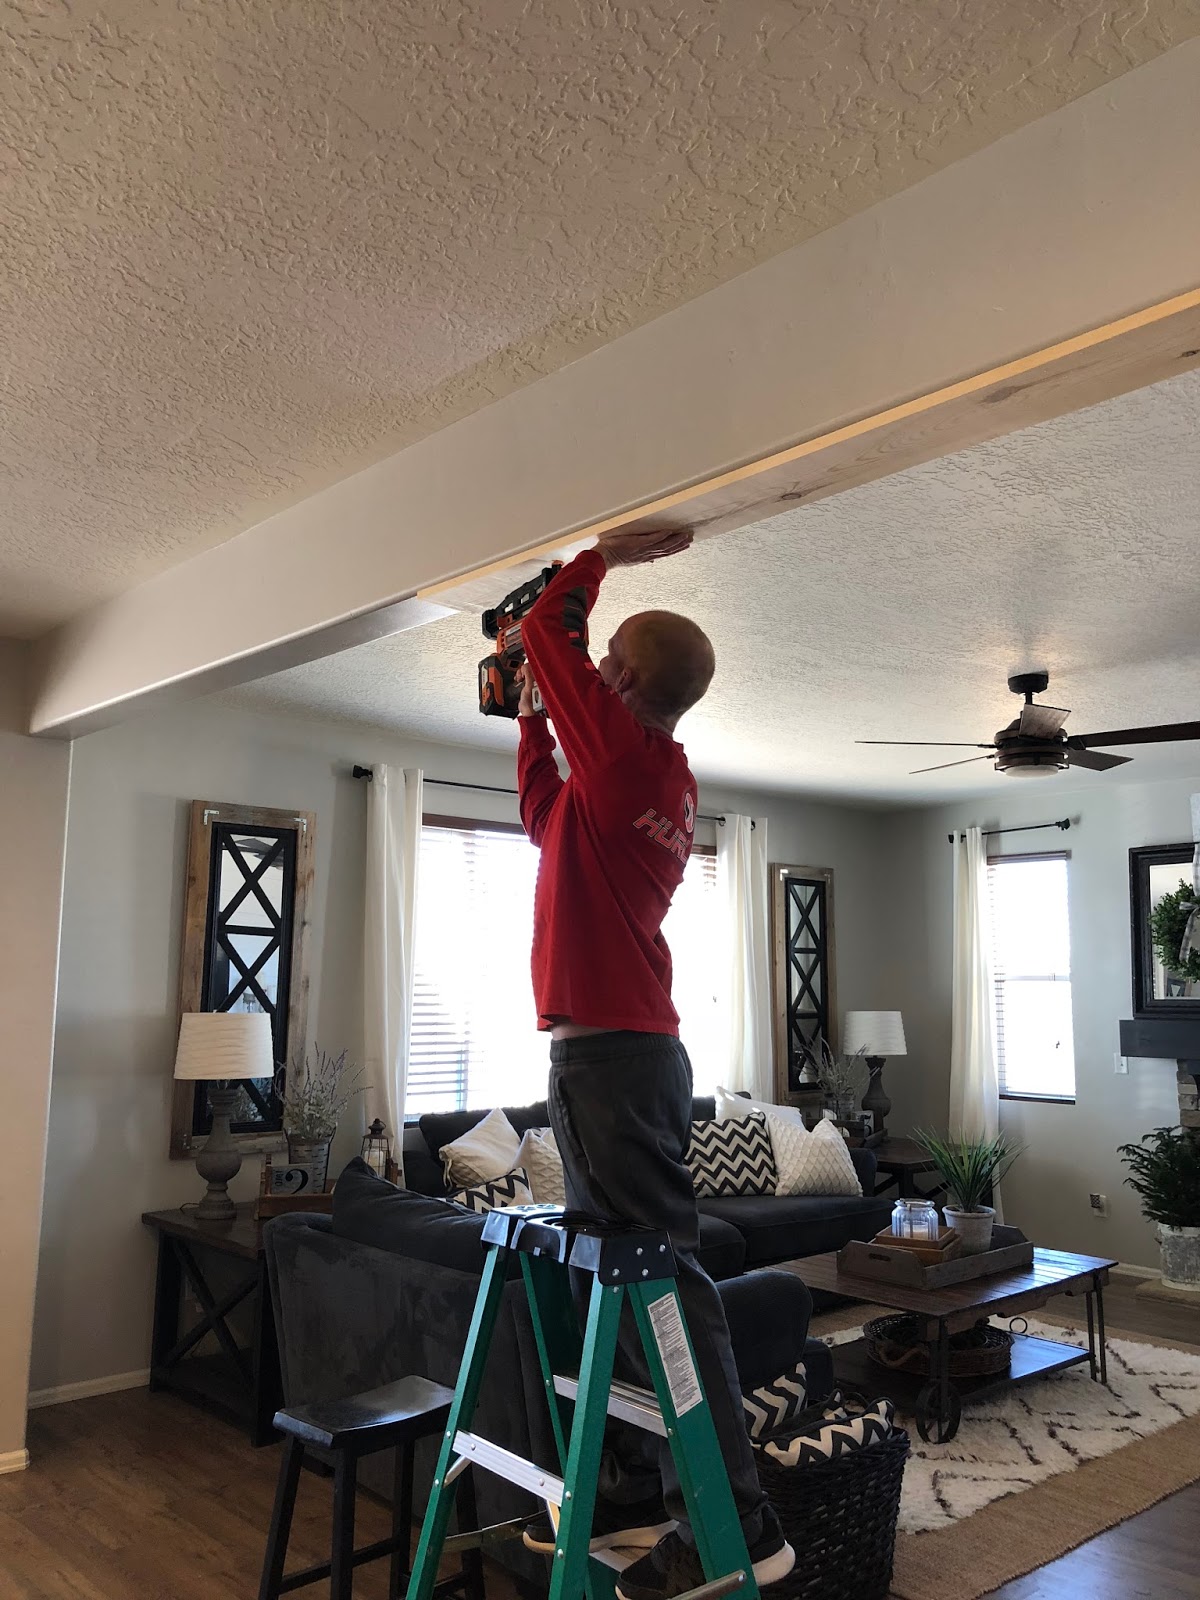
Now that your boards are cut you can build the top beam. To do this you are going to place a 1″x 8″ board on the underneath of the header then a 1″x 6″ board on each side, essentially wrapping that section on wall to look like a beam. You are going to want to put some construction adhesive on the back of each board then place it on the the wall and secure it with nails.
Step 4
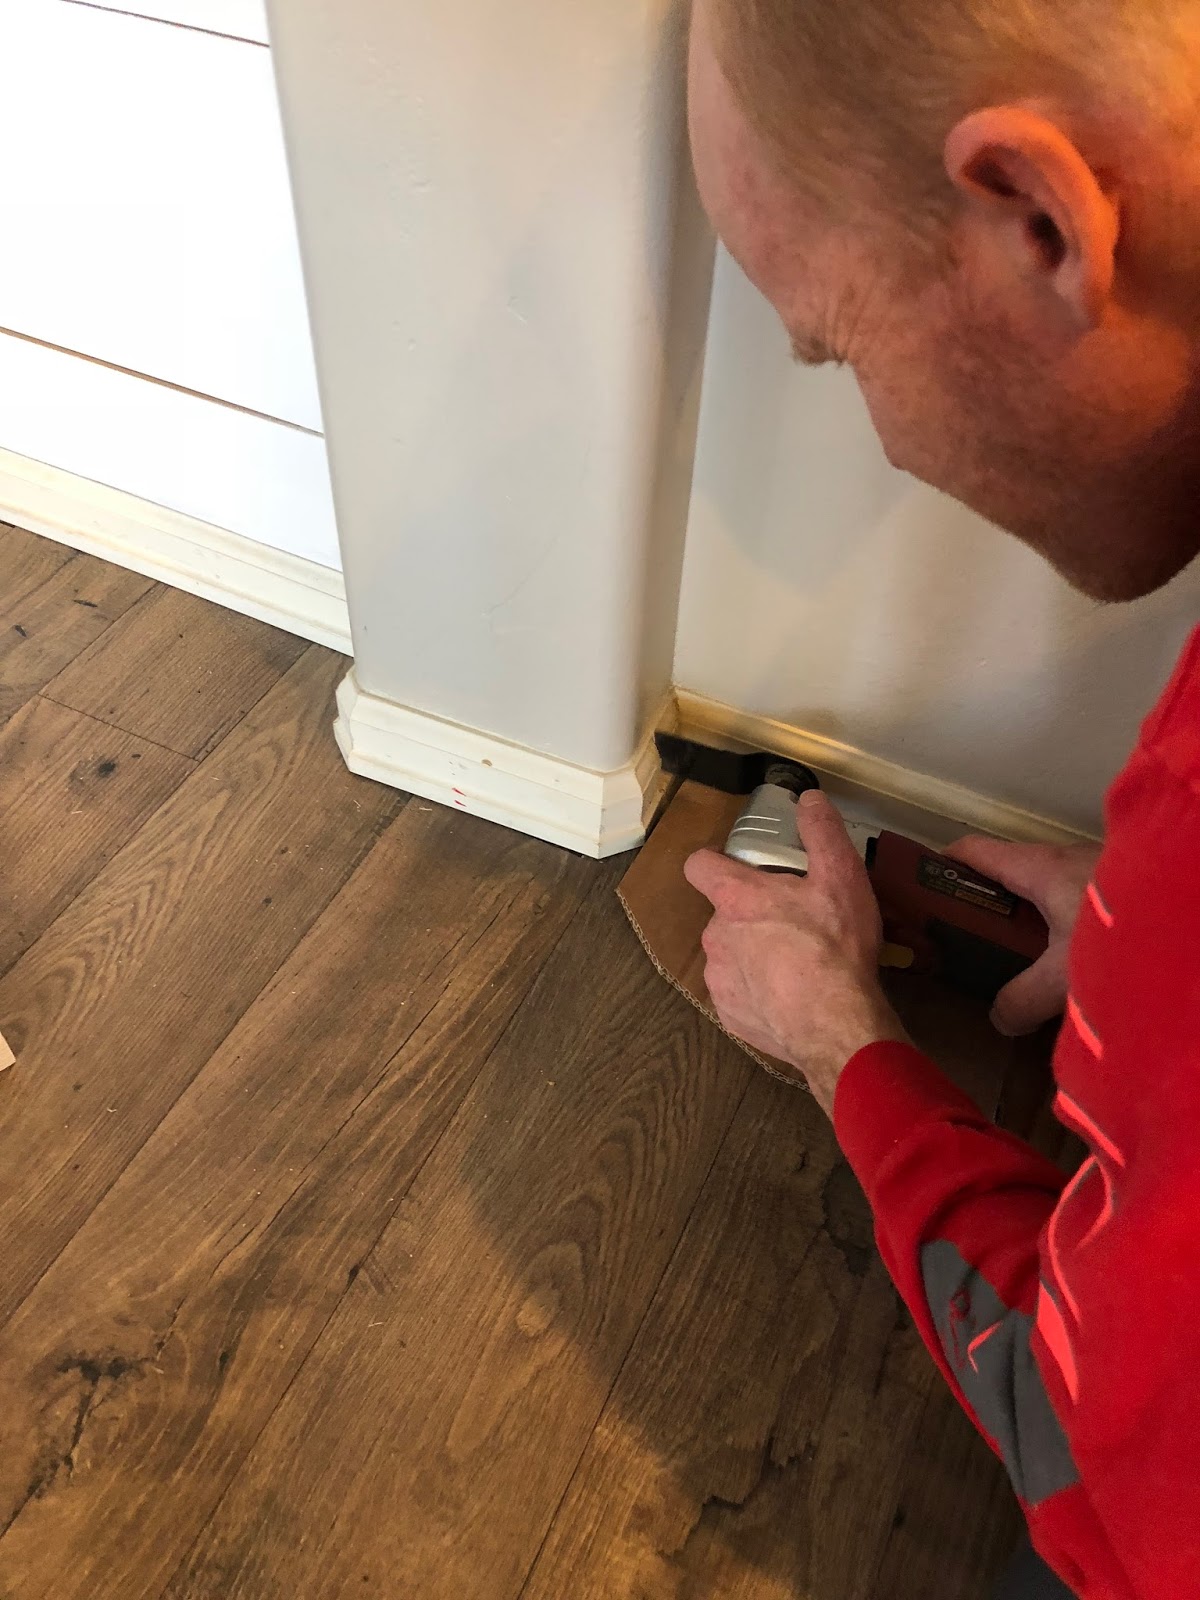
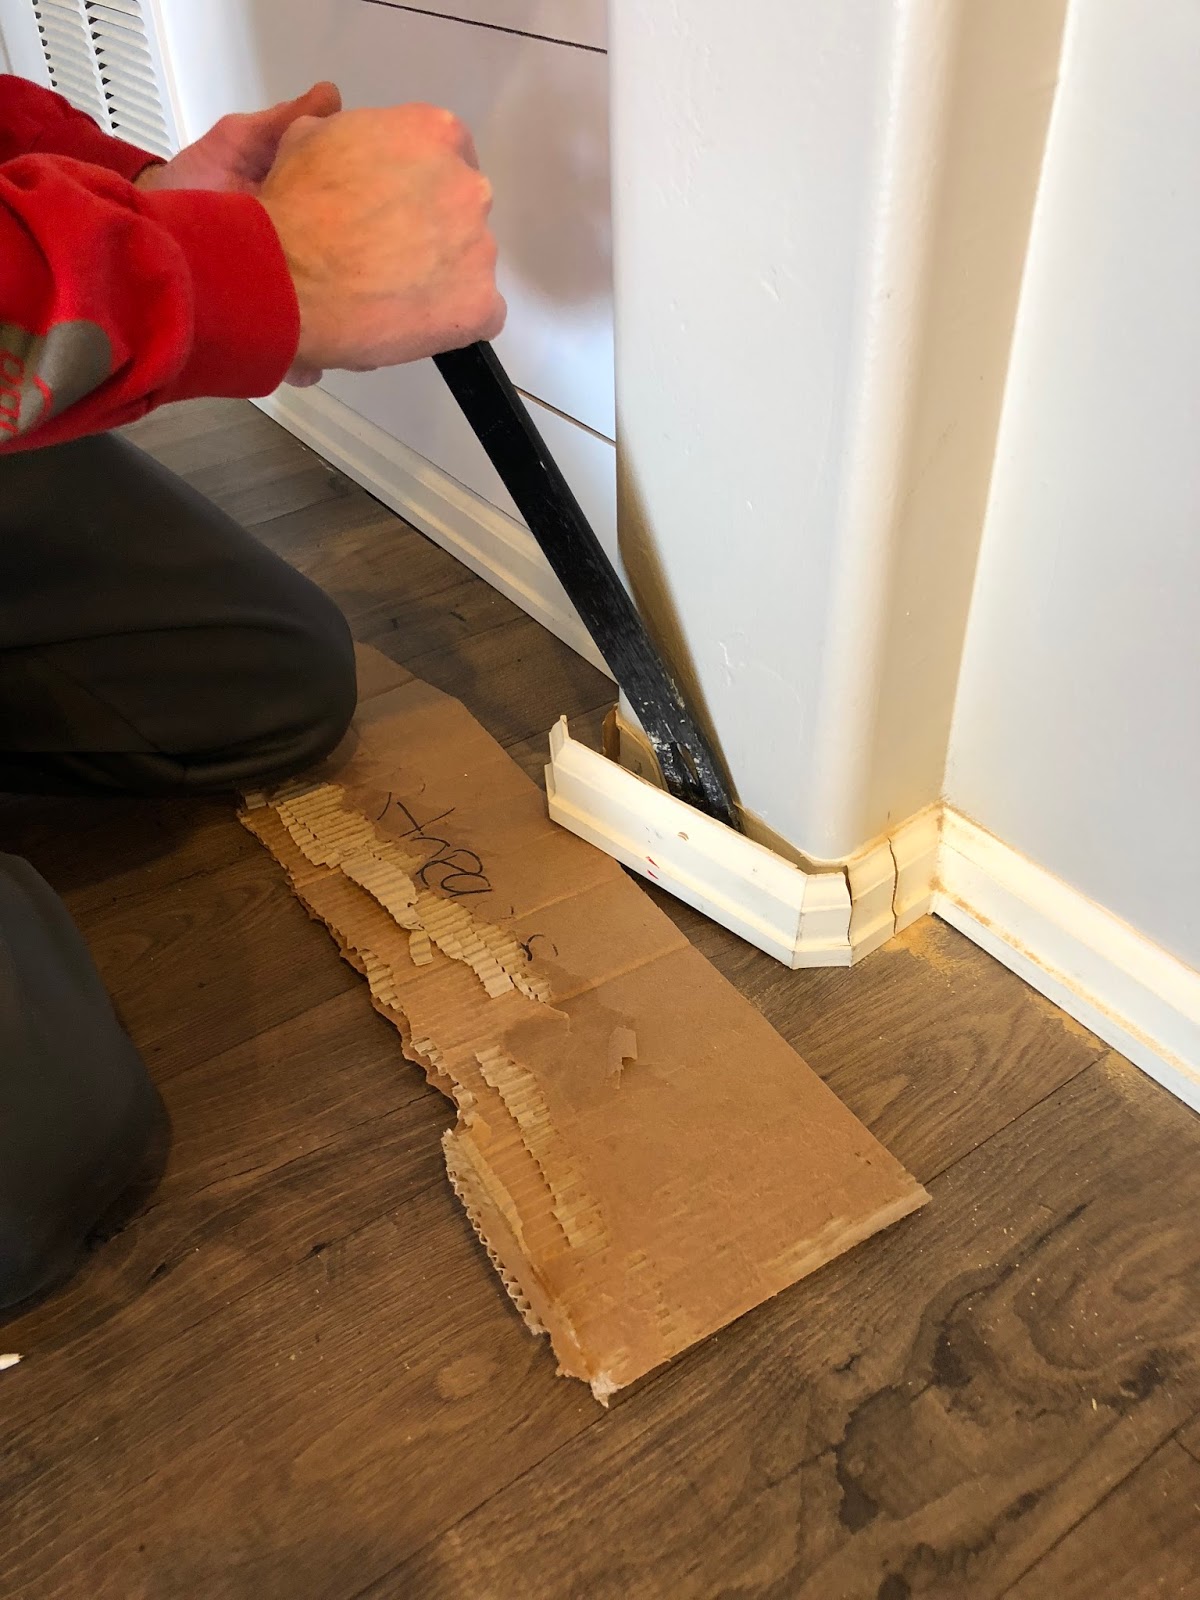
Before you can build your side beam you are going to want to cut out any base board you may have on your wall so that the beams can sit flat against the wall. This is where you are going to use your cutting tool to carefully cut the sides and then the pry bar to remove the piece of base board.
Step 5
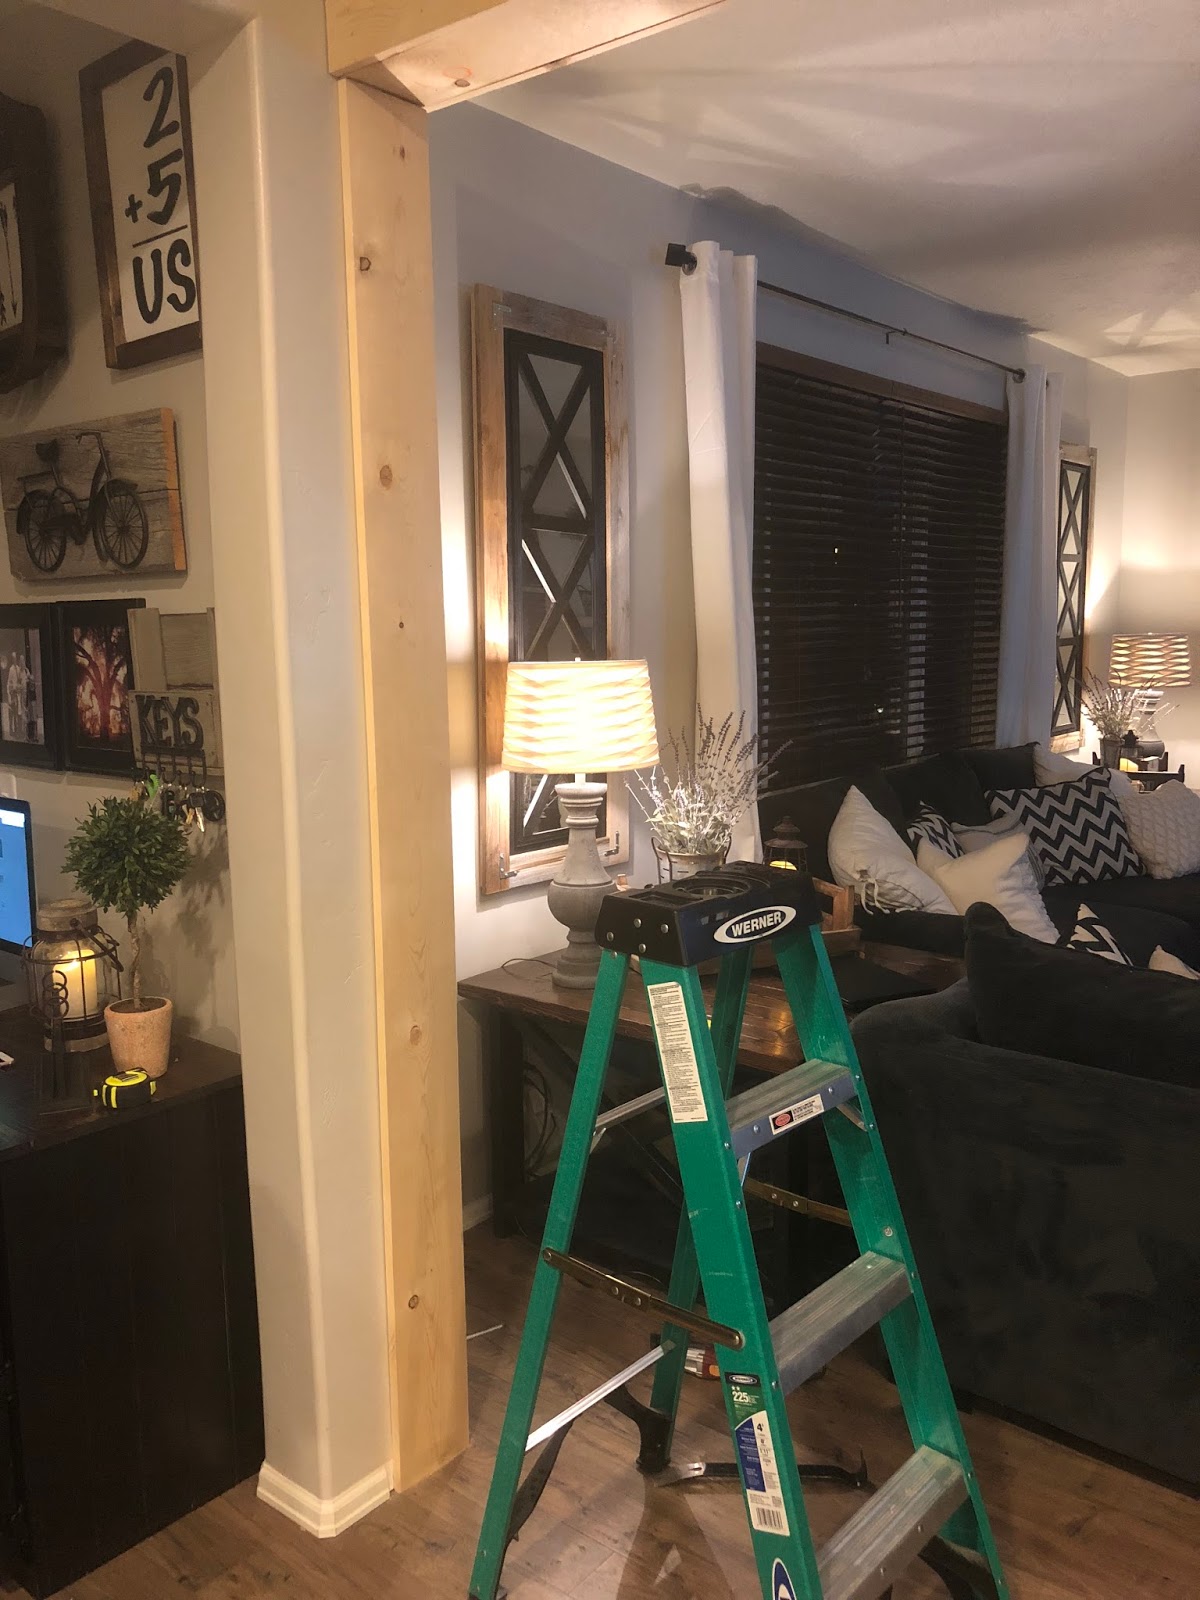
Next step is to build the beams on each side. For our space on one side we were able to attach the beam to the side of the wall, but on the other side we had to build a cleat to attach the wood to since the wall was flat. Depending on your walls you can attach you side beams either way. For our first side we built a hollow 3 sided beam that we attached to the wall.

Step 6
For the next side beam we attached it to the wall using a cleat. You are going to want to attach your cleat (board) to the flat wall first, then build your hollow beam around your cleat. Use wood glue where your boards touch each other, and construction adhesive where your boards touch the wall. Once your cleat is in place you will attach the other sides of the beam to the wall and secure with brad nails, making sure to fire the nails into the wood cleat.
Step 7
Now that the main structure is built it’s time to add the trim. Use the 1″x 2″ MDF boards to trim out the top beam. Start by attaching a piece to the bottom then another piece to the sides, making sure to overlap the side of the MDF you just attached to the bottom of the beam, essentially forming an L shape on the bottom of your top beam. Then attach a piece of the MDF to the top side of the beam and repeat for the other side of the beam. Secure with wood glue and nails.

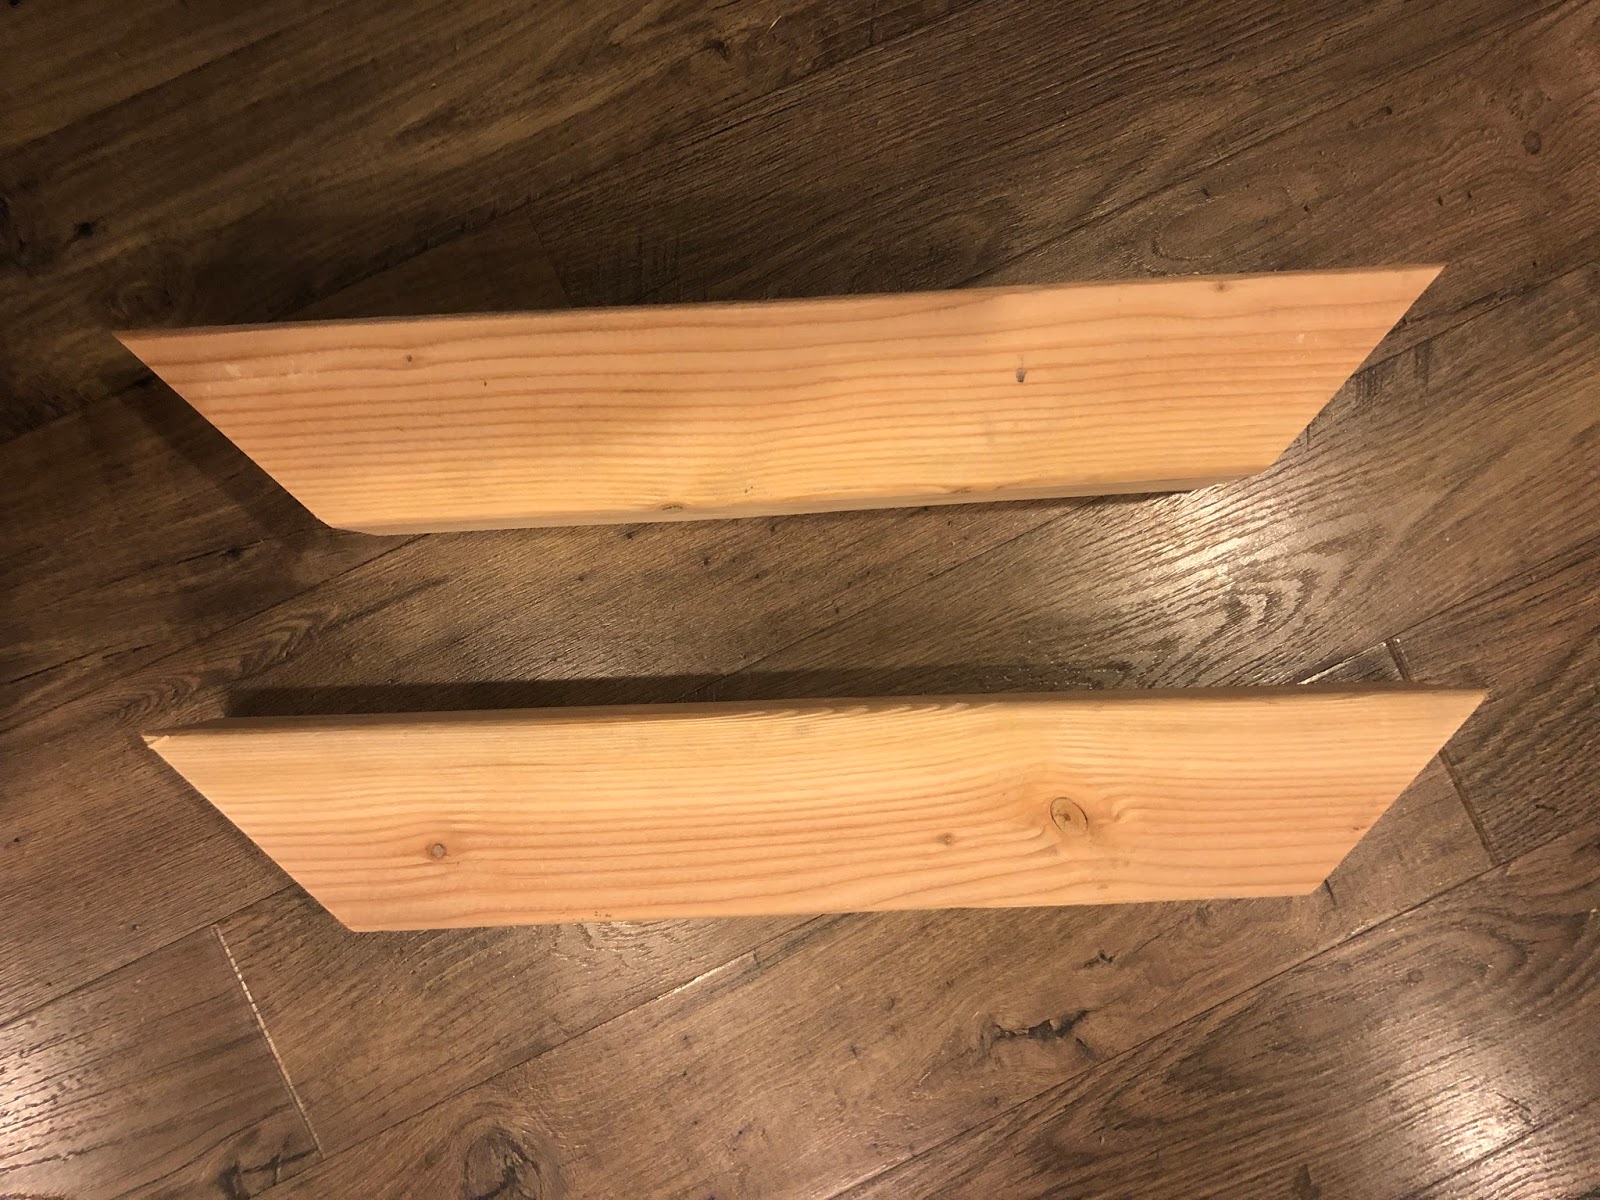
Step 8
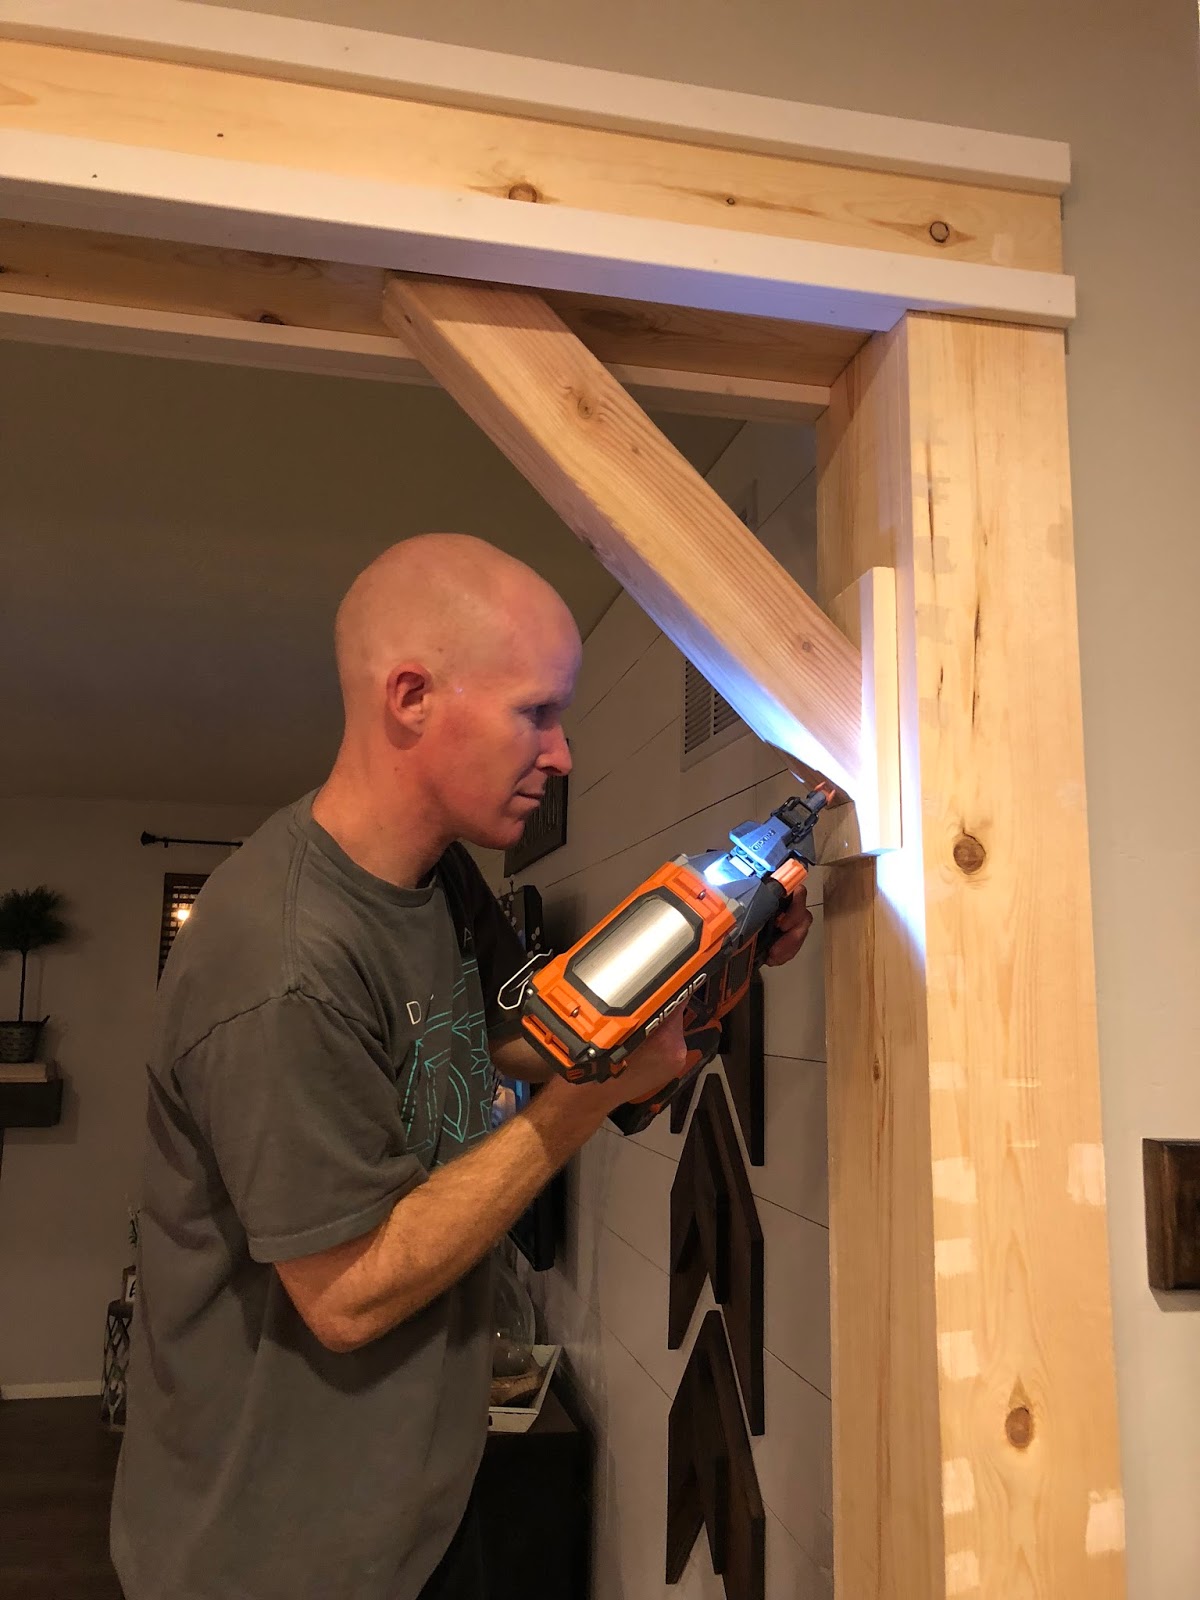
Now it’s time to build the corbels on the side of the beams. Cut your 4″x 4″ at a 45 degree angel to the size that fits your space. Take some of your scrap pieces of wood used to build the beams and cut a piece to attach to the bottom of your corbel. (This is just decorative and an optional step) Attach the base plate for the corbel to each side beam with wood glue and nails
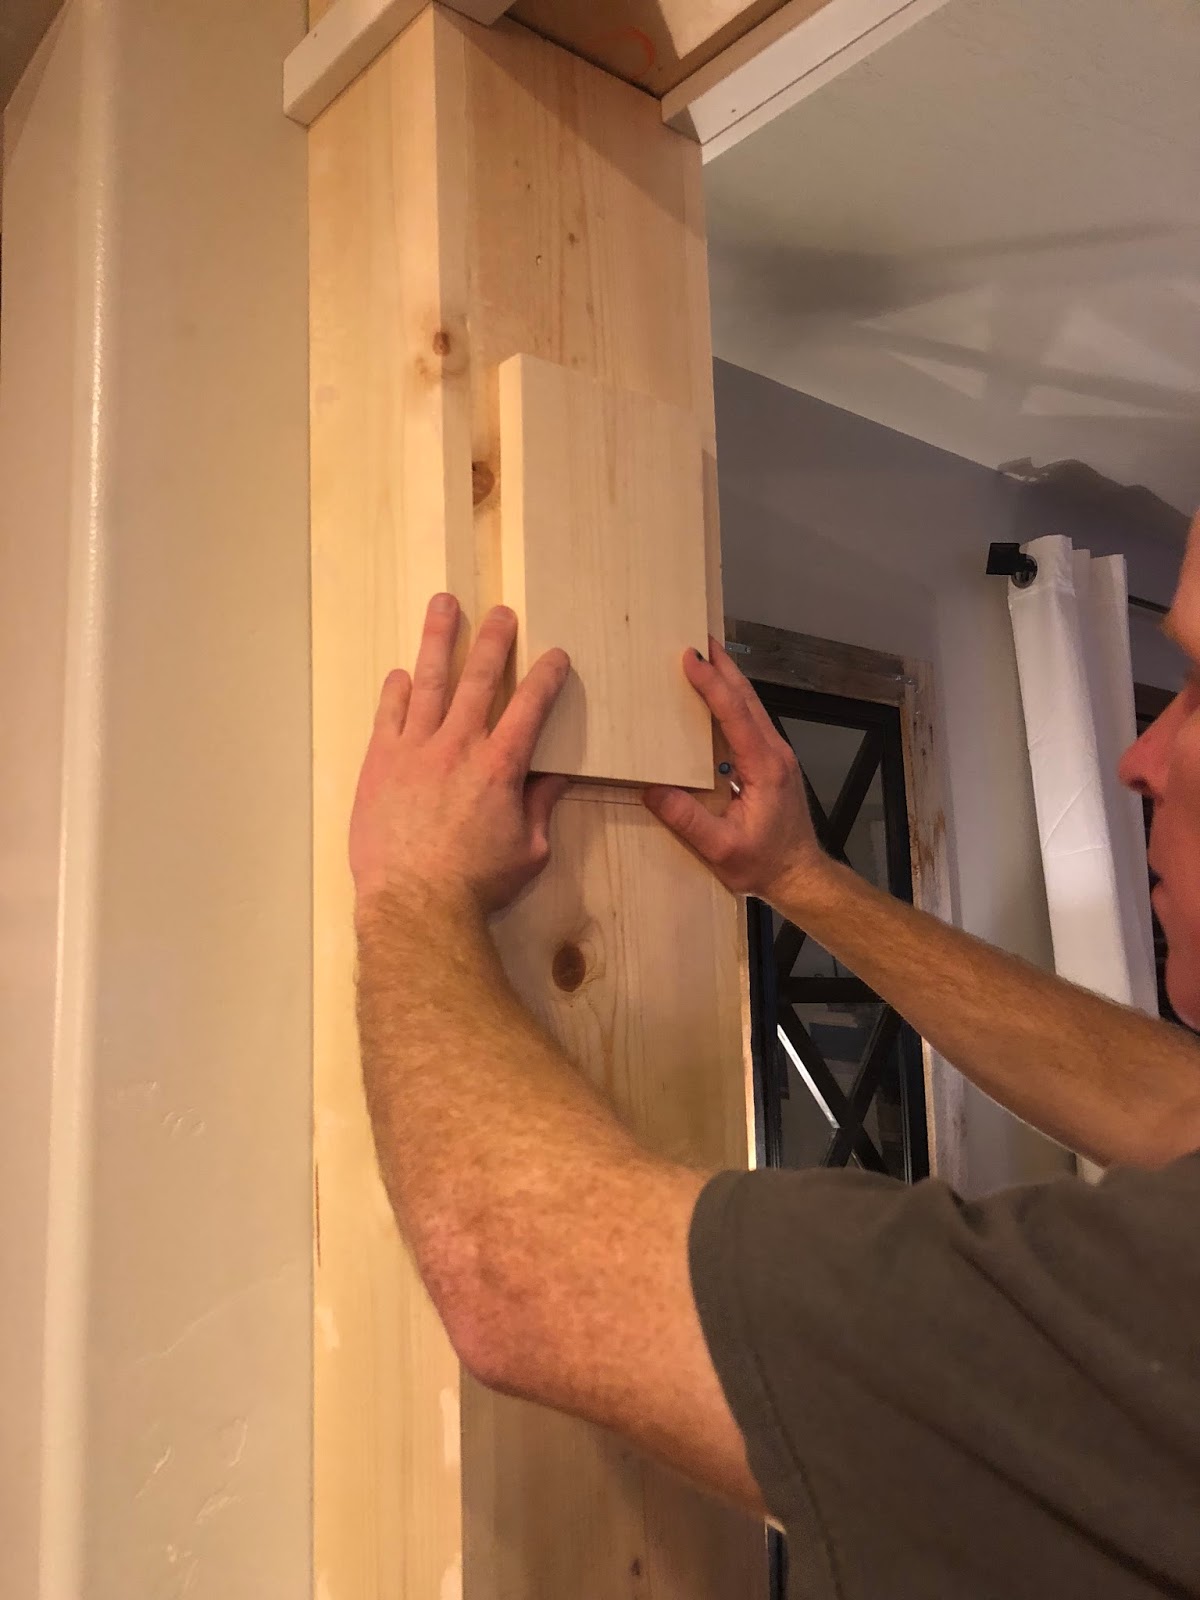

Step 9
Now its time to attach the corbels, use wood glue and nails. Shoot your nails at the base and top of the angled cut of the 4″x 4″
Step 10
Now that the build part is finished it’s time to get it prepped for painting. You are going to need to fill all the nail holes and seams in the wood with caulk for a seamless looking finish. This dries pretty quickly (about 30 min) so once that is done and dry you can start painting.
Step 11
Now it’s time to paint!! We used a true white Valspar paint in a semi-gloss finish. You can paint this any color or use any brand paint you like, I just recommend getting it in a semi-gloss so that it can be easy cleaned and its not overly shiny.
This project took us 2 days to complete. It’s definitely not a beginners DIY project but if you have some building knowledge then it will come together nicely! I’m so excited with how well this project turned out and I hope you will give it a try in your home!!

-Grey Birch Designs-