


read more
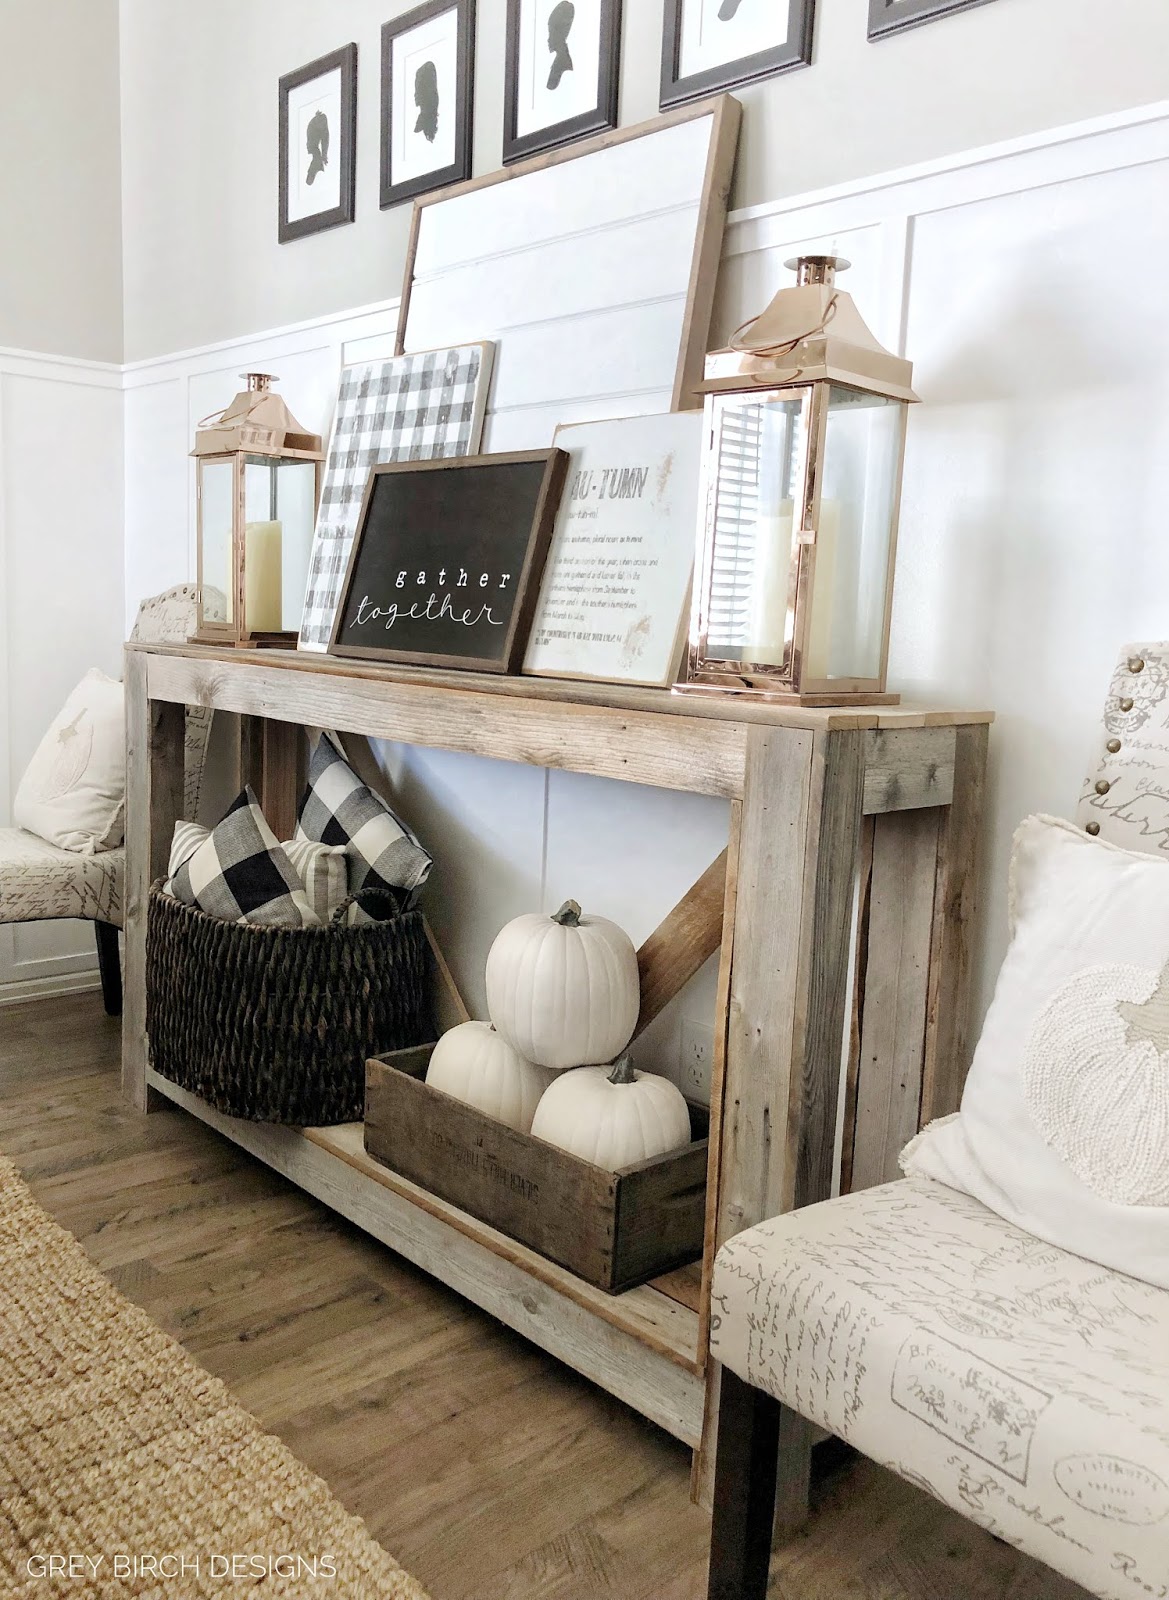
I really love the look of layered signs! It’s such a fun look to create a statement piece in your home. The key part to making this work is to establish your statement piece, and today I have a fun DIY project that can be used as your anchor piece. This board combines some of my favorite things: wood signs and SHIPLAP!!! This shiplap board is the perfect anchor piece in a sign grouping because it adds texture without taking away from the whole design. It can also be used in many other ways, such as in combination with a wreath, etc. The possibilities are endless.
Supply list
- Plywood or MDF board cut to your desired size
- Tongue and groove or standard shiplap boards
- White paint
- 1″ x 2″ boards (for the trim)
- Any stain color you like (for the trim)
- Miter saw
- Wood glue
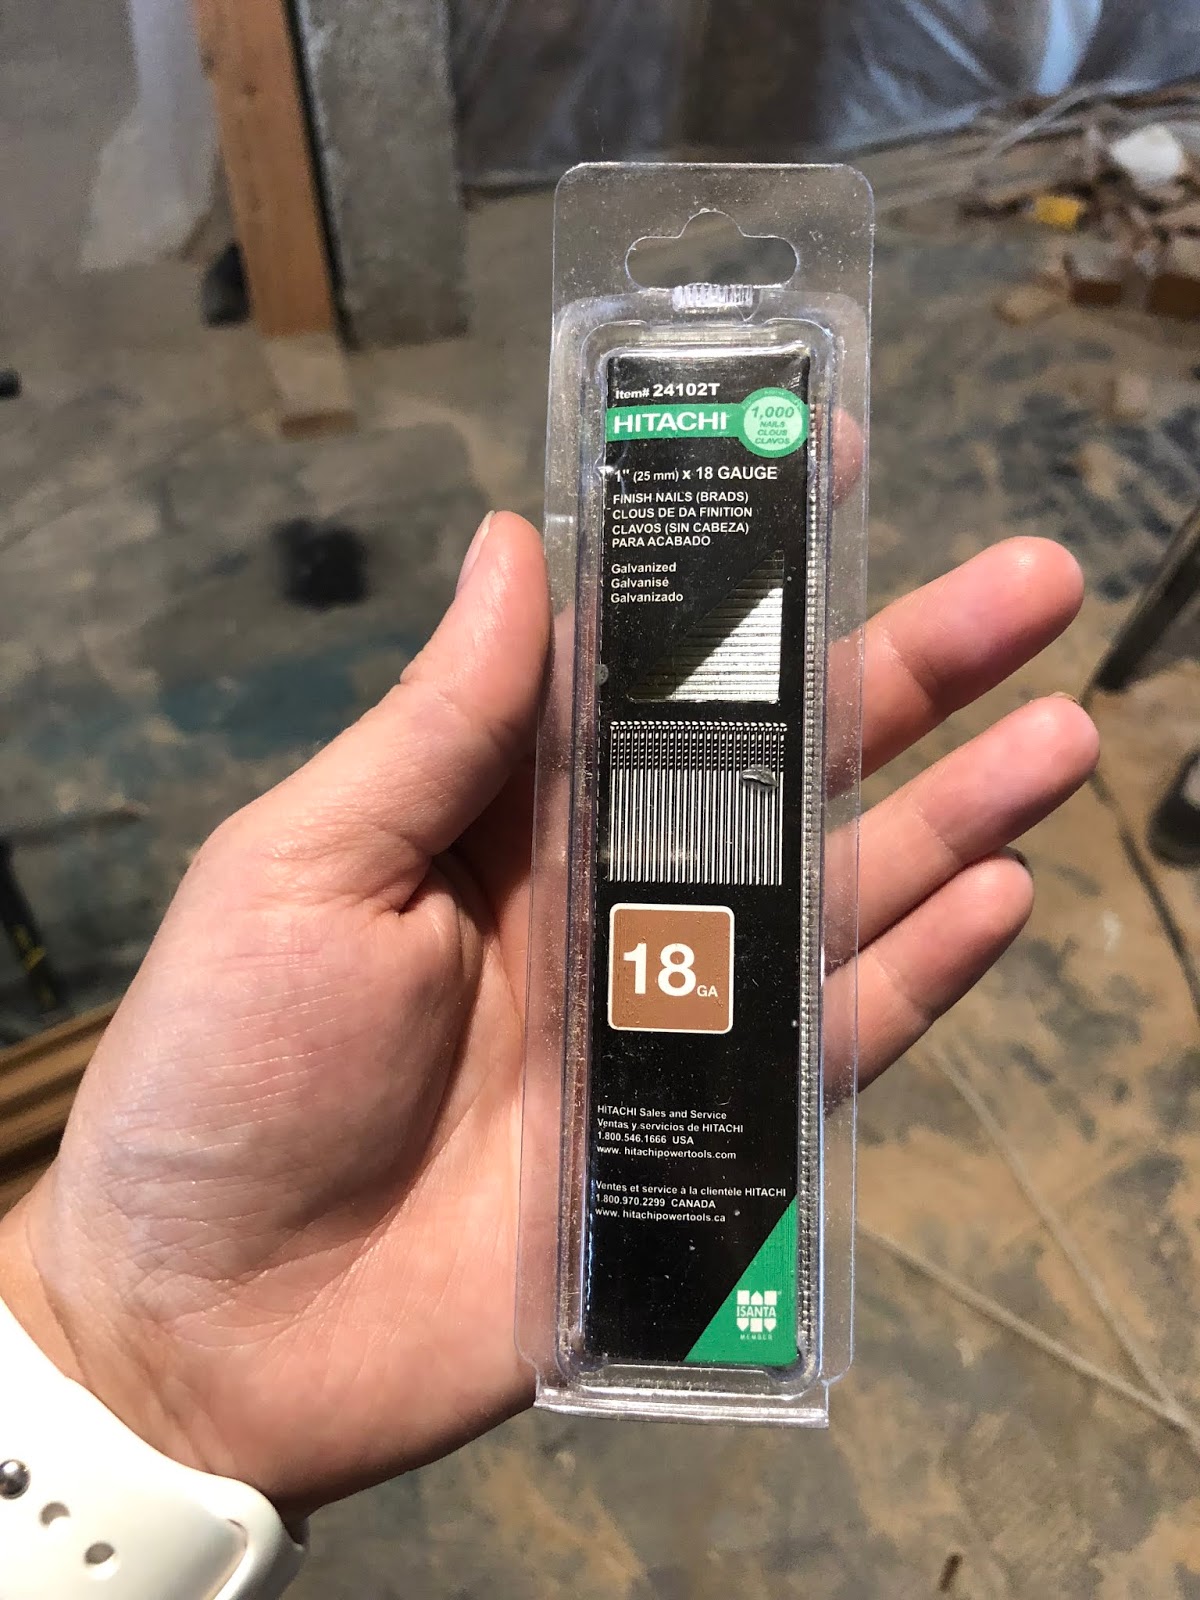
- Brad nails and nail gun
Step 1
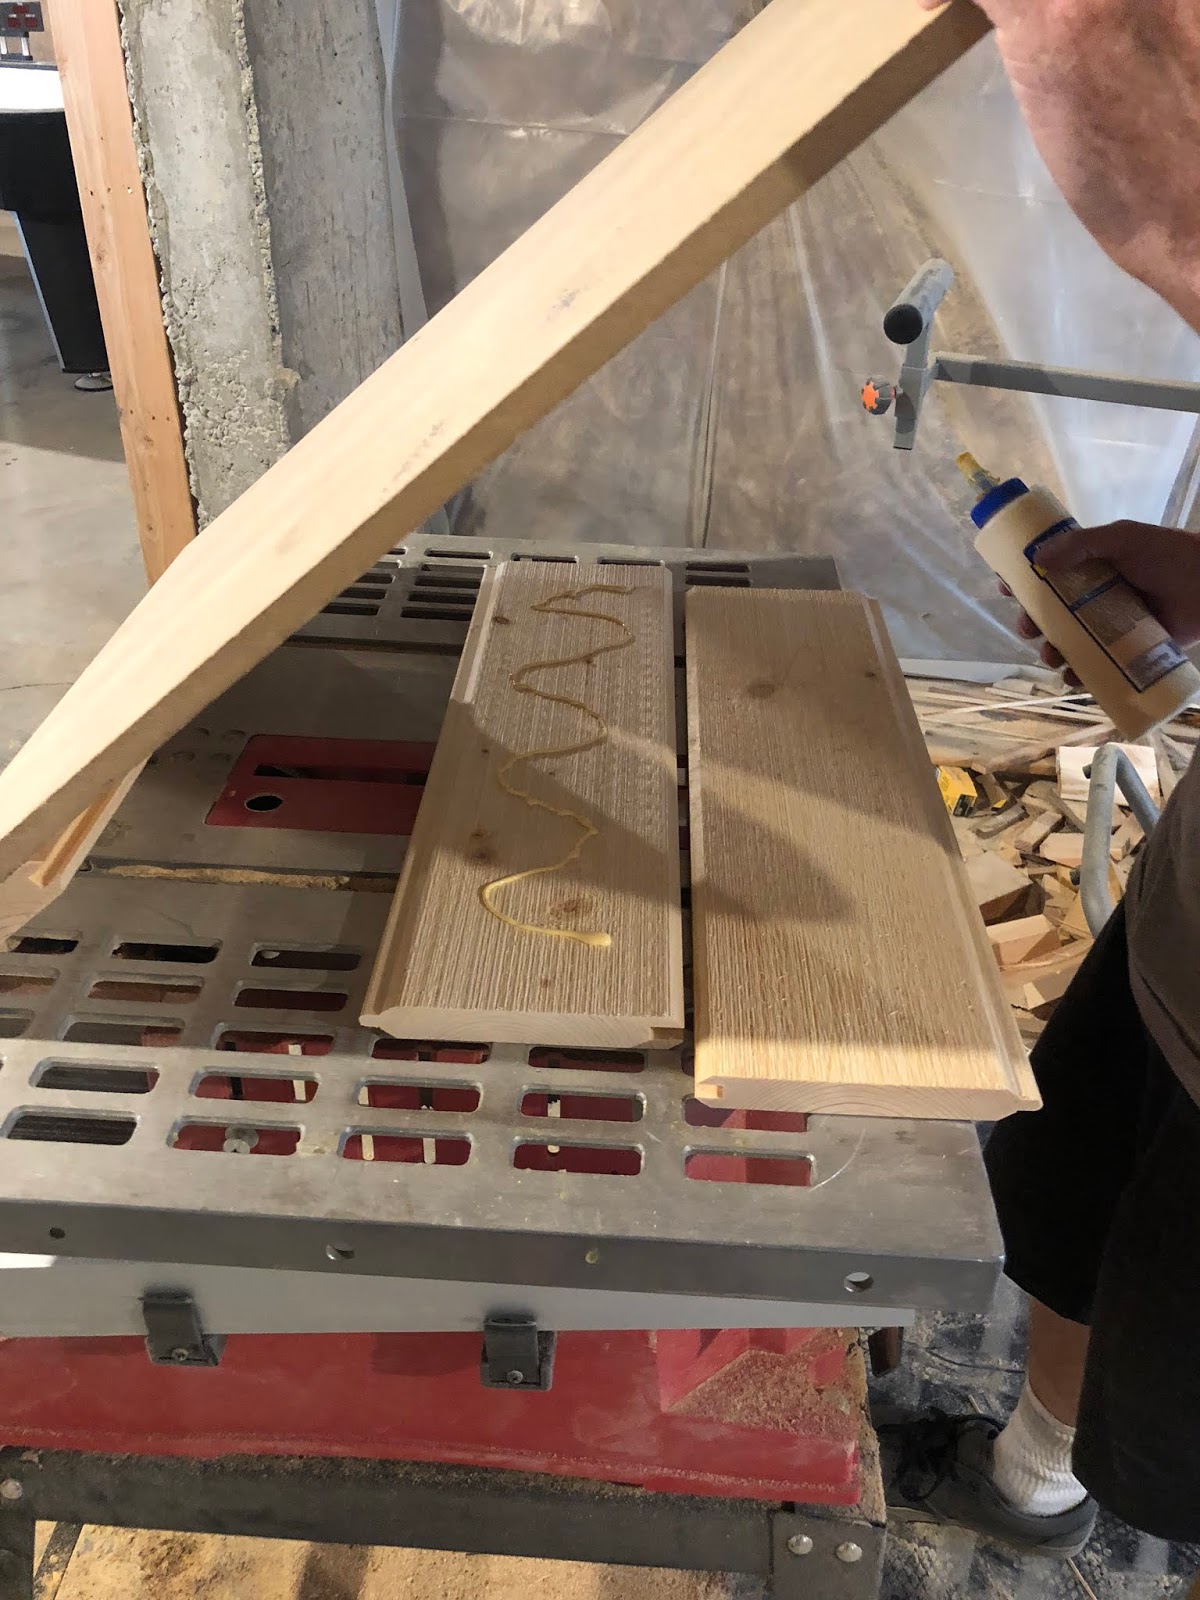
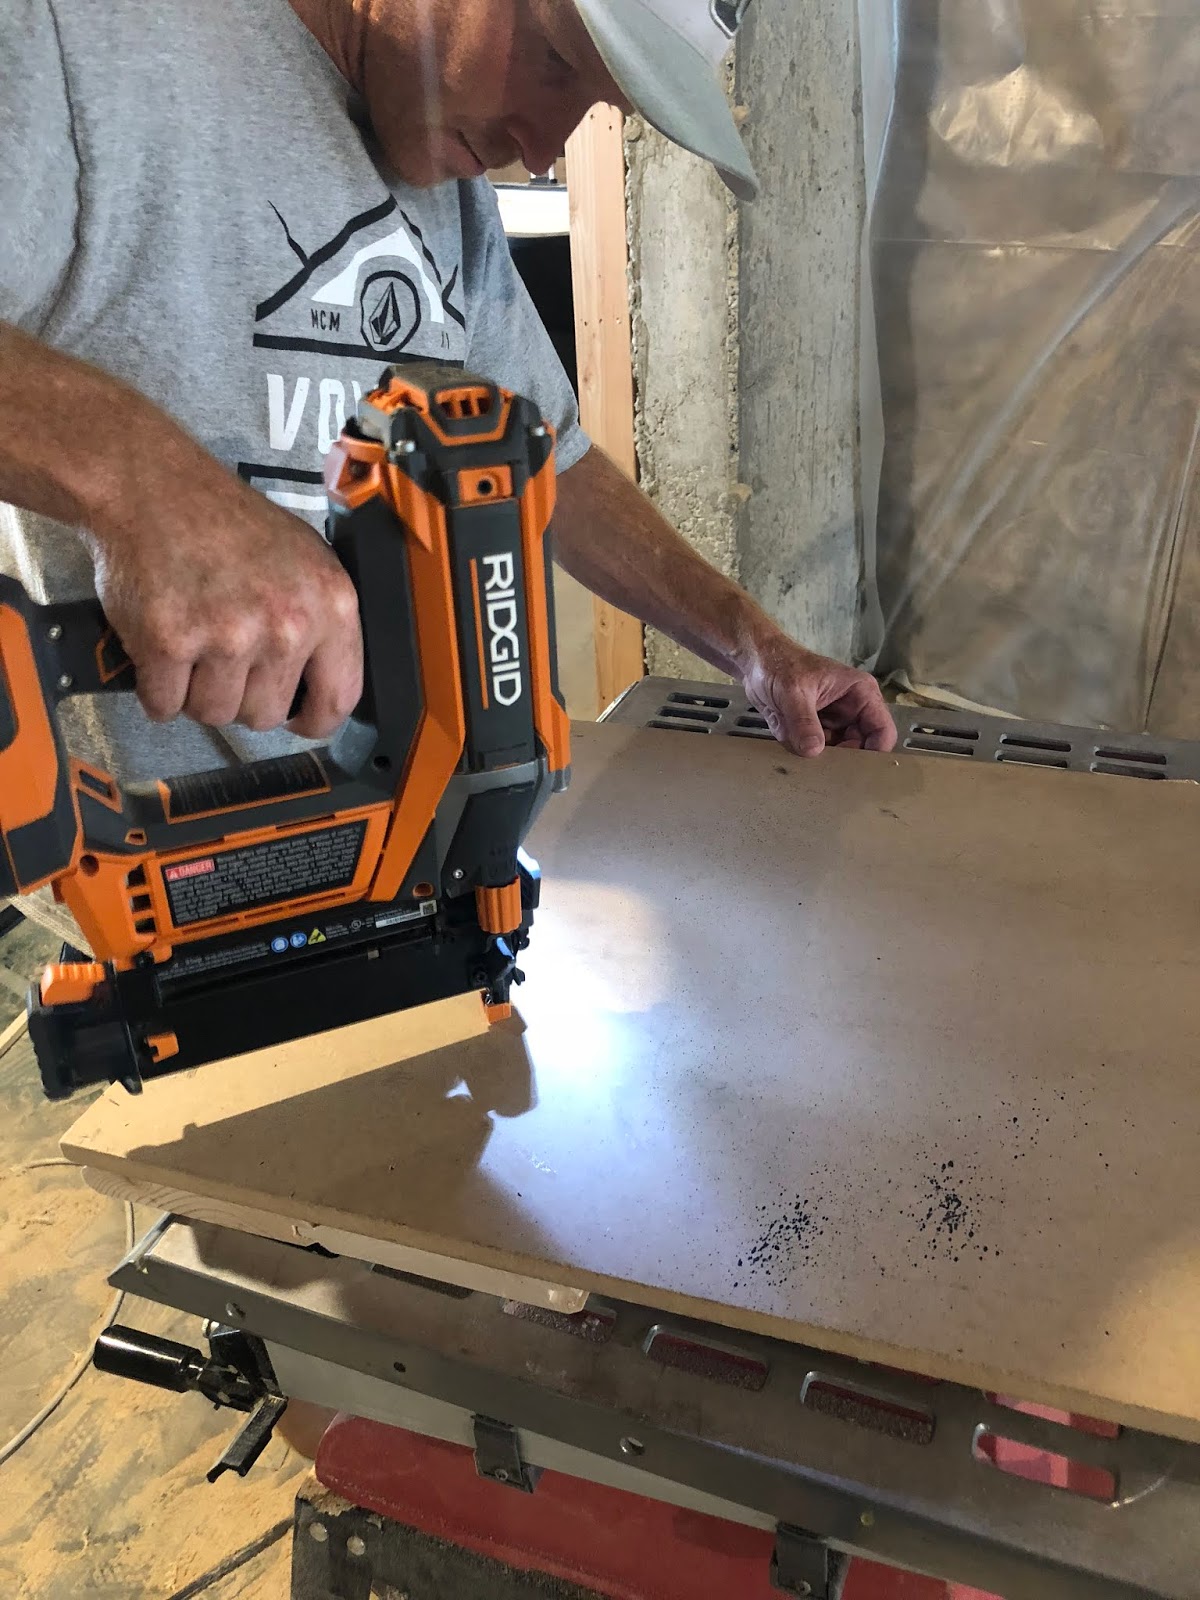
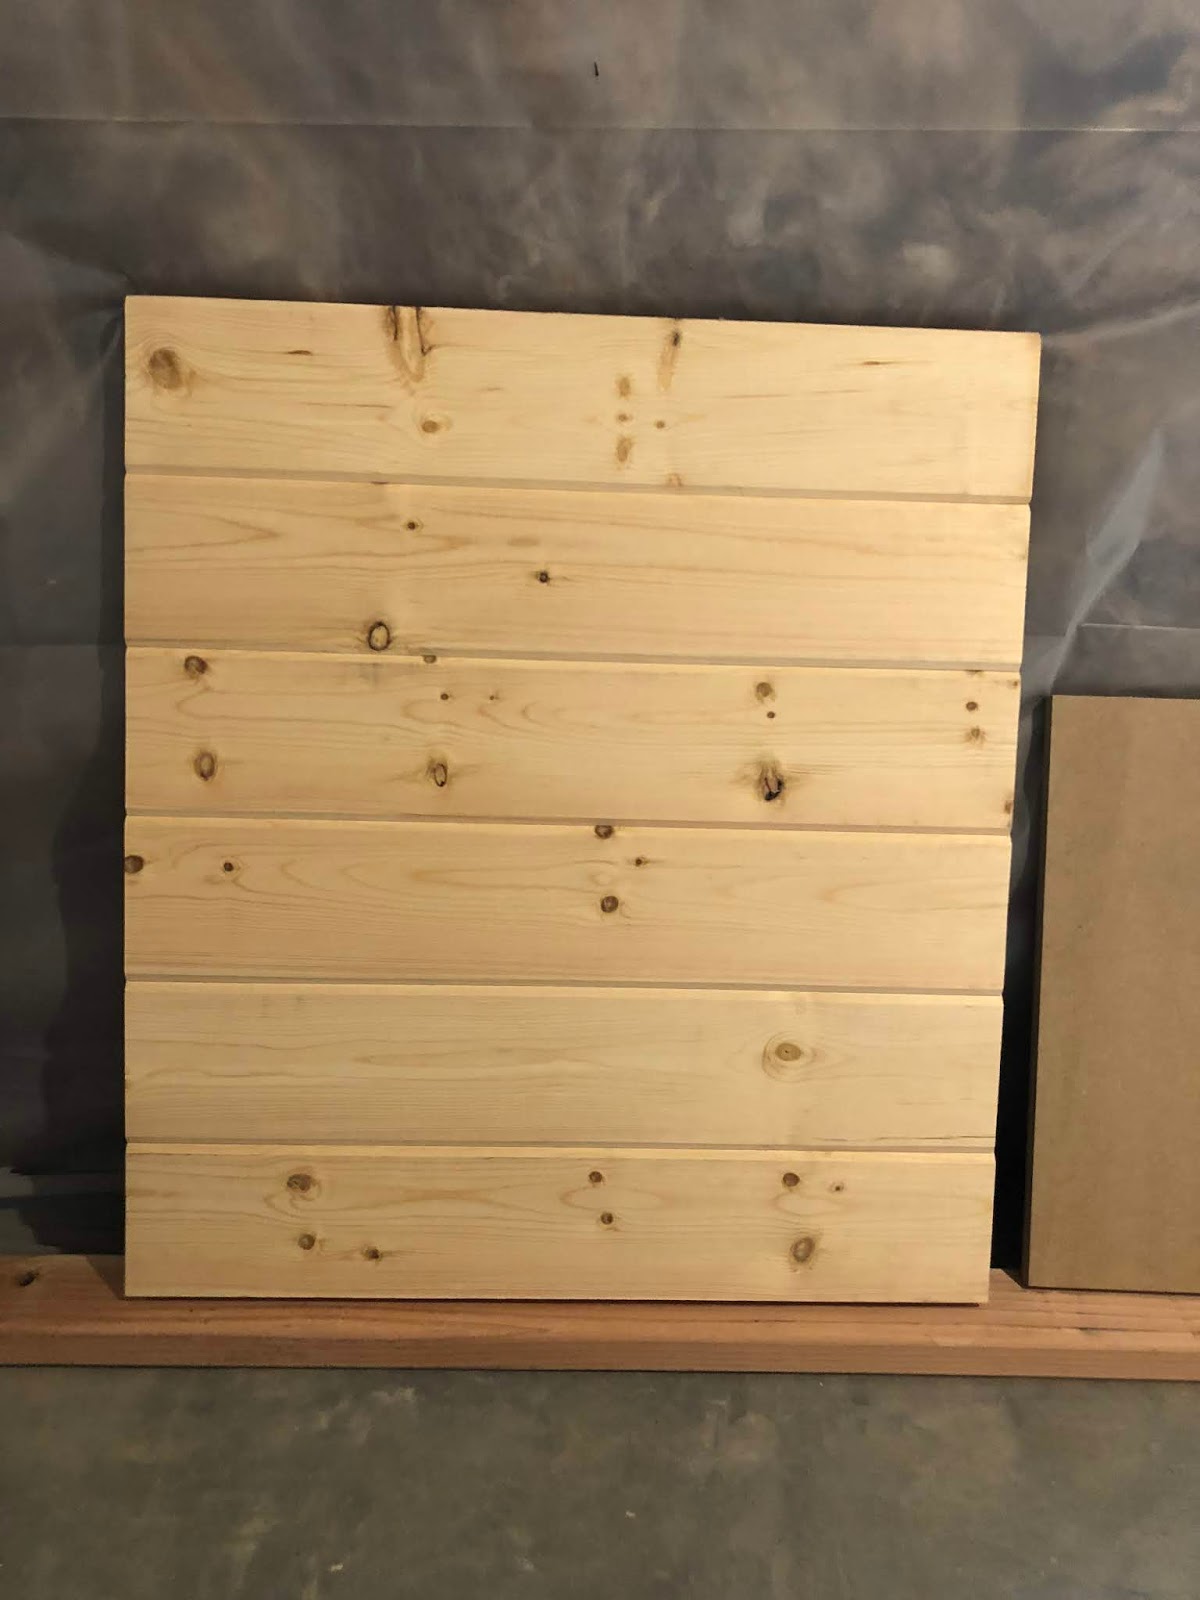
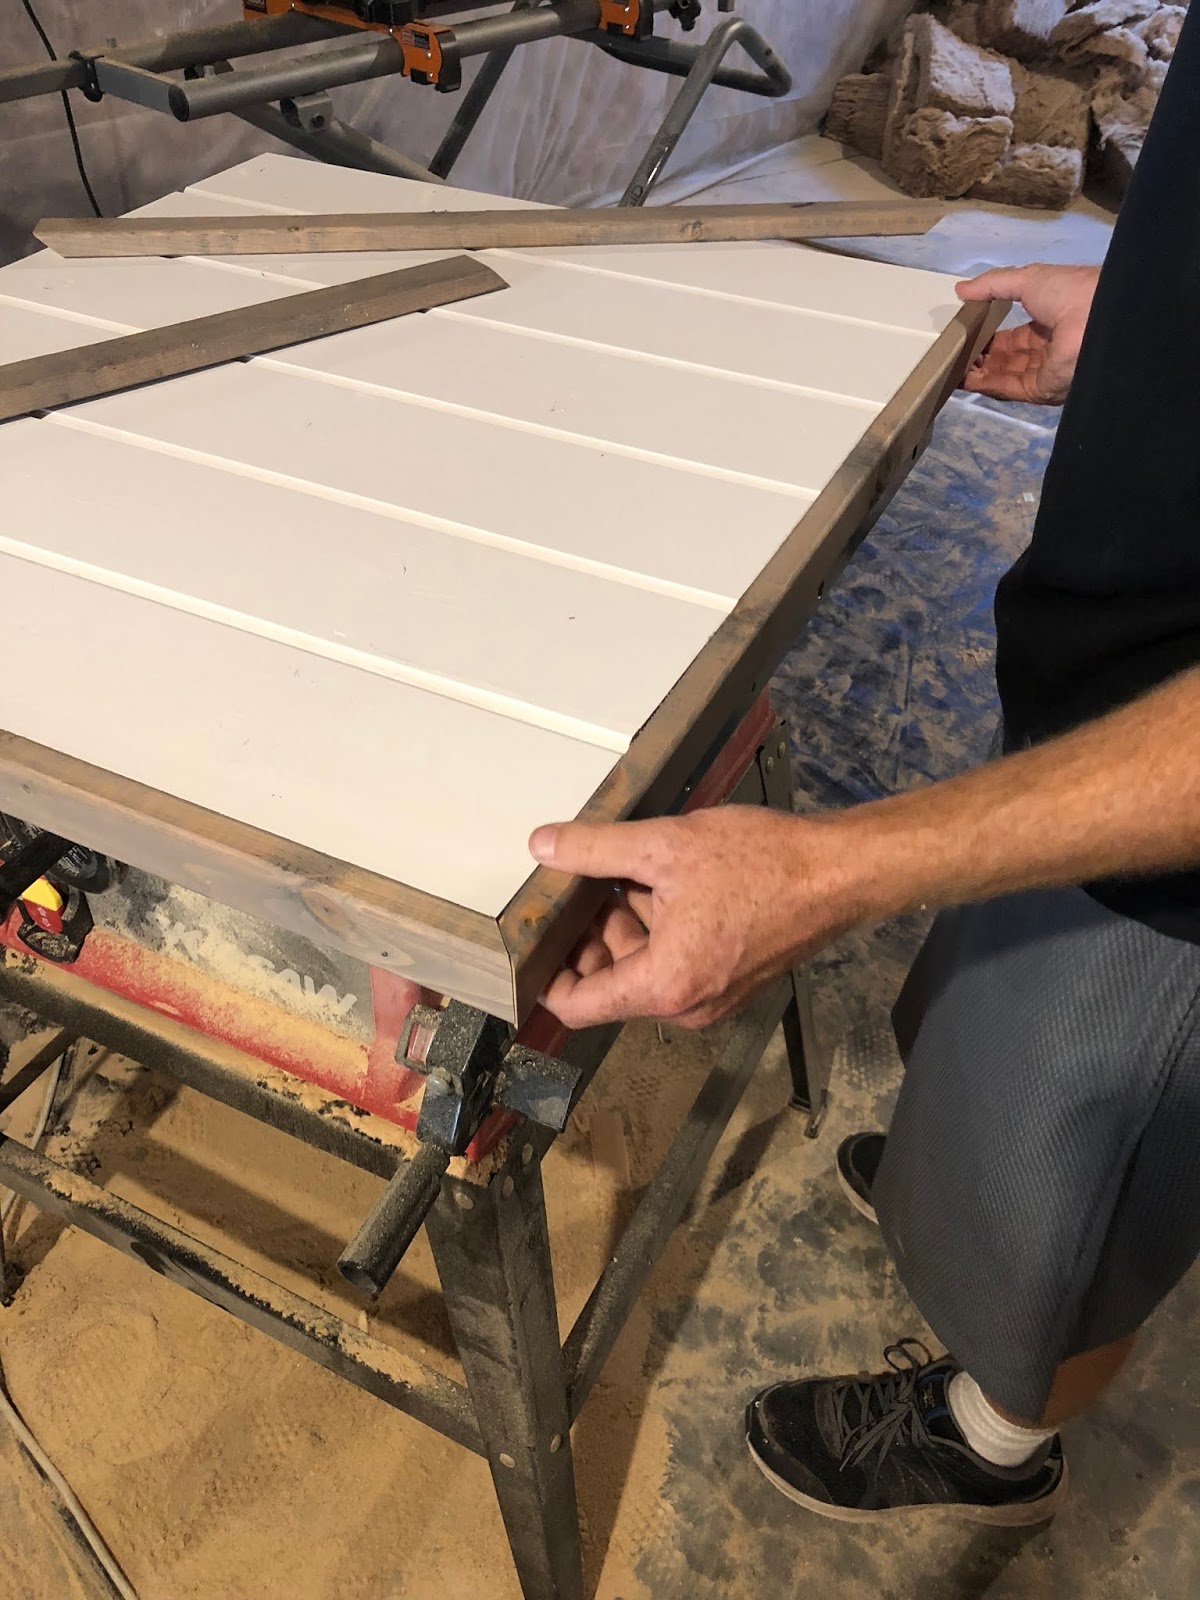
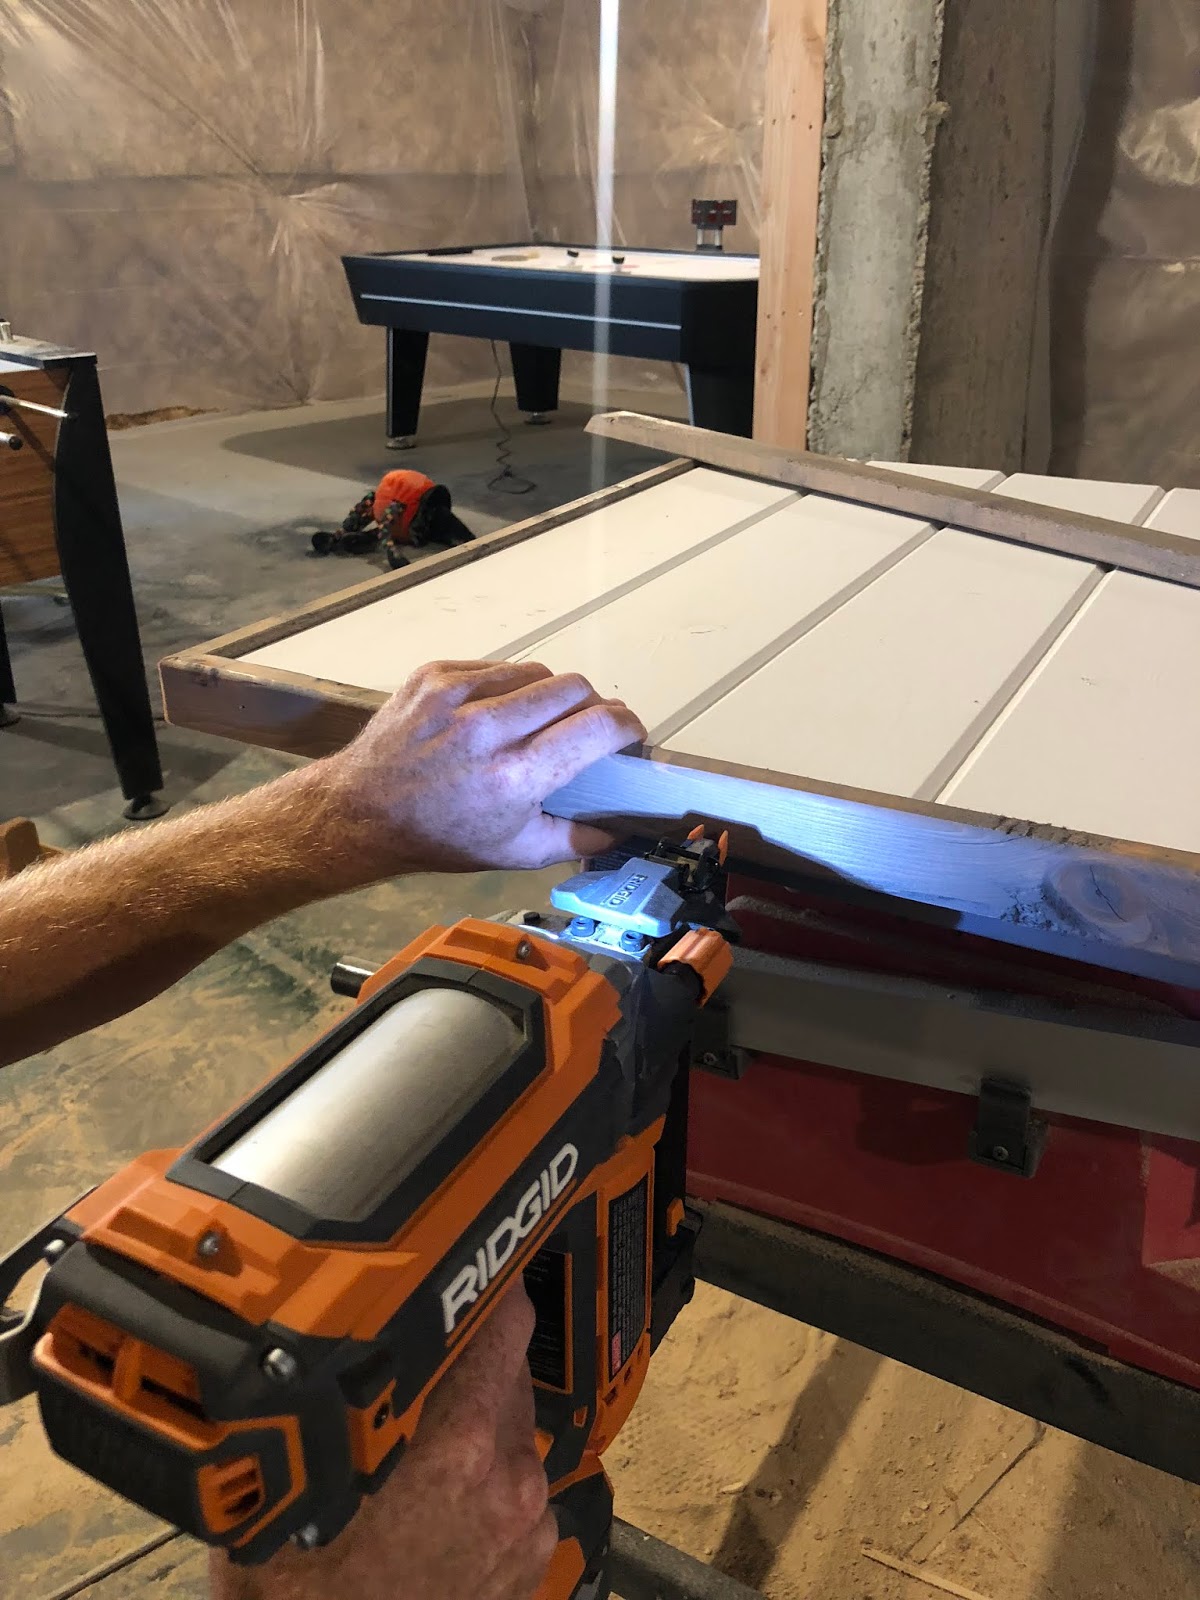
The first thing you want to do is cut your MDF or plywood to the size you want your sign to be. Home Depot can make the cuts for you for free or you can use a table saw if you have one. Then measure the width of your board and cut pieces of shiplap at that length to stack one on top of another. You will need to determine how many of pieces of shiplap to cut based on the height of your sign. Now its time to assemble everything together! Fasten the shiplap pieces to the board using glue and brad nails. For a cleaner look, shoot the nails in from front to back. This requires assembling everything upside down like you see in the pictures below.
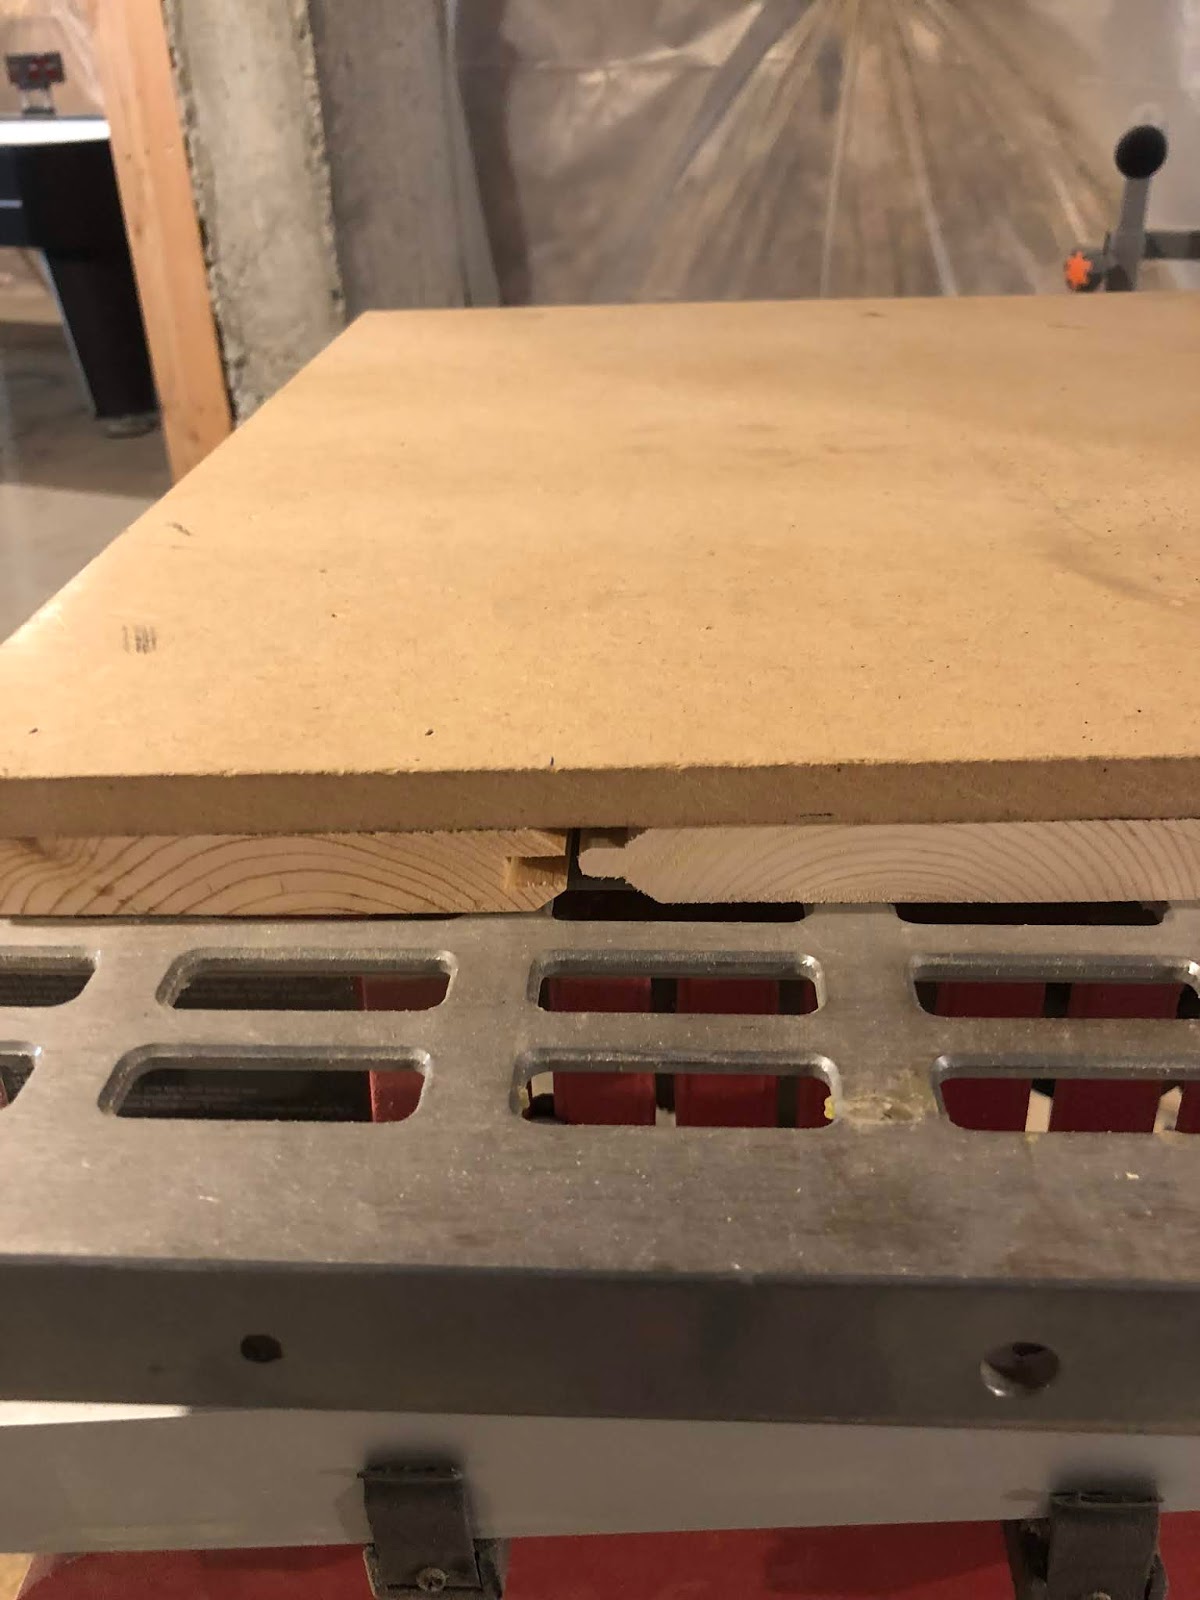
We used 1 inch 18 gauge brad nails. First we nailed the sides and then added a few more nails along the middle in a zig zag pattern.
Step 2
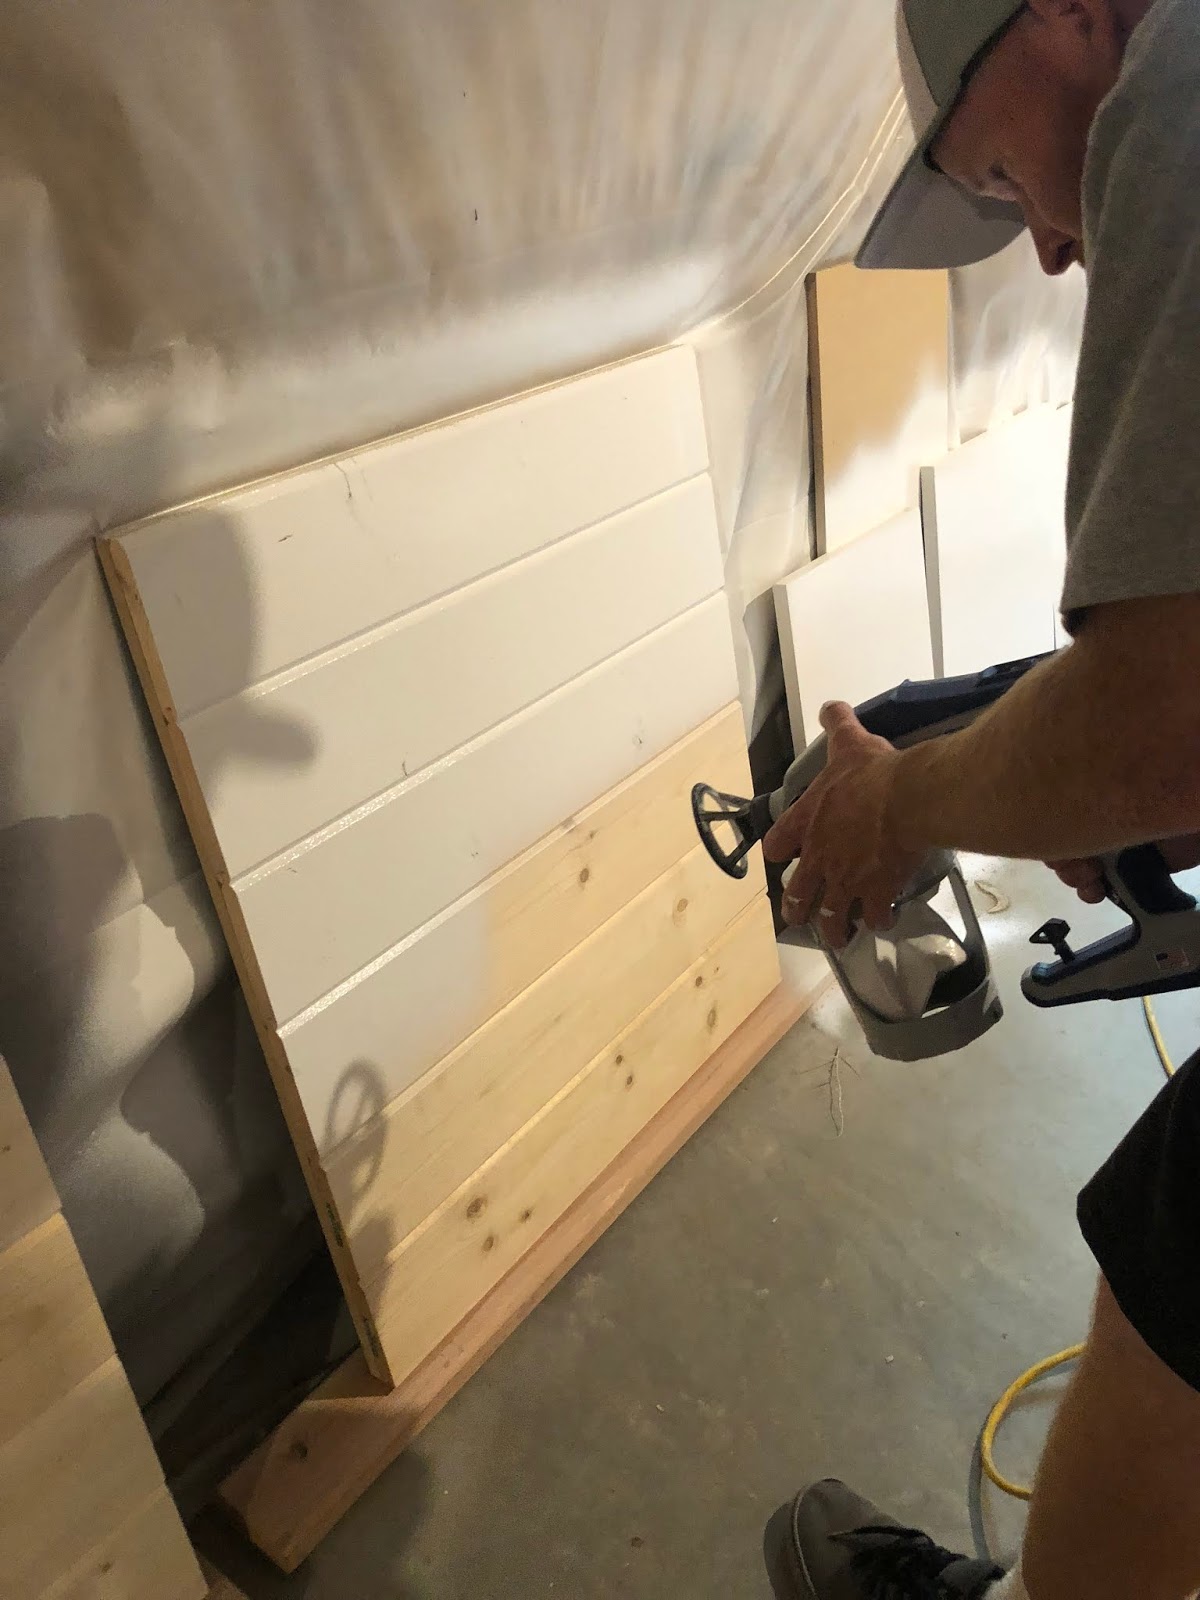
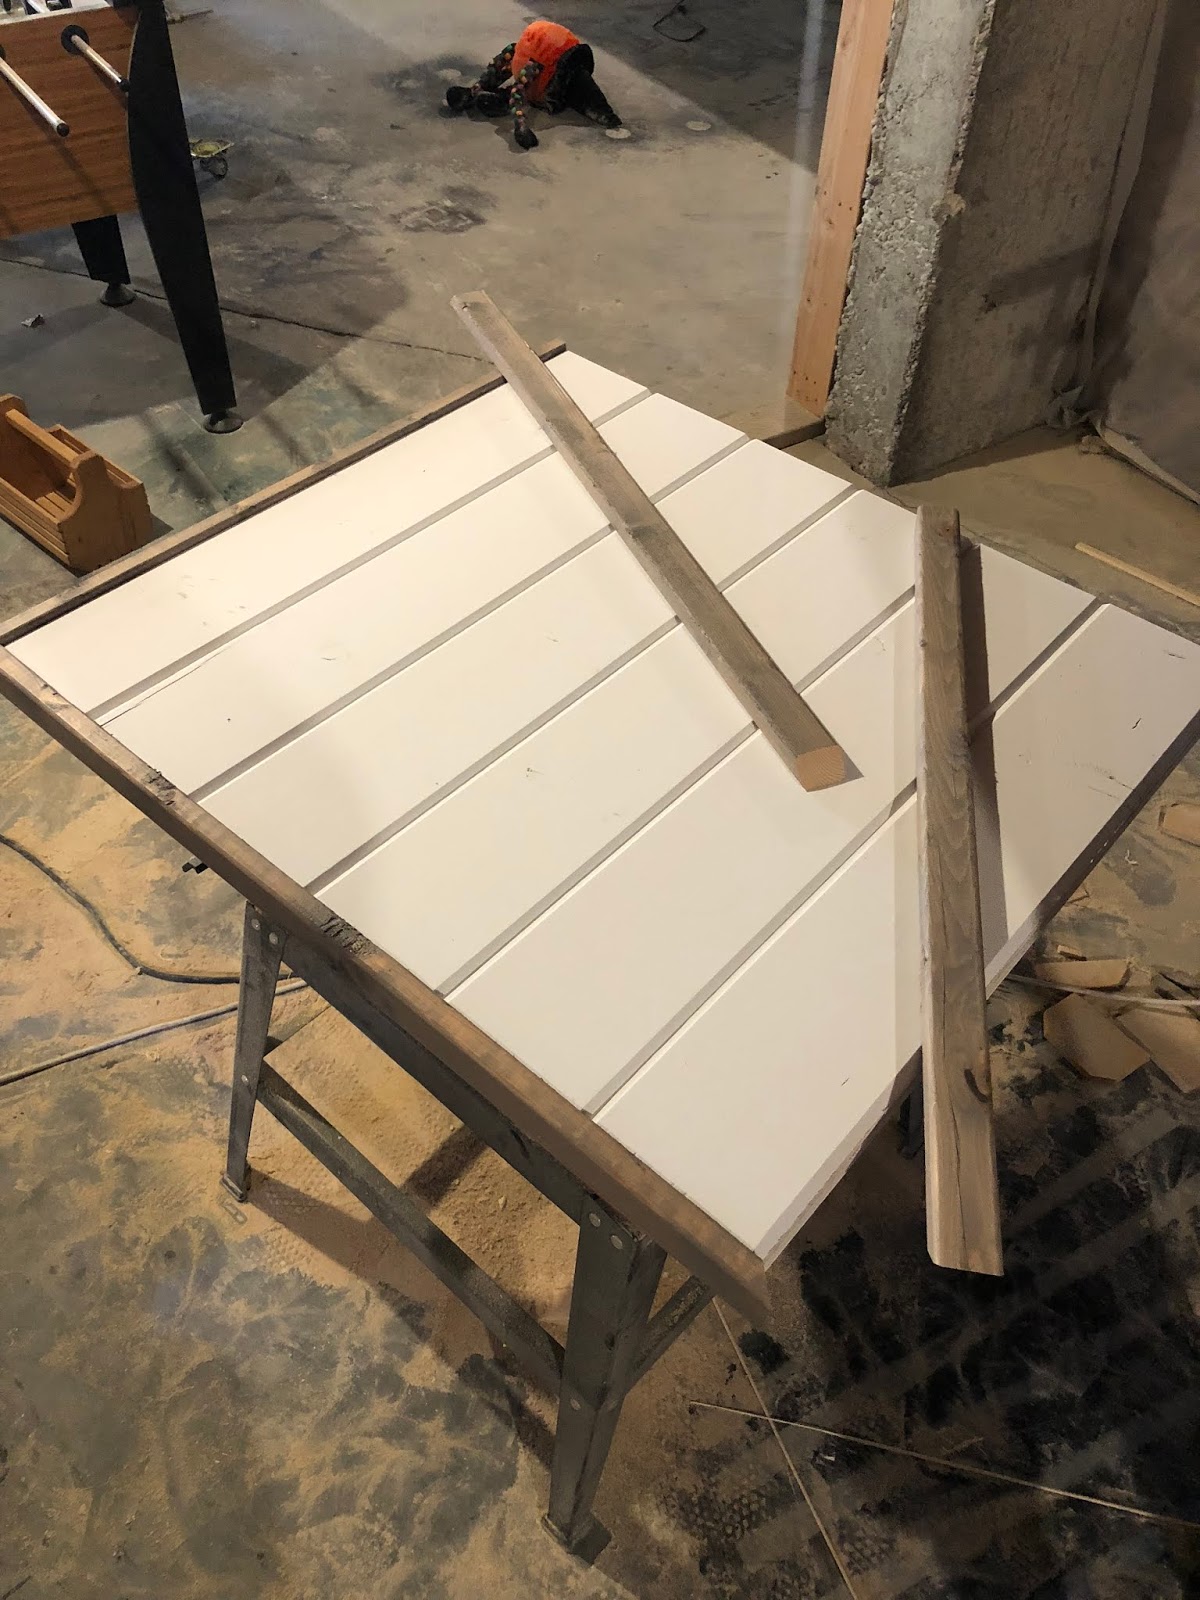
Now it’s time to paint. Don’t worry about painting the sides because they will be covered with your trim pieces. We used a paint sprayer but you can easily do this with a roller or paint brush. While that is drying you can cut and stain your trim
Step 3
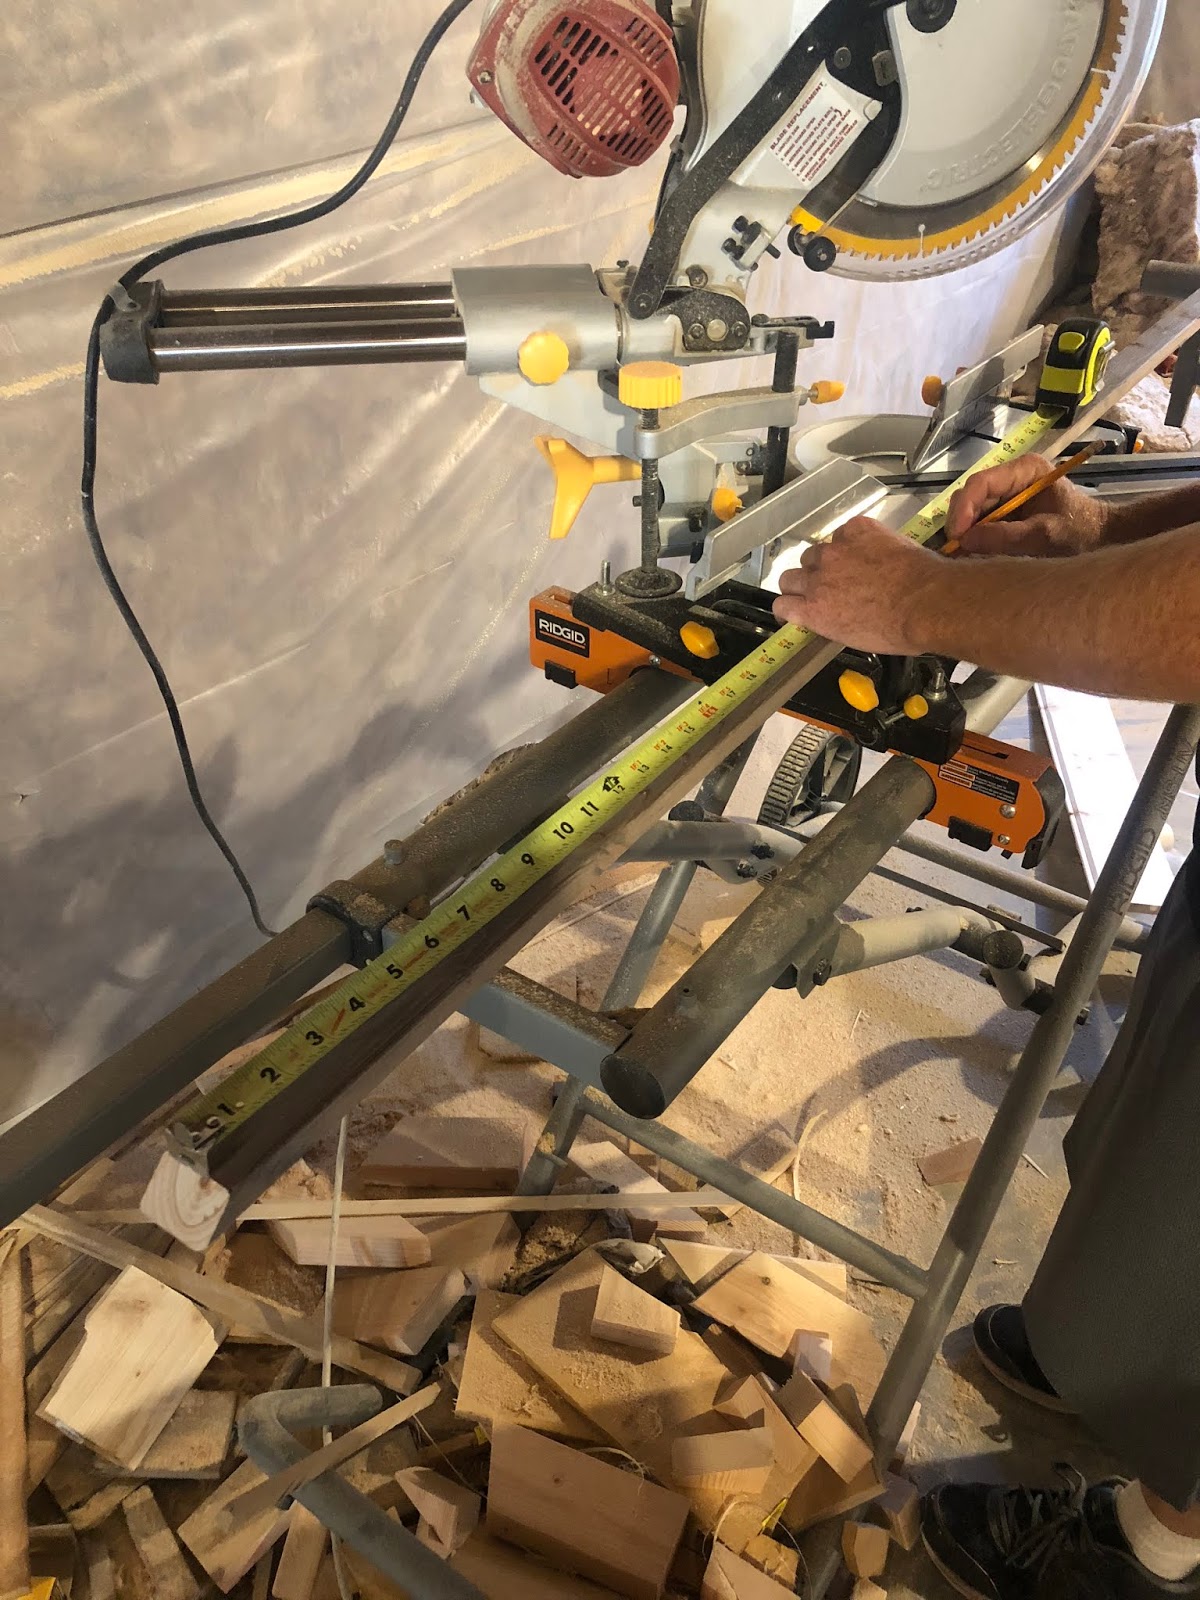
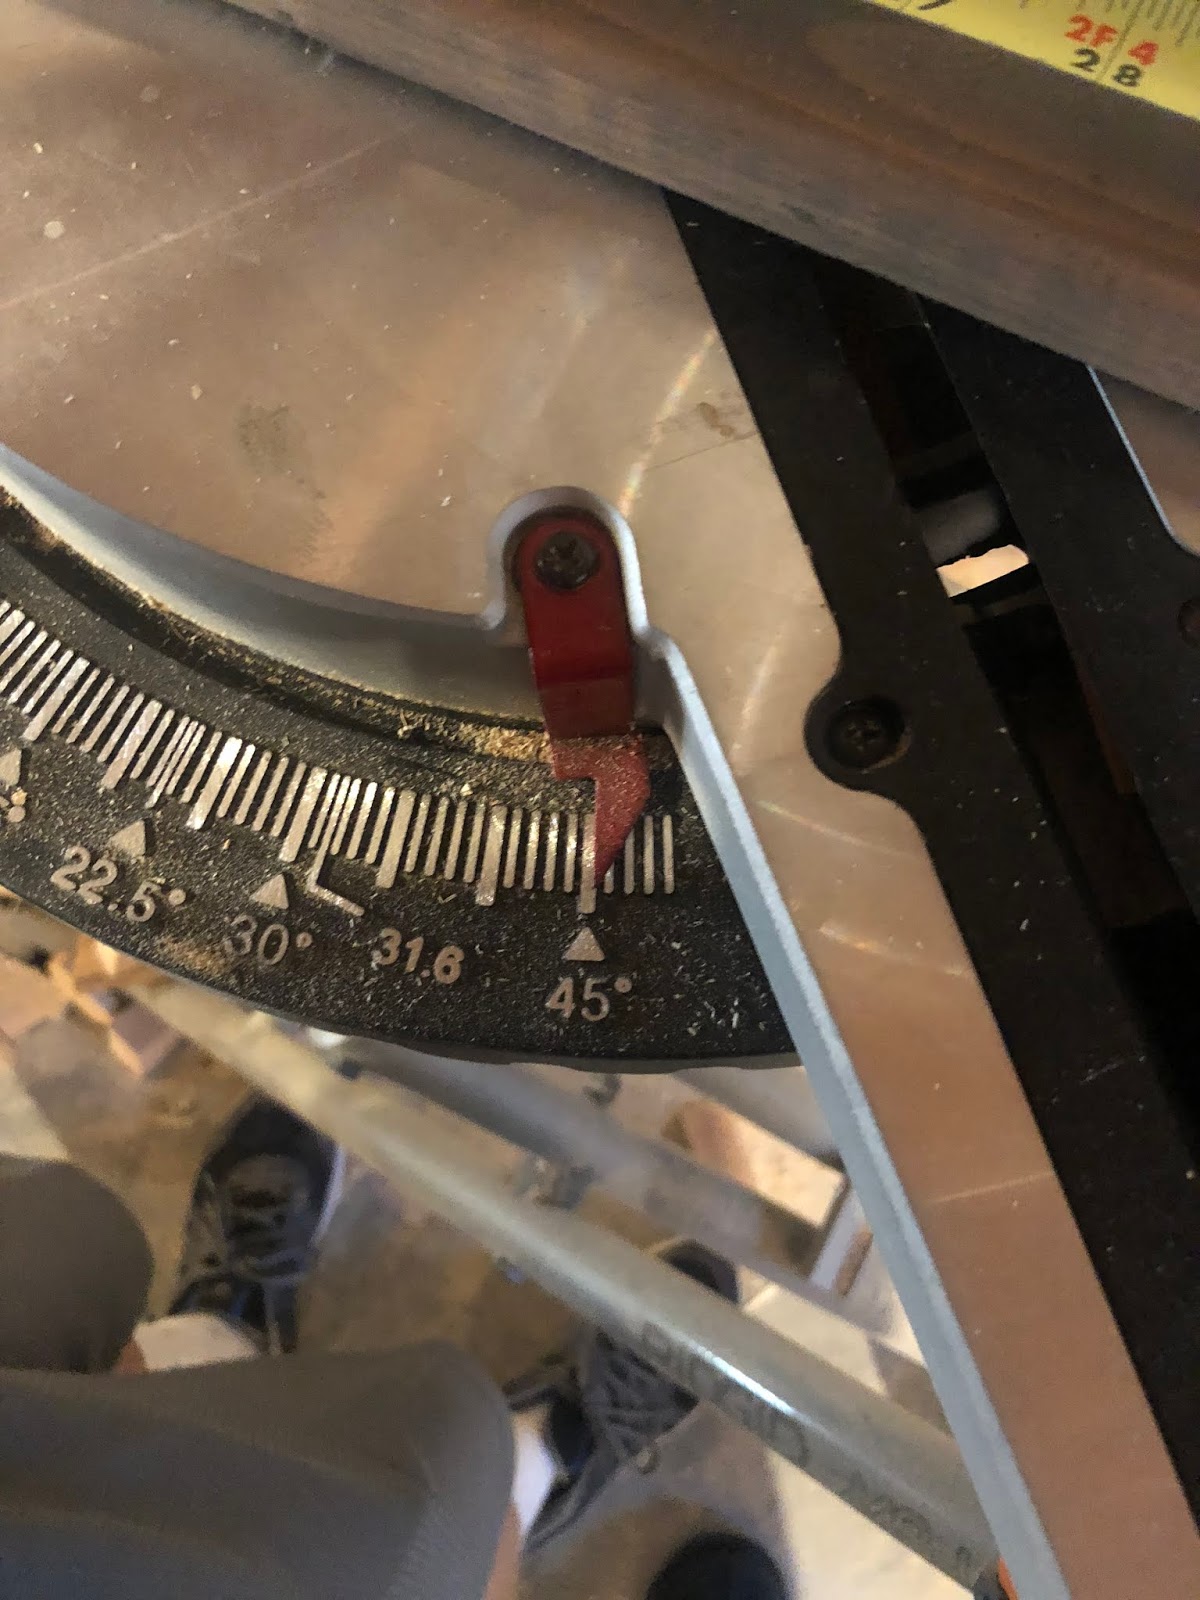
Measure out the lengths of trim needed and cut them to size at a 45 degree angle. The trim will attach to the outside of the sign so that the sides are covered. It can be tricky to get the measurements right so I like to cut each piece a little too long and then slowly cut them down to size.
Step 4
Attach the trim with a thin bead of wood glue and brad nails. Take your time with this step and it will pay off in the end.

That’s it! A fun, easy sign to use in countless places in your home! I hope you enjoyed this fun shiplap DIY project!!
-Grey Birch Designs-
read more
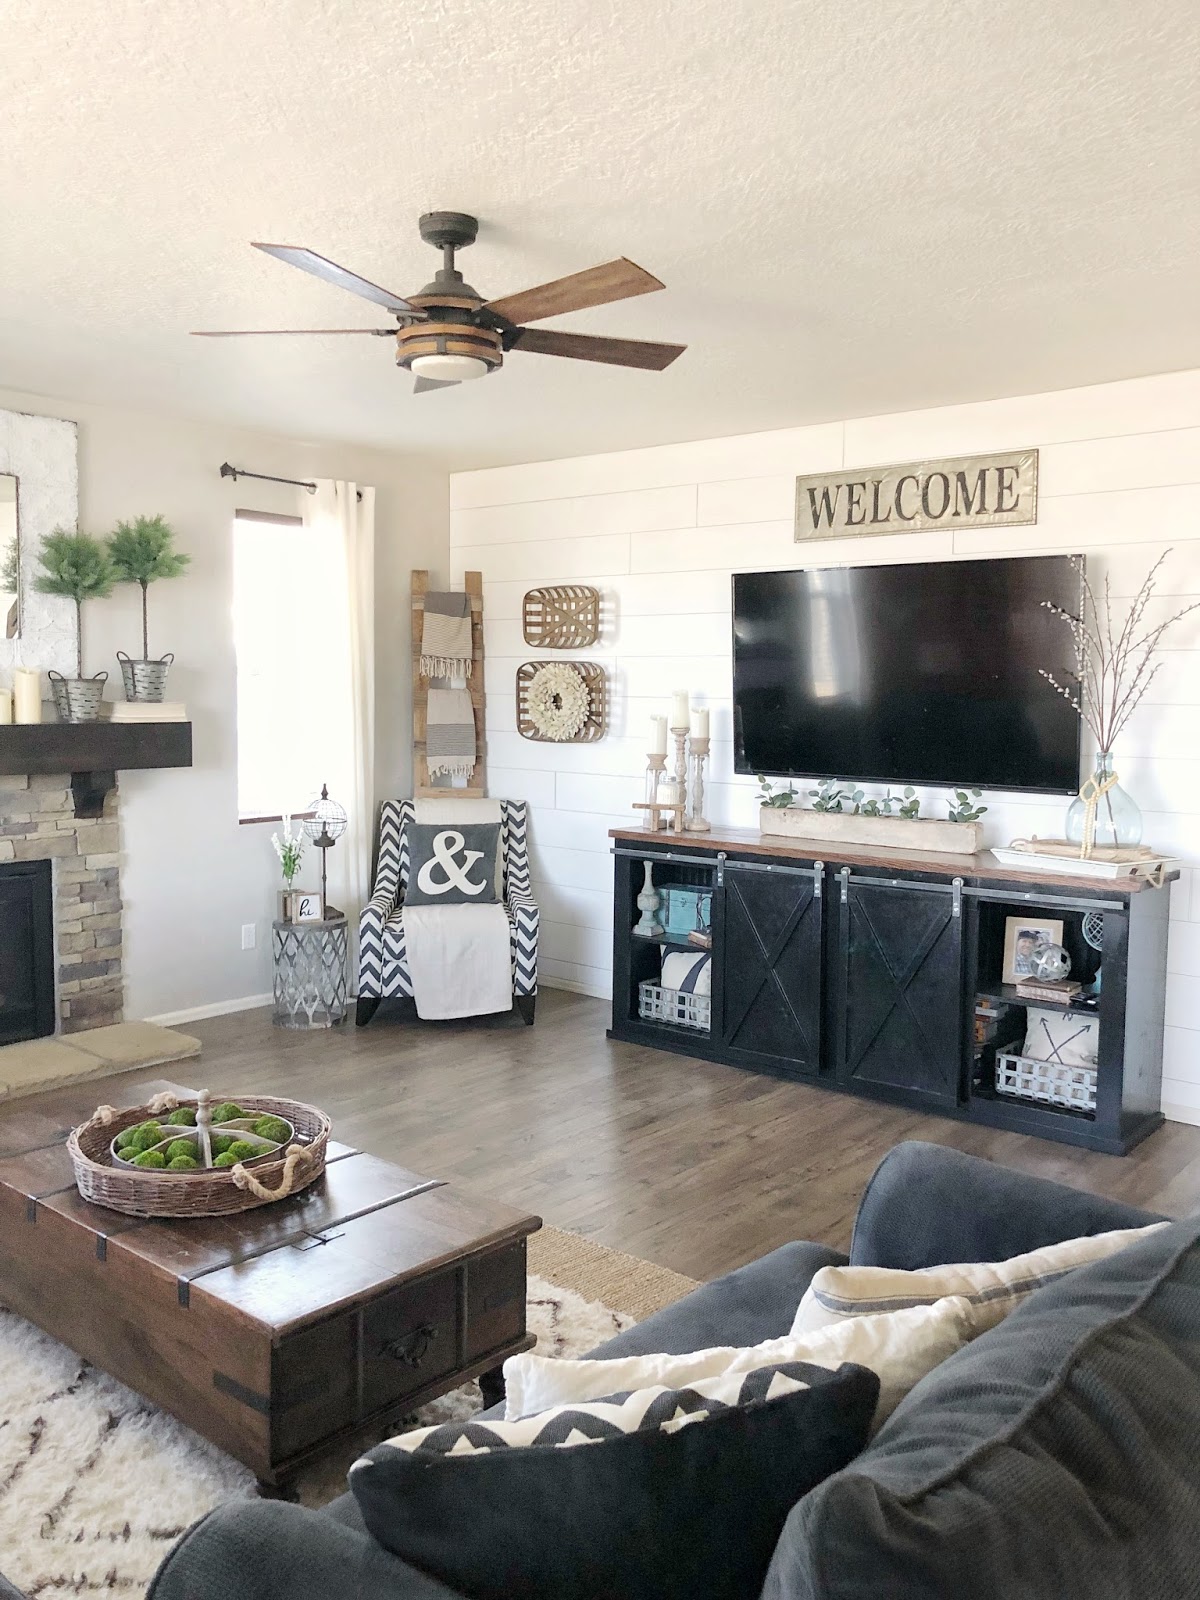
One of my favorite things in the world is shiplap walls!! I love the look and the impact they make in a space. They are also an inexpensive update you can do yourself to give your room a high end look! We have put shiplap in a few of our rooms and I get asked questions about them all the time, so here is my step by step tutorial on how to shiplap a wall.
Supply List:
- Plywood (standard 4’x8′ sheets)
- White paint (or whatever color you want to paint your shiplap)
- Paint supplies (Paint Roller, Paint Brush, Paint Tray)
- Nail gun with 18 gauge brad nails or hammer and finish nails
- Stud Finder
- Level
- Pencil
- Miter Saw
Step 1:
The first thing you will want to do is measure your wall to figure out how much plywood you will need to buy. For our wall we used 4 sheets of plywood and ripped (cut) them into 7 3/4″ strips at Home Depot. This size got us the most use out of the sheets of plywood with very little left over scraps. This is the type of plywood we used for our living room wall but there are a variety of types/thicknesses to choose from.
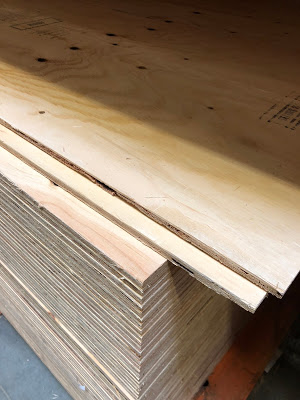
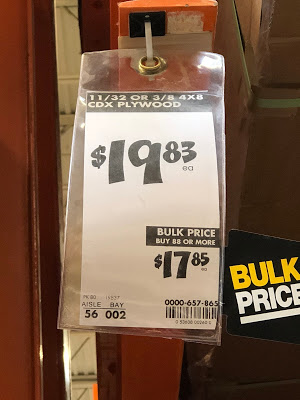
*TIP: If you buy your plywood at Home Depot they will rip your boards for free. If you are at Lowes they charge .25c a cut, and that can add up when doing a project like this!
If the wood you are using is rough you will want to sand the boards before you put them up on your wall. If they are smooth you can skip this step!

Step 2:
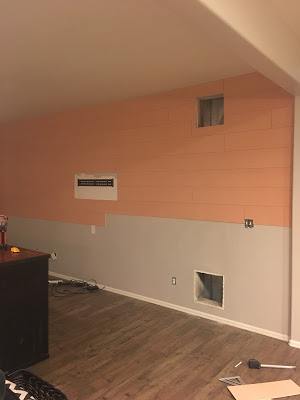
Once your boards are relatively smooth it’s time to get them up on your wall. Start by marking your wall studs. Use a stud finder to locate each stud at the top and bottom of the wall. Draw a vertical line down the wall in pencil to mark where each stud runs down the wall. You must nail the wood to the studs – drywall alone is not strong enough.

Step 3:
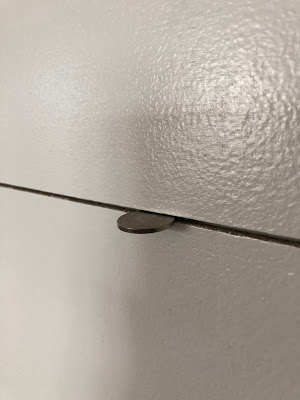
For this style of shiplap we wanted the breaks in the horizontal pieces to look random, so you are going to want to cut some of your boards at different lengths. Start working in the top corner and work your way across and down. To get the spacing the same we used a couple nickels and placed then in between each row. Once each board was nailed we removed the nickels and repeated this step all the way down the wall.
*Tip: You are going to want to cut your boards around any vents or switch plates on your wall so that when you put them back on you will have a nice clean look.
Step 4:
Now that your shiplap is all up it’s time to paint! I always recommend getting a satin finish in your paint so that it can be cleaned. If you want a more glossy look you can always go with a semi gloss or gloss. We used a satin finish on our shiplap wall.
That’s it!! Let your paint dry for 24 hours before you put anything back up on your wall and enjoy!


-Grey Birch Designs-