


read more
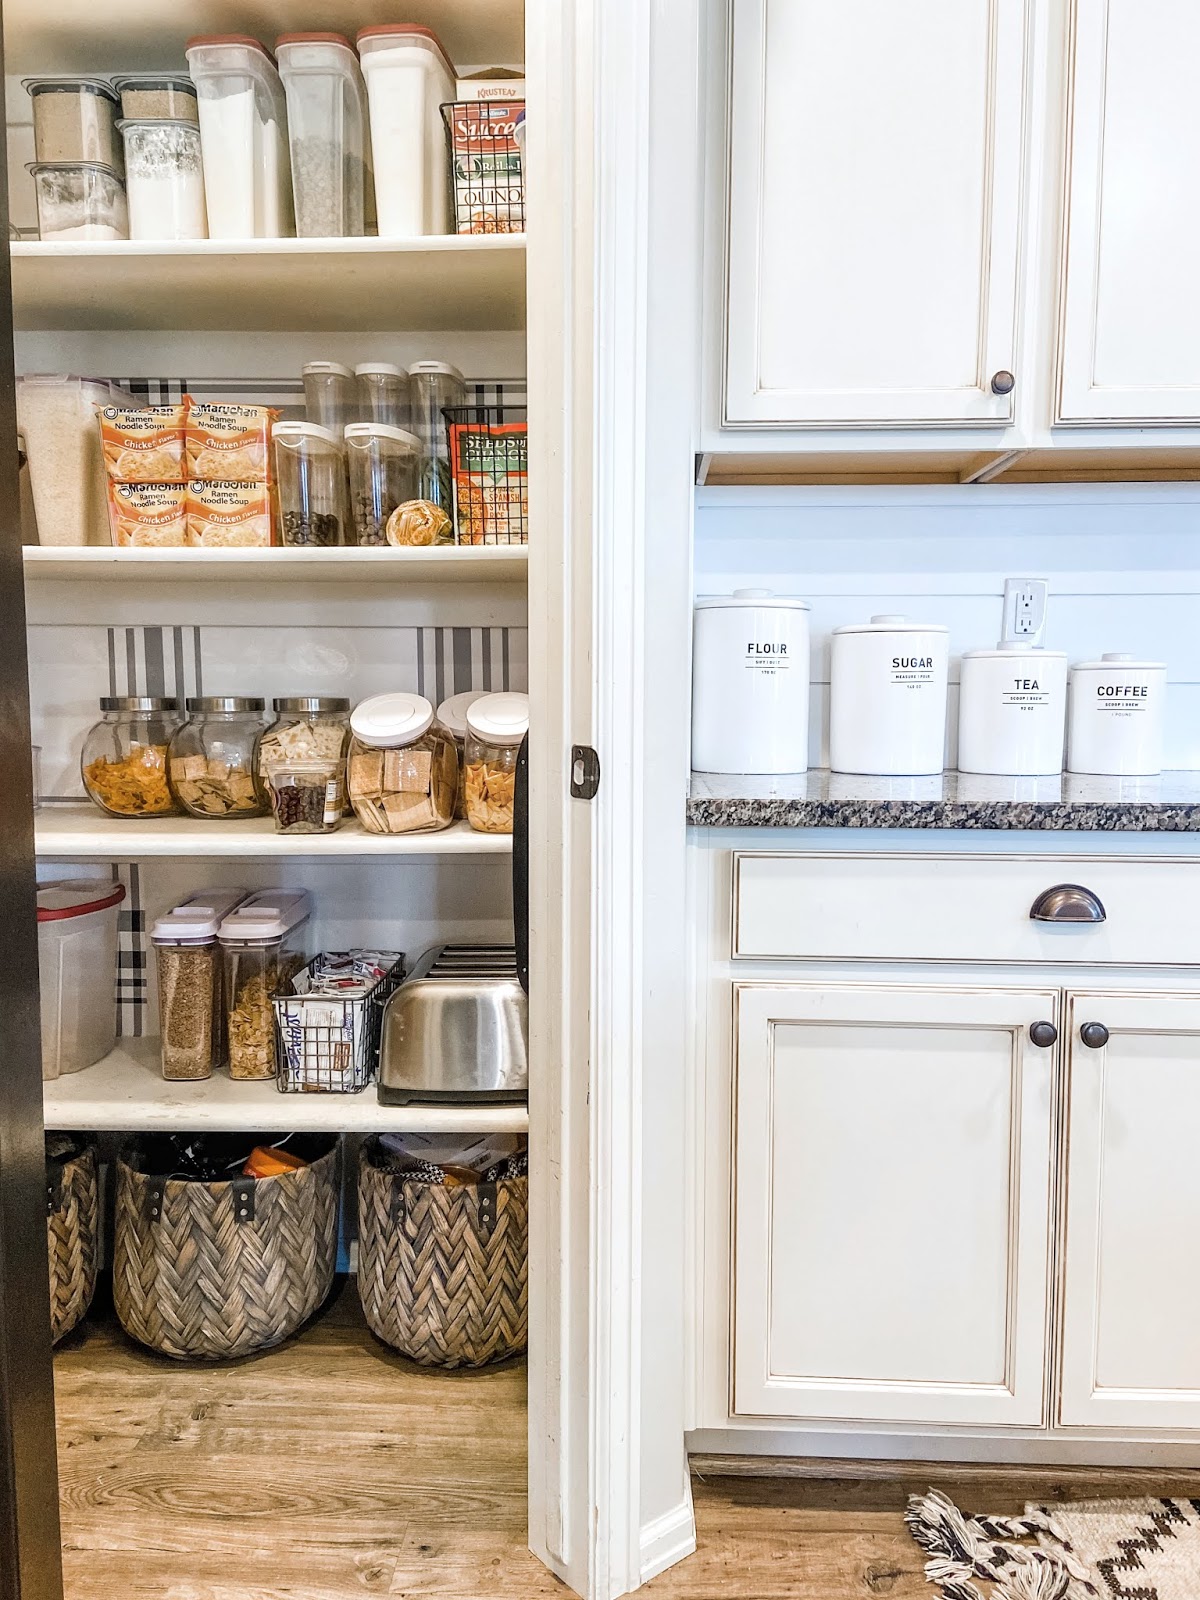
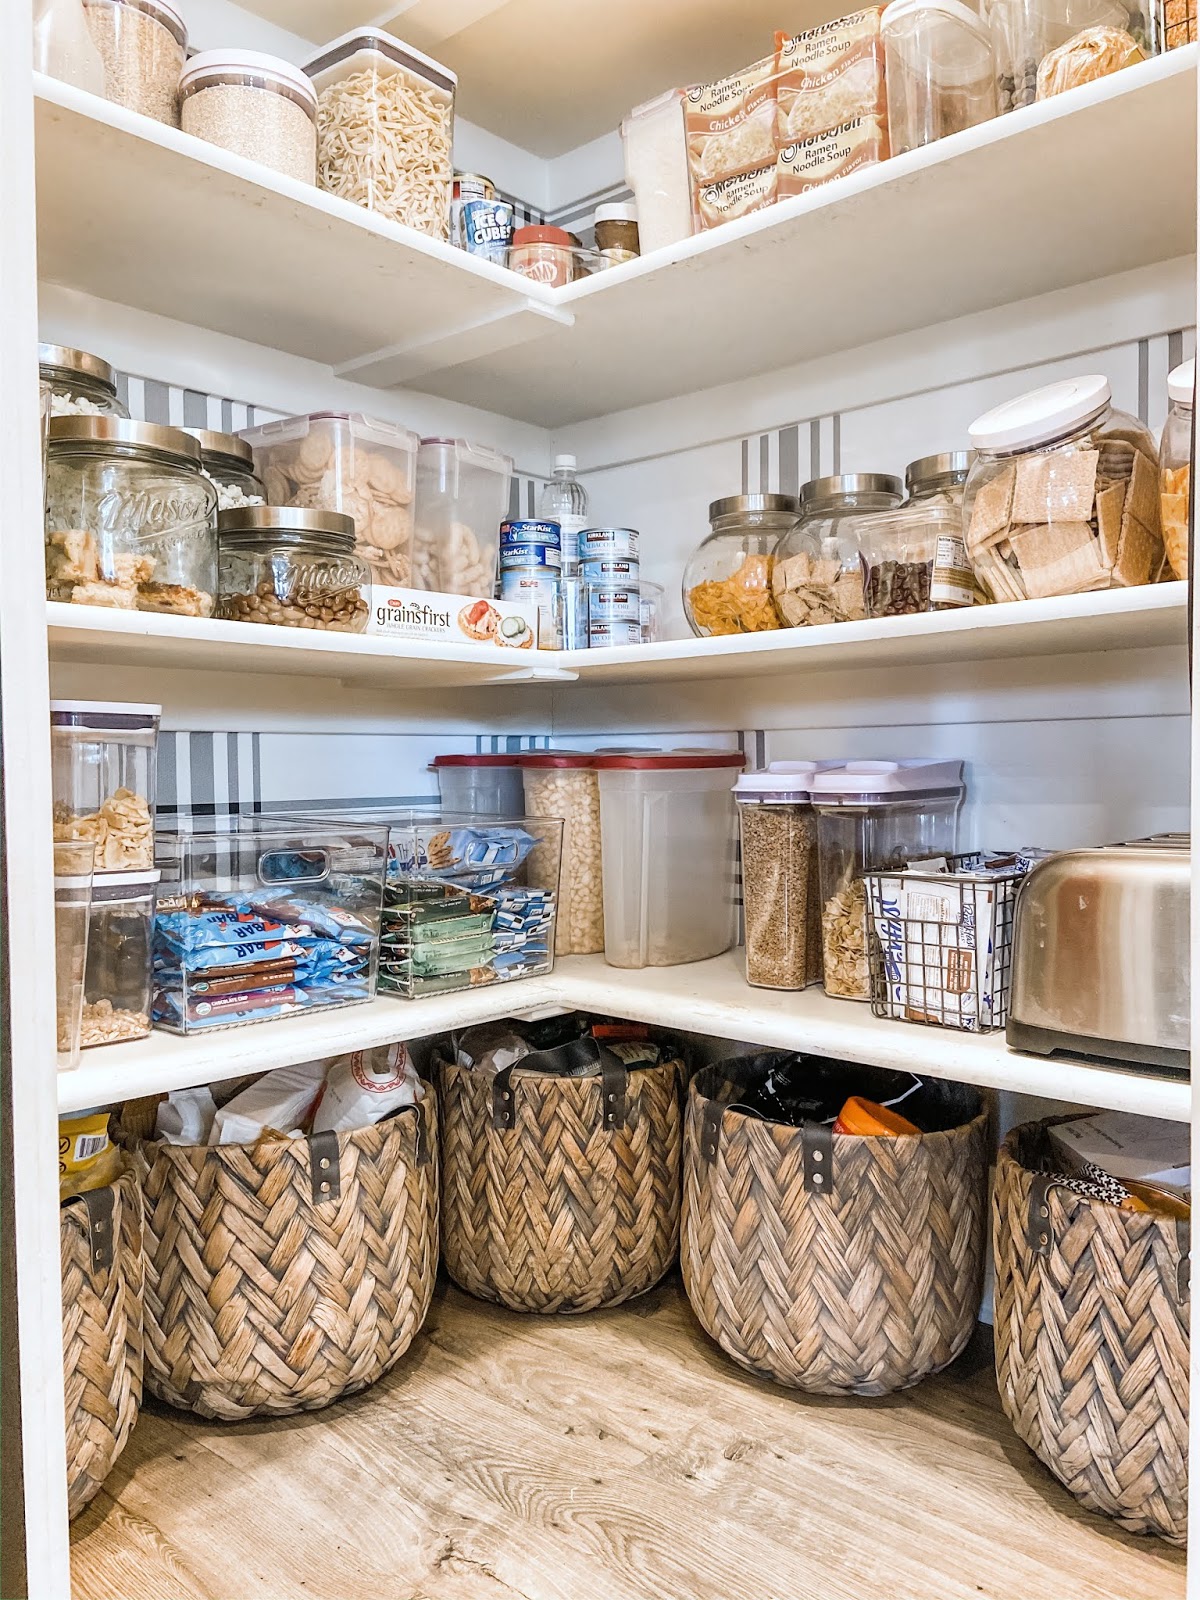
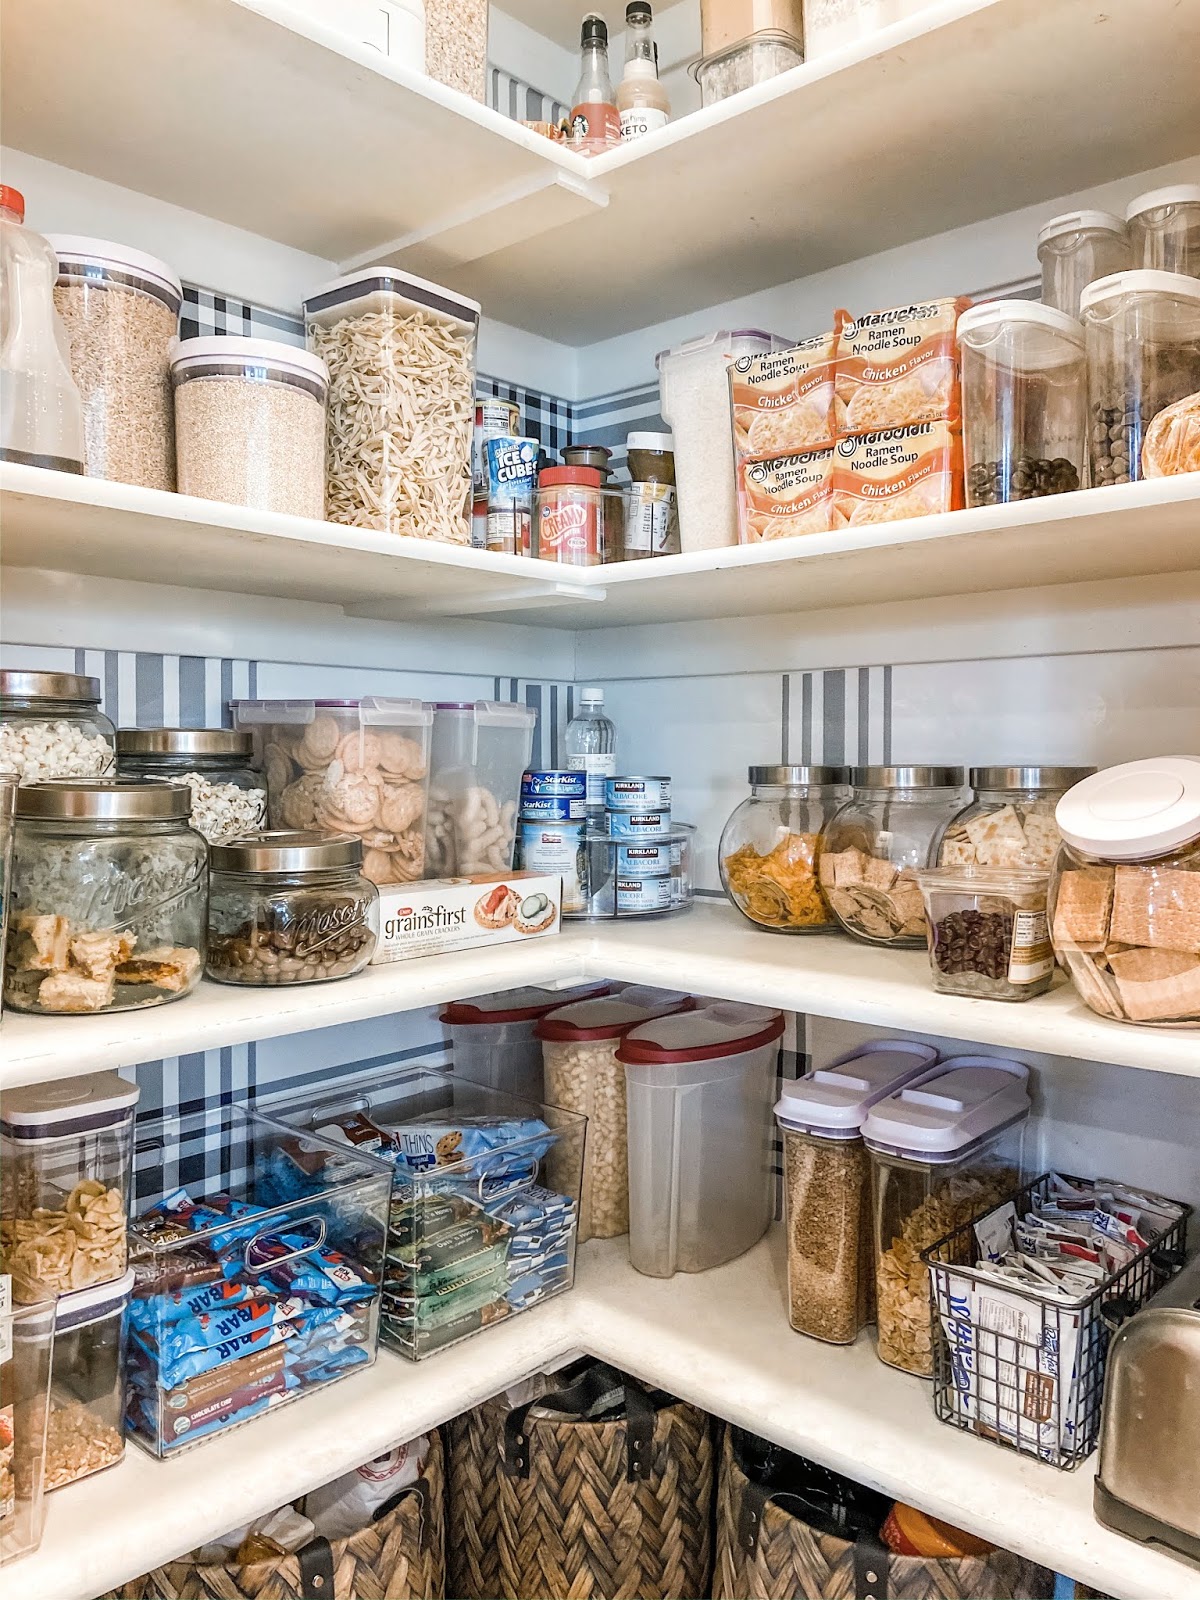
If you are like us then you are trying to keep your trips to the market to a minimum right now. For a family of 7 that means we have to stockpile things in our home, something we don’t normally do. The problem I find myself running into is how to store it all while still keeping my pantry organized. Thankfully I have come up with a few tips to fix this overflowing pantry problem!
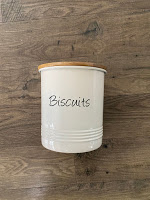
Tip #1 – Get some storage containers – These have been a lifesaver! I find that they hold a good amount of food, are easy to fit in the pantry, and generally take up less space than boxes. They also keep me way more organized.
Tip #2 – Keep your clear bin of food full – Simply by doing this I eliminated a bunch of extra food bags and boxes, making more room for a stockpile!
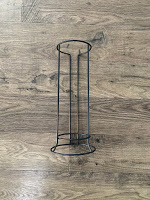
Tip #3 – Get some large baskets – I recently added these baskets to the bottom of my pantry. They are perfect for the big packages of crackers or cereal. These bags of food are hard to store because you can’t stack them and they take up a lot of space. By having them in these baskets they are neatly tucked away but also easy to access when it’s time to refill the container! My kids can even handle that job!!
Tip #4 – Utilize the out of reach shelves – Having a tall pantry means the top shelf is hard to access and rarely used. This is the perfect space to stack those boxes from Costco that you’re not quite ready to open yet. It’s out of the way and off the shelves you use every day. Since they are still packaged you can stack those to the ceiling if you want to!!
Here are the links to the products I used from Bed Bath and Beyond in my pantry storage project!! #ad
This was the most satisfying project I have done while stuck at home, and I’m loving how nice and organized everything is now!
Happy Organizing Everyone
-Grey Birch Designs-
read more
With Mother’s Day coming up next month and the state of our current health crisis, this year will most definitely look a little different. Each year my kids go out with my husband and pick me out something they think I will love. The best part of the gift is that, whatever it is, they picked it out for me! Since that won’t really be possible this year they asked if they could do something around the house that would be special for me. Although I’m sure they were thinking something along the lines of making be breakfast in bed, I had a better idea: cleaning the WHOLE KITCHEN by themselves!!!!
Now I think this is genius since a clean kitchen always makes me happy and makes me feel productive. Even better, a clean kitchen that I didn’t have to clean! Thankfully for them it’s really not that big of a job. Last year we updated most of our appliances to these fingerprint resistant Samsung appliances. Our Refrigerator Dishwasher and Microwave are always fingerprint and smuge free so the kids don’t really even need to clean them!! Before we had these that was a big chore and it took a good amount of time to make our old stainless steel appliances shine.
The whole thing took my kids only 20 mins to do and they even wiped down the shiplap all around the island, something I never do!! After they finished, two of my kids said they liked cleaning the kitchen and would do it more often!! Talk about a Mother’s Day bonus!!
Now that I have a clean kitchen the kids and I are going to dirty it up again and bake our favorite Banana Bread Recipe It’s delicious but I make a just a few little changes to the ingredients:
+ Nonstick baking spray, for the pan or parchment paper
+ 8 tablespoons salted butter, softened but still a little cold
+ 1 cup packed light brown sugar
+ 2 large eggs, beaten
+ 2 teaspoons pure vanilla extract
+ 5 very ripe bananas, mashed
+ 1 ¾ cups all-purpose flour
+ 1 teaspoon baking soda
+ ½ teaspoon kosher salt
+ 1 cup chocolate chips (we tend to be generous with chocolate at out house)
+ granulated sugar (dusted on top before baking)
We love cooking together and this recipe is so easy my kids can practically make it by themselves. Plus, all the ingredients are staples in our house so there’s no need to go out and brave the supermarket!!
-Grey Birch Designs-
read more
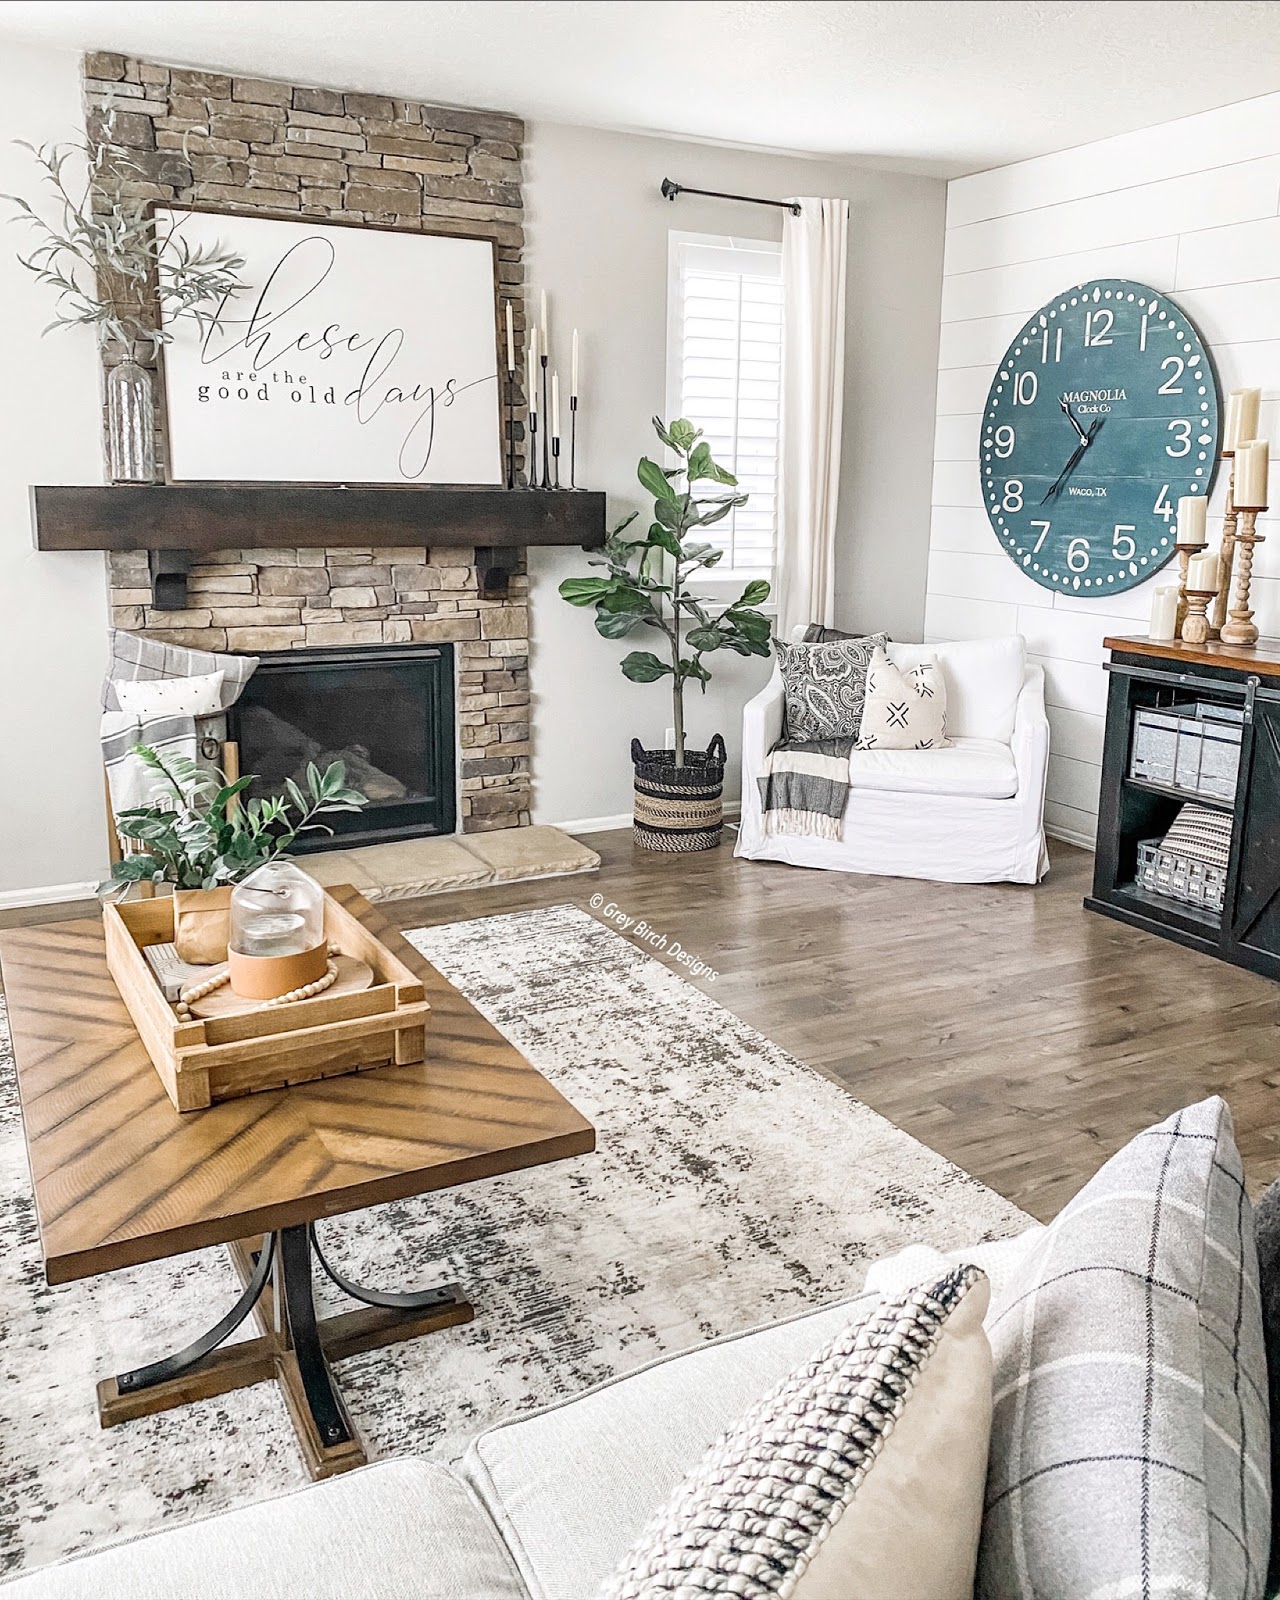
When designing our living room I always envisioned creating a cozy, relaxing sitting area; a place I could see myself curling up next to the fireplace reading a book or watching a movie with my kiddos. Can you visualize it?? Now fast forward to my reality……
I tried a few different chairs but they either lacked the cozy factor or were comfortable but not stylish. This was a lot harder then I thought it would be, maybe because I had been creating this little corner in my head for so long and I had some serious wish list items! This was when I decided I needed to go custom. This way I could pick the comfort level and style so it would match my other living room furniture.
That’s when I found this gorgeous Amelia Chair from Sixpenny! It’s an oversized chair big enough for cuddling with my kids and bringing my vision of the perfect sitting area to a reality- exactly what I was looking for! The first step was picking the fabric. I ordered a bunch of their samples so I could get a good look at how they would work with the other furniture in my living room. I decided to go with the Cotton Linen in the Pacific Pearl and it’s simply beautiful. For the chair fill I wanted something ultra cozy so I picked the feather down fill and it didn’t disappoint!
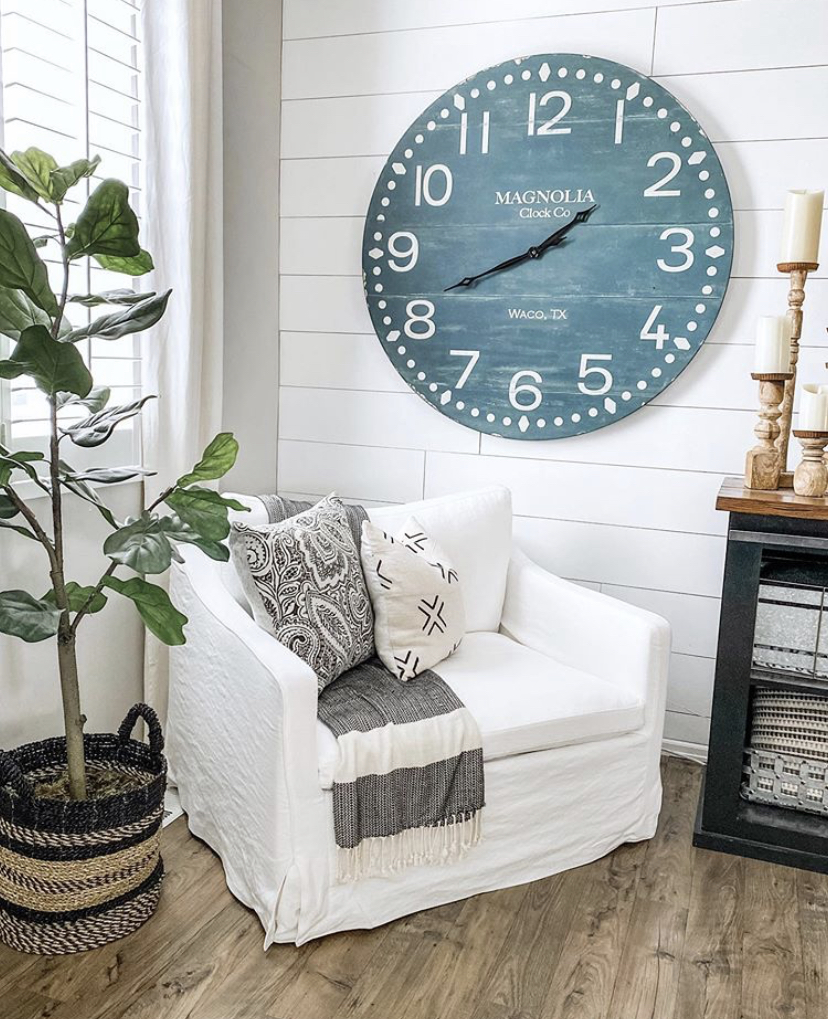
Next I added a throw blanket and a few pillows with some fun patterns and great texture to give it that cozy welcoming feel. Then I completed the look with some faux greenery and a few of my favorite pieces of decor!
This little corner has become the best seat in the house, literally!! I thought I would spend a lot of time here but truth be told, I have to fight my kids for a turn in our new sitting area….haha!! Needless to say we are thoroughly enjoying it and because this chair has a slipcover I don’t have to worry about spills and sticky fingers.
-Grey Birch Designs-
read more
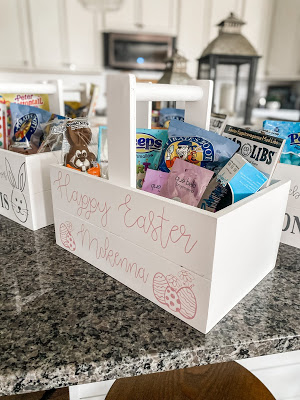
I always have so much fun putting together Easter Basket goodies for my kids. One thing I don’t love is filling their baskets with tons of candy. I like to find some alternatives to mix in with a few of their favorite candies! As my kids have grown I have also had to get more creative, since my teenage daughters aren’t going to be interested in the same things I put in my 6 year old son’s basket…..haha!!
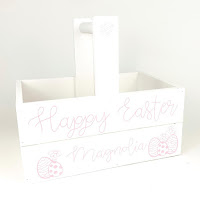
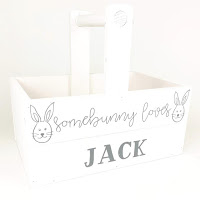
This year I decided to get all my kids new Easter baskets, and when I saw these personalized wood baskets from 12timbers I fell in love! The best part about these is they will last for years to come. I’m excited to start a new tradition with these adorable Easter Baskets
-My 2020 Easter Basket Round Up-
-Ideas For Teenage Girls-
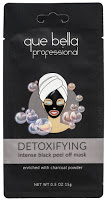
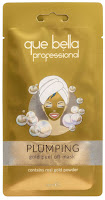
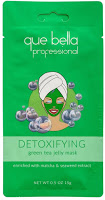
If you have girls like mine then they are all about the beauty products. My daughters love to do their hair, paint their nails and recently have been loving face masks! I grabbed a few of these Que Bella Face Mask They have so many different kinds, they are affordable and my girls love them!
These two are our favorites!

Something else I thought was fun is the travel size of our favorite Wet Brush to throw in their backpacks or purse. I also picked up Easter themed Mad Libs I remember loving these as a kid and it’s fun to see my kids get a kick out of them too!
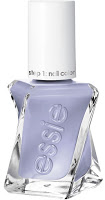
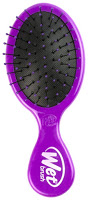


Gel Nail Polish Mini Wet Brush Easter Mad Libs Bath Bombs
-Ideas For Boys-
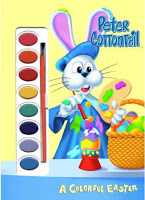
For my boys I found some cute things to keep them entertained. First is a painting color book. I know my boys will sit in the kitchen and paint together for hours so this book was well worth the $3.59 haha!! My youngest loves anything Paw Patrol so this cute book was so perfect!


Finally, I can’t forget some of my kids’ favorite Easter candy must haves. My kids would be happy campers if Peeps were sold all year long, I think you either love them or hate them….haha!!


read more
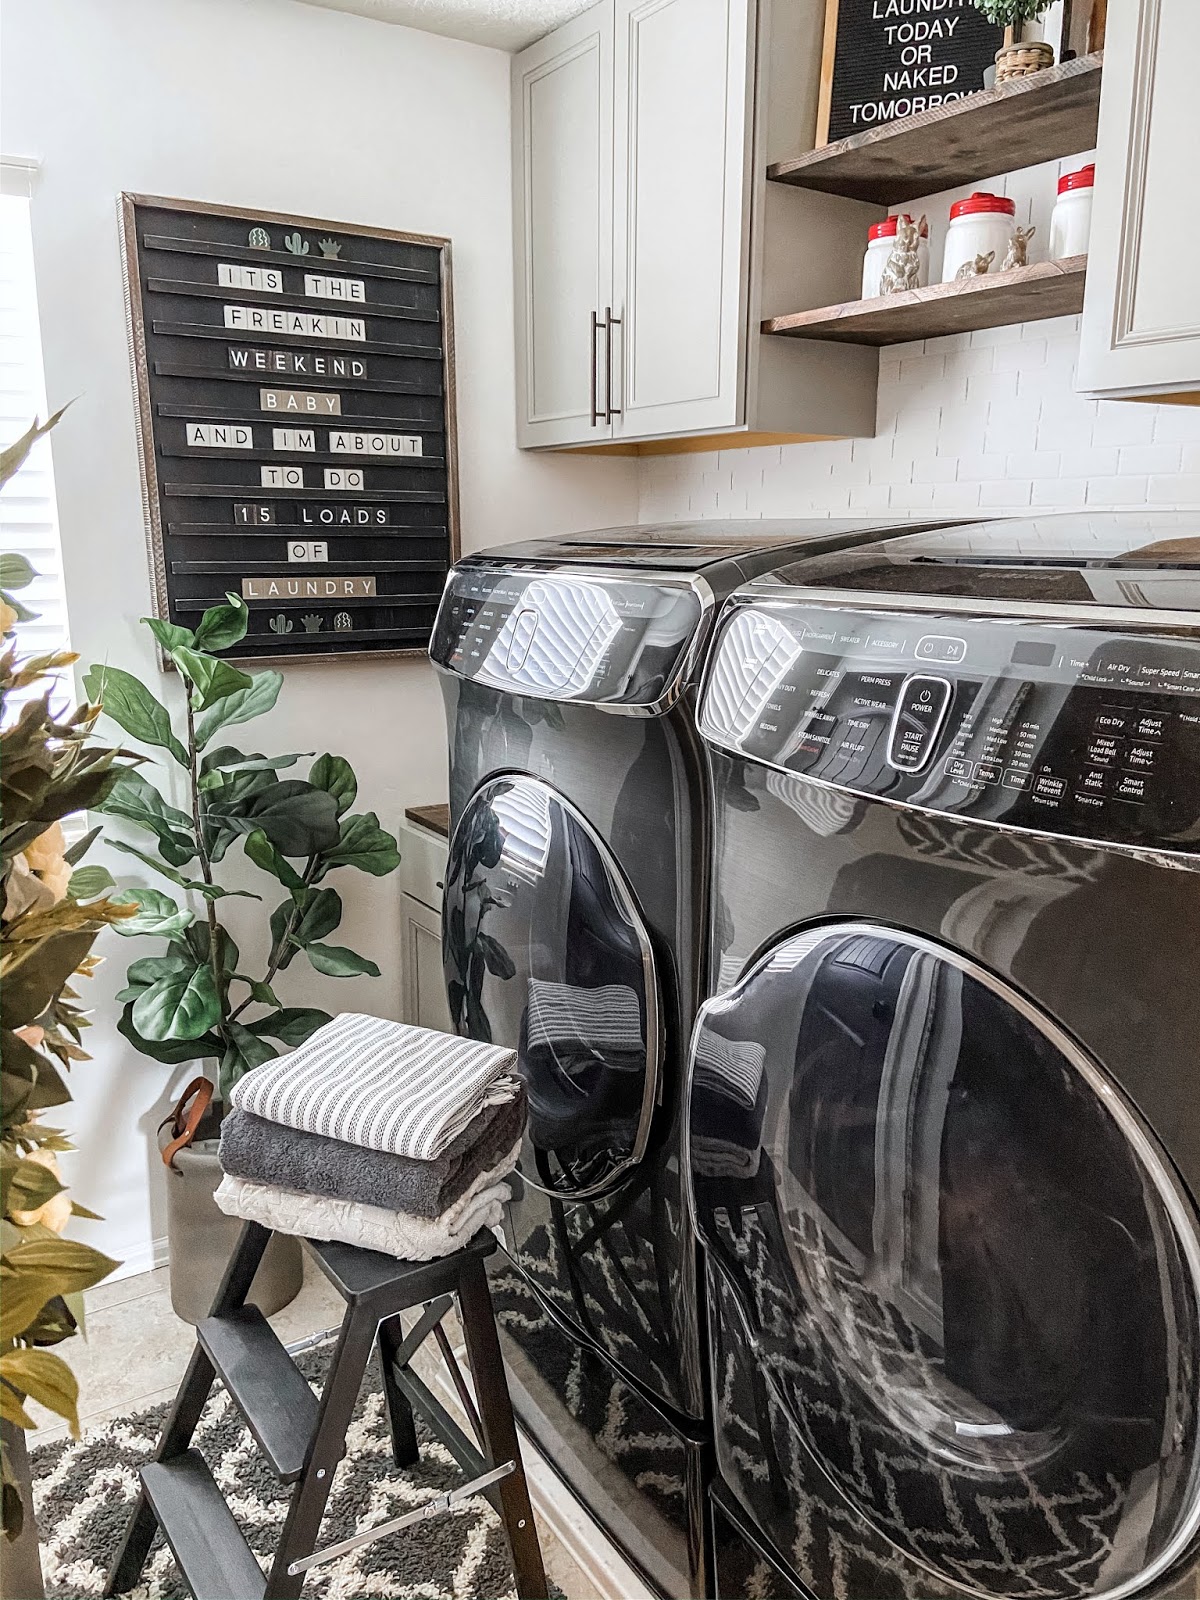
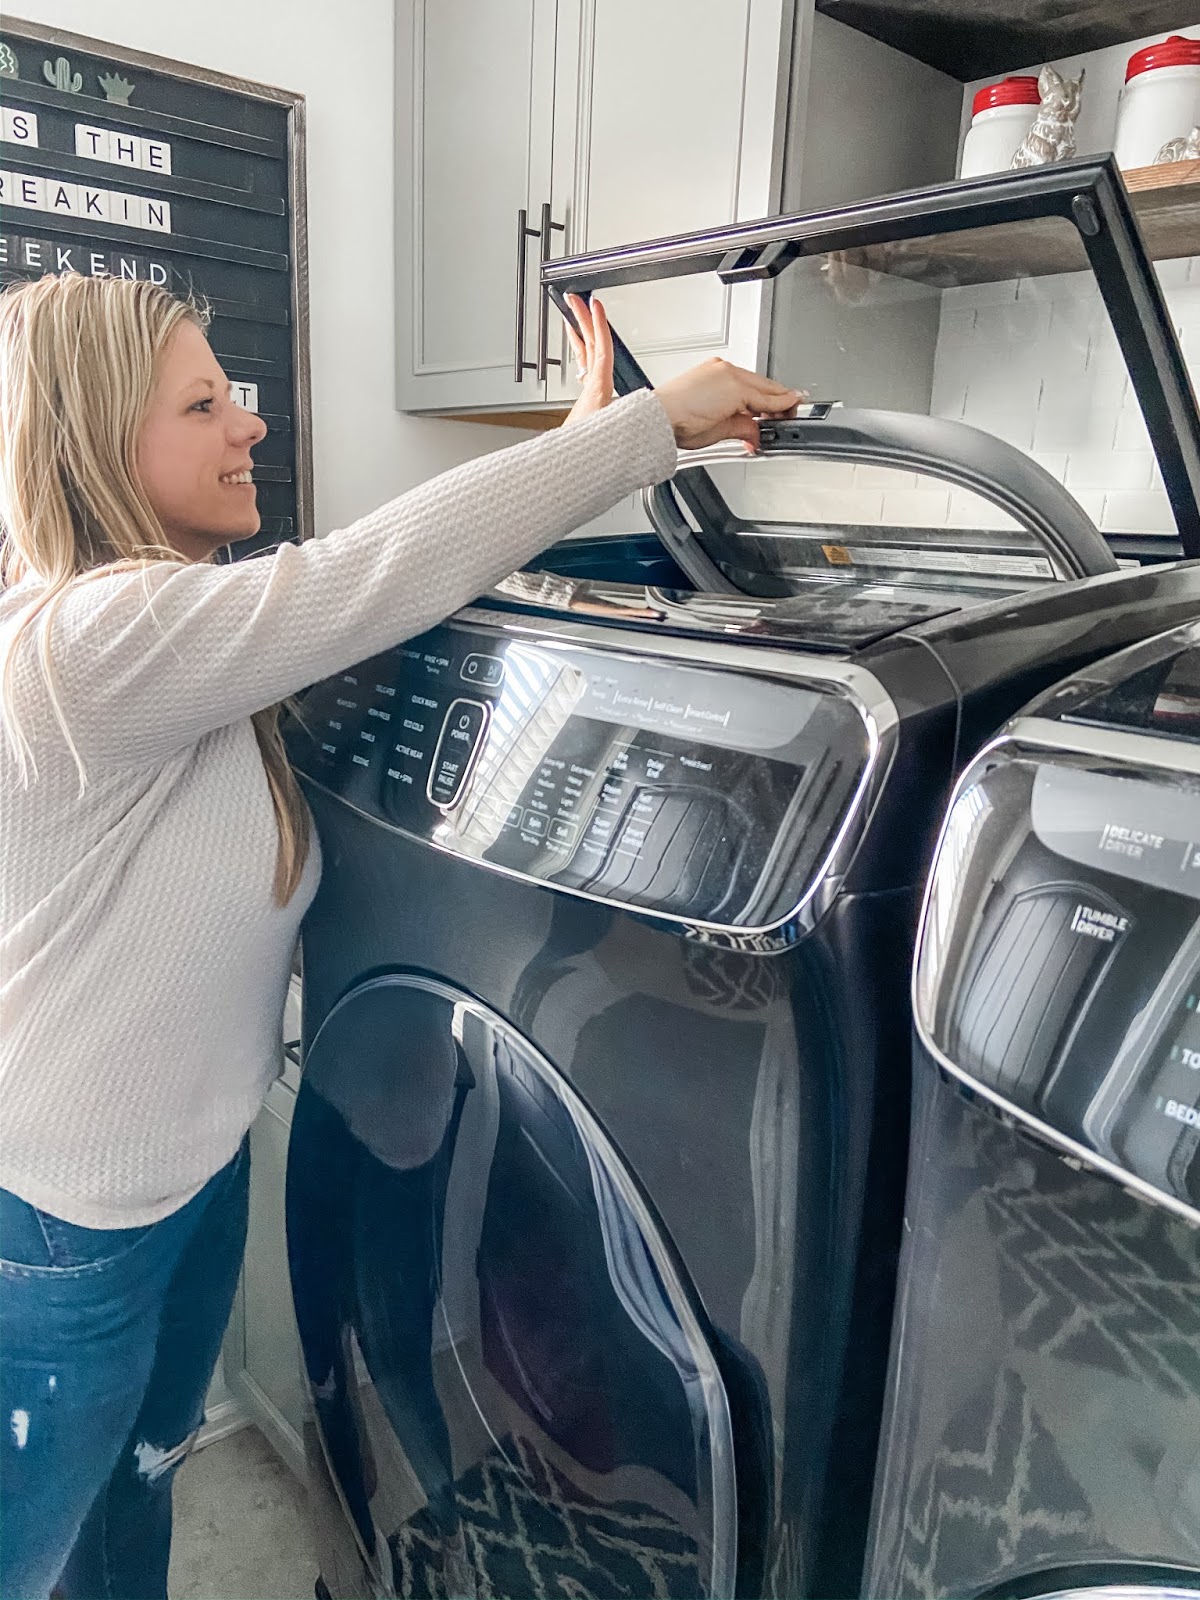
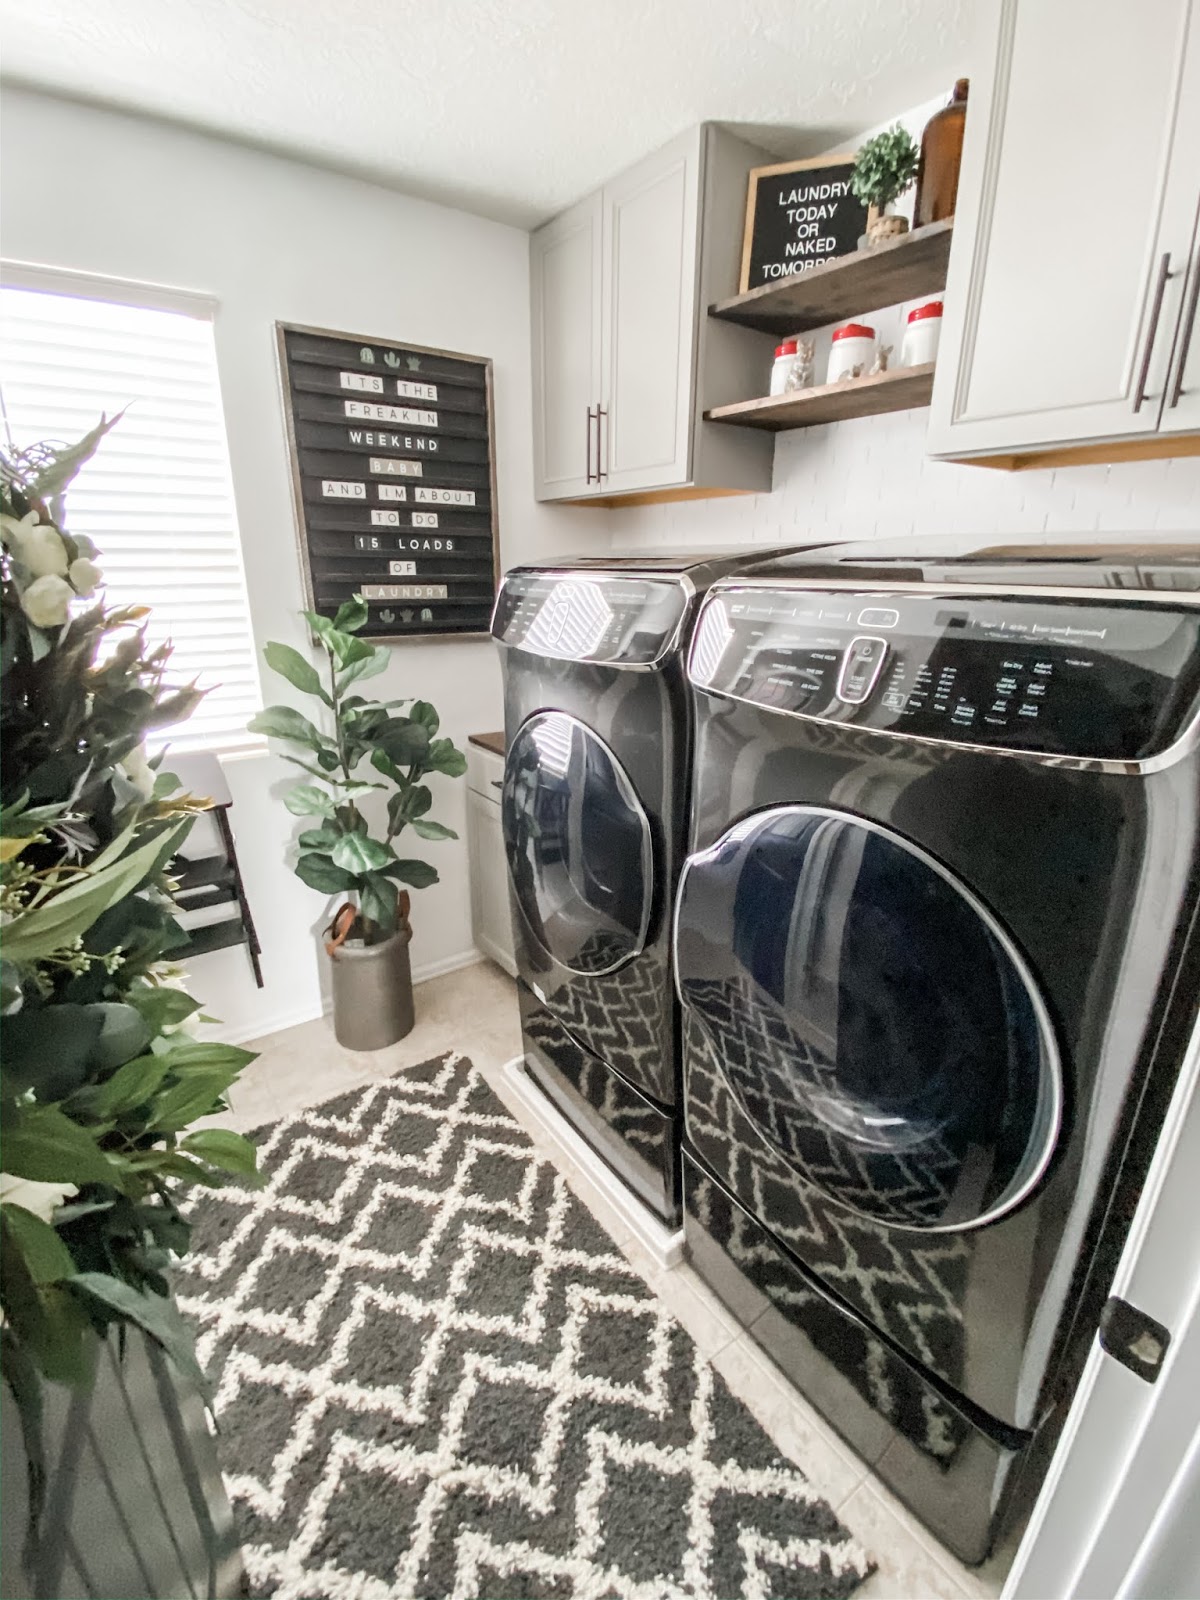
How many hours a week do you think you spend in your laundry room? When I sat down and really thought about it I was shocked!! With this being such a highly used room I decided to give it a little Spring/Easter update like the rest of my home. I’m convinced it makes doing the laundry that much more enjoyable!!
I added a Spring wreath on the door, a set of cute ceramic bunnies on the floating shelves above my washer and dryer, and a fun letter board on the wall to change out the quotes during the year! It was fun to dress up this space with some seasonal decor but the stars of the room are my Samsung FlexWash Washer and Samsung FlexDry Dryer #sponsored I can honestly say after updating my washer and dryer to these beauties from Samsung I actually enjoy doing the laundry. Say what?! I know I’m as shocked as you!! Although there are so many things I love about these machines I have to say by far my favorite is being able to was 2 loads at once – one regular load and one delicate or small load in the top. Talk about a game changer!
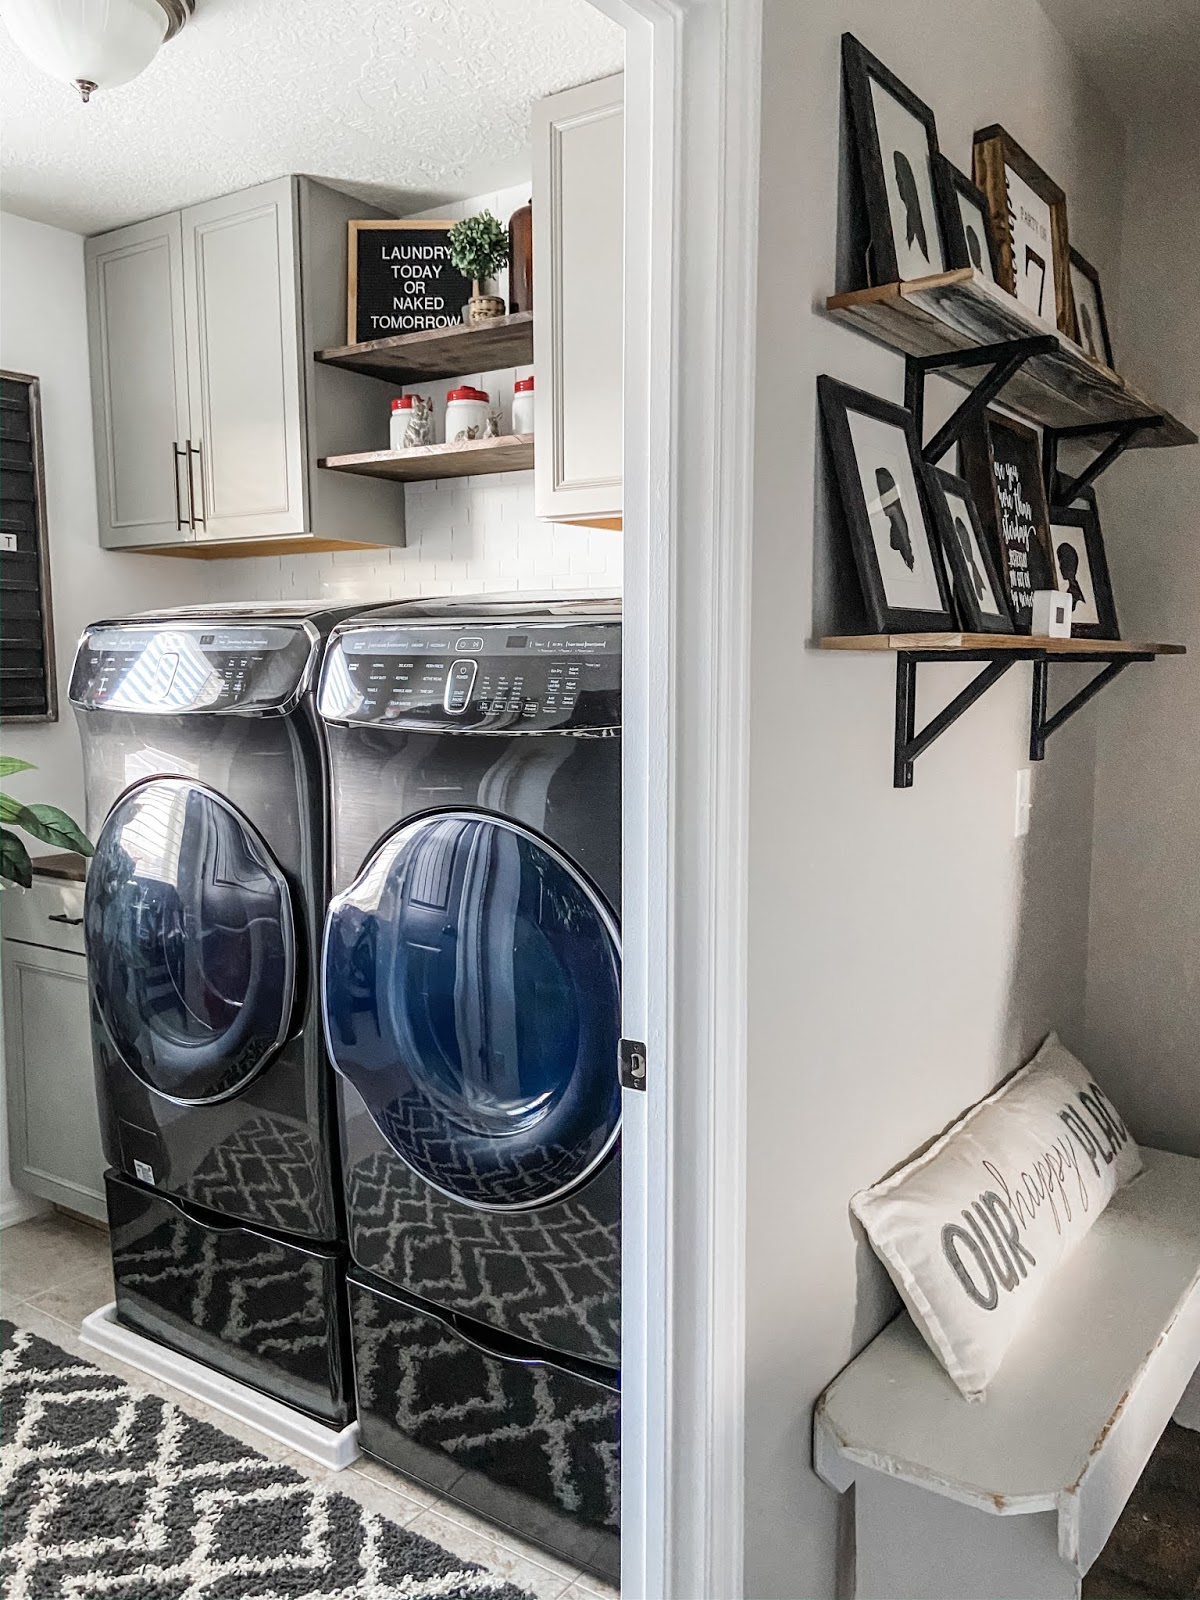
Now if that doesn’t make you feel like a super mom or super dad I don’t know what does! You can find out more about these awesome machines here: FlexWash Washer and Electric FlexDry Dryer Now I’m off to do about 100 more loads of laundry in my newly decorated Spring laundry room!!
-Grey Birch Designs-
read more
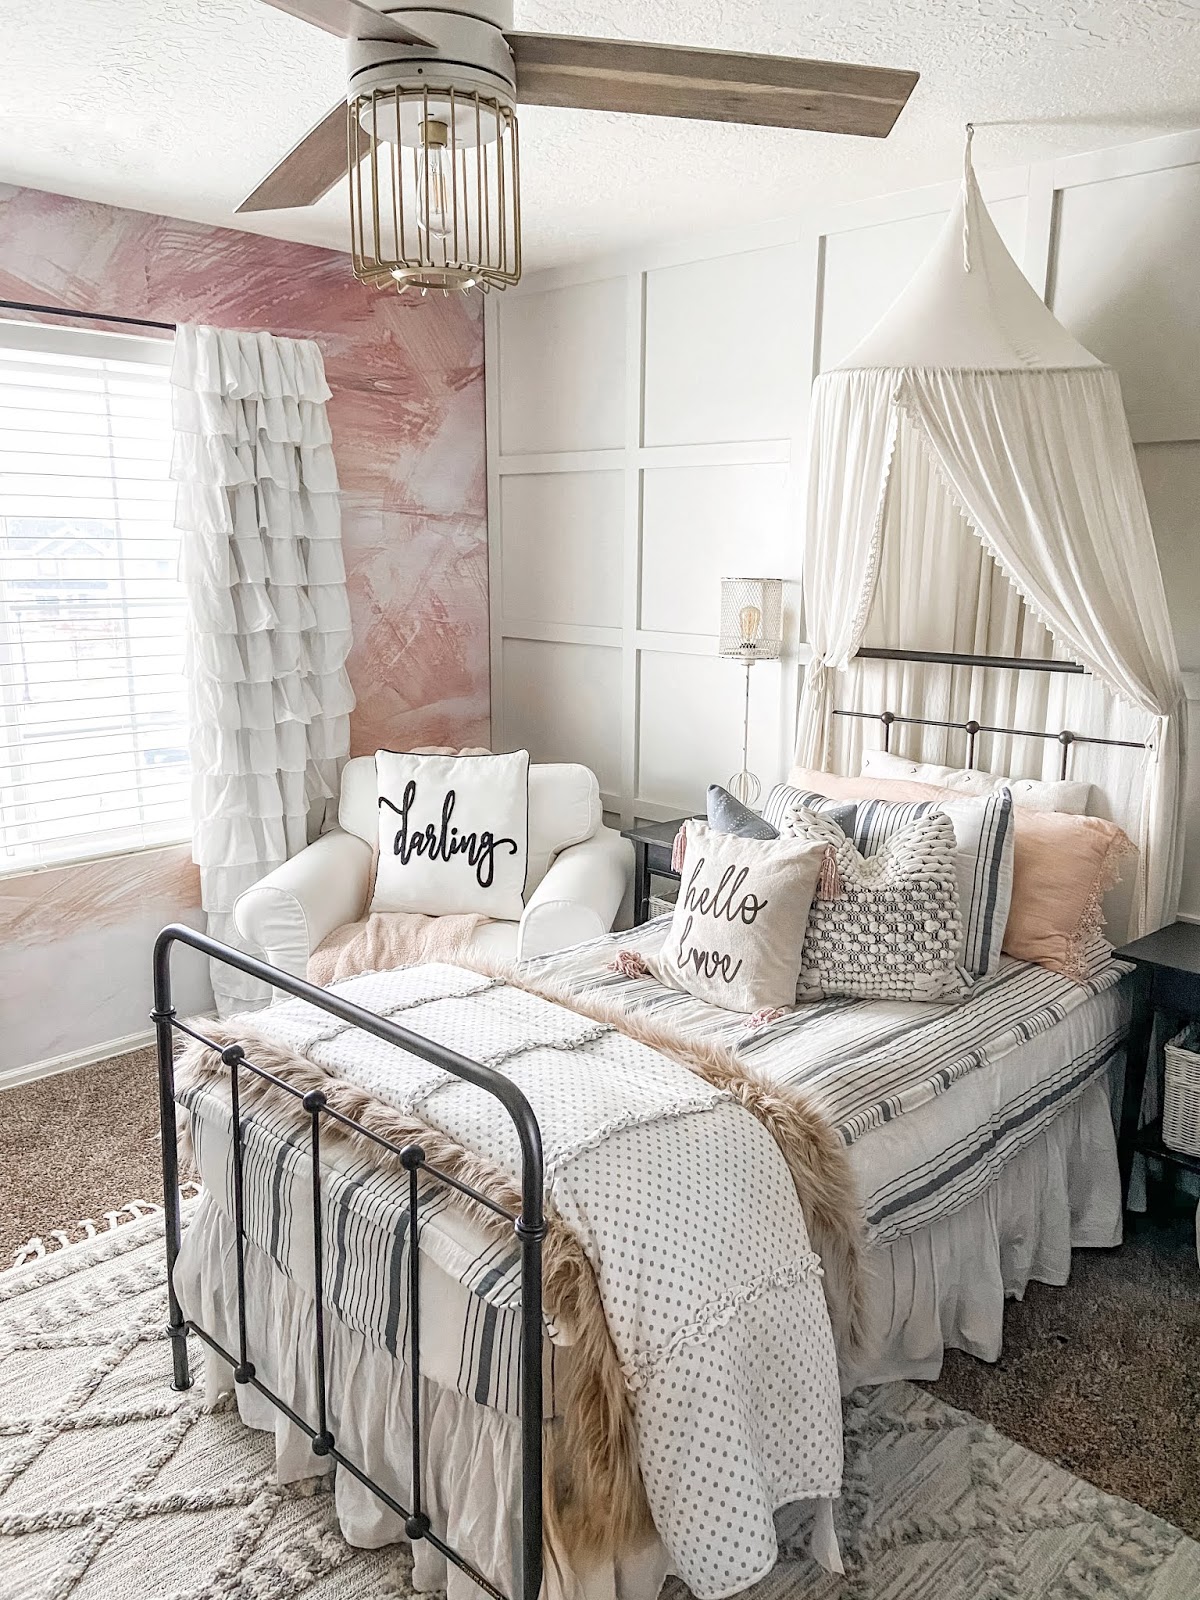
Last year when I updated my daughter’s room the one thing I didn’t change was her bed. I knew what I wanted but just couldn’t find the perfect bed, that is until I came across Charles P. Rogers They have an amazing selection of metal frame beds, exactly what I was looking for!
I’ve always loved metal beds but it’s hard to find a high quality one that doesn’t wiggle and squeak. Charles P. Rogers is known for their high quality beds so I felt confident going with a trusted name! When I came across this Cottage Bed it was love at first sight! The style and lines of this bed are perfect. It’s soft with round corners, perfect for a girl’s room but can be easily dressed to fit a boy’s room!
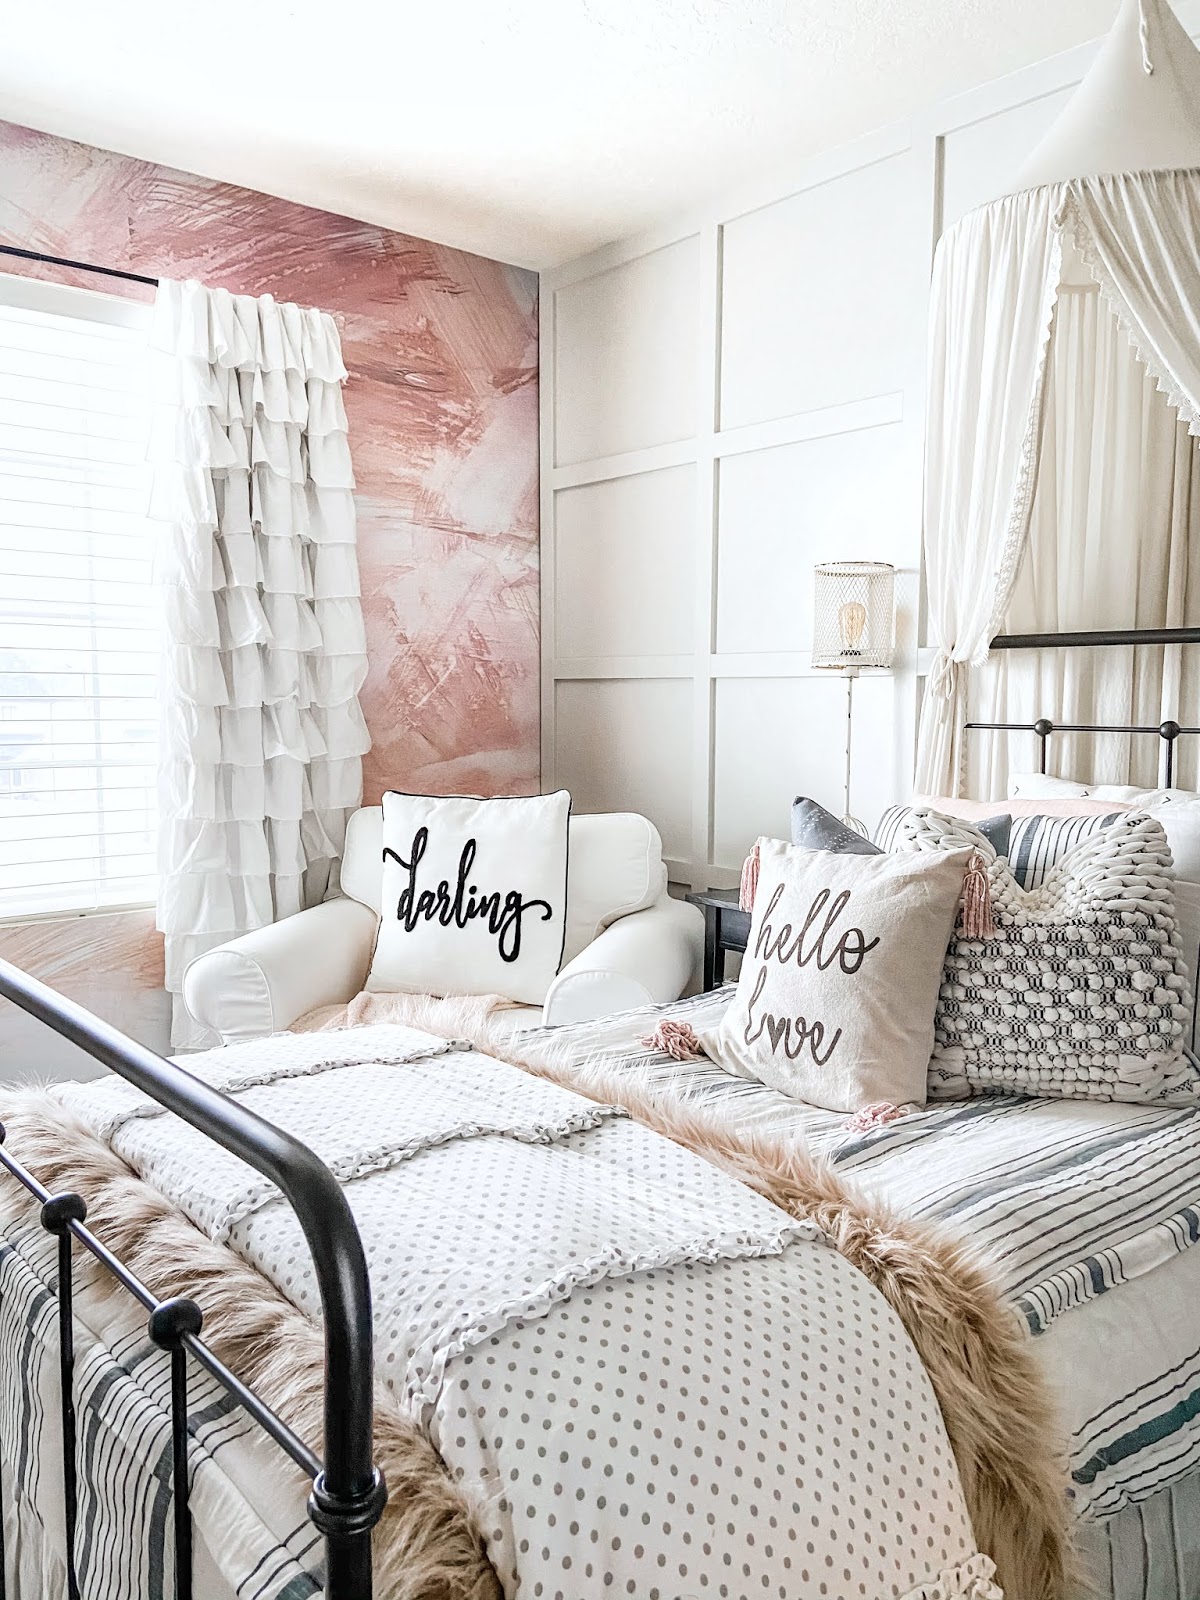

I have been extremely impressed with the quality of this bed and how well it fits the style of my daughter’s room! Right now they are running a special sale for all of you so you can save between $50-$500 off your entire purchase of $299 or more with code: WSB2020 from Charles P. Rogers Check out all their beautiful beds and take advantage of the sale while it lasts!!
-Grey Birch Designs-
read more
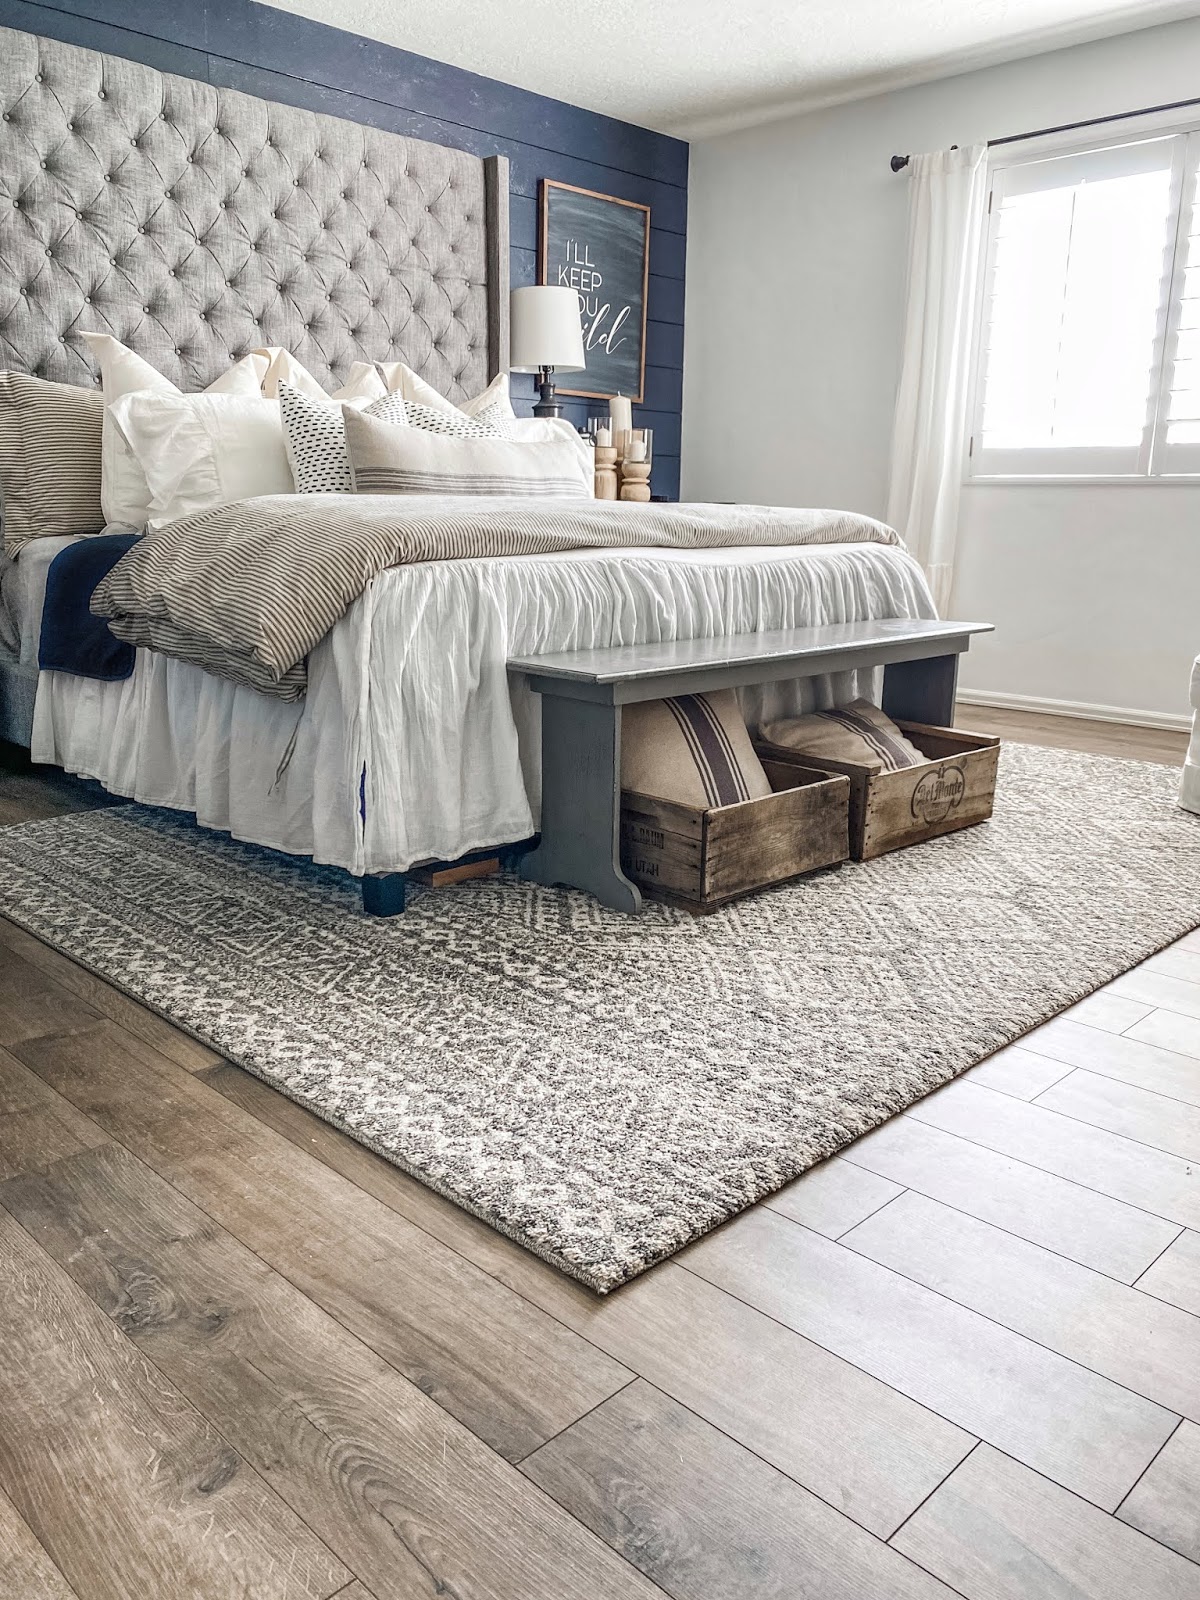
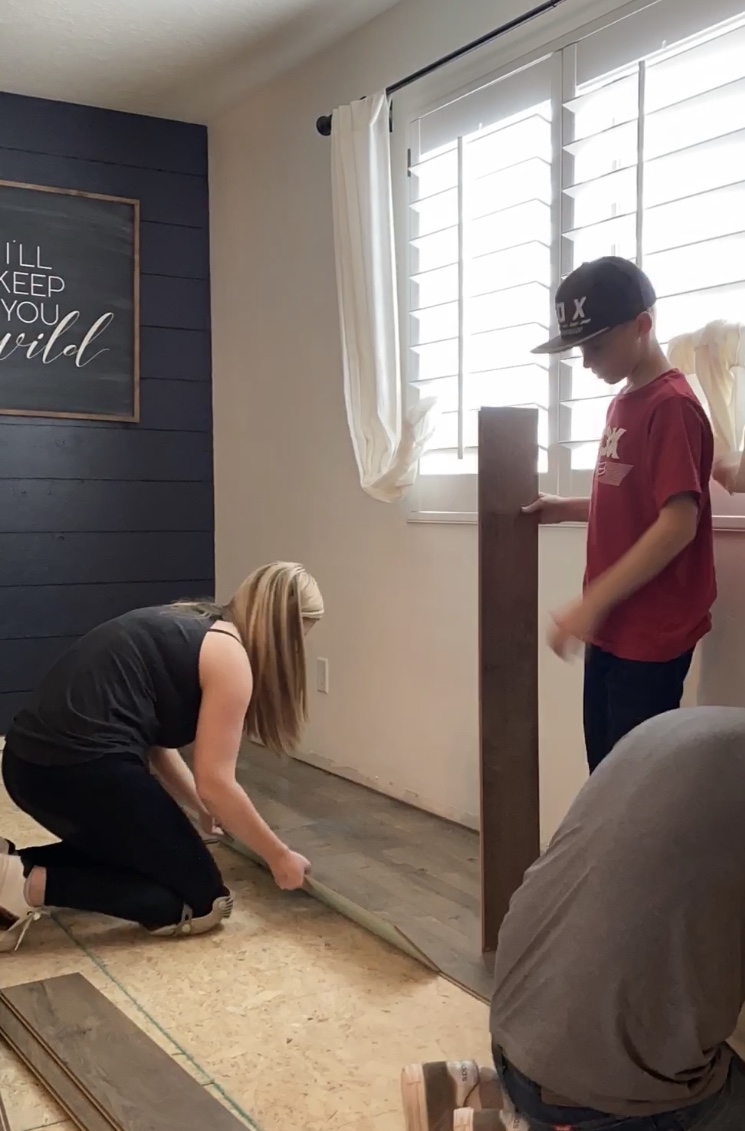
This month we tackled a big home project, one that I have wanted to do for some time now. We ripped out the carpet upstairs and installed new laminate flooring! I was a little nervous this was going to be more than we could handle, but this product from Creative Surfaces made the installation super easy!
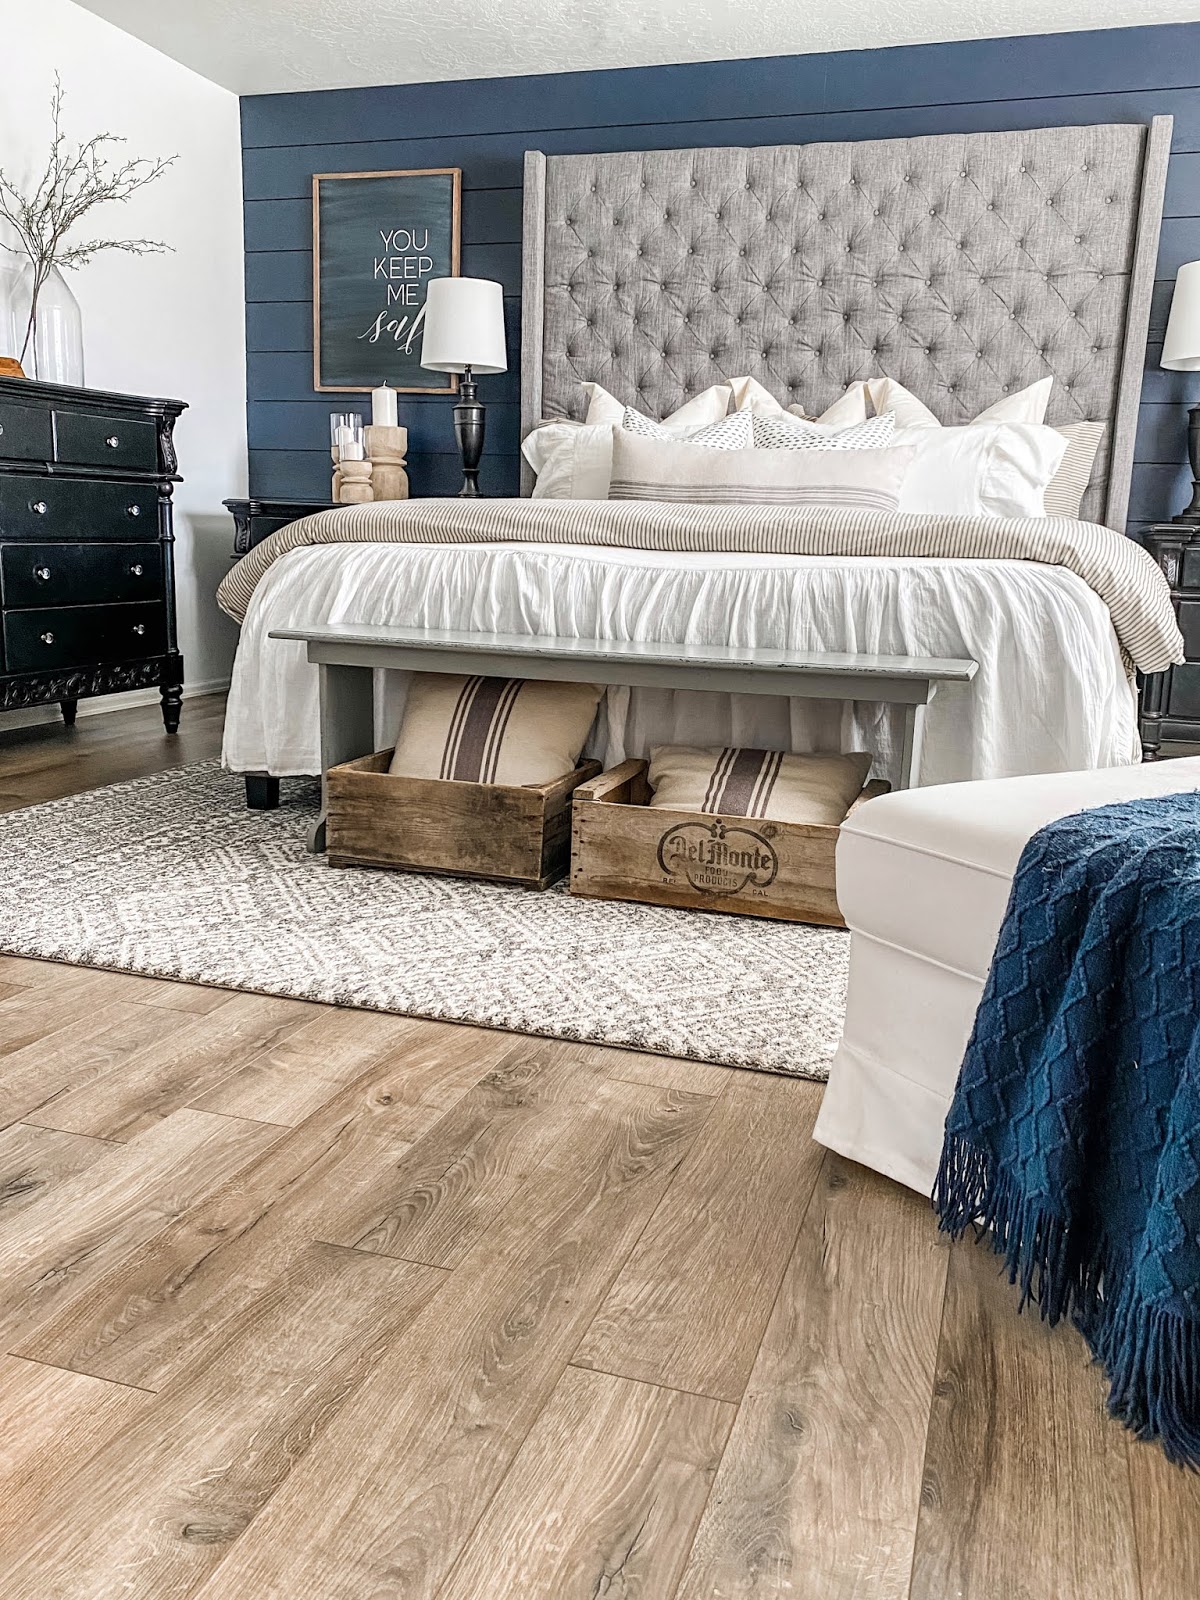
We chose the Riverside Oak Laminate Plank and the color is perfect! It’s a beautiful medium brown with a subtle grey undertone. There are beautiful variations in the planks, giving them the look and feel of real wood but with the benefit of being extremely durable.
One thing that makes this flooring so easy to install is the underlayment is already attached to the planks. If you have ever installed laminate flooring before and fought with a big roll of underlayment then you know what a huge time saver this is. The planks also have SurfaceLoc system making it easy to snap and lock the boards together to form a solid surface floor.

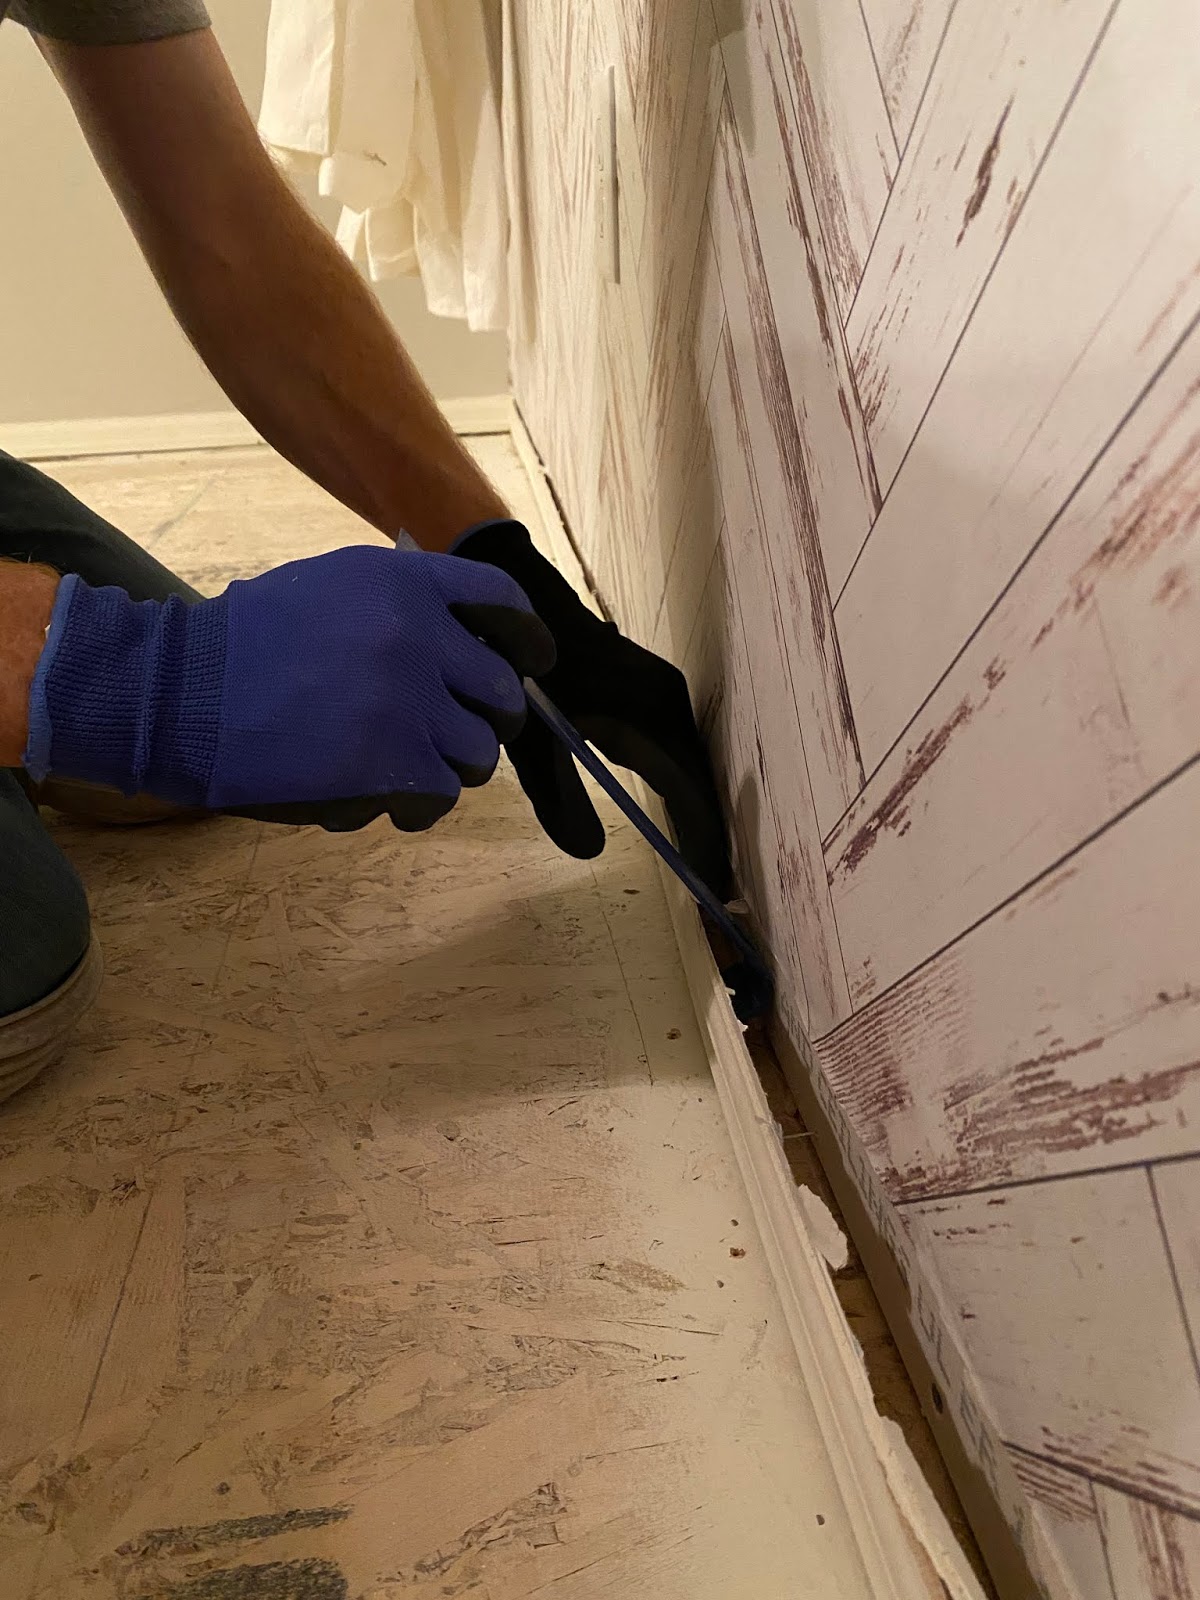
There are a few things that are important to remember when switching out your flooring from carpet to laminate. First you will need to remove your baseboards. This is important because the thickness of carpet is much less than laminate, so you will not be able to slide your laminate under the baseboards. A tip to save a little money is to reuse your old baseboards instead of replacing them. If you use a hammer and a pry bar you can carefully pull the baseboards off the wall without damaging them. If you choose not to remove your baseboards you have the option of using quarter round moulding to hide the gaps for a clean finished look.
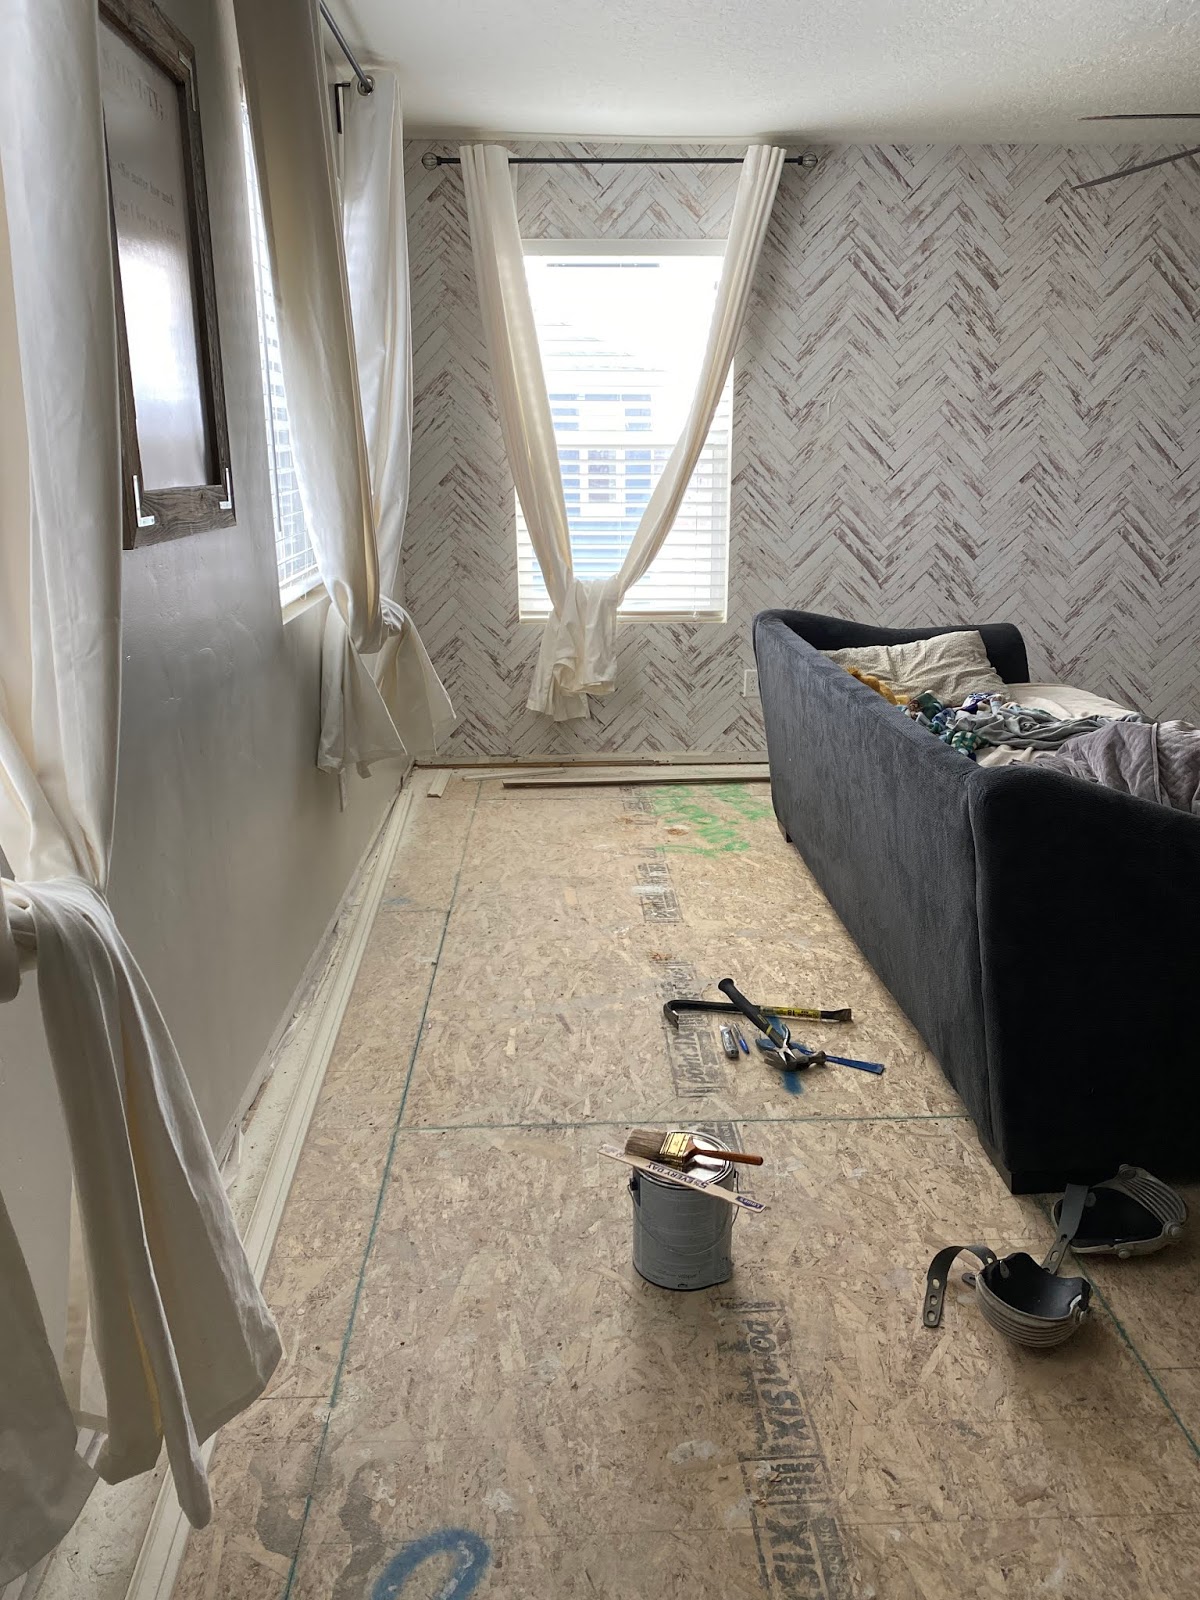
When you lay the floor you want to make sure you stagger the boards. If any of your seams meet up then your joints won’t be as strong and could shift over time. Install your floor like a typewriter by starting at one end and working your way left to right. When you get to the end, cut your board to length and use the left over pieces as the start of the next row.
I wish I had done this project sooner because it completely transformed our upstairs! Now my flooring is not only beautiful but is also super easy to clean, which is awesome with 5 kids and 2 dogs!!
You can find this laminate flooring at your local Walmart or check their website Creative Surfaces to see when it will be available in your area!
-Grey Birch Designs-
read more
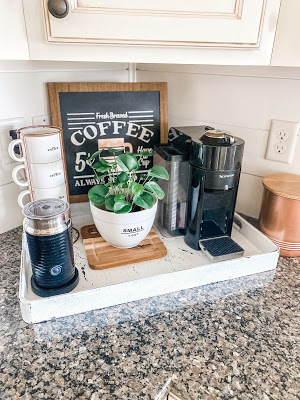
Most people keep their coffee maker out on their countertop, but it’s not the prettiest thing to look at! I wanted to create a countertop coffee station that was compact, functional, and appealing to the eye. I challenged myself to come up with a different kind of DIY. I didn’t want to have to build anything, buy a bunch of stuff, or spend a lot of money, so upscaling items was the perfect solution!!
I made a list of the must have items in my coffee station:
-A cup holder
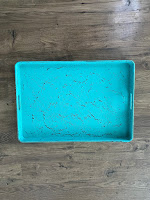
-A tray big enough to hold everything
-A place to hold my coffee pods
-Some decor to make it cute
I went out hunting for things that would meet these needs but were as budget friendly as possible. I knew the colors of the items didn’t really matter because I could change them. The main focus was the right size and functionality.
I found the perfect size canister for my coffee pods, a large enough tray to hold everything, a mug holder, and the perfect size sign to make it cute and also hide those ugly power cords! I got all this for under $40. The only problem was none of the items were the ideal color or matched my style. My next step was to figure out my color scheme with the help of all the amazing paint colors available from ColorShot
For this project I used:
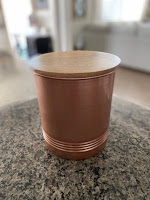
I wanted a distressed look for my tray so I first painted it with Blackout Once it dried I painted it with Marshmallow and sanded it to get some of that black paint to show through, giving it a great distressed look! For my mug holder and coffee pod canister I wanted to bring in a copper color so I used Lucky Penny on both of these!


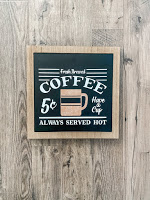
The last thing I did was create a cute coffee sign. I popped the wood board out of the frame, painted the background with Blackout and laid down my stencil. I sprayed the stencil with Marshmallow and then I pulled more of that pretty copper color into my sign by using the Lucky Penny-Paint Pen to color in the coffee cup. I wanted it to have a vintage look, so before the paint dried I blotted it with a paper towel. I repeated this step 3 times to get the look and depth of color I wanted. Check out this video for more details on how I made this fun sign!
This project made such a difference in our kitchen!! I set out to make something functional, compact, and beautiful all on a budget and I think I hit all those points!
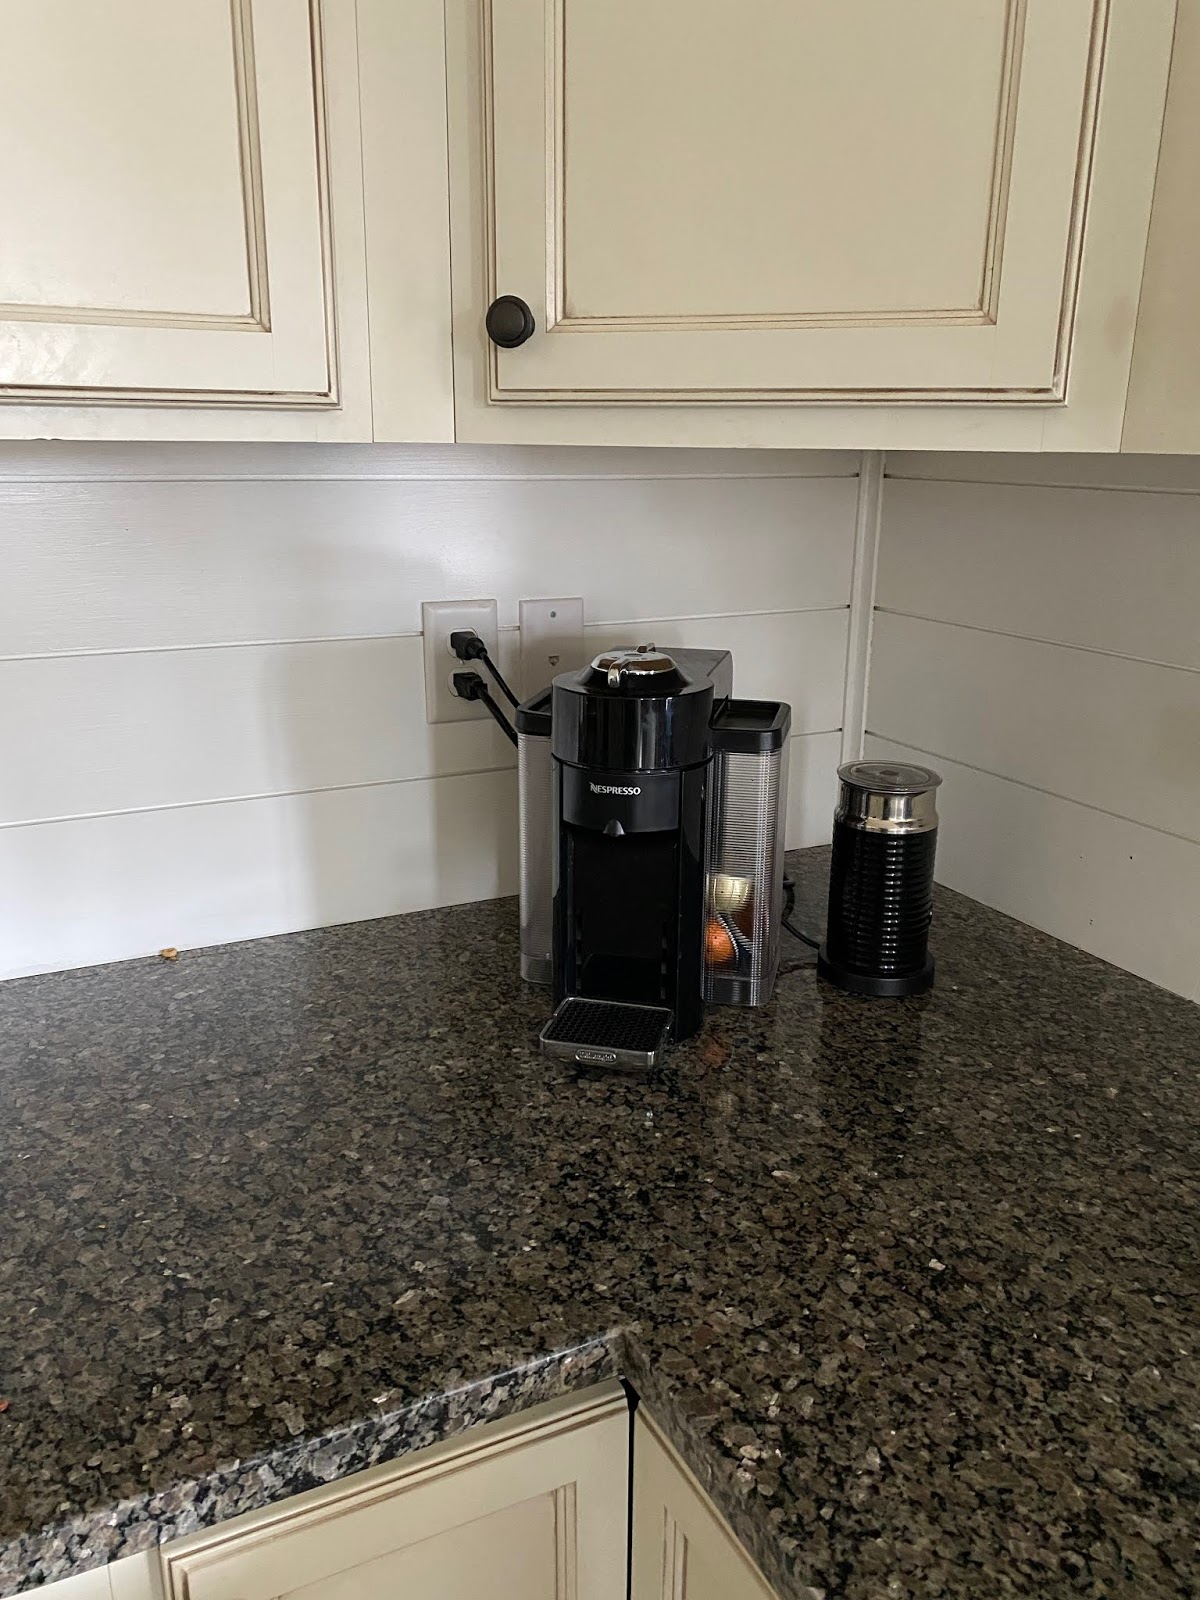
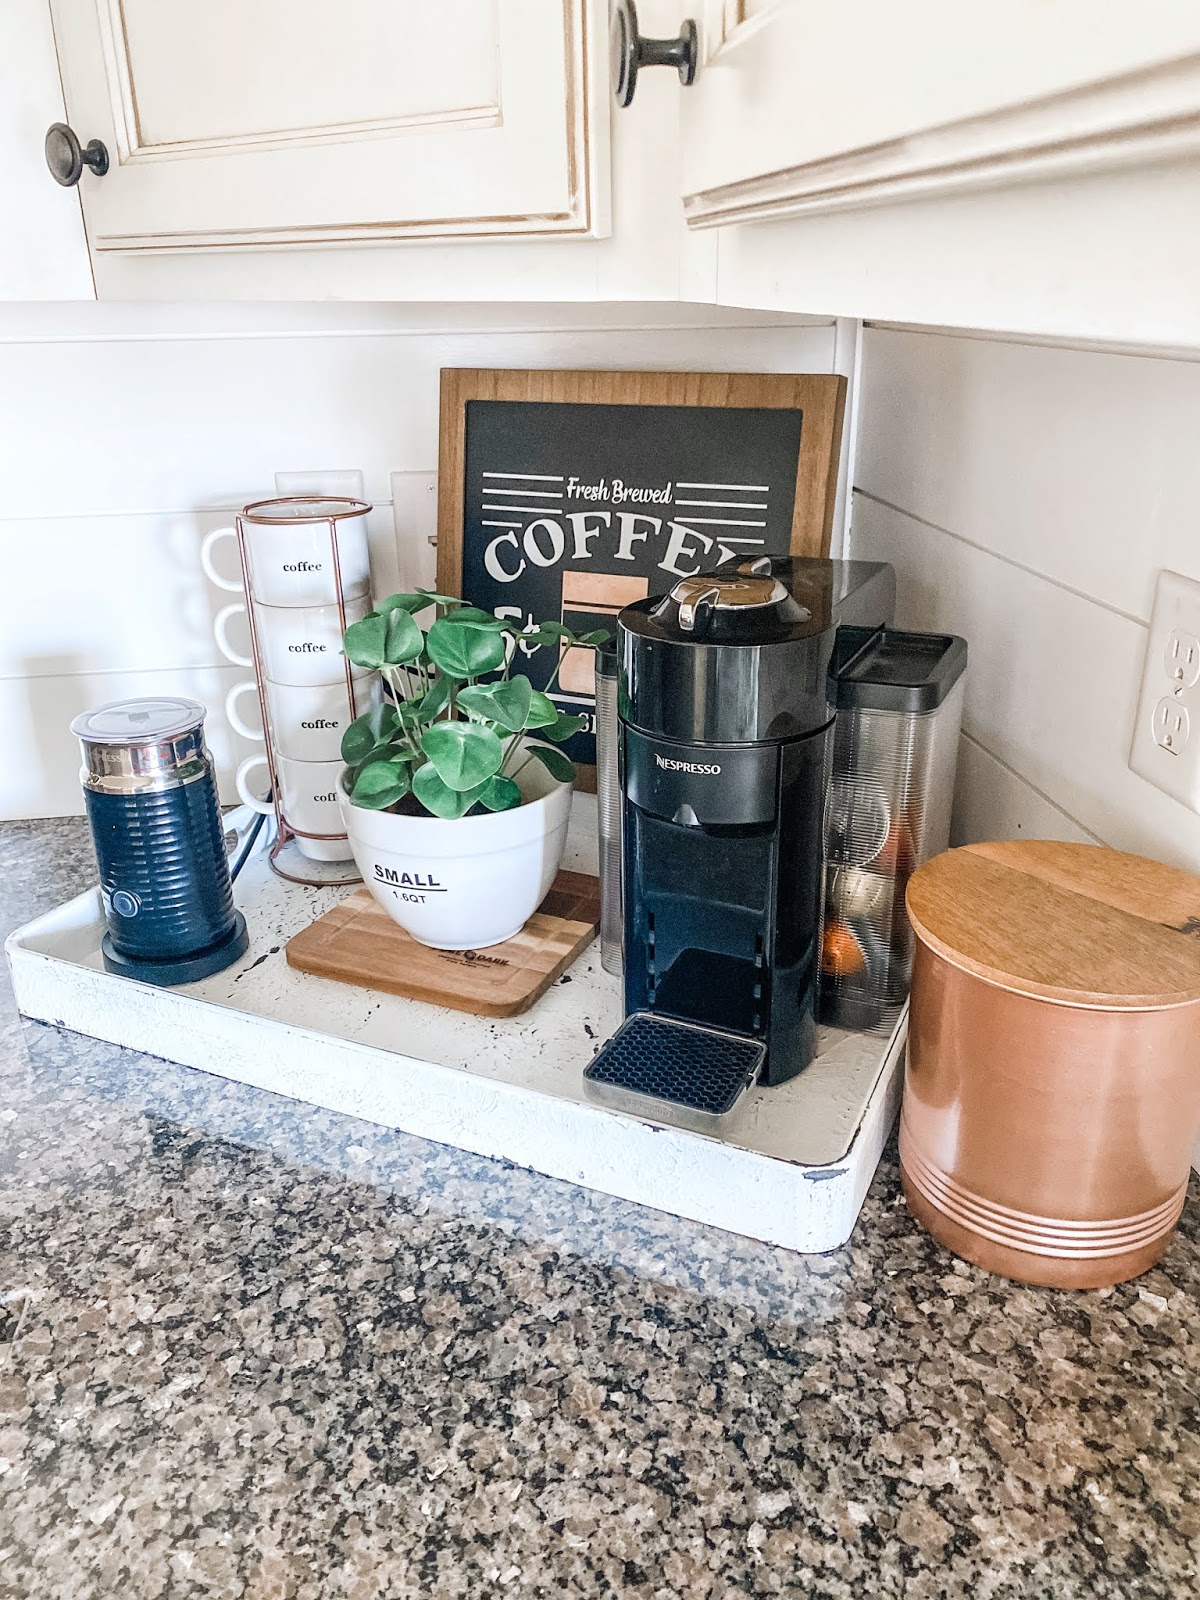
Before After
All ColorShot paint products are available at Home Depot
To watch this whole project from start to finish check out this link to my DIY video!!
-Grey Birch Designs-