


read more
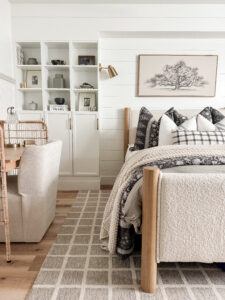
If you’ve ever had a room with a weird soffit that drives you crazy, you’re not alone! For the past year, I’ve been staring at one in my daughter’s bedroom, wondering how to make it blend into the space rather than sticking out like a sore thumb. Since removing it wasn’t an option due to the plumbing inside, we decided to get creative and work it into a custom built-in design using IKEA bookshelves, shiplap, and some good old-fashioned DIY magic.
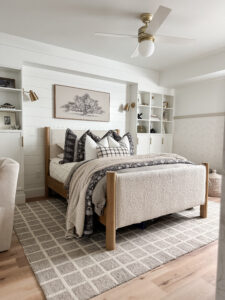
The result? A functional and beautiful built-in unit that looks like it was always meant to be there. If you’re into DIY projects, IKEA hacks, or interior design, this is one transformation you don’t want to miss!
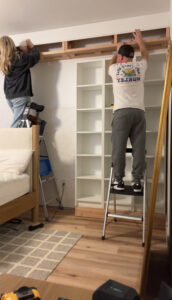
Step 1: Building the Base Frames for the Built-In Bookshelves
The first step in this IKEA hack was to create a solid base for the bookshelves. We built two base frames and secured them to the wall studs on either side of the bed. This not only ensured stability but also raised the bookshelves to a more custom built-in height.
Once the bases were in place, we positioned three IKEA bookcases on each side and attached them to the wall using L-brackets for extra security. These bookshelves served as the foundation for our new built-in storage system.

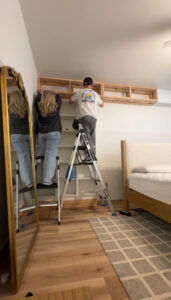
Step 2: Addressing the Awkward Soffit with a Custom Frame and Shiplap
Now, onto the real challenge: that awkward soffit. Since removing it wasn’t possible, we decided to make it look intentional rather than like an afterthought. We built a frame matching the depth of the bookshelves, attaching it to the soffit and extending it across the wall.
To give it a polished, cohesive look, we installed 8-inch wide shiplap boards across both the frame and the soffit, making it appear as one continuous built-in unit. To further enhance the seamless design, we continued the same shiplap down the back of the wall between each bookcase. This simple addition made a huge visual impact, instantly elevating the entire space.

Step 3: Adding Trim, Molding & Paint for a Custom Look
Once the shiplap was in place, we framed out the top of each bookcase using MDF boards to create a more finished, custom look. Then, we filled all the nail holes and seams, making everything smooth and ready for paint.
For the color, we chose Pure White by Sherwin-Williams in a satin finish. This kept the space light, bright, and modern, while also helping the built-in blend seamlessly with the rest of the room.
To complete the built-in, we added new baseboards, trim, and molding around the shiplap for that final polished touch.

Step 4: Installing Stylish & Functional Finishing Touches
Now for my favorite part—the finishing touches! We installed doors on the bottom half of the bookcases, providing hidden storage for toys, books, and other items.
For lighting, we opted for these stunning battery-operated sconces that are controlled with a remote—no hardwiring needed! This was a simple way to add ambiance without having to deal with electrical work.

The Big Reveal: A Built-In That Looks Like It Was Always Meant to Be!
Looking back at the before and after, I can’t get over how much of a difference this built-in made. That once-awkward soffit now blends seamlessly into the design, and the additional storage has been a game-changer for our daughter’s room.
This project solved two major problems:
1. Making the soffit look intentional instead of like an afterthought.
2. Creating much-needed extra storage in a stylish and functional way.
Why This IKEA Hack Works for Any Home
If you have an awkward soffit, a blank wall, or just need extra storage, this IKEA hack is a perfect solution. By combining affordable IKEA bookshelves, simple framing, and shiplap, you can create a custom built-in that looks high-end without the high-end price tag.
So, if you’re feeling inspired to tackle your own DIY home improvement project, this is your sign to go for it! Have you ever done an IKEA hack or a built-in project like this? Share your experience in the comments—I’d love to see what you’ve created!
Links for this room can be found HERE!
Ikea bookcases we used can be found HERE!
Watch this project unfold from start to finish below!
Happy DIY-ing!
read more
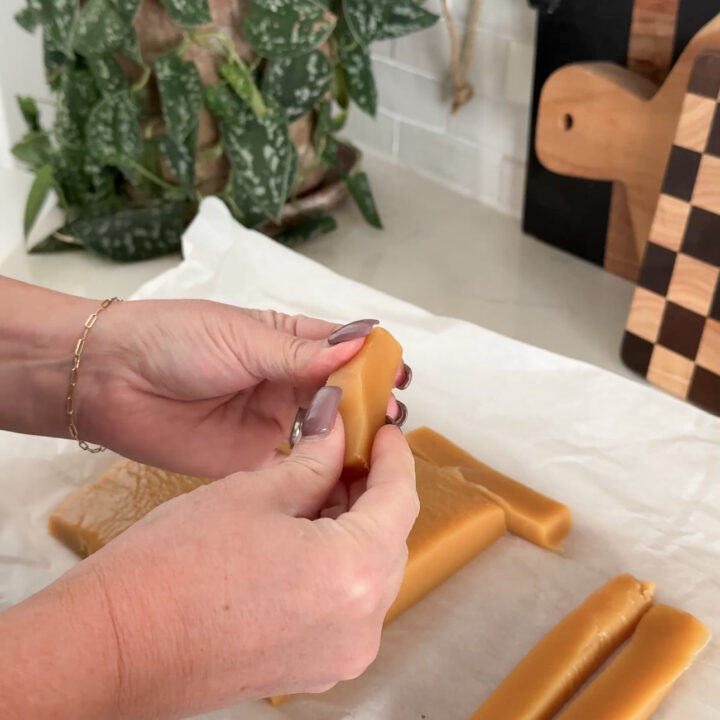
One of my favorite treats is homemade caramels but I don’t like the hassle of making them the traditional way, that is why this microwave caramel recipe is my favorite!
These are truly as easy as they sound and I promise if you can use a microwave you can make these caramels! Making these is one of my favorite holiday traditions, and it also makes for great neighbor, friends, or family gifts!
My touchless paper towel dispenser is one of my favorite kitchen finds too and I always have an added appreciation for it every time I cook! Check it out here!
Easy Microwave Soft Caramels
Ingredients
- 1 cup unsalted butter
- 1 1/2 cups brown sugar
- 1/2 cup granulated sugar
- 1 cup light corn syrup
- 1 14oz. can sweetened condensed milk
- 1 tsp. salt
- 2 tsp. vanilla extract
- corse sea salt to sprinkle on top
Instructions
- Melt the butter in a microwave safe bowl.
- Mix together the butter, brown sugar, granulated sugar, corn syrup, salt, and sweetend condensed milk in a large microwave safe bowl.
- Heat the caramel mixture in the microwave in 3 minuite intervals stopping to stir in between.
- For softer caramels heat for just under 10 minutes, for harder caramles add an extra minute. The goal is for the caramel to reach between 238-242 degrees.
- After it's done heating up add the vanilla, then mix and pour into a square baking dish lined with wax paper. Sprinkle with the sea salt if you like!
- Let sit in the refrigator orvernight or at least a few hours to cool.
- Cut with a knife and wrap in wax paper!
-Grey Birch Designs-
read more
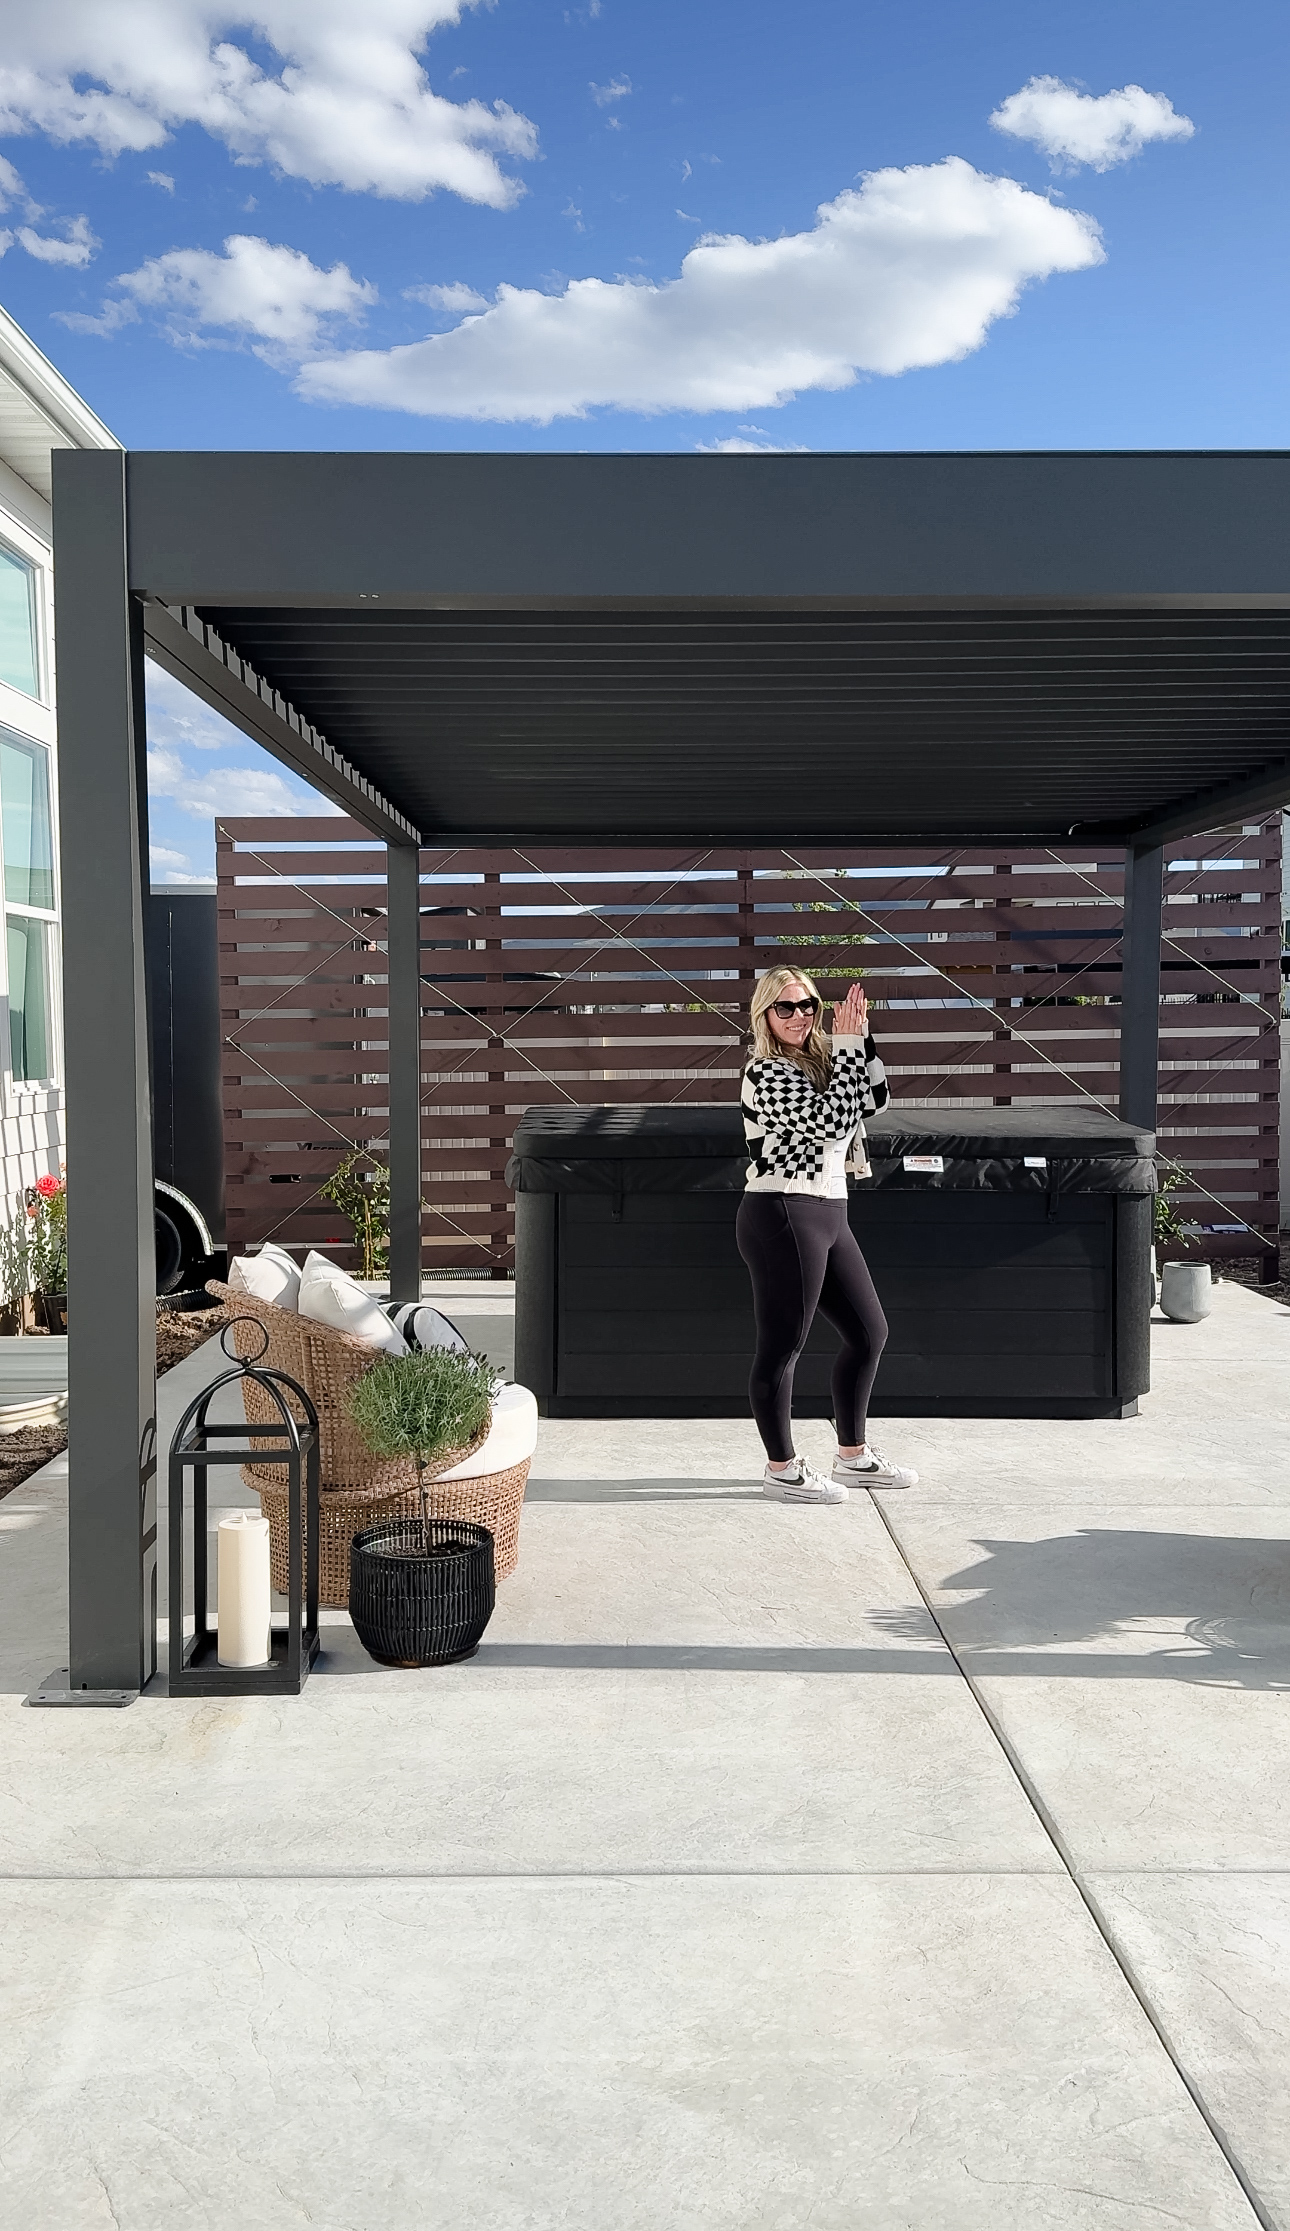
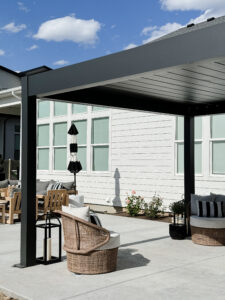
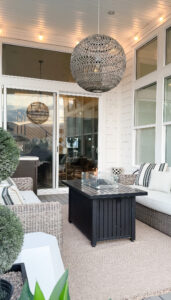
This year we have been putting a lot of focus on our backyard, taking it from an empty dirt lot to a place our whole family can enjoy! We knew we wanted a large concrete patio with different areas to hang out in. My kids’ only request was a spa and I was completely onboard with that so designing the spa area of our backyard was the first thing on the list!
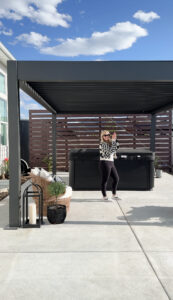
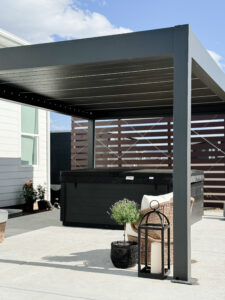
There were a few things that we needed to make the space beautiful, functional, and comfortable. First was a covering, I wanted us to be able to enjoy the spa no matter the weather, sun or snow, so we added this amazing pergola. We have the 13’x19′ Skydance in black. The top opens and closes with a remote, has LED lights, and a water tight roof! The assembly was easier than we thought it would be and the quality is unmatched by anything we have ever owned previously. This is a structure that will last the test of time.
Next we decided to build a slat wall behind the pergola. I chose this project for a few reasons. It creates separation from the RV pad on the side of our house, it adds privacy from future homes that will be build around us, and it’s a beautiful addition to our garden, especially once the wall is covered with Clematis on the trellis we installed! This project took us about 3 days and made a huge impact!
Supplies Needed:
Flowering vine like Jasmin or Clematis of your choice
Setting the posts:
First you will need to set your redwood posts in the ground. Before you can do that you want to treat the bottom portion of the post that touches the dirt with wood protectant. This will protect the wood from the dirt and water in the ground. We treated the bottom 30″ since that’s how far down into the ground we set our posts. Then dig your holes, 3 times as wide as the post, set the posts level in the holes, and fill with 2-3 bags of concrete per post. We set the first 2 posts on the end and then ran a string line in-between the two to easily line up the middle posts. We used quick set concrete and let it sit about half a day until we attached the slats to the post ensuring to insure they were dry.
Attaching the slats:
We used 1″x4″ pine boards and attached them to the posts with 2″ spacing. You can make the gap bigger or smaller as you like but keep in mind where you live. If you get high winds keep the gap 2″ or larger, otherwise this wall may turn into a sail and could cause quite a problem! We first tacked up the boards with a nail gun then re-inforced them with exterior screws to secure them in place. (TIP: Using a spacer is the easiest was to keep your gaps the same size.) Once they were attached we cut off the extra wood on the sides and top for a clean, even wall.
Staining the wall:
We used Behr all weather outdoor deck stain on the slat wall in the color Mahogany. You can get it in a sold or semi-trasparent stain. If you want to see the wood grain I suggest the semi-transparent. I wanted more of a painted look without the wood grain showing through so I went with the solid. It goes on easy with a brush and paint roller and was one coat coverage! This stain can last up to 25 years!
Adding a trellis:
This part is optional but in my option it takes the project next level! We bought a DIY Trellis kit and installed it on the face of the slat wall. It’s such a smart system and went together perfectly! You can customize the design and shape you want your vines to grow in and I’m excited to see my Clematis cover the trellis!
We have so much more planned for our backyard this season and this is just the beginning!
-Grey Birch Designs-

read more
We have been in our new home for a year and a half now and we are finally putting our backyard together and I couldn’t be happier! We want a low maintenance yard so we are doing lots of hardscape, flower beds, and no grass! So far we have installed a large concrete patio for 3 separate outdoor living spaces: a spa area, lounge space, and a spot for outdoor dining. Next comes the part I have been dreaming of for over a year, the landscaping!
There are so many option when it comes to flowers, plants, and trees that I was a bit overwhelmed in the beginning, but now have a more clear picture of what I want the space to look like. We have already starting planting around the back deck and the side of the house, and now we are planning out the large planter bed that will run along the side of the concrete patio. Here is what we have planted so far and a list of trees and plants we are considering for the back of the yard along the fence line.
Roses and Hydrangeas
These are 2 of my very favorite things to plant. They are easy to grow and so beautiful in full bloom! We are planting 2 types of roses in our backyard, Iceberg Roses and Hybrid Tea Roses.
Iceberg Roses
The Iceberg rose is a shrub type rose, relatively fast growing and disease resident. They produce beautiful smaller size white roses from late spring to first frost. These are great to use as boarders around decks and porches, as well as hedges and lining fences. They can get large but are shapable and can be cut back to desired size. We planted a few of these in our front yard flower beds last year and just recently planted more along the side of our house. They love sun so plant them where you get full sun! This is what my iceberg roses looked like at my last house after only a few years!
Hybride Tea Rose
The Hybrid Tea Rose is a beautiful show stopper rose. It grows tall stocks and is perfect for cutting to bring fresh roses into you home. The blooms are large and fragrant, they also love lots of sun and are easy to grow. We are planting these along the back side of our home where they have the ability to grow tall and wide and I can’t wait to see them flourish!
Snowball Hydrangea
The Snowball Hydrangea is a beautiful round in shape hydrangeas bush. They like full sun to part shade. We are planting these around our back deck. This type of hydrangea gets large, wide and tall so they make for great borders around areas like decks. I have dreams of sitting out here being surrounding by flowers all day! This is also a great hydrangea for colder areas and they bloom on new wood so in the winter cut it pretty far down and new shoots pop up and bloom in the spring.
Limelite Hydrangeas
We planted 2 Limelite hydrangea trees in our front yard last year and I love them so much. They are a beautiful white colored large cone shaped bloom and they come as trees or shrubs. They do well in full sun to part shade and bloom on old wood. This means in the winter you only cut off the dead blooms and leave the old stocks. If you cut off the stocks you won’t have blooms the next year because all the new blooms are already growing inside the stocks waiting to pop out the next season. If you’re local check out Glover Nursery or Sun River Gardens – this is where I got mine from!
Trees
We are planning to add 4 or 5 trees to our yard along the back fence line inside a large garden bed are are building. We need something that doesn’t get too large but will still provide us with some shade and privacy. The options are seriously endless and picking trees is a large investment. You also have to think about how it will work in your yard once it’s at it’s full maturity, otherwise you will be ripping trees out and no one wants to do that! Some of the top contenders for us right now are:
Magnolia tree
Birch tree (it’s name alone is so fitting!)
Musashino Zelkova
Willow
Tree recommendations
I asked you all what you favorite backyard trees are, something on the smaller size around 30′ max hight and here are your top recommendations! We will be adding a few of these to our yard from this list over the next month and I will share the process and what we picked out.
Dakota Birch
Cherry Blossom Tree
Dogwood Tree
Firestick Tree
Japanese Maple Tree – (Recommended by many)
Autum Blaze Maple
Ruby Sunset Maple Tree
Pacific Sunset Maple Tree
Crimson Sunset Maple Tree
Crep Myrtle – (Recommended by many)
Redbud Tree – (Recommended by many)
Zelkova Tree
Rocket Juniper Tree
Kentucky Coffee Tree
Crabapple Tree
Bradford Pear Tree
Columnar Oak Tree
Dwarf Lilac Tree
Karl Fuchs Tree
Sanders Blue Atlas Tree
Chokecherry Tree
Stay tuned to see how this project unfolds and all the trees and flowers we pick for our backyard!
-Grey Birch Designs-
read more

Family Favorite Chili Recipe
This Chili is a mix of sweetness with a mild kick!
Ingredients
- 1/2 white onion
- 1 tbsp. olive oil
- 1 clove of garlic
- 1 lb ground turkey or ground beef
- 1/2 tsp. pepper
- 1/2 tsp. salt
- 1 tsp. cumin
- 4 tbsp. light brown sugar
- 2 tbsp. chili powder
- 1 tbsp. unsweetened cocoa powder
- 2 15oz. cans kidney beans
- 2 15oz. cans crushed tomatoes
- 1 15oz. can beef broth
Instructions
- Saute onion, garlic and meat in a pot with the oilve oil until the meat it browned
- Add all the spices and stir to combine
- Add tomatos, beans and broth to pot and bring to a boil then reduce to a simmer until thickened, about 30 mins uncovered
- Serve with schredded cheese, sour cream and cornbread if desired!
Notes
This makes for great leftovers and is even better the next day, if it lasts that long!
-Grey Birch Designs-
read more

Worlds Easiest Chicken Noodle Soup
I love making this recipe as a way to use leftover chicken or if I just want a easy week day meal.
Ingredients
- 1/2 white onion
- 1 cup chopped celery
- 1 small bag chopped baby carrots
- 1-2 cloves of garlic, minced
- 1 tsp. kosher salt
- 1/8 tsp. pepper
- 1/2 tsp. dried thyme
- 1/2 tsp. dried rosemary
- 2-3 bay leaves
- 1/4 tsp. basil
- 3 32oz. cartons of chicken stock
- 2 cups cooked chopped chicken
- 1/2 a bag of wide egg noodles
- 1 bouillon cube
- 1/2 cup heavy whipping cream
Instructions
- Add all the ingreadents to the slow cooker except the noodles and heavy wipping cream. Cook on high for 4 hours
- The last 20 mins add the noodles and heavy wipping cream. Cover and cook the remaing time
- Keep in your fridge cooked for 3 days or freeze up to 3 months
Notes
This soup is a huge hit with my kids, and its even better the next day!

read more
I am often asked about the paint colors in my home. I will be showing off each color, starting with the main level.
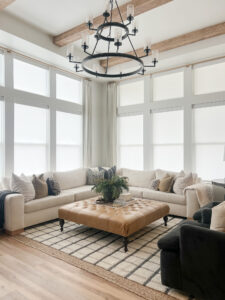
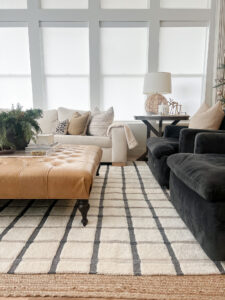
Pure White by Sherwin-Williams
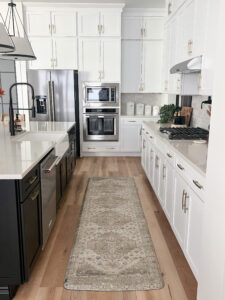
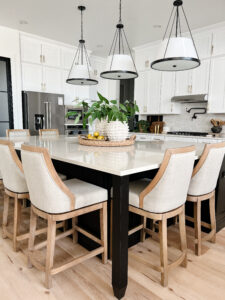
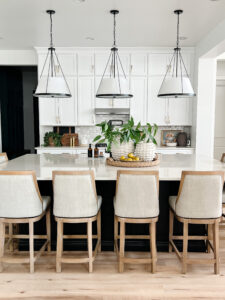
One color that is consistent throughout my home is white. I have it everywhere and it’s the main base paint color. If your looking for a true bright white color that doesn’t have any undertones this is the one to pick! This color is prominent in my living room and kitchen. The cabinets came painted white from the manufacturer but perfectly match the Pure White on the walls. The walls and ceiling are an eggshell finish and the trim is semi-gloss.
Hale Navy by Benjamin Moore
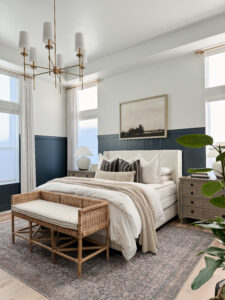
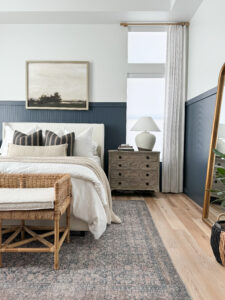
In my bedroom I did a painted bead board treatment and used the color Hale Navy by Benjamin Moore in a satin finish. This is one of my favorite colors and I will be using it again in other areas of my home. It’s a beautiful navy blue color with a touch of warmth. The top part of the walls and ceiling are Pure White by Sherwin-Williams in an eggshell finish.
Black by Behr and Huck & Fin Wallpaper by WallBlush
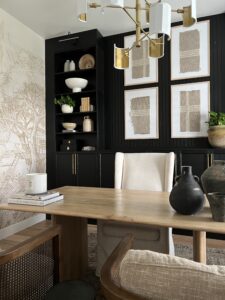
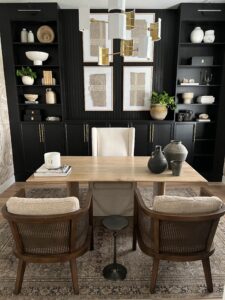
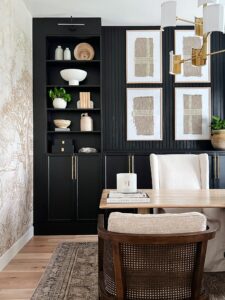
In my office I created custom built-ins with two Ikea Billy Bookcases and a slat wall in between. I didn’t paint the bookcases but I did paint the slat wall with the color Black by Behr in a satin finish. It’s an identical match to the black Ikea bookcases and brought the whole unit together as one! On the other walls I hung this gorgeous mural called Huck and Fin by Wall Blush. It’s the perfect backdrop I was looking for and one of my very favorite wallpaper prints in my home. It comes in peel and stick or un-pasted. I went with the un-pasted as I think it’s easer to install. My code GREYBIRCHDESIGNS gives you 30% off any purchase on their website!
Rock Bottom by Sherwin-Williams with Organic Dots by Ayara Home
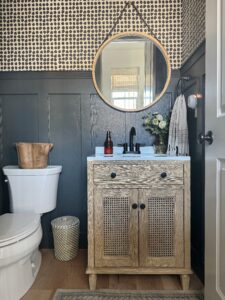
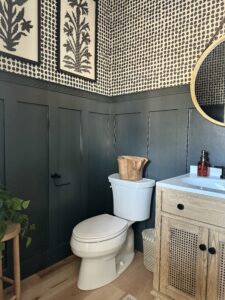
In my half bathroom on the main floor I installed a board and batten wall treatment and painted it Rock Bottom by Sherwin-Williams in a satin finish. This is a very dark, moody green color. In areas where there isn’t a lot of light it can look almost black, but in natural light you can see the beautiful green color pulling through! On the top of the board and batten I hung the Organic Dots wallpaper by Ayara Home. This is a peel and stick wallpaper and the texture of the fabric is very high quality and well made! My code GREYBIRCHDESIGNS will save you 10% off any purchase on their website!
Riverway by Sherwin-Williams
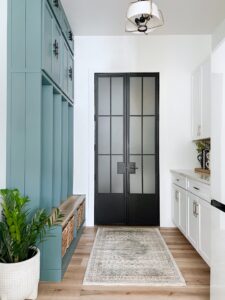
In my morning kitchen I built mudroom lockers for our kids and painted them the color Riverway by Sherwin-Williams in a satin finish. It’s a gorgeous blue color with undertones of green and gray. The rest of the room is painted Pure White by Sherwin-Williams in an eggshell finish.
-Grey Birch Designs-
read more
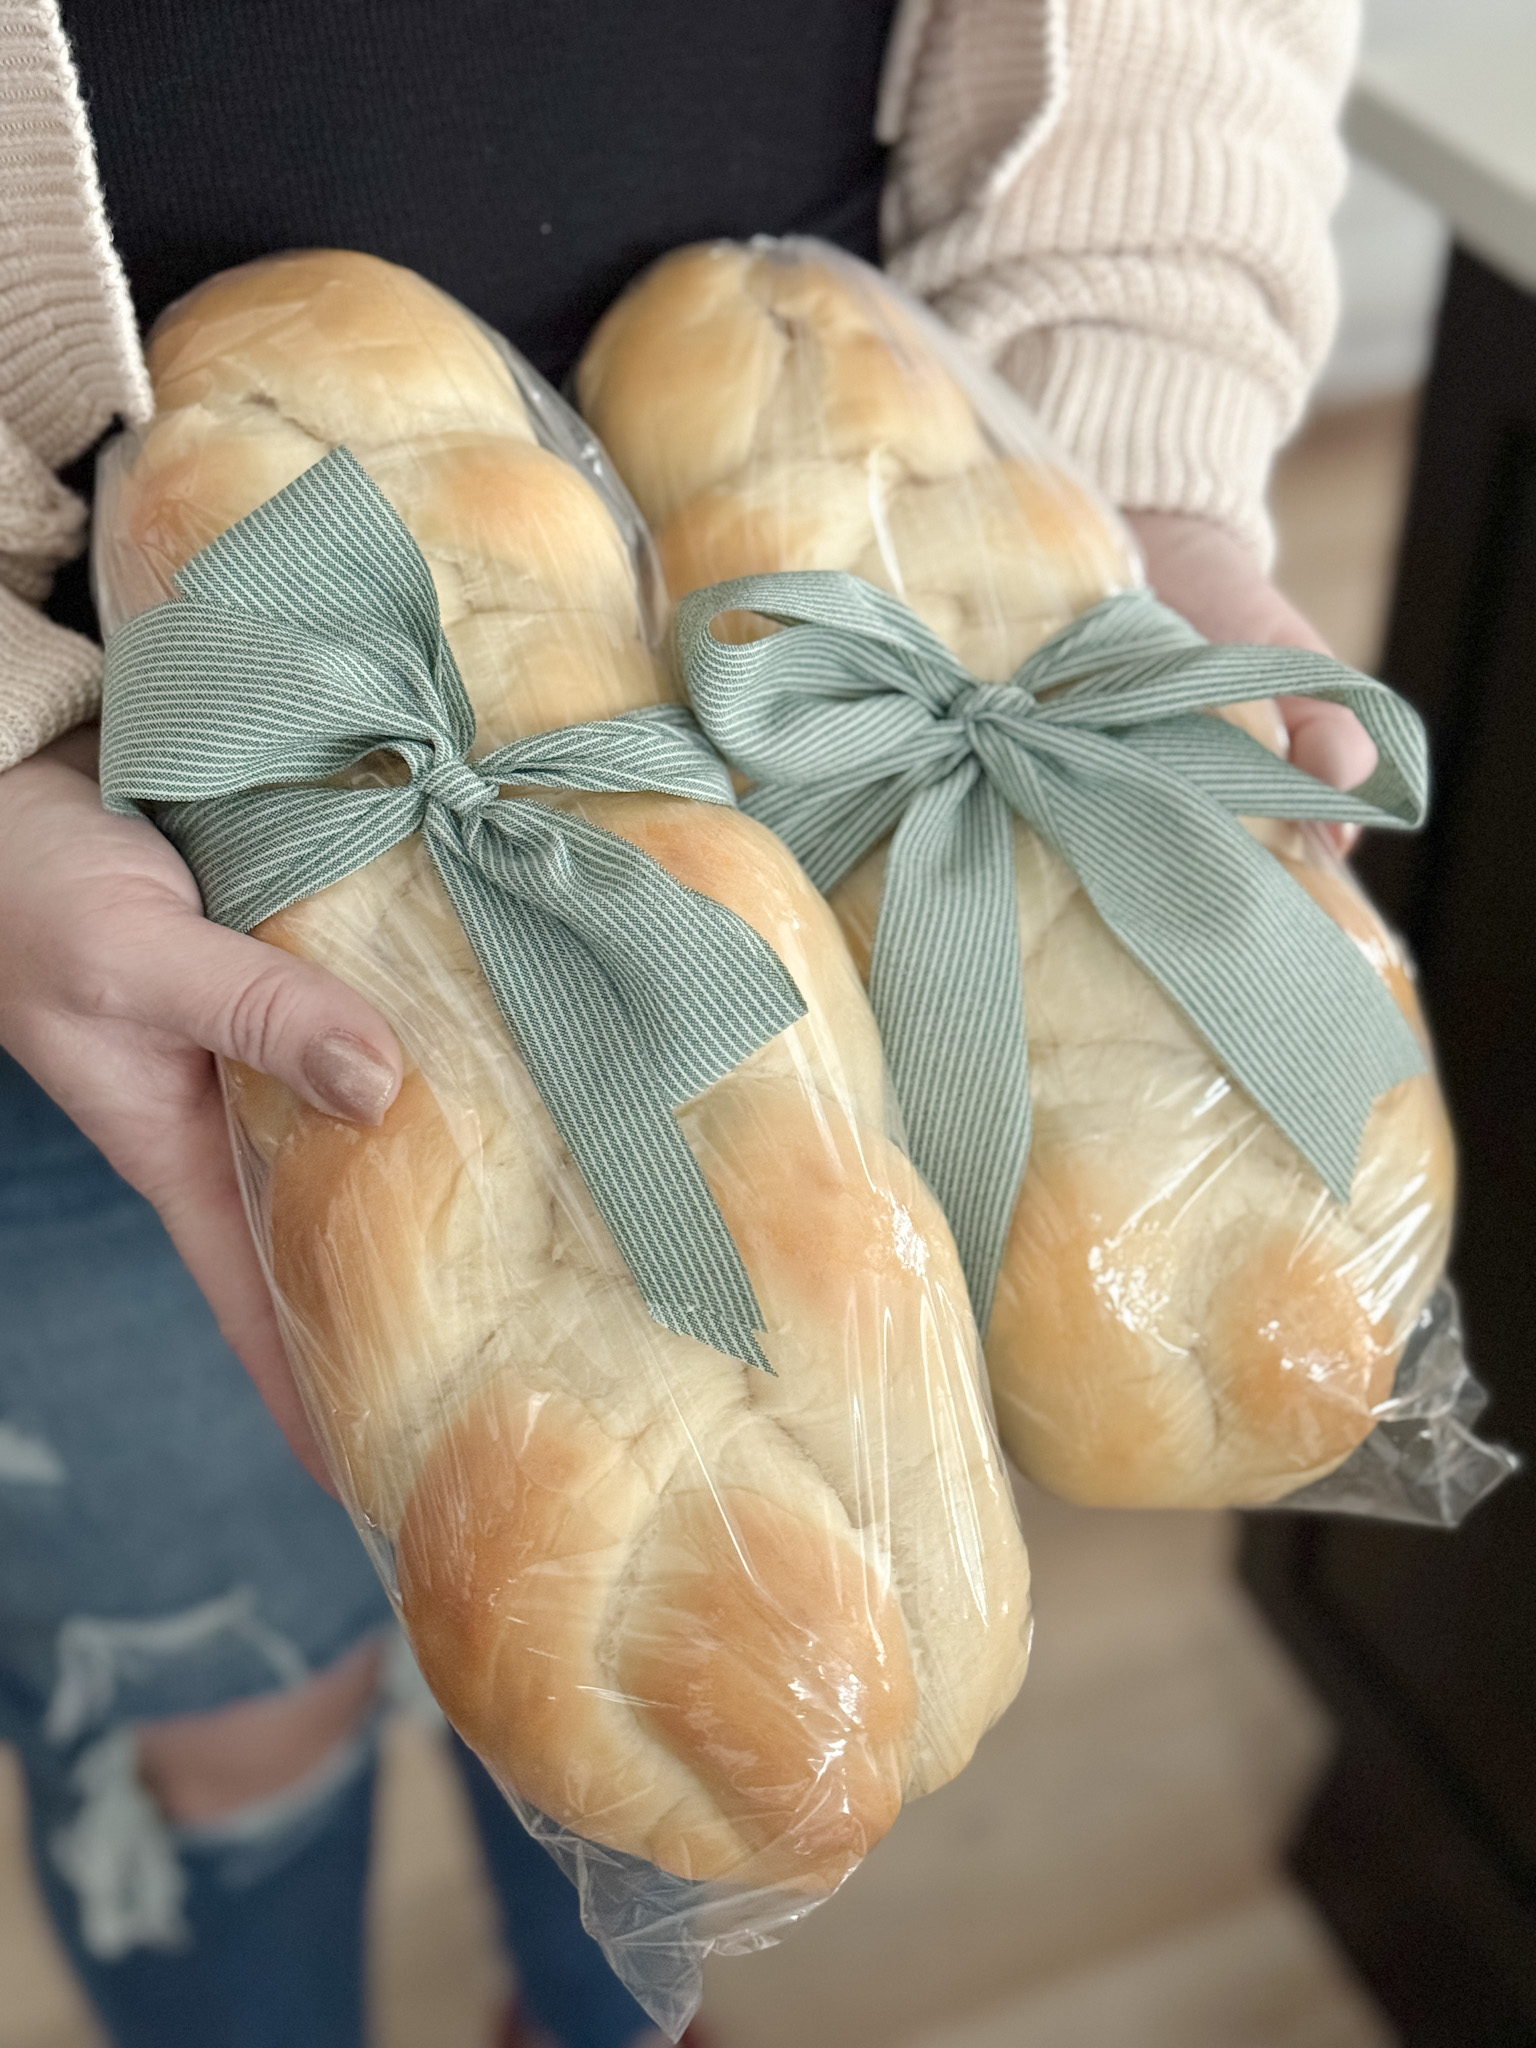
It’s a great gift idea and it’s easy to make! I hope you give this recipe a try!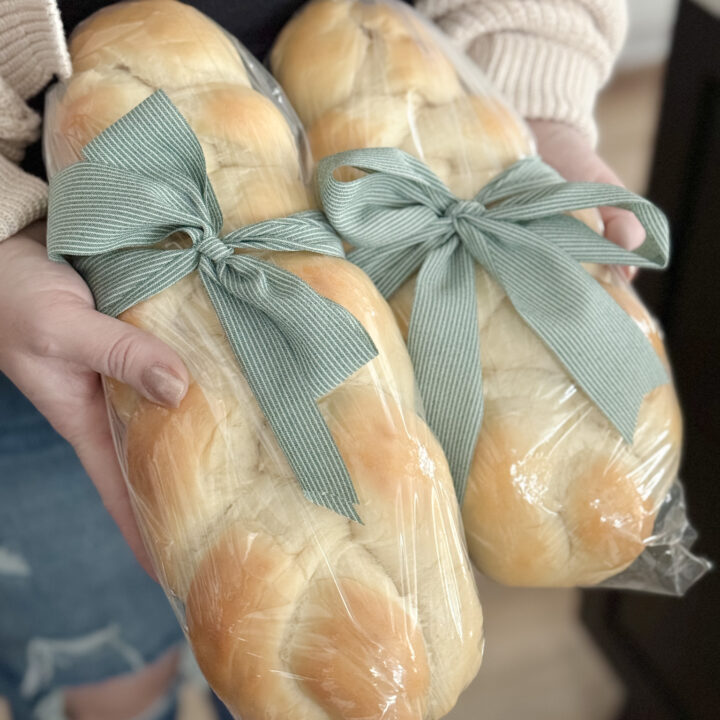
My Family's Homemade Bread Recipe
Ingredients
Instructions
Knead in mixer for 5 minutes then check to see if elastic enough, it shouldn’t be very sticky.
Bake at 350 for 22 minutes if doing 2 loafs of braided bread. If doing in a loaf pan bake 25-30 minutesNotes
I have always loved making bread and have been doing it since my kids were little. From the amount of different bread recipes in our family cookbook I can see now it must run in my blood! My favorite one is a recipe from my relative Dorisa. Her bread recipe is made with simple ingredients that we all have in our home, and it’s easy to make and absolutely delicious!
This recipe will yield 2 loaves of bread or 24 rolls. My favorite way to make this is to turn my loaves into braided bread, like I have done here!

-Grey Birch Designs-